ZINFI UPM GuideCo-Branded Assets Management for Partner Portal Administrators
01
Introduction
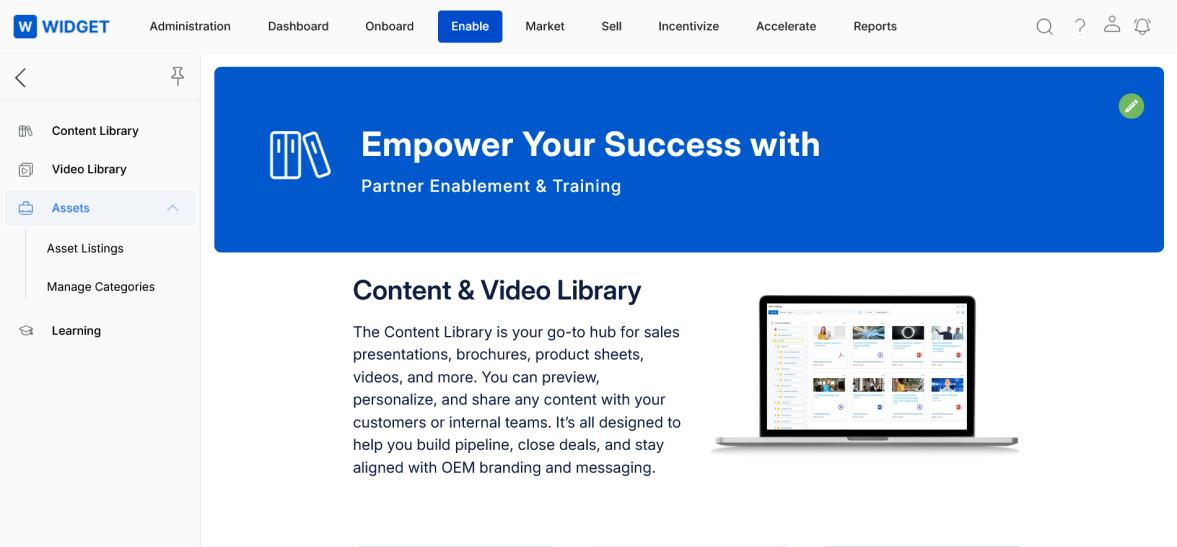
The Co-Branded Assets Management application is part of the EXPAND tools in the ZINFI UPM Platform. It allows your organization to automate distribution of digital assets to channel partners, who can then co-brand and reuse these assets for a variety of marketing- and sales-related activities.
Asset Management
The Co-Branded Asset Management application allows your organization to upload and manage assets in various formats — HTML, HTML5, and PDF — and make them available for sales teams in the channel for marketing and selling to customers. Users can edit and customize available content using co-brandable "zones" that you define and assign to them.
Asset validity is managed via the Publish Date and Expiration Date functionality. Multilingual capabilities allow country teams to enjoy localized content upload and management on a global scale.
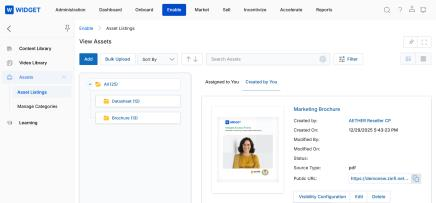
Asset Management — list view showing asset details and action buttons.
Key Features
Asset Setup & Upload
Asset Expiration Management
Asset Access Control with Partner Notifications
Asset Access Reporting
Asset Approval Management
Using the Co-Branded Asset Management application, your organization can support multiple contributors to a specific asset and configure a multi-level approval flow for asset uploads or updates before publishing assets for channel partner access.
The granular management capabilities also allow your organization to restrict portal admins from uploading or publishing unapproved assets. System alerts can be configured to notify you and the portal admins when an asset is uploaded, accepted, or rejected.
Key Features
Multi-level Asset Approval Management
Asset Feedback Management
02
Asset Listings
Accessing Assets
Click on Enable from the top navigation menu.
Click on Assets in the left menu bar:
Click Asset Listings to manage existing assets.
Click Manage Categories to manage the categories of the asset library.
Accessing Assets via Enable > Assets > Asset Listings in the left menu.
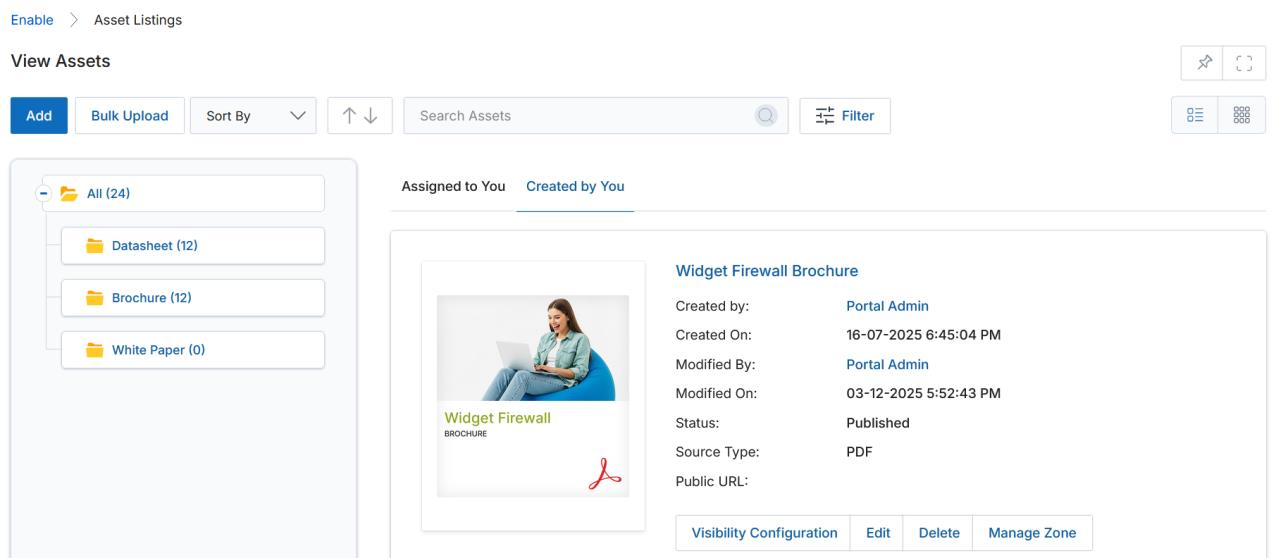
View Assets
Click on either List View or Thumb View to change the visual arrangement of each asset.
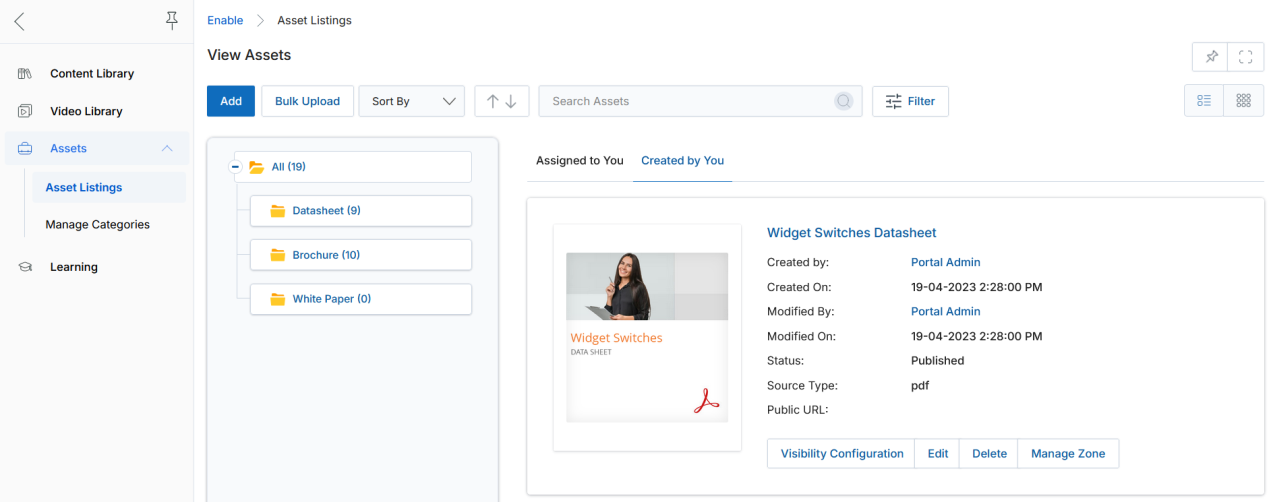
List View Representation — A list view displays records for one object at a time, arranged in multiple rows. Users can create custom List Views by applying filters, sorting options, and other criteria.
List View — displays asset metadata including Created By, Status, Source Type, and action buttons.
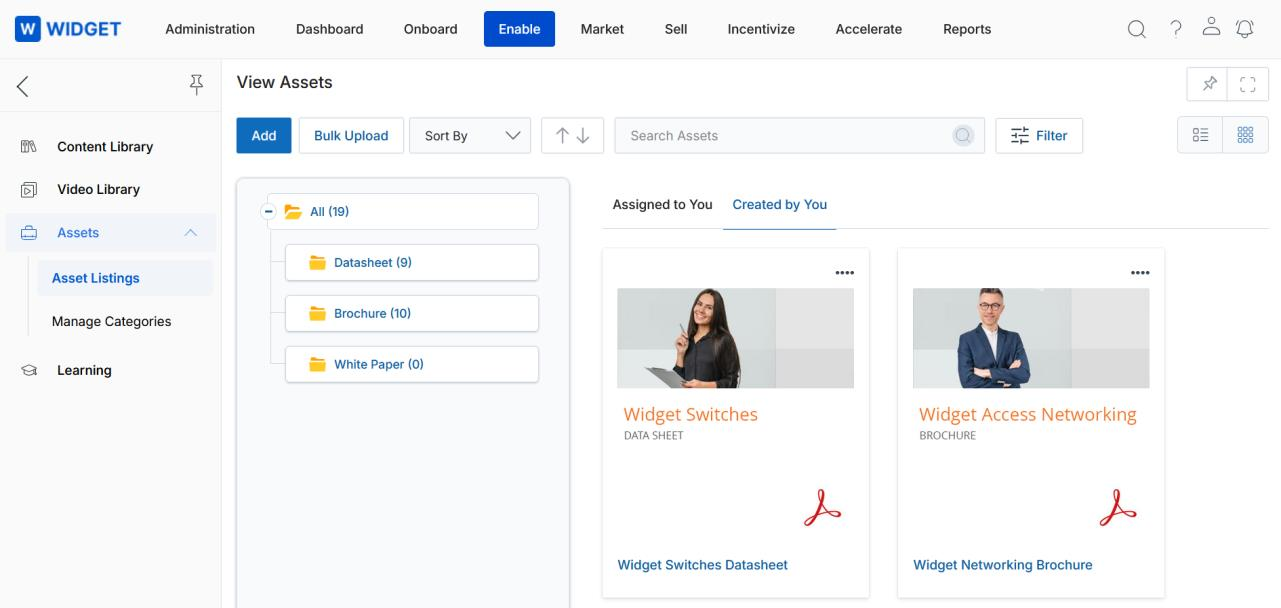
Thumb View Representation — In the thumbnail view, click the three dots (…) on an asset icon to reveal the options: Edit, Visibility Configuration, Delete, and Copy. In the list view, these options are already visible.
Thumb View — assets displayed as thumbnail cards with a three-dot context menu for actions.
Click Add to add new assets. A new page will open to upload new assets.
Click the Bulk Upload button to reach the Asset Bulk Upload page for uploading assets in bulk.
Click Sort By to sort assets by Created On, Modified On, or Asset Name.
Sort By control with ascending (↑) and descending (↓) order buttons.
Sorting Order Buttons: The ascending (↑) and descending (↓) arrow indicators remain inactive when no criteria are selected in the Sort By field. The default sorting order can be defined from Workflow by selecting a value from the Order Type dropdown. The arrows can then be used to toggle that default order on the listing page.
Click the Filter button to open the Filter pane.
Filter pane — supports filtering by Category, Asset Name, and Source Type.
Click the cross icon (✕) to close the Filter pane.
Choose filter options and then click Apply to display the relevant assets.
Filtered asset results — the library updates to show only assets matching the selected criteria.
The search results display only assets that match your filter settings.
The asset library has two tabs:
Asset library tabs — Assigned to You and Created by You.
Tab
Description
Assigned to You
Assets created by other users and assigned to you for viewing or editing via the Visibility Configuration tool.
Created by You
Assets you have created in the system, over which you have full control.
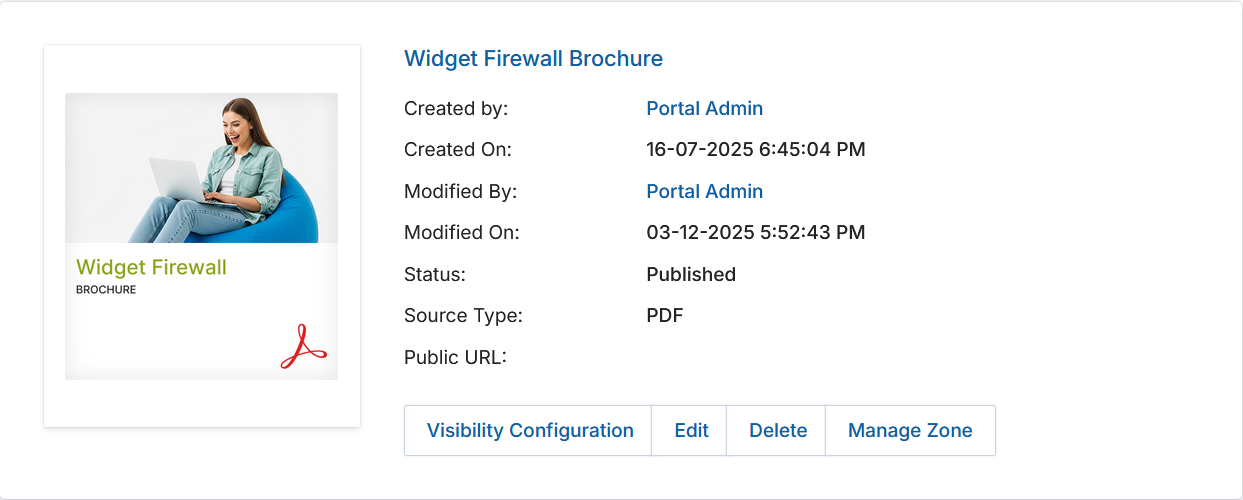
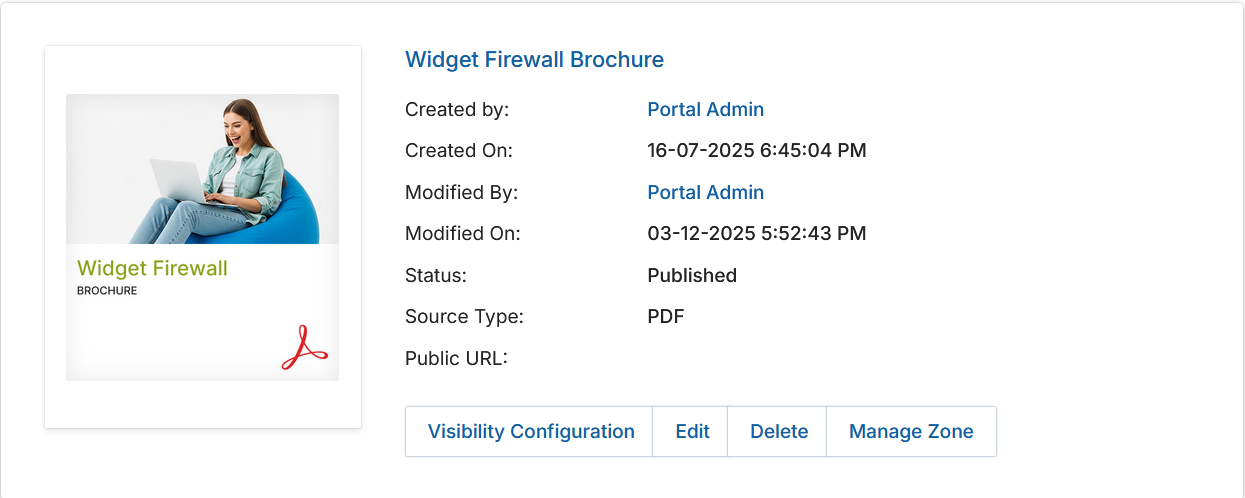
In the details of each content listing you will find the following elements and buttons:
Element / Button
Description
Thumbnail Image
Shows the thumbnail image of the asset.
Title
The asset title. Clicking it navigates to the asset's detail page.
Created By
Displays the name of the user who created the asset.
Created On
The date this asset was originally uploaded and created.
Modified By
Displays the name of the user who last modified the asset.
Modified On
The date this asset was last edited or modified.
Status
Status of the asset: Draft, Published, or Expired.
Source Type
The type of asset (PDF, HTML, Static Banner, etc.), assigned automatically on upload.
Public URL
The direct shareable link for external access to the published asset.
Edit (button)
Opens the asset settings for editing.
Visibility Configuration (button)
Assigns which country, language, and user type (by User or by Group) can access the asset in read-only or read-write mode.
Delete (button)
Removes the asset from the library.
Manage Zone (button)
Opens the Zone editor to add or modify co-brandable image and text zones.
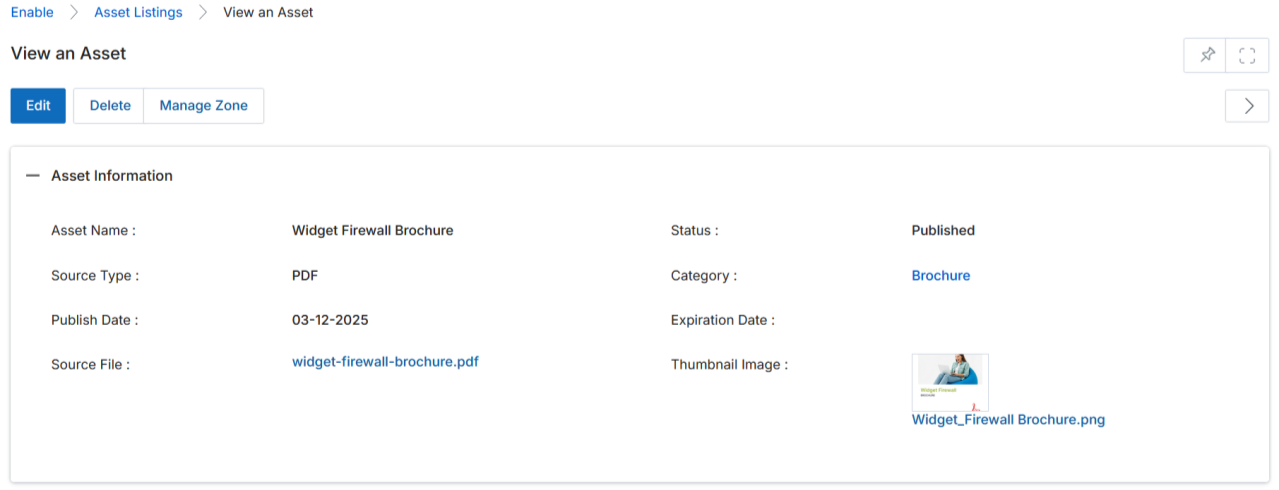
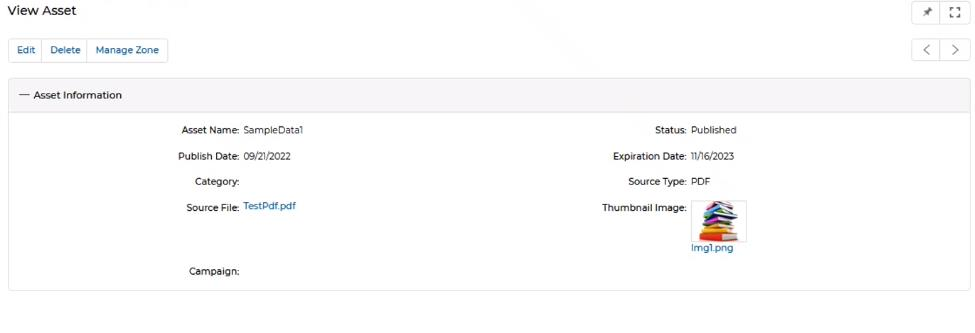
View Asset Details
Click the Name / Title of any asset in the Created by You tab to open its detail page.
View an Asset page — shows asset information, source file link, thumbnail, and action buttons.
The top of the page provides the following action buttons:
Button
Description
Edit
Opens the asset to edit co-brandable zones in the editor.
Delete
Removes the asset from the library.
Manage Zone
Opens the zone editor for adding images and text to co-brandable zones.
The Asset Information section contains the following fields:
Field
Description
Asset Name
The name of the asset.
Status
Draft — not yet published; Published — visible to partners; Expired — past expiration, visible only to the creator; Archive — archived for future use.
Category
The category the asset belongs to.
Source Type
The file format (PDF, HTML, Static Banner, etc.).
Source File
Attach the source file by clicking Browse.
Thumbnail Path
Upload a thumbnail image to represent this asset in the library listing.
Publish Date
The date the asset is published and made available.
Expiration Date
The date the asset expires and becomes hidden from partners.
Campaign
Selector field to associate this asset with a specific Campaign as a tactic.
Is Manual Thumbnail
Toggle: Yes or No.
View an Asset — Asset Information section with all metadata fields and Thumbnail Image.
Edit an Existing Asset
Pick the asset you wish to edit, then either:
Click the Edit button directly on the asset listing card, or
Click the Title / Name to navigate to the detail page, then click the Edit button there.
Asset listing card — click Edit to open the asset editor.
In the editor page, the same Asset Information fields are available for update: Asset Name, Status, Category, Source Type, Source File, Thumbnail Image, Publish Date, and Expiration Date.
Approving an Asset
If you are included in the approval flow for an asset, that asset will appear in the Assigned to You tab.
Locate the asset and click its Name / Title to open the detail page.
Once inside the detail page, you will see the Approval History related list with available actions:
Approval History — displays approval steps with Approve and Reject action links.
Action
Description
Approve
Adds notes and approves the asset, pushing it to the next-level approver.
Reject
Adds notes and a rejection reason, and pushes the asset back to the creator for revision.
Adding / Uploading a New Asset
On the View Assets page, click Add.
View Assets — click Add to create a new asset, or Bulk Upload for bulk imports.
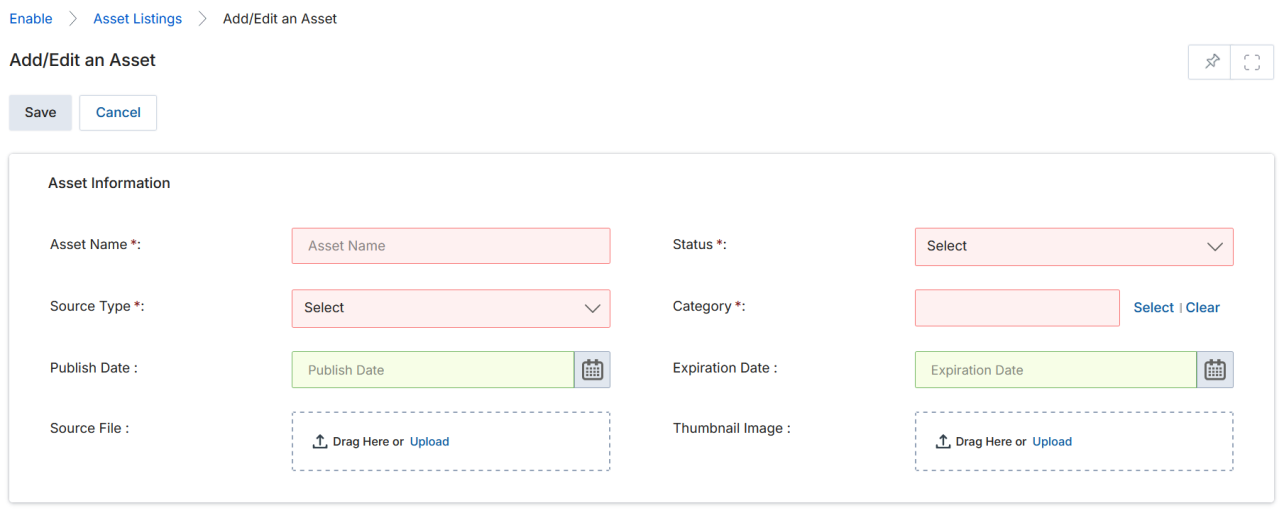
The Add/Edit an Asset page opens. Fill in the following fields:
Add/Edit an Asset form — enter metadata and upload the source file and thumbnail.
Field
Description
Asset Name
The display name of the asset.
Status
Draft, Published, or Expired.
Publish Date
Date the asset becomes visible to partners.
Expiration Date
Date the asset expires.
Category
The category this asset belongs to.
Source Type
Asset format: PDF, HTML, Static Banner, etc.
Source File
Click Browse (or drag and drop) to upload the asset file.
Thumbnail Image
Upload a thumbnail to represent this asset in the library listing.
Click Browse, select the file, and click Open.
File Upload dialog — browse to select the document or content file to upload.
Once uploaded, the Asset Type is automatically set based on the file format.
Click Save to add the asset to the library. You can then click on it to edit the co-brandable zone details.
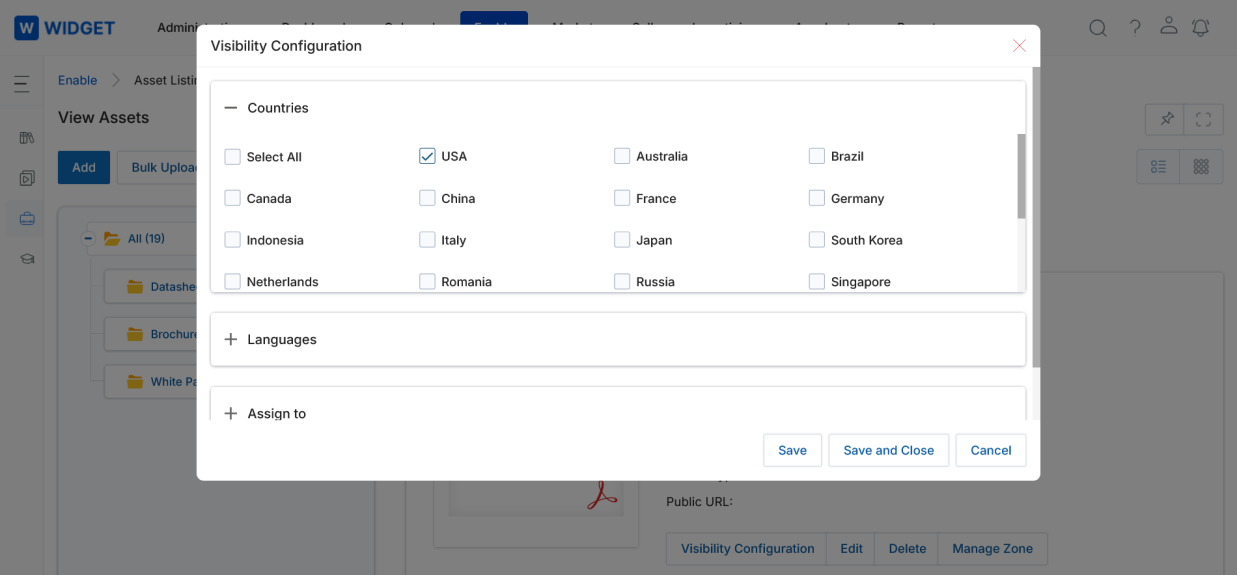
Visibility Configuration of a Co-Brandable Asset
From the View Assets page, click Visibility Configuration on the asset you wish to configure.
View Assets — click Visibility Configuration to control who can see the asset.
Before or after editing the asset settings or adding zones, click Visibility Configuration to define which Country, Language, and User/Group can access the asset.
In the Visibility Configuration panel, choose Countries and applicable Languages.
Use the Assign To section to assign the User Type (by User or by Group) with read-only or read-write permission.
Visibility Configuration — assign access by country, language, user, or group.
Note: Primarily, partners receive Read Only access, while Admins receive Read/Write access. The User Assignment option is also available directly from the View Asset page.
Click Save to apply the visibility settings.
Creating / Managing Co-Brandable Zones
Click the Name / Title of any asset to navigate to the View Asset page.
On the View Asset page, click Manage Zone.
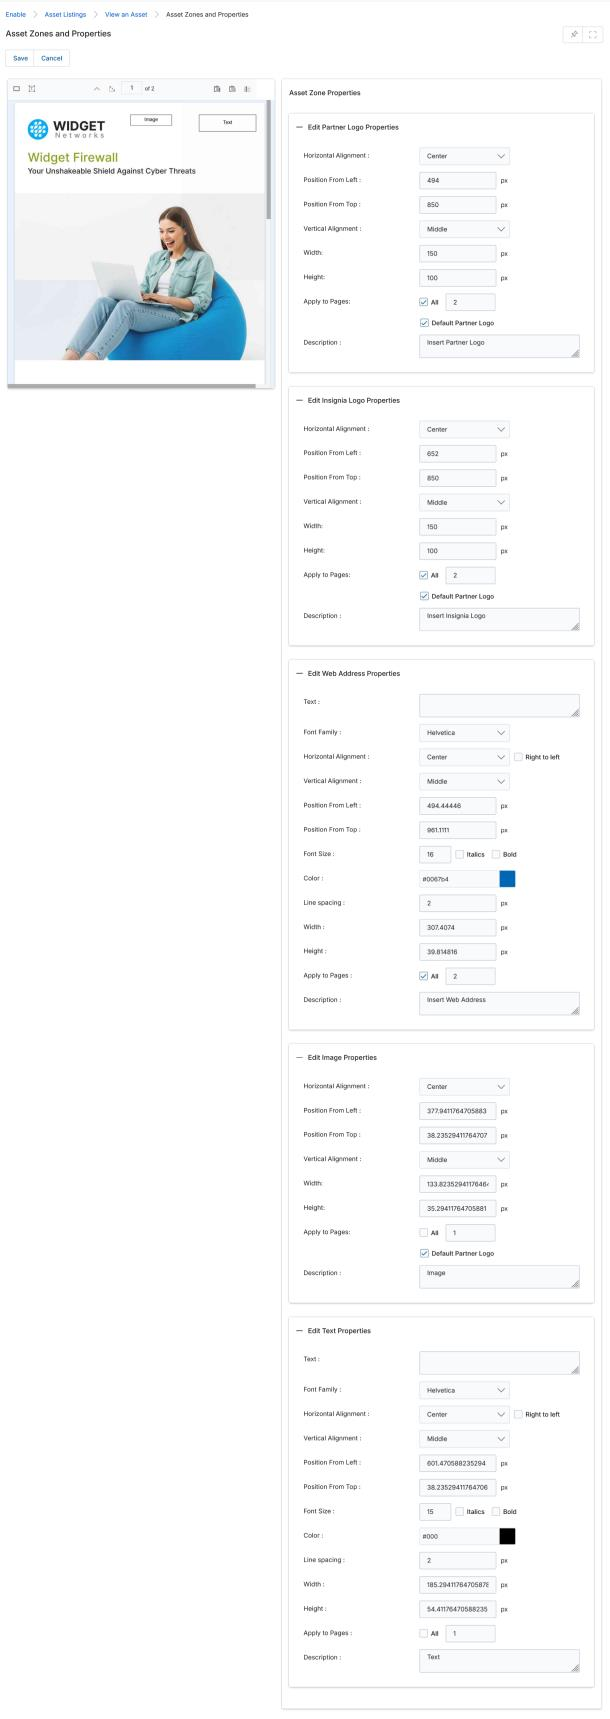
View an Asset — the Manage Zone button opens the Asset Zones and Properties editor.
Clicking Manage Zone opens the Asset Zones and Properties page.
On this page, you can upload a partner Logo, embed Images, and add Text about the organization.
Image and Text boxes are available to specify co-brandable zones.
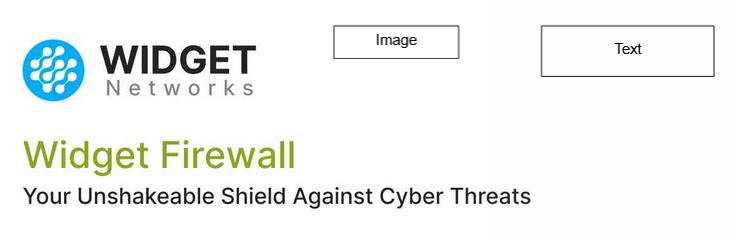
Image box and Text box icons — drag and drop these onto the asset canvas to create co-brandable zones.
Drag and drop the Image or Text box onto the asset canvas to create co-brandable zones.
Co-brandable zones placed on the asset — Image zone (for partner logo) and Text zone side by side.
Default Logo for Co-Branding — Enabling the toggle associated with Default Logo Co-Branding allows the admin to designate a specific image zone as the default partner logo location. Only one image zone can be designated as the default logo zone.
Click Save to save the defined zones.
The Asset Zone Properties panel allows fine-grained configuration of each zone. It contains multiple sub-sections:
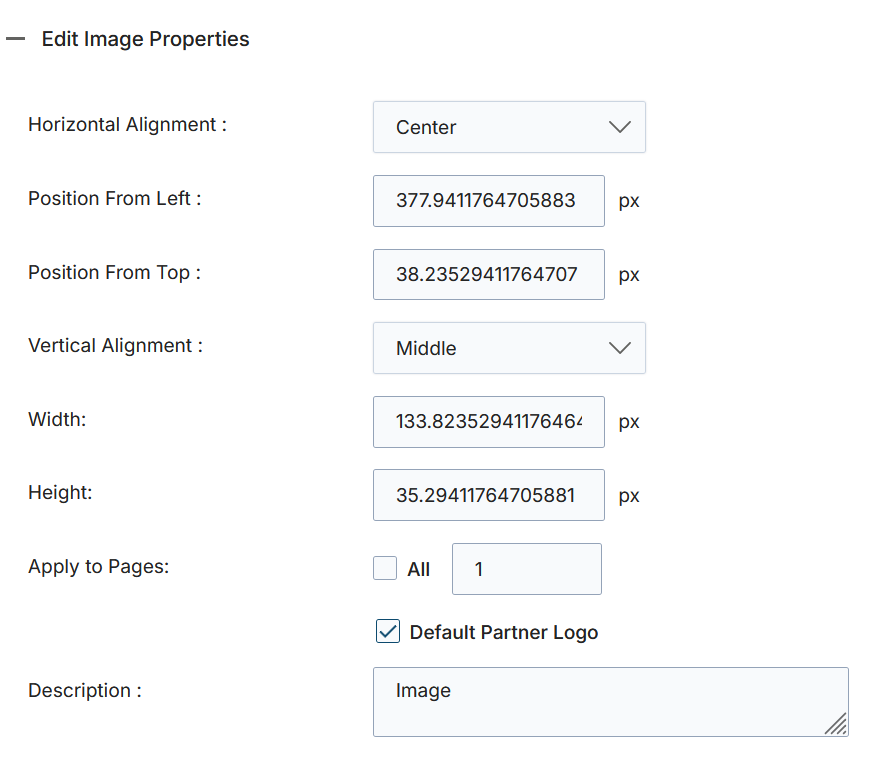
a. Edit Image Properties
Edit Image Properties — configure alignment, position, size, and page scope for an image zone.
Property
Description
Horizontal Alignment
Position the image horizontally: Center, Left, or Right.
Position From Left
Left offset of the image in pixels.
Position From Top
Top offset of the image in pixels.
Vertical Alignment
Position the image vertically: Middle, Top, or Bottom.
Width
Image width in pixels.
Height
Image height in pixels.
Apply to Pages
When checked, applies these image properties to all available pages.
Default Partner Logo
Marks this zone as the default partner logo zone.
Description
A brief description of the image zone.
Horizontal Alignment dropdown — Center, Left, or Right.Vertical Alignment dropdown — Middle, Top, or Bottom.
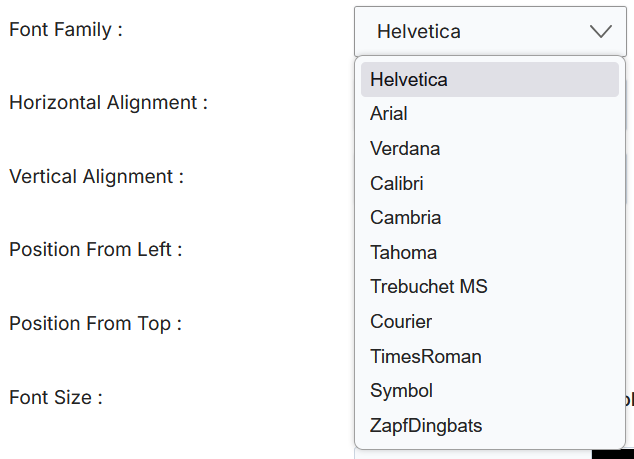
b. Edit Text Properties
Font Family dropdown — select from Helvetica, Arial, Verdana, Calibri, Cambria, Tahoma, Trebuchet MS, Courier, TimesRoman, Symbol, and ZapfDingbats.
When checked, applies text properties to all available pages.
Description
A brief description of the text zone.
Text zone horizontal alignment — Center, Left, or Right.Text zone vertical alignment — Middle, Top, or Bottom.
Save / Cancel: Click Save to persist all zone changes. Click Cancel to discard unsaved edits.
Bulk Upload
The Assets Application integrates with the UPM Import Engine to support bulk import of asset content and associated metadata. The import engine accepts asset records in standard .xlsx format, along with a .zip archive containing the content files (PDF) and thumbnail images organized per the category tree.
View Assets — click Bulk Upload to access the Asset Bulk Upload page.
Click Enable from the top menu.
Click Assets > Asset Listings in the left menu bar.
Click Bulk Upload on the View Assets page to reach the Asset Bulk Upload page, where all bulk upload instances are listed.
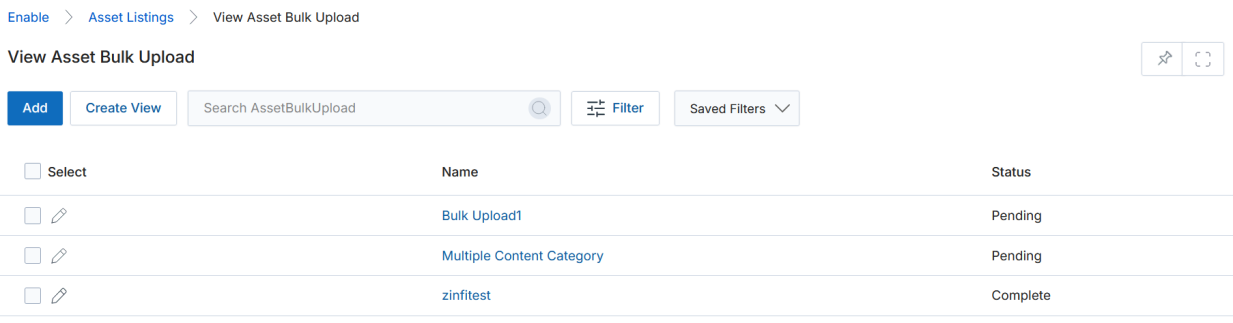
View Bulk Uploads
The Asset Bulk Uploads list page displays all bulk upload instances. Click on any bulk upload name to review the XLSX file and ZIP archive details, along with the upload status.
Asset Bulk Upload list — shows each upload instance by Name and Status (Pending / Complete).
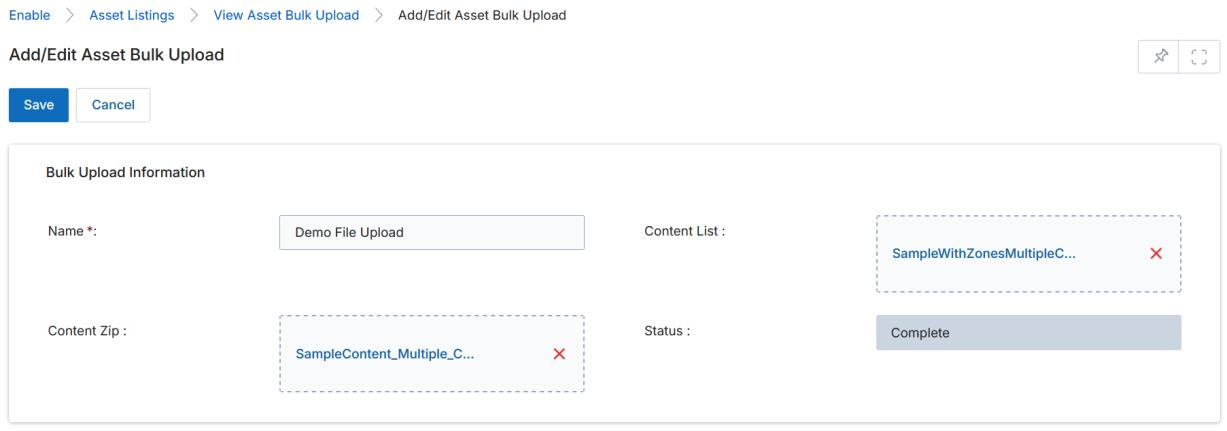
Add a Bulk Upload
Click Add to create a new bulk upload instance.
On the Add/Edit Asset Bulk Upload page, fill in the following fields:
Add/Edit Asset Bulk Upload form — provide a name, upload the XLSX content list, and the ZIP archive.
Field
Description
Name
A descriptive name for this bulk upload instance.
Content List
Upload the XLSX file containing document metadata and asset parameters in the prescribed format.
Content Zip
Upload the ZIP archive containing thumbnail images and content files organized by category folder structure.
Status
System-generated status: Pending while processing; Complete when finished.
Click Save to submit the bulk upload.
Uploading Bulk Contents — XLSX Format
The prescribed XLSX file uses three sheets:
Sheet1 — Category Tree: Defines the category structure using a Bottom-Up Approach: All > Category2 > Category1.
Sheet1 — Category hierarchy definition using CategoryName and ParentCategoryName columns.
Sheet2 — Content Details: Provides metadata for each document, including DocumentId, Name, CategoryName, Thumbnail_Path, SourceFile, Languages, DescriptionText, PublishDate, asset_validity, IsPublished, UrlLink, FileType, and Version.
Sheet2 — document content details with sample data rows.
Sheet3 — Asset Zone Properties: Defines zone properties per document, including DocumentId, Type (image/text), X, Y, Height, Width, Alignment, VerticalAlignment, AppliedToPages, Description, FontSize, Color, LineSpacing, Italics, Bold, and FontFamily.
Sheet3 — Asset Zone Properties for each document, defining image and text zone parameters.
Upload the Content List (XLSX) and Content Zip (ZIP archive), then click Save.
The status changes to Pending while the system processes the import, then to Complete when finished.
Bulk upload complete — status shows Complete once all assets are imported.
Navigate to Asset Library and click the relevant Category to view the newly uploaded assets.
Click Manage Zone on any uploaded asset to verify that zone properties were imported correctly.
Asset Zones and Properties — Image and Text zones transferred correctly through bulk upload.
Click Visibility Configuration on any uploaded asset to confirm the configuration was imported as defined in the Excel sheet.
Visibility Configuration — reflects the country and group settings uploaded via the XLSX content list.
03
Manage Categories
Creating & Editing Categories
Click Manage Categories in the left menu bar. The Manage Category page opens, displaying the category tree.
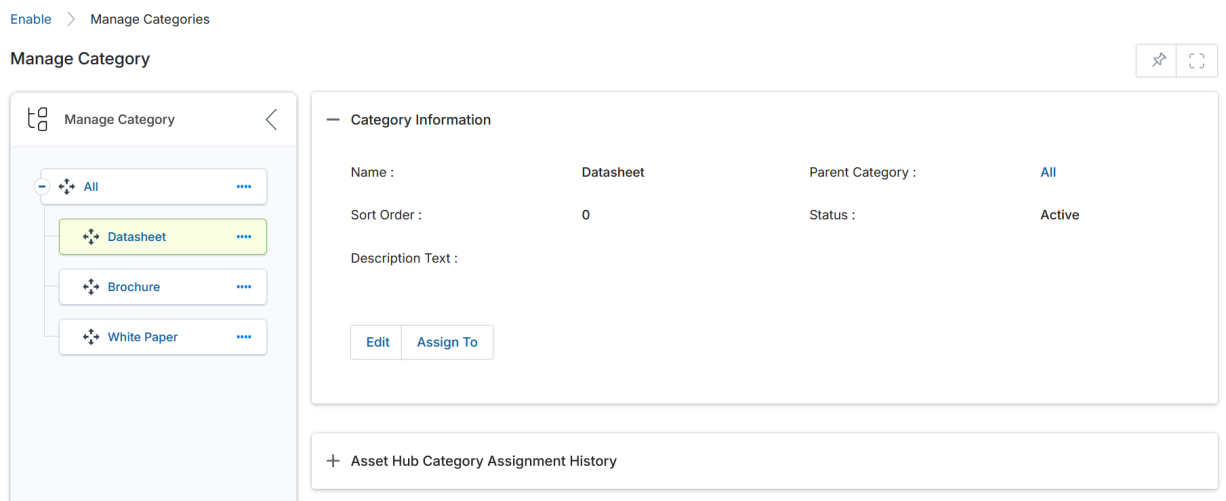
Manage Category page — left panel shows the category tree; right panel shows Category Information.
Click on any Category Name to access the Category Details page, or click the Edit button to edit that category directly.
Editing an Existing Category
Click the Category Name you wish to edit. The Asset Hub Category Information section appears on the right.
Click Edit to modify the category fields.
Category Information panel — displays all category metadata with Edit and Assign To buttons.
Field
Description
Name
The display name of the category.
Parent Category
Select the parent category. For top-level categories, select All. For sub-categories, select the appropriate existing parent.
Status
Category status: Active, Inactive, or Draft.
Sort Order
Determines the position of this category in the hierarchy tree.
Description
Full description of the category, displayed on the listings page.
Adding a New Category
Click the Sublink (…) associated with a specific category to reveal the option to create a new sub-category.
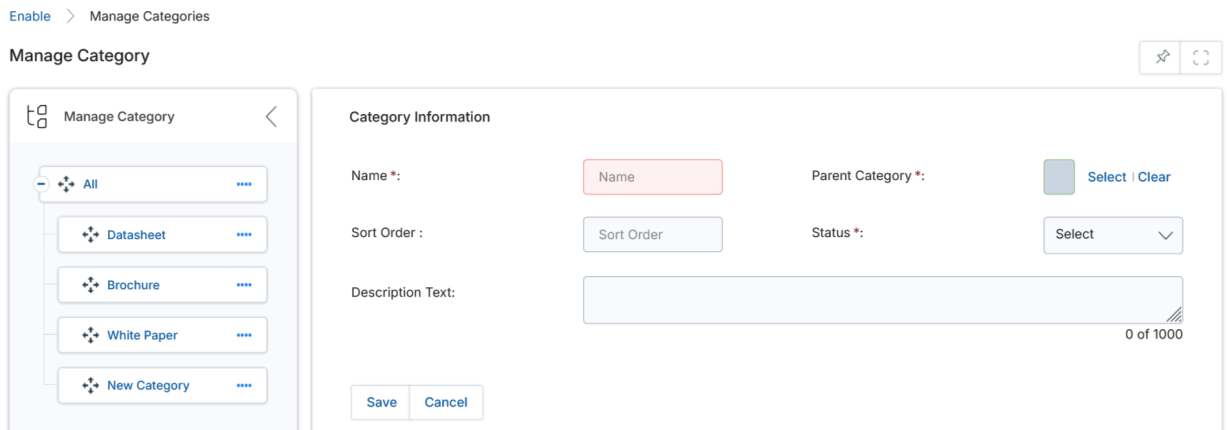
The Category Information form opens with the same fields as above. Fill in all required fields.
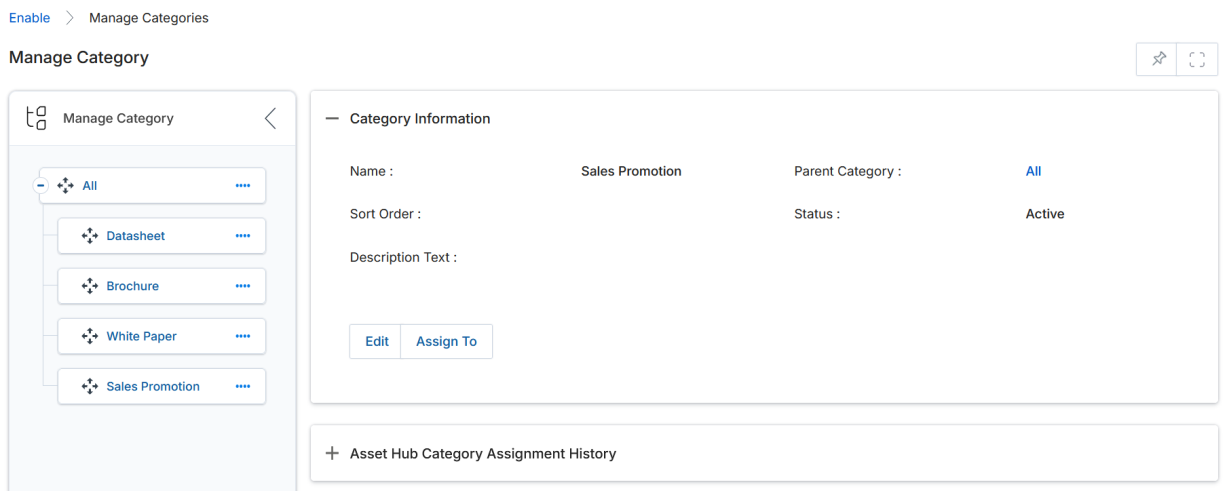
Add New Category form — fill in the category details and click Save.
Click Save to create the new category. It will then be available in the category tree for adding content.
04
Manage Partner Logo
This section is primarily for the Channel Partner Administrator (CPA) — the admin at the partner organization — to create a repository of logos that partner reps can choose from when co-branding assets.
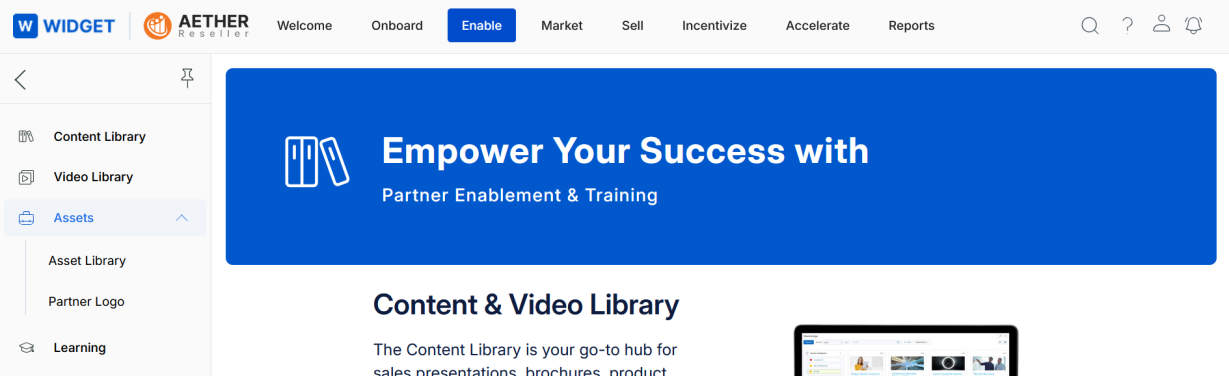
Click Enable on the top menu.
Click Assets > Partner Logo in the left menu bar.
Navigation — Enable > Assets > Partner Logo opens the partner logo repository.
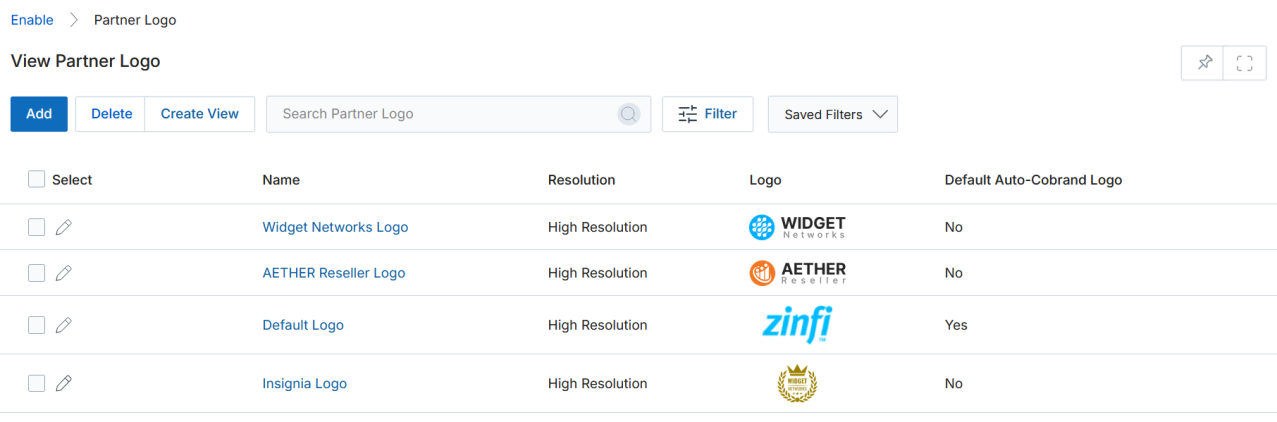
View Partner Logo
Clicking Partner Logo from the left menu opens the View Partner Logo page, displaying all uploaded logos.
The page toolbar provides the following options:
Button / Option
Description
Add
Create a new partner logo entry.
Delete
Deletes the selected logo record(s) from the list.
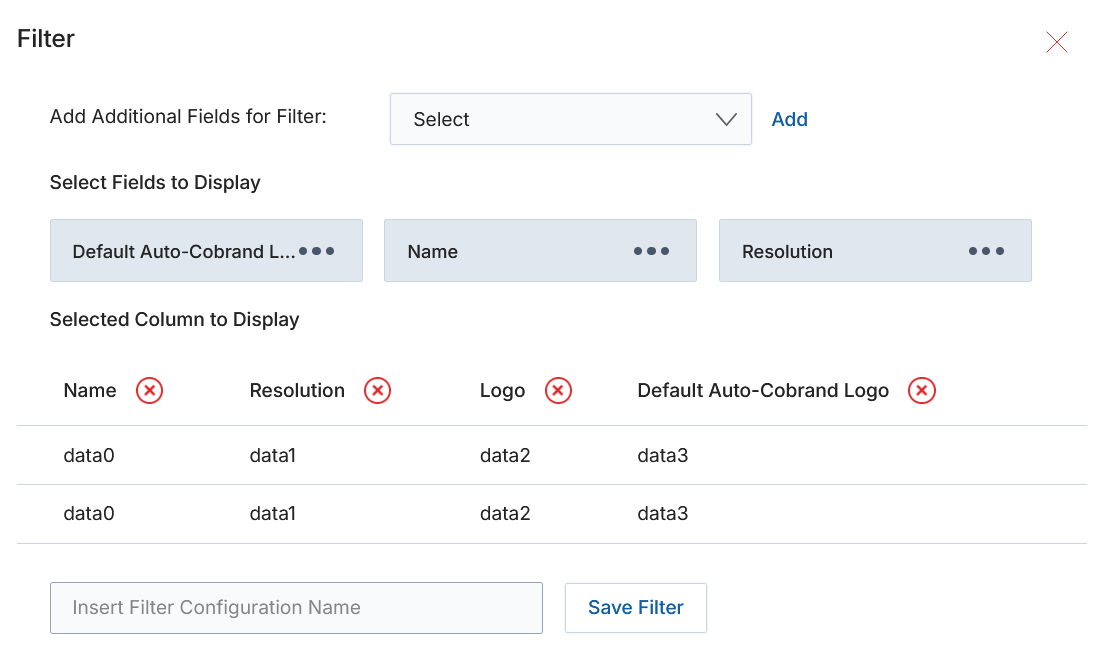
Create View
Manages the visible columns on this listing page. Select additional fields, choose columns with the Dots selector, remove columns with the orange ✕ button, then save the new view with a name.
Filter
Opens a search popup to locate specific logo records by name or other criteria.
Saved Filters
Lists saved filter configurations. Each saved filter can be edited (update the name) or deleted.
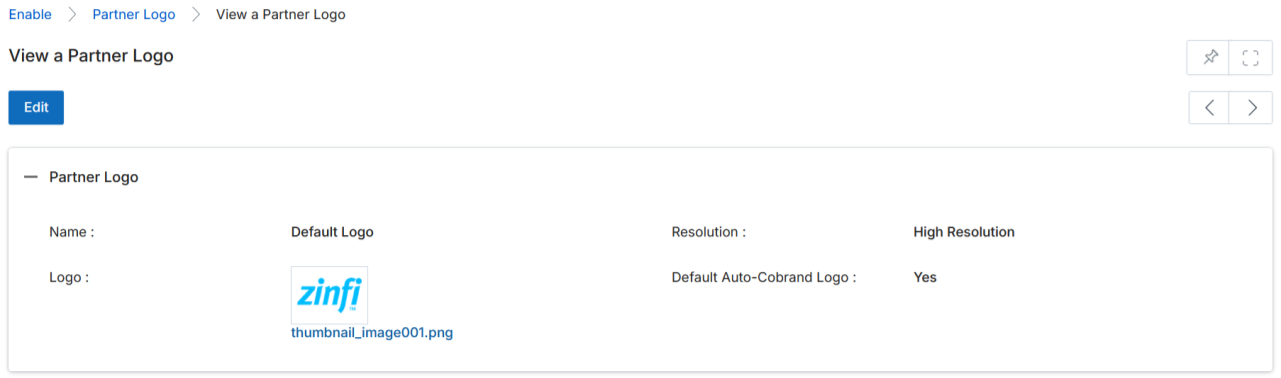
View Logo Details
Click the Name / Title of any logo to open its detail page.
The View a Partner Logo page displays the following information:
Field
Description
Name
The display name of the logo.
Resolution
Resolution of the uploaded logo: High Resolution or Low Resolution.
Logo
The logo image as uploaded.
Default Auto-Cobrand Logo
Indicates whether this logo is set as the default for partner co-branding.
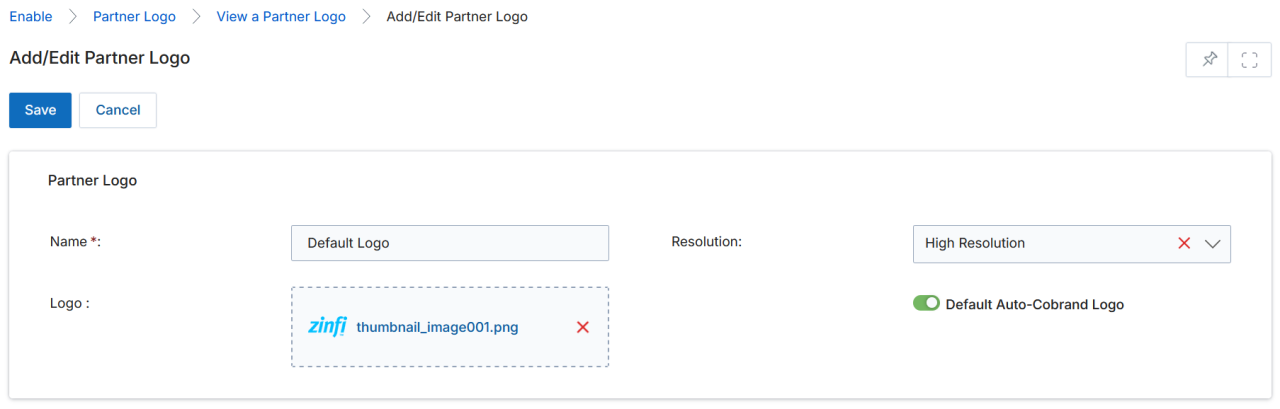
Add / Edit a Logo
To edit an existing logo — click the small pencil icon on the listing row. To add a new logo — click the Add button at the top of the View Partner Logo page.
On the Add/Edit Partner Logo page, fill in the following fields:
Field
Description
Name
The display name for this logo.
Resolution
Set to High Resolution or Low Resolution.
Logo
Upload or drag-and-drop the logo image file.
Default Auto-Cobrand Image
Enable the toggle to designate this logo as the default for all partner co-branding. Only one logo in the repository can be set as the default; partner users cannot override this selection.
Important: The CPA can designate only one logo as the Default Auto-Cobrand logo. Once set, partner users will not be able to change this default logo.
Click Save to save the logo record, or Cancel to discard changes.