Introduction
ZINFI UPM offers a state-of-the-art discussion group feature with the introduction of the Community and Comments module — where a group of individuals with similar interests can either formally or informally bring up ideas, solve problems, or make comments. The module operates like a discussion forum. It is tree-like in structure, containing discussions, replies, and sub-replies. The discussions can be shared via social syndication and business intelligence reports can be generated based on activities within the module. Within a community, each new discussion can be replied to by as many users/partners as wish to participate.
Integrating Community Feature
The Community forum is an online discussion tool where people can hold conversations in the form of posted messages for specific records. People can attach files and can tag users, groups, and previous conversations.
The primary aim of the Community module is to facilitate communication and the sharing of files between users/groups for records associated with sales.
- Community Integration with PRM modules
- Partner Collaboration
- Add fields as required from a collection of available ones
Partner Comments and Collaboration
The Comments & Community feature is a tool where people can share their views for a specific record with users and groups and can attach files. The tool takes a two-dimensional approach to sharing views. Its sole purpose is to pass communications and share files to users or groups for records associated with sales.
- Share discussions & files with all users
- Garner real-time feedback and collaborative engagement
- Message publicly or privately
Communities
Navigate to the Community module by clicking Accelerate on the top menu, then selecting Community > Communities in the left menu bar.
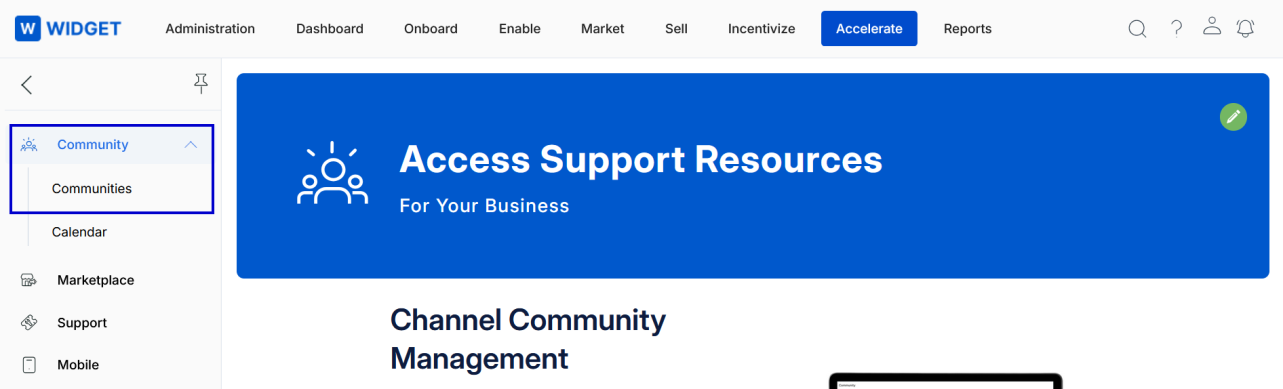 Communities navigation highlighted">
View Existing Community Info
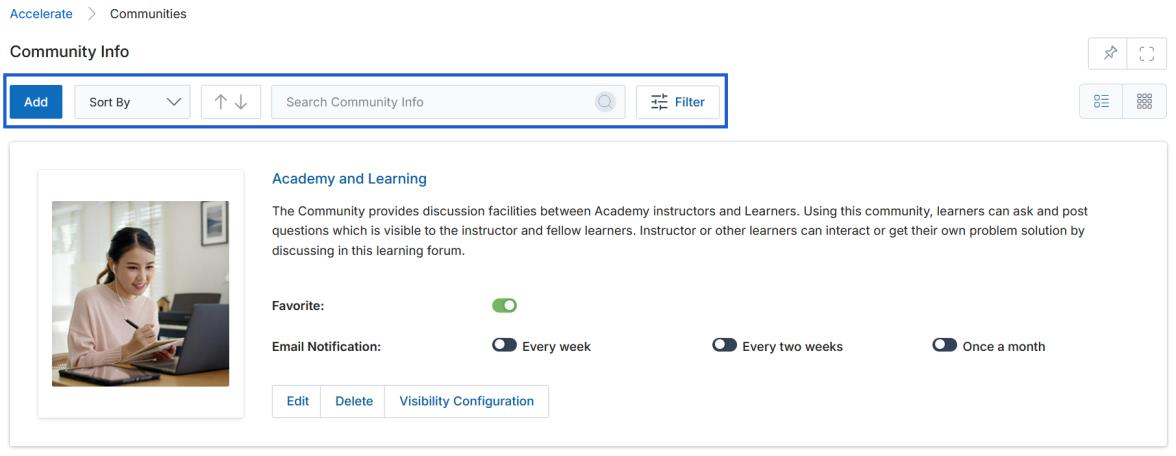
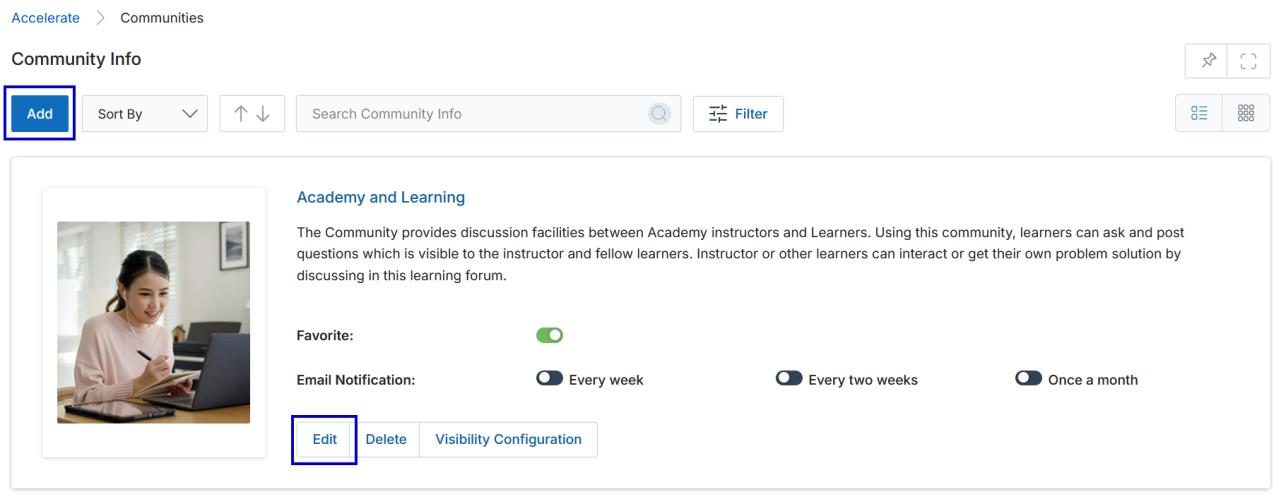
Clicking on Communities opens the Community Info page where all existing communities are listed. The toolbar at the top provides these actions:
- Add — Opens a new page to create a new Community Info record.
- Sort by — Lets you sort the listed Community Info records using available parameters in the dropdown.
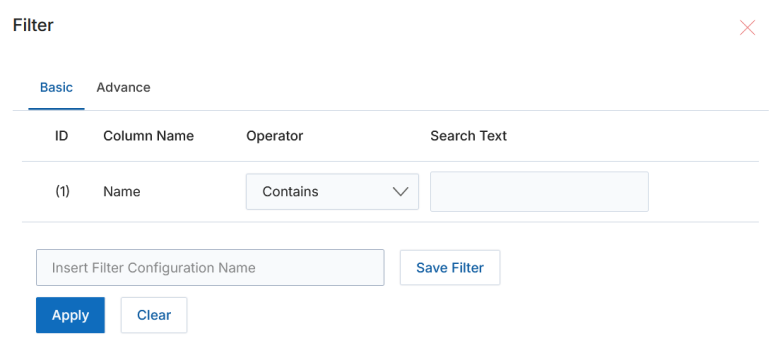
- Filter — Opens the Filter pane to search for specific Community Info records.
For each record on the page, the following per-record actions are available:
- Edit — Opens the record's edit form to update the Community Info.
- Delete — Permanently removes the Community Info record.
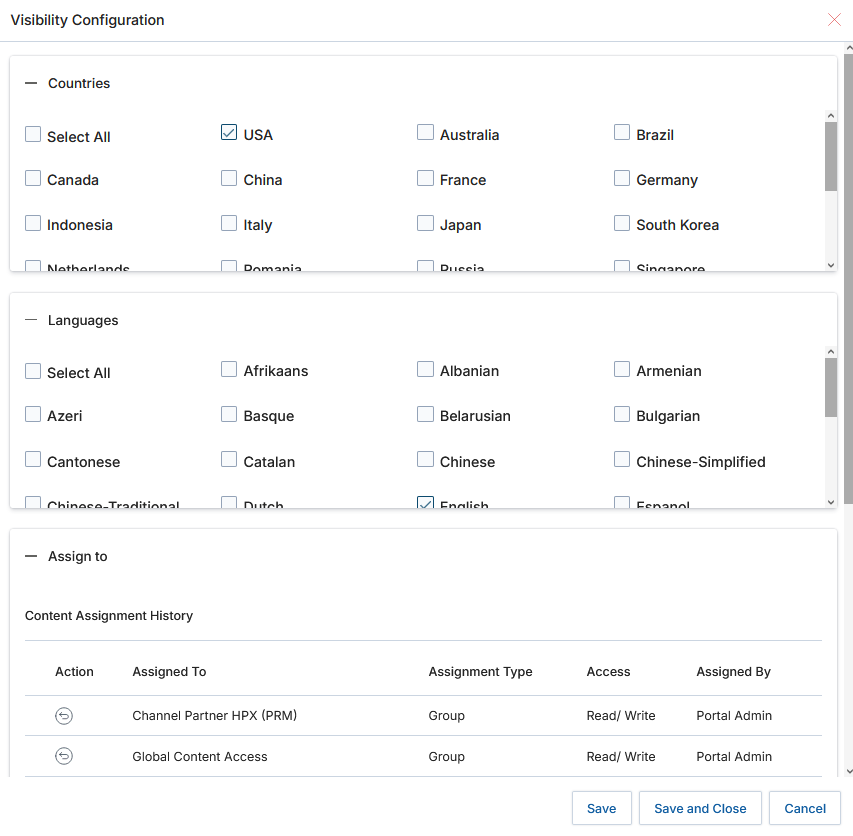
- Visibility Configuration — Lets you set which Country, Language, and Assign To groups can see the Community Info.
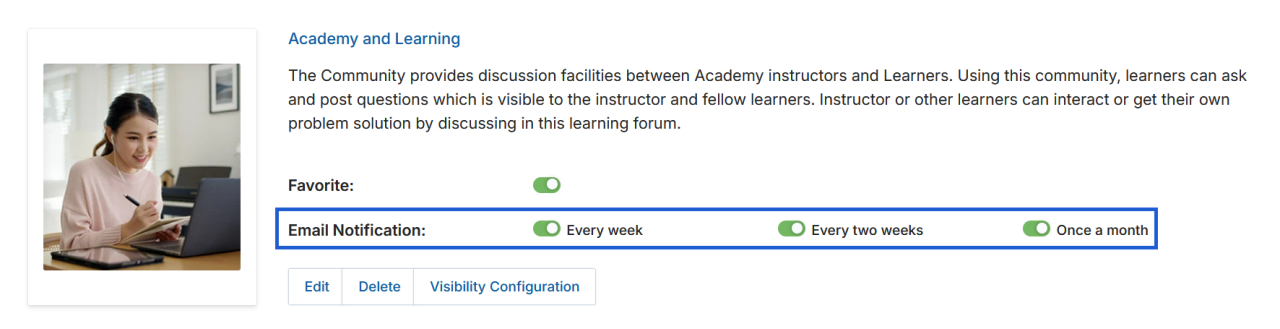
Two additional per-record preferences control how users engage with a community:
- Favorite — Enabling the "Favorite" toggle pins the community to the user's dashboard for quick access.
- Email Notifications — Users can subscribe to receive email digests every week, every two weeks, or once a month to stay informed about new posts, discussions, and announcements.
To search for a specific Community Info record, click the Filter icon (three parallel lines) to open the Filter pane. Enter criteria in the Name field and click Apply.
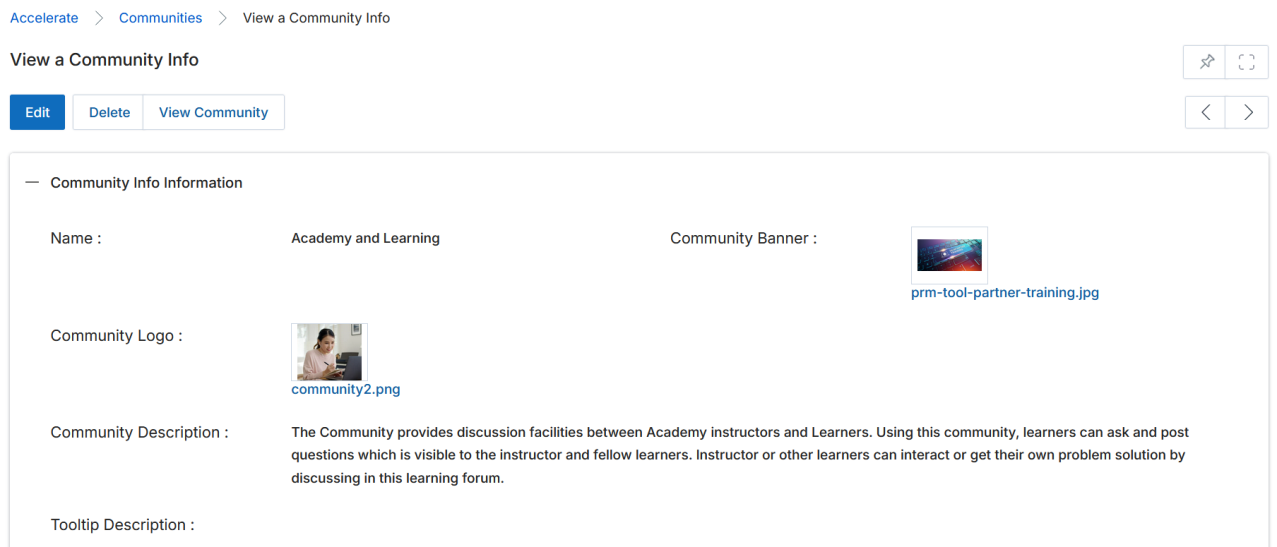
View Community Info Details
Click the name of any Community Info record to open its detail page. The page shows all stored fields and provides three action buttons at the top:
- Edit — Updates the existing Community Info record.
- Delete — Removes the Community Info record.
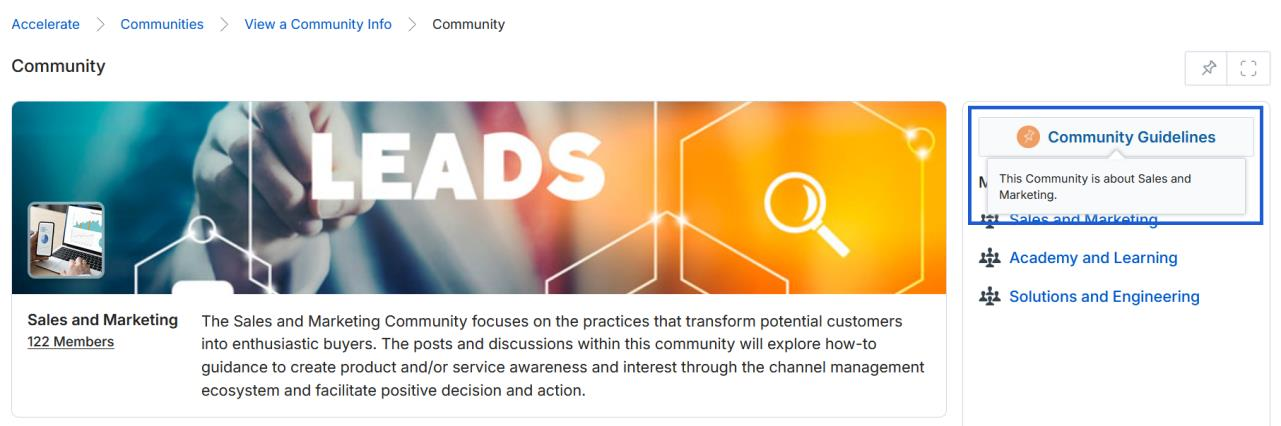
- View Community — Opens the Community page where posts can be read, commented on, or created, and where the full list of communities assigned by the Admin is visible.
View Community and Creating Posts
Clicking View Community opens the live Community page. The right-hand panel lists all communities created by the Portal Admin. The main area shows the community banner, member count, and the full post feed.
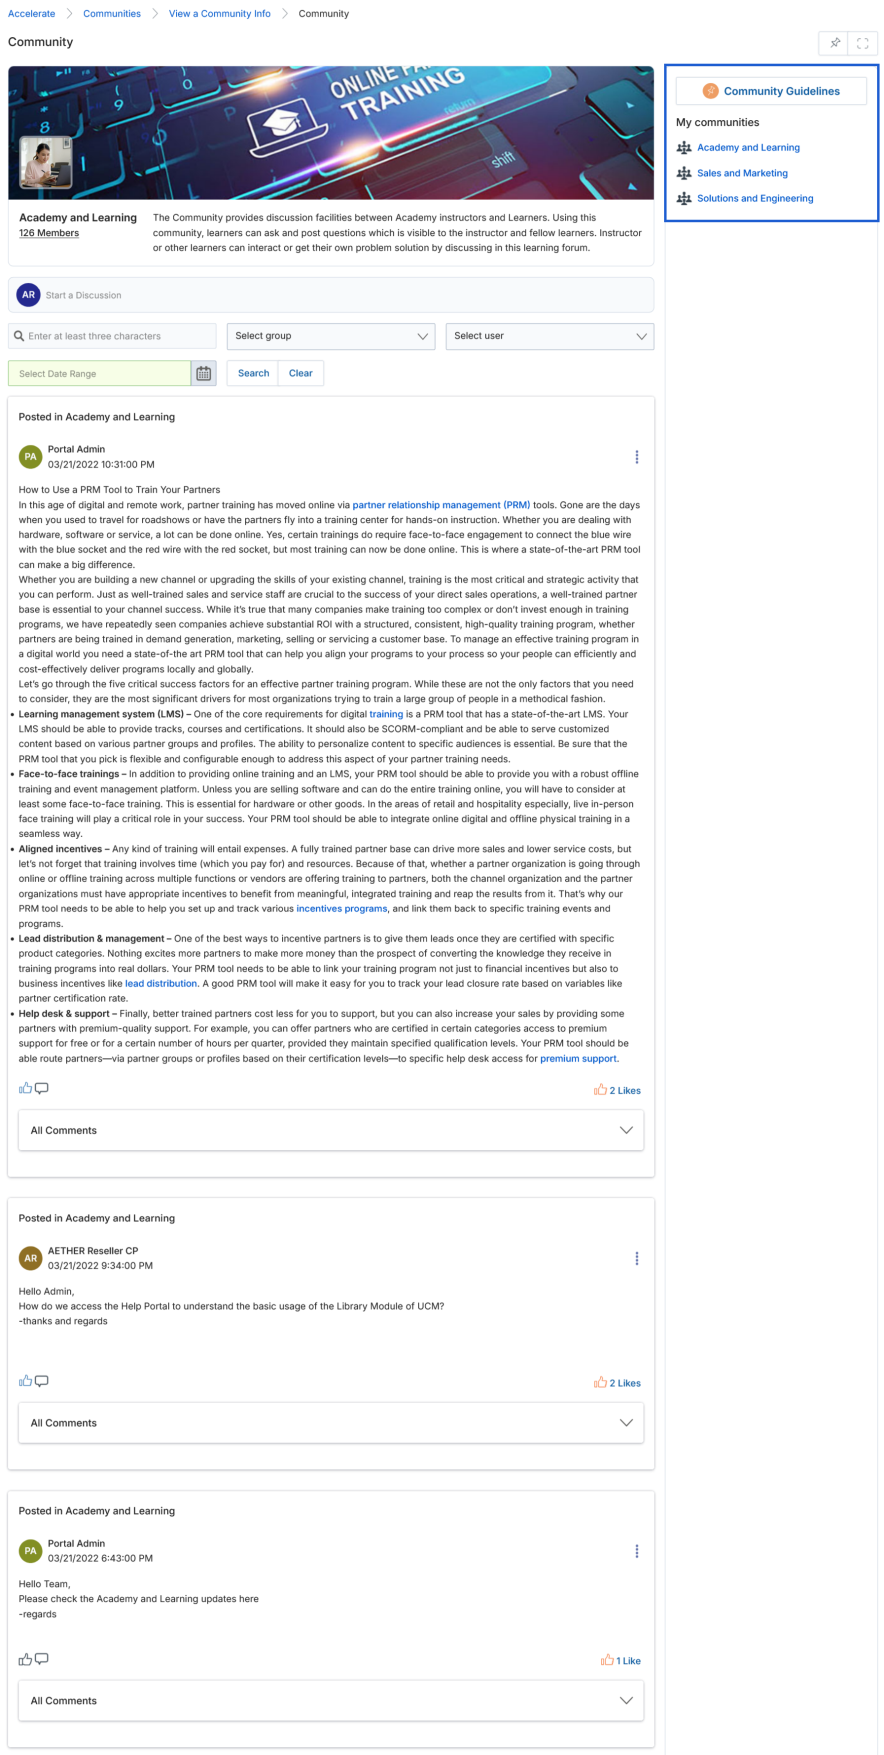
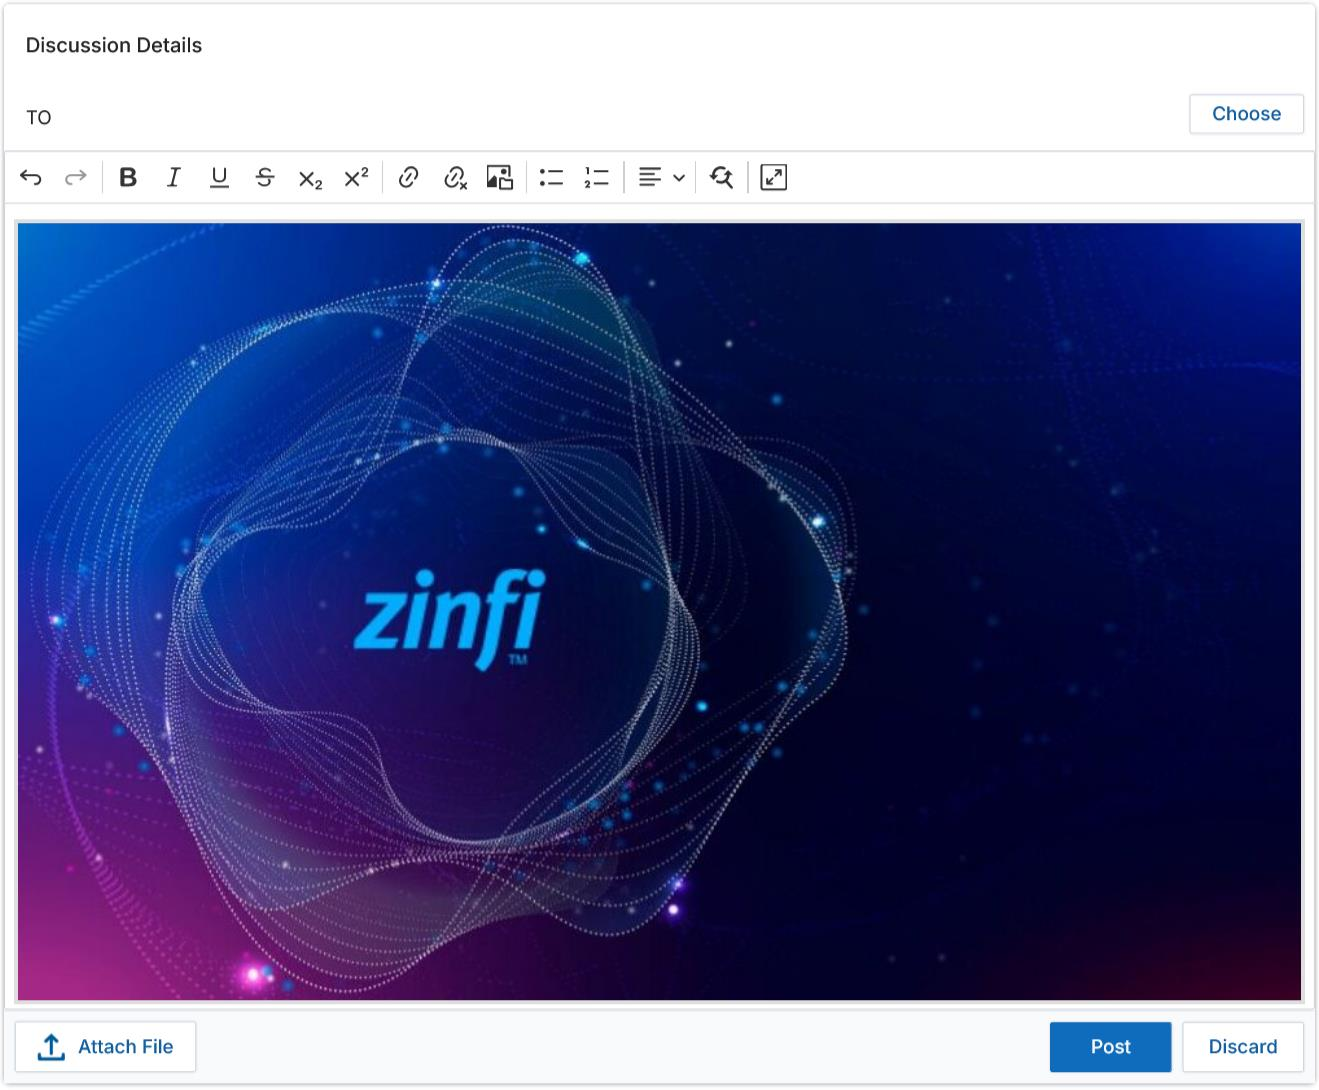
To start a discussion, click the Start a Discussion panel. This expands a Discussion Details box with a rich-text editor.
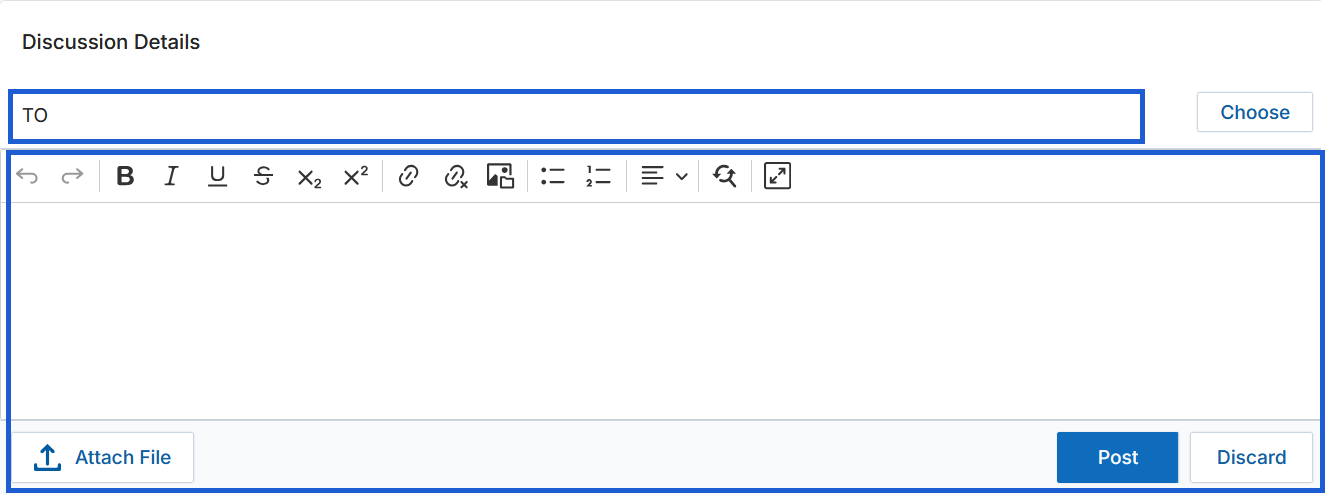
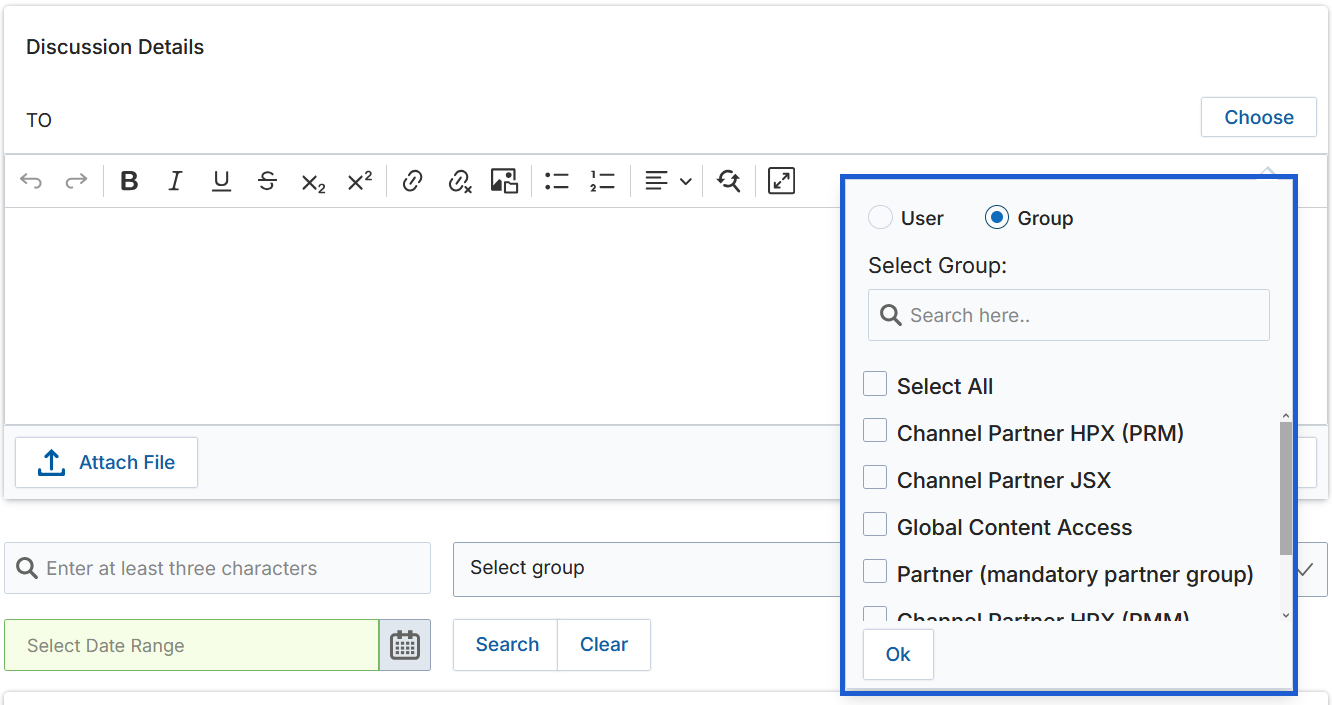
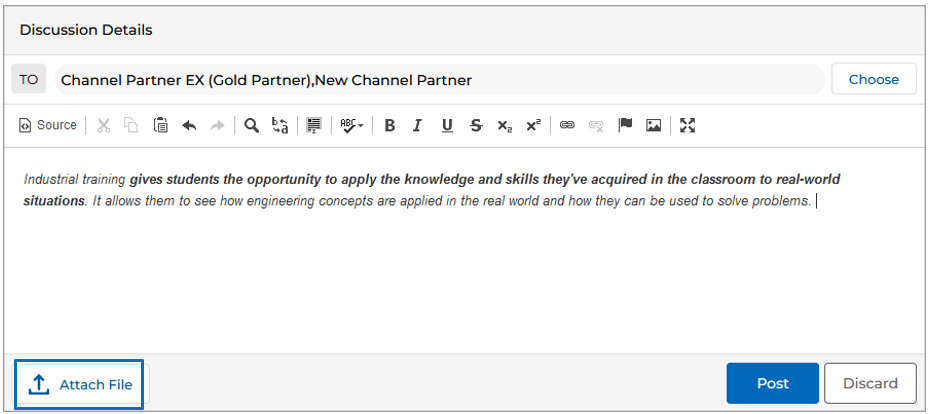
Click the Choose button to select the users or groups who will receive the post. Toggle individual recipients; selected names appear in the TO field.
Draft the message body in the rich-text editor, then click Post to publish or Discard to cancel.
Posts can be searched using the filter bar above the feed. Enter keywords in the search field, optionally select a group and user, choose a date range, then click Search. Only posts matching the criteria are displayed.
Once a post is published, every community participant receives an email notification. Recipients can reply directly from the email and the comment is captured in the portal automatically.
Attaching Files to a Post
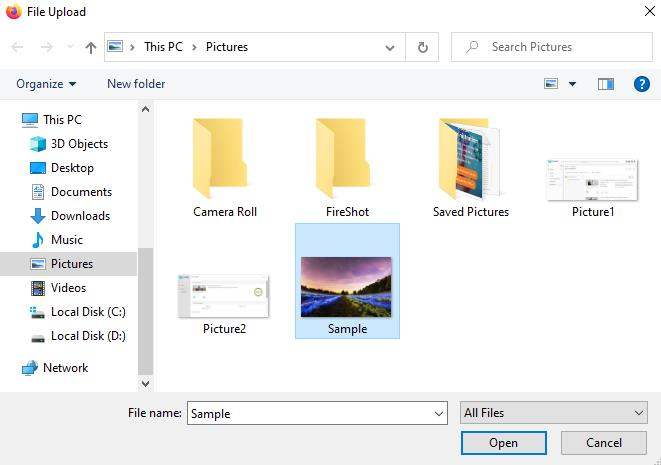
Posts can include file attachments in formats such as .png, .xlsx, .doc, .pdf, and others. Click Attach File and select the file from your system. Repeat to attach multiple files. Use the Bin icon to remove an attachment or the Download icon to save a copy. Posts can also contain inline images inserted via the embedded HTML editor.

Liking and Commenting on Posts
After a post is published, recipients can Like it by clicking the Thumbs Up icon. Any participant can click the comment icon (beside Thumbs Up) to open a collapsible comment editor. Write the comment and click Add Comment to submit.
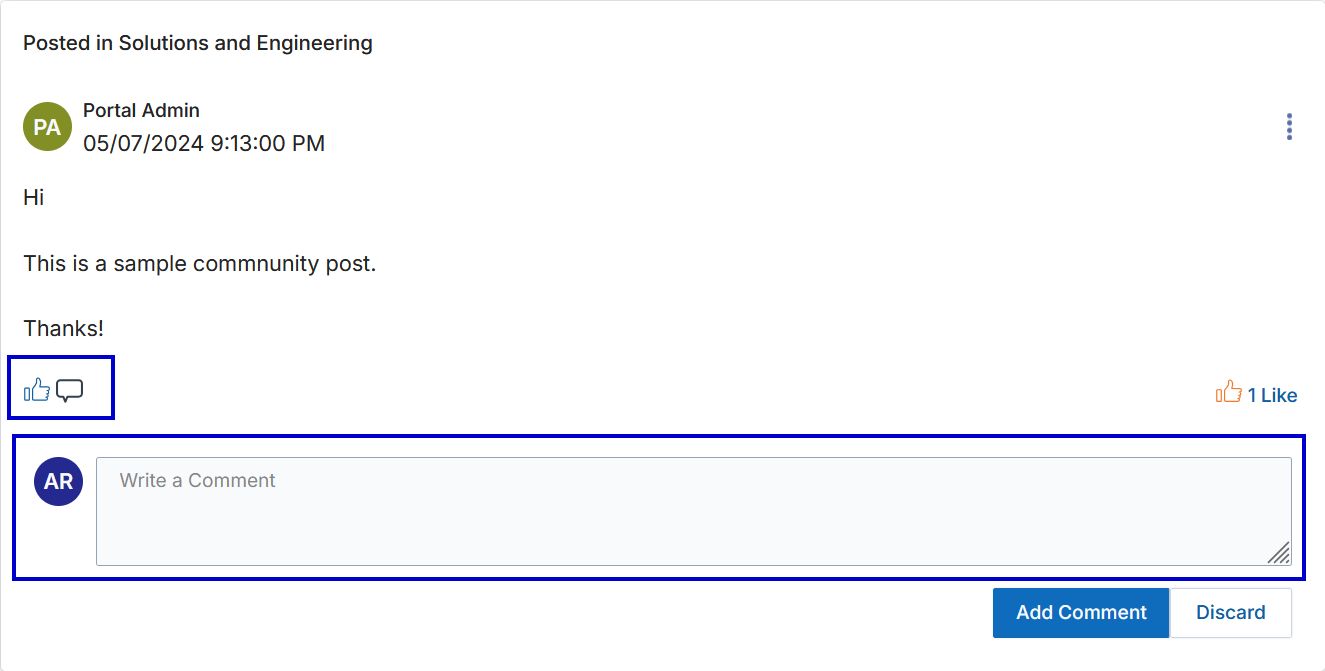
Notification emails are sent when a user comments on a post. The post owner and all users above them in the UPM hierarchy receive the notification email including the comment text.
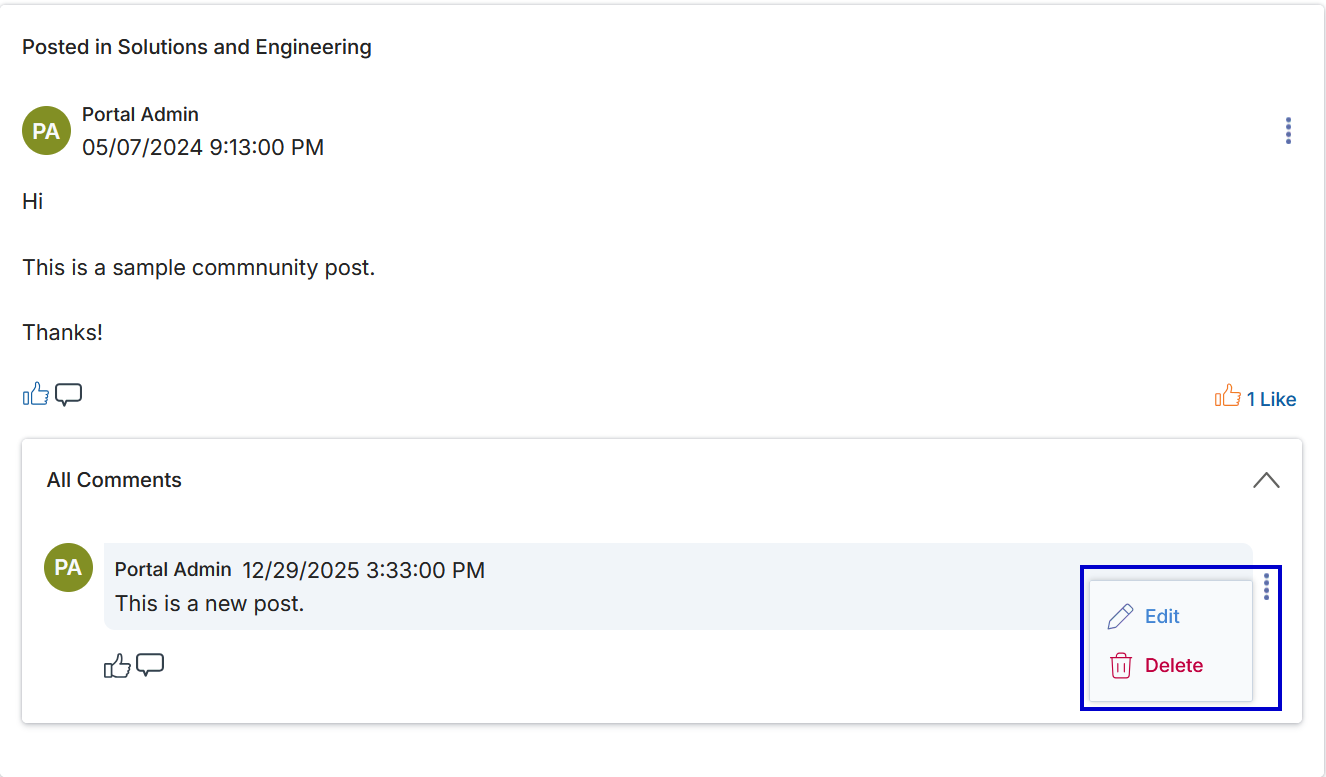
Editing and Deleting Posts or Comments
Admins can edit or delete any participant's posts or comments. Other users can only edit or delete their own. Access these options by clicking the three-dot menu (⋮) at the top-right corner of any post or comment card.
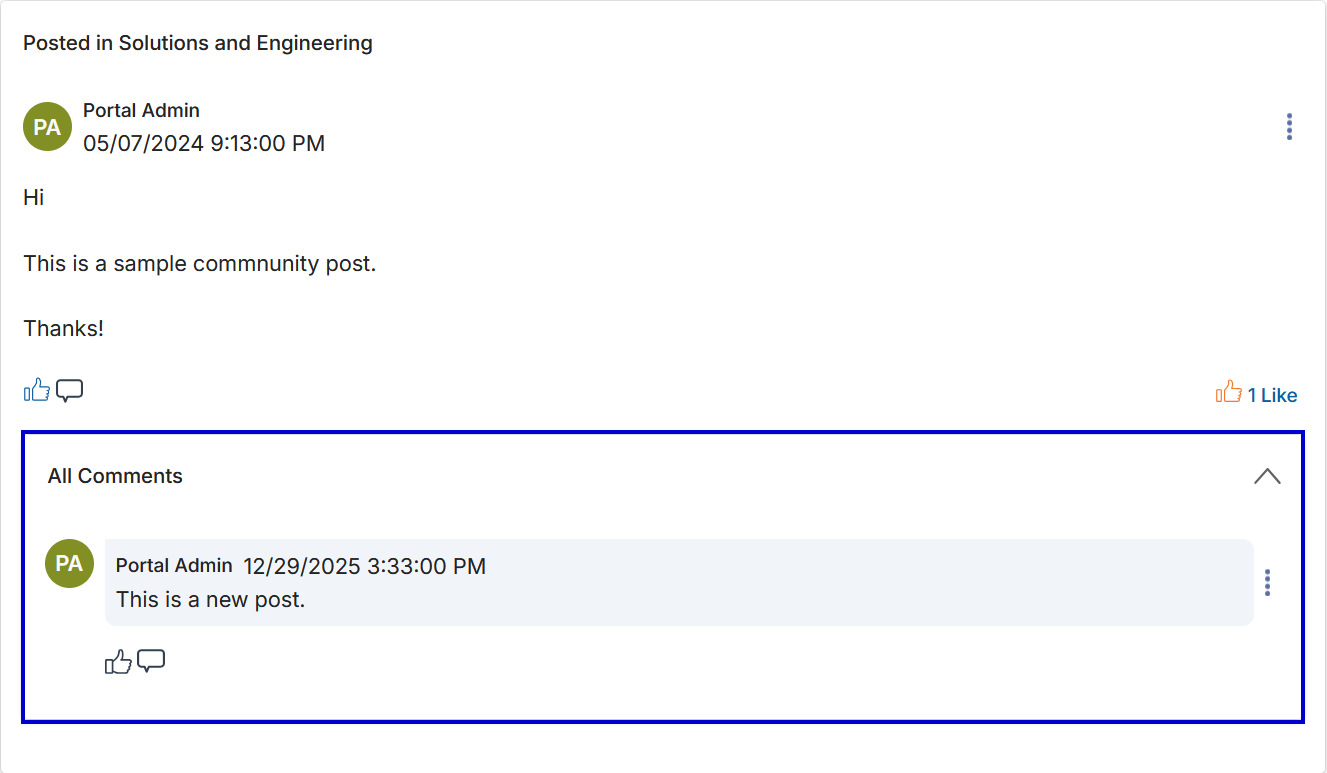
Clicking All Comments expands a collapsible window listing all comments on a post.
Managing User Access (Banning)
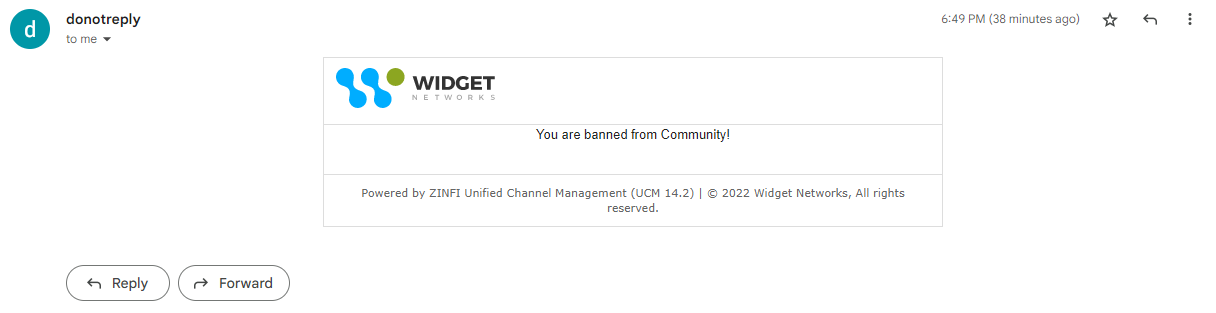
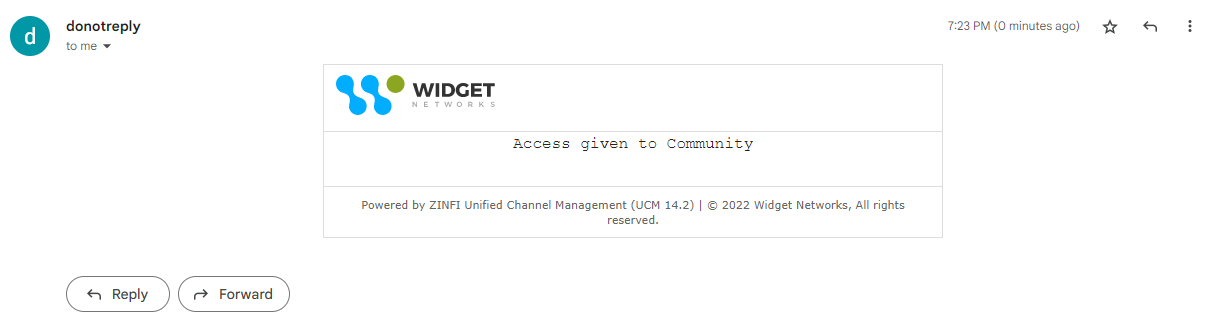
From the User Management module, an Admin can invoke or revoke a ban on any user's access to Communities. Both actions trigger an automatic email notification to the affected user.
Add/Edit a Community Info
Click Add on the Community Info list page to create a new community, or click Edit on an existing record to modify it. Both actions open the Add/Edit a Community Info form.
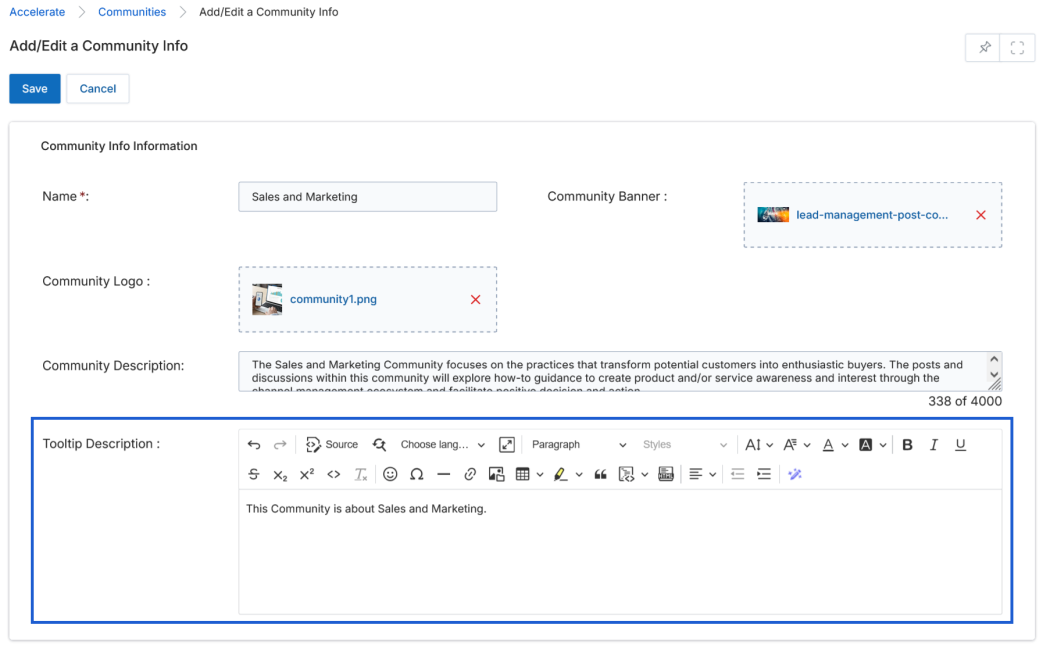
The fields in the Community Info Information section are:
| Field | Description |
|---|---|
| Name | Required. The display name of the community. |
| Community Banner | Drag or upload a banner image for the community page header. |
| Community Logo | Drag or upload a logo image displayed alongside the community name. |
| Community Description | A plain-text description (up to 4,000 characters) visible on the community listing card. |
| Tooltip Description | A brief synopsis displayed as a tooltip in the Community Guidelines panel when a user hovers over the community name. |
Click Save to apply changes or Cancel to discard them. After saving, the Tooltip Description appears in the Community Guidelines hover tooltip.
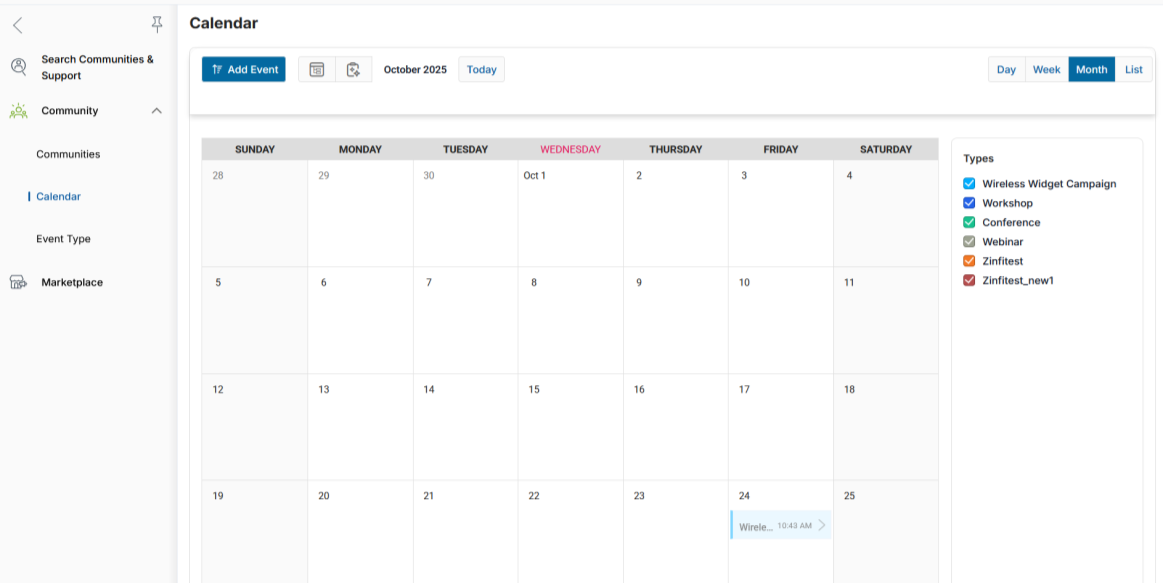
Calendar
Access the Calendar by clicking Accelerate on the top menu, then selecting Community > Calendar in the left menu bar. The calendar displays events by month, week, day, or list view. A Types legend on the right shows all active event types with their color codes.
Add Calendar Events
To create an event, click Add Event and complete the Add/Edit an Event Information form.
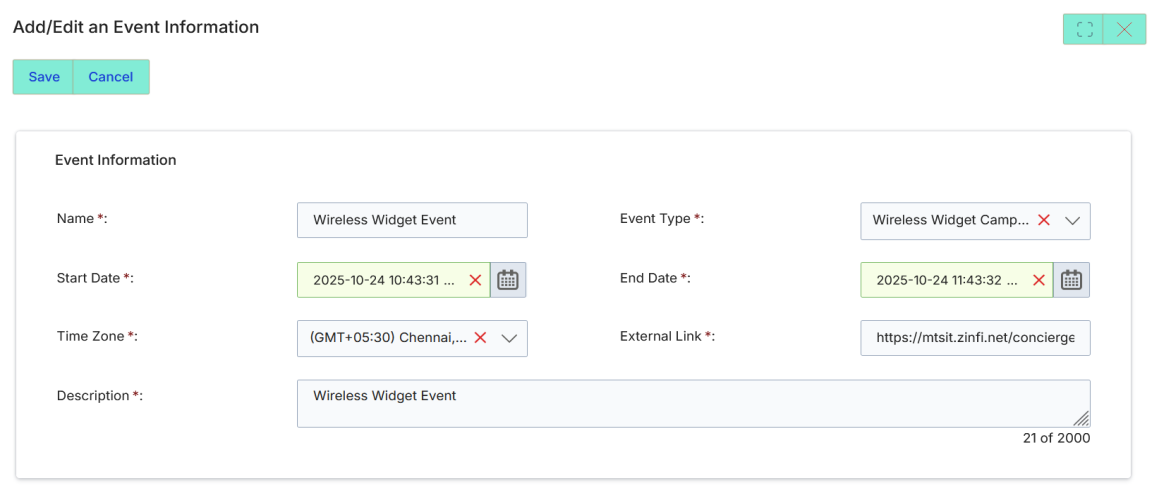
The event fields are:
| Field | Description |
|---|---|
| Name | Required. The display name of the event. |
| Event Type | Required. Select a pre-configured event type (e.g. Workshop, Conference). Determines the color shown on the calendar. |
| Start Date | Required. The start date and time of the event. |
| End Date | Required. The end date and time of the event. |
| Time Zone | Required. The time zone for the event dates. |
| External Link | Required. URL for the event registration or information page. |
| Description | Required. A brief description of the event (up to 2,000 characters). |
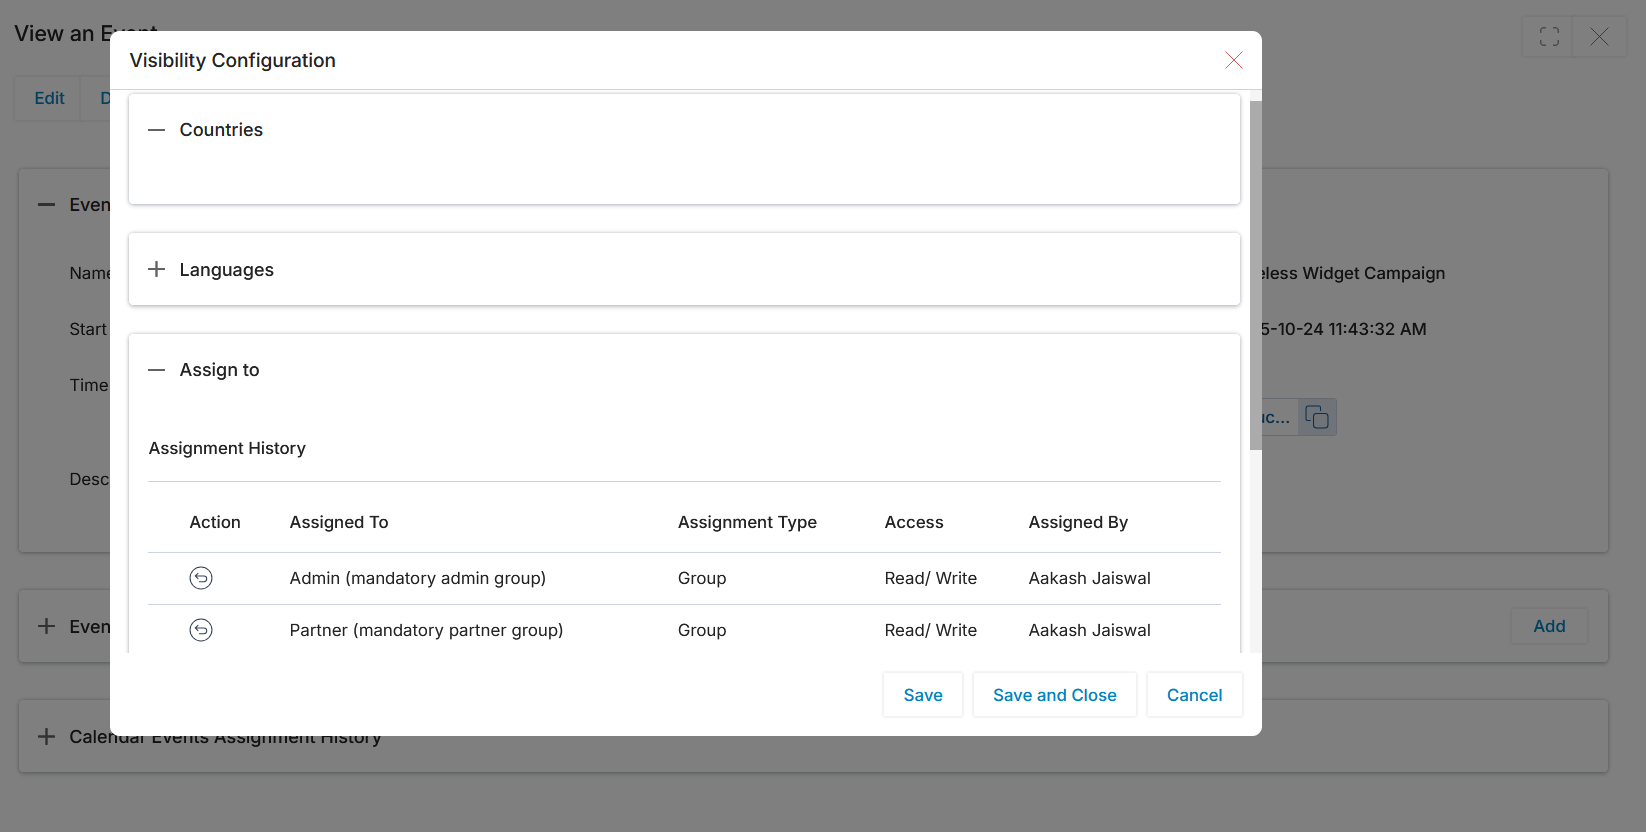
After filling in the event details, use Visibility Configuration to assign the event to specific partners or groups based on country and language configuration.
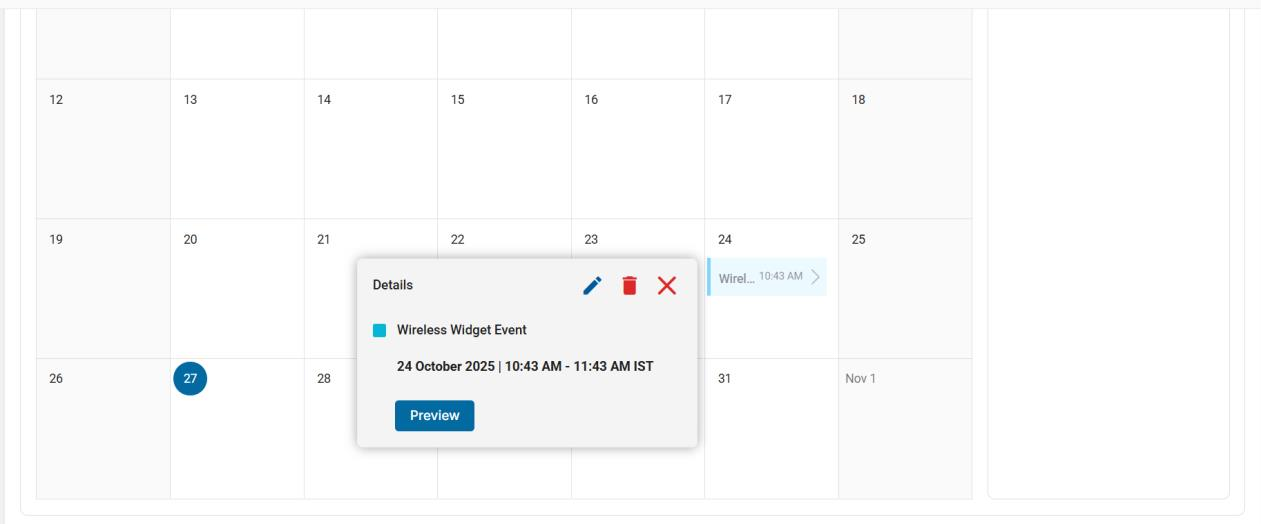
Click Save. The event appears on the calendar on its specified date. Click an event to see its Details popup with the event name, date/time, and a Preview button.
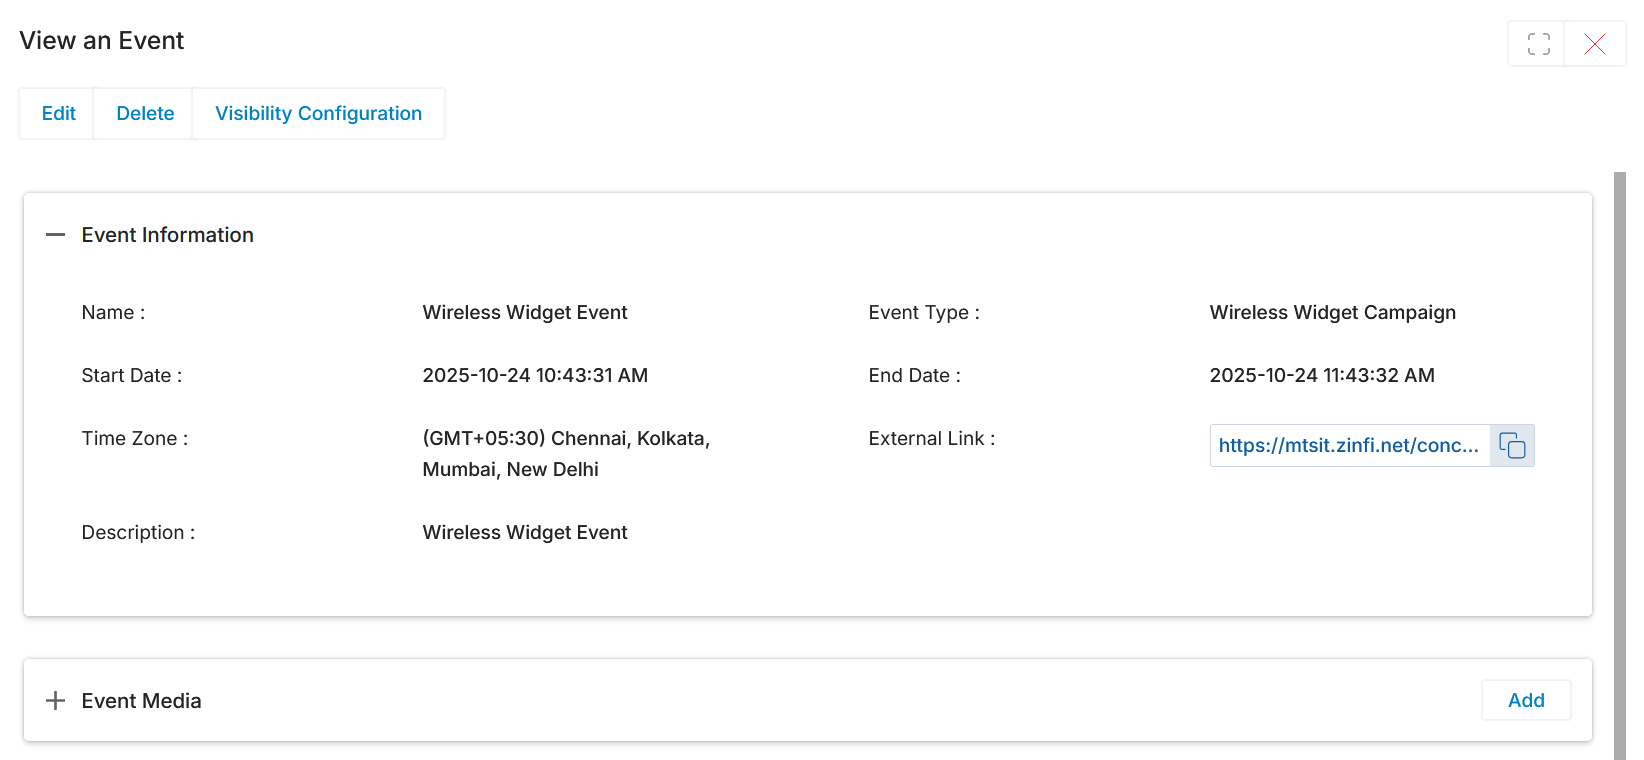
Clicking Preview opens the View an Event detail page showing all event fields and an Event Media section where images or files can be attached.
Adding Event Media
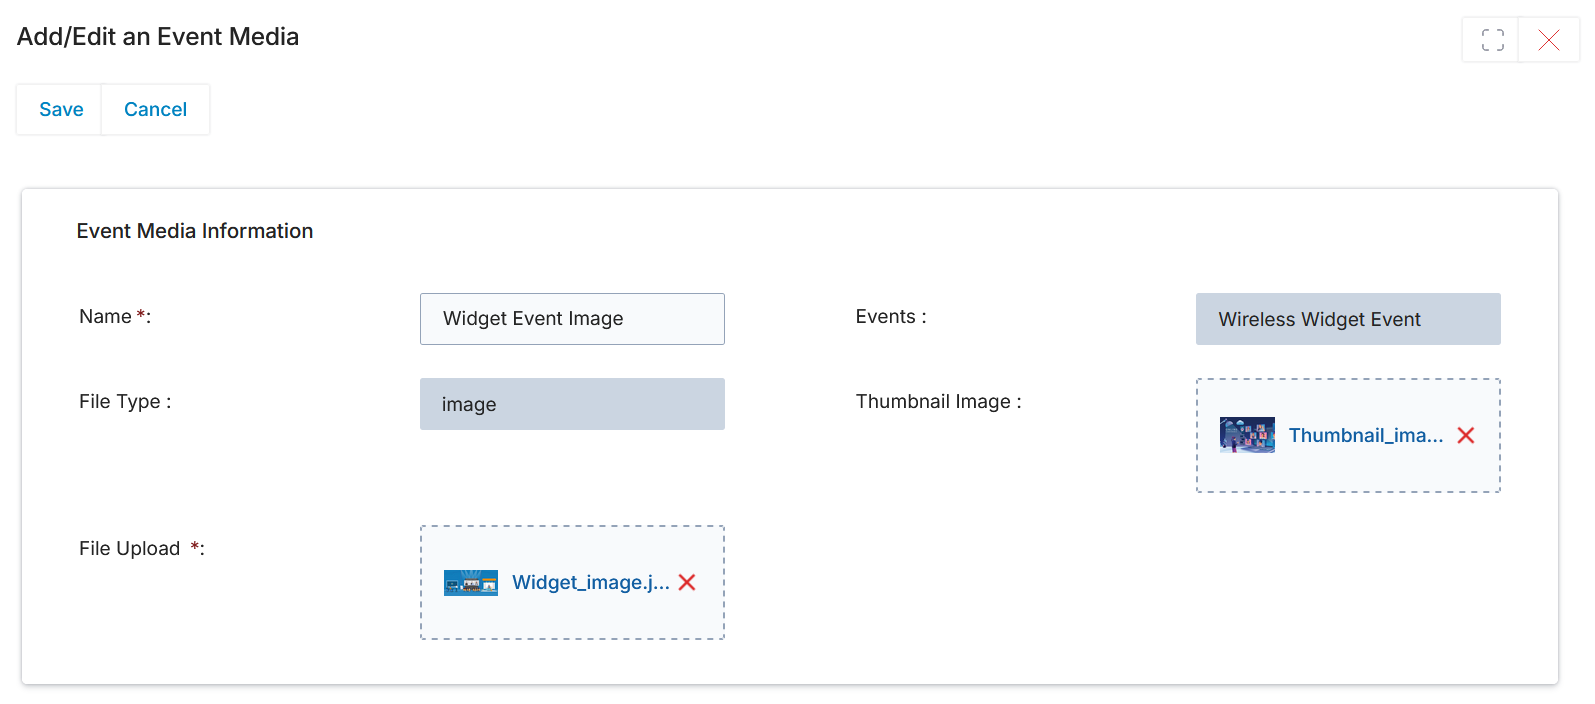
In the Event Media section, click Add to open the Add/Edit an Event Media form. Provide a name, select the file type, upload the file, and optionally attach a thumbnail image. Click Save to attach the media to the event.
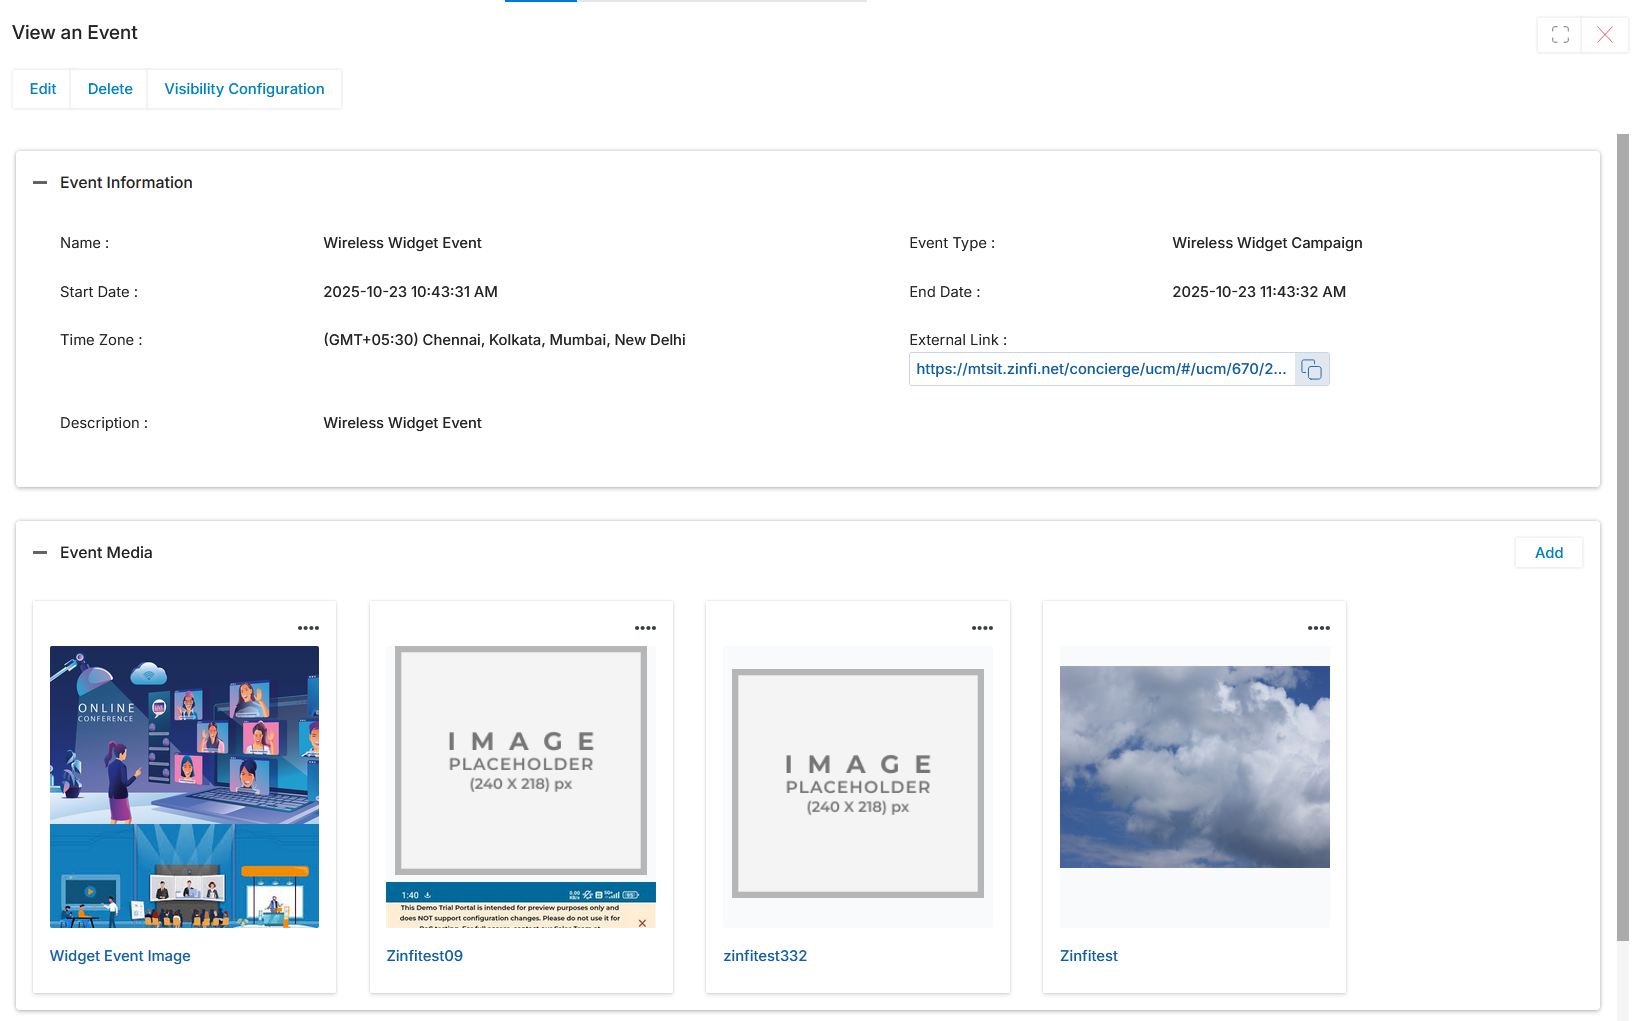
Once saved, the uploaded media tiles appear in the Event Media section of the event detail page.
Update any event details and save at any time. Changes sync in real time across all partner views.
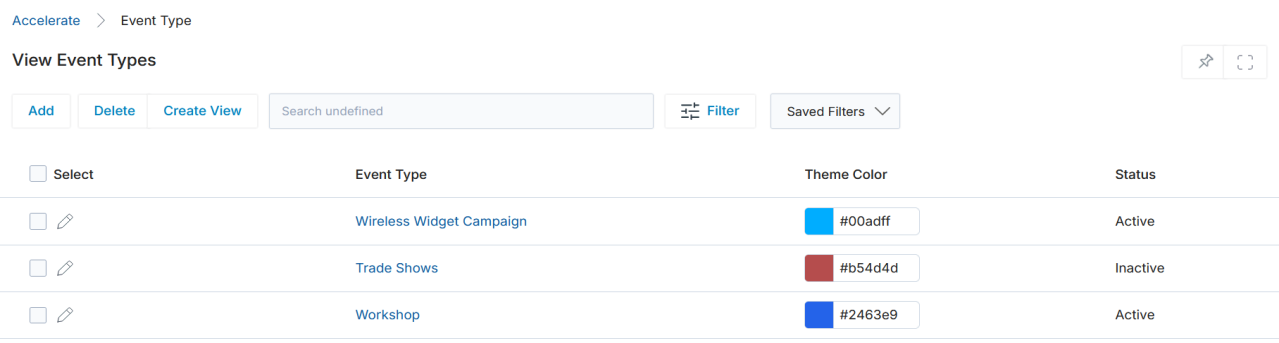
Event Type
The Manage Event Types feature is a master configuration page within the Community application. It enables administrators to define distinct event categories for organization-wide and internal enablement activities, ensuring consistent scheduling and clear visual differentiation on the calendar. Each event type is associated with a specific color tag so different kinds of events — such as training sessions or partner meetings — are immediately distinguishable.
Navigate to Accelerate > Community > Event Type in the left menu bar.
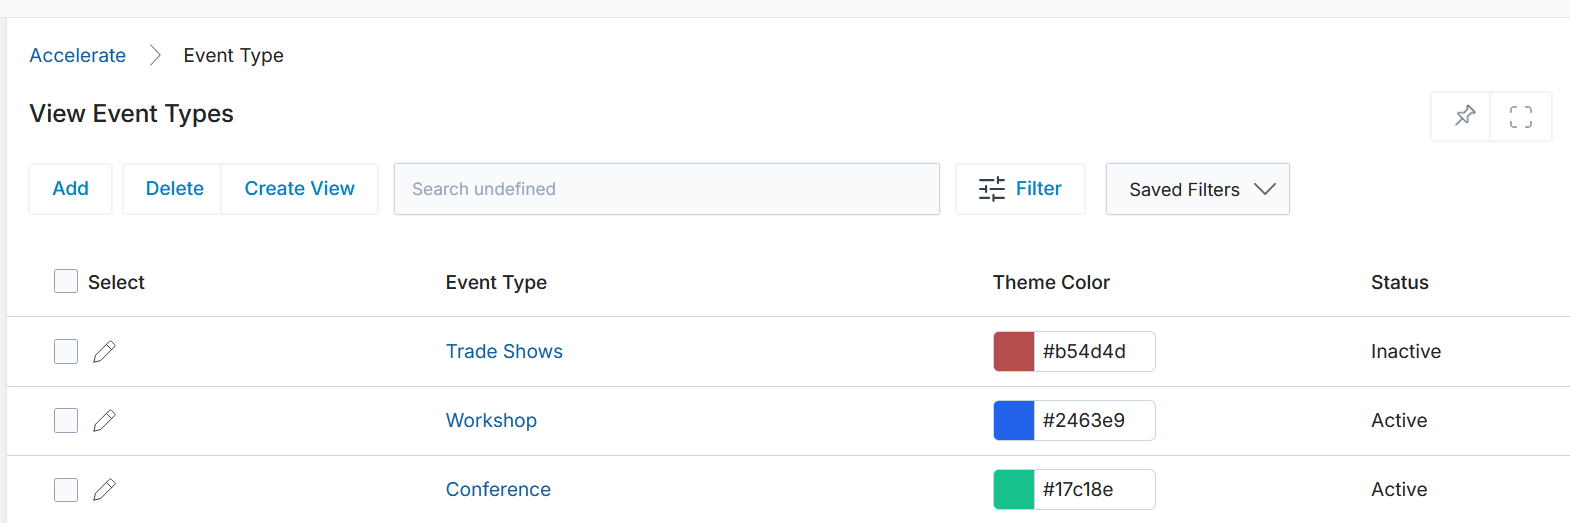
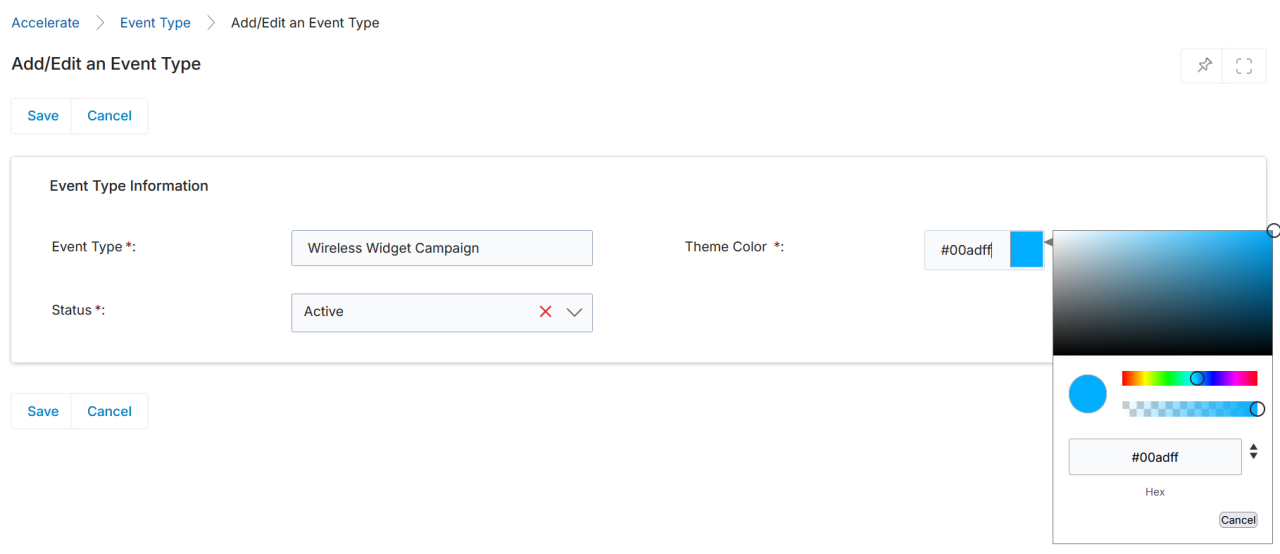
To create a new event type, click Add. The Add/Edit an Event Type form opens. Enter an Event Type name, choose a Theme Color using the color picker, set the Status to Active, then click Save.
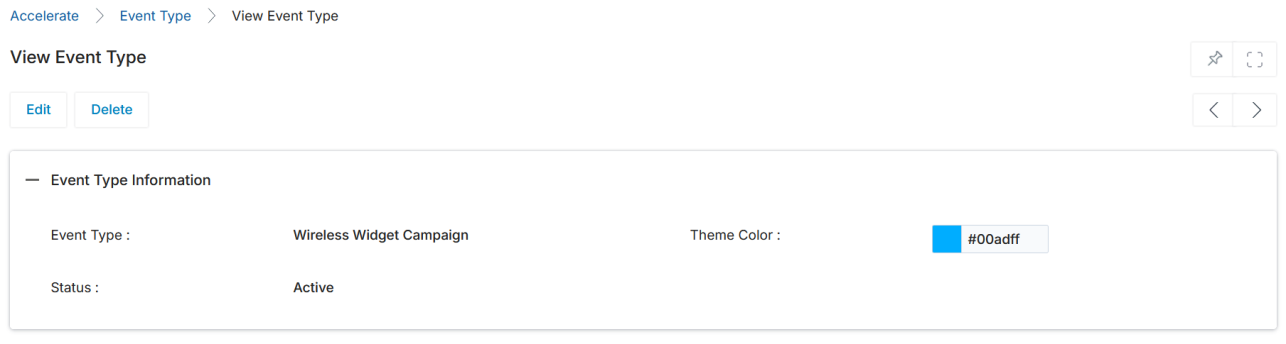
The newly created event type appears immediately in the View Event Type detail page confirming the name, color, and Active status.
The event type also appears in the View Event Types list and becomes available for selection when creating or editing calendar events.