
Introduction
ZINFI's UPM Content Library puts your sales and marketing collateral at your users' fingertips — enabling you to easily access, customize, and share any content from inside your UPM instance with your partners. The library provides a secure repository for files ranging from traditional business documents to audio files, video files, spreadsheets, images, and web pages.
Library as the Content Repository
Content is the potent strategy for keeping prospects engaged throughout the sales cycle. Teams can create and manage fresh, compelling collateral, making it accessible and shareable on multiple digital channels. Whether digital assets include e-books, videos, banners, images, or customer stories, the Library provides an online system to manage sharing so your organization and partners have real-time access to this essential content.
Teams can also track material usage and manage the assets' lifecycle in the library. With UPM Library you can store files in fully searchable repositories known as resource categories. Administrators can create multiple libraries, categories, and sub-categories, and then configure user permissions within the library to balance content access with security.
Key Features
- Video Library
- Organized Files and Folders
- Advanced Search and Filters
- Secured Library
Aligning the Sales Process
The UPM Library helps you create an effective sales content directory by streamlining the buyer's purchase journey. By analyzing sales processes, you can align the right content to be delivered, tag assets to the channel lifecycle by type, and show salespeople when specific content becomes useful by sharing assets with specific partners or partner groups.
Through UPM's EDISON reporting, analyze references and insights that allow your organization to design relevant interactions with leads. Differentiate documentation to satisfy the needs of different personas through folders and localize the library by updating the Intended Audience, Content Owner, relevant Technology, Organization, Languages, and Countries where the content will be made available.
Key Features
- Audit the sales content.
- Align Content to Teams.
- Deep customer insights.
- Multilingual support for global sales.
Managing the Content Library
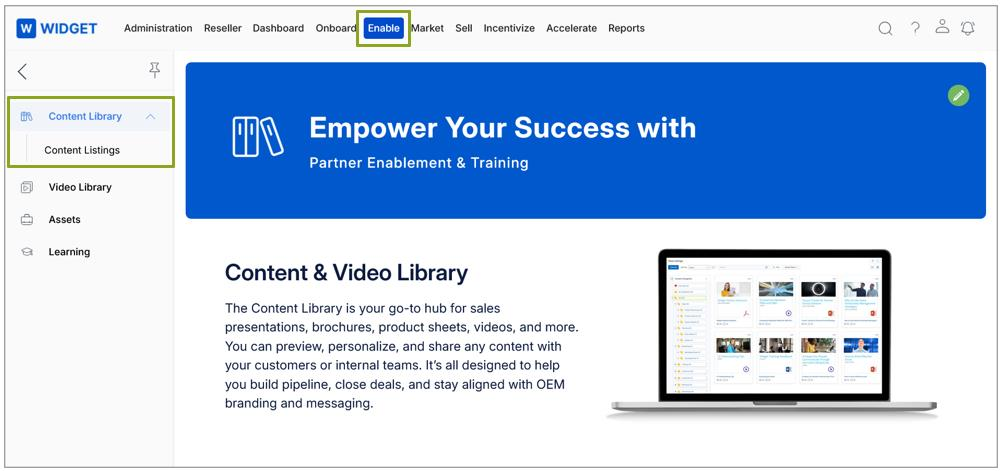
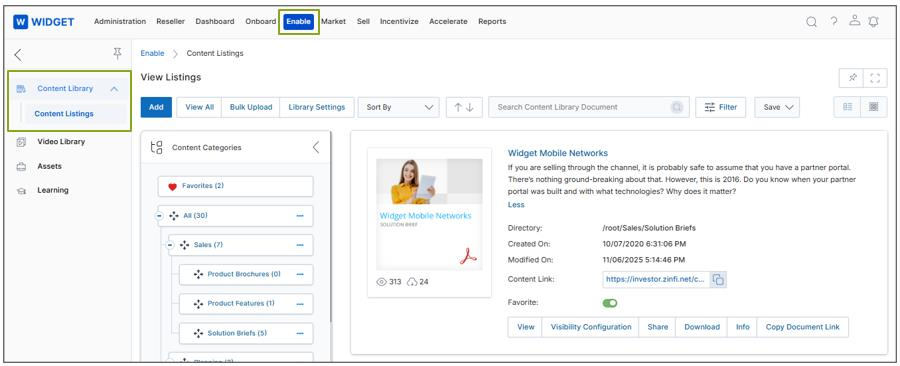
Accessing the Content Library
- Click on Enable from the top navigation menu.
- Click on Content Library in the left menu bar:
- Click Content Listings to view the documents in the library.
- Click Manage Categories to view and manage the content, categories, and files.
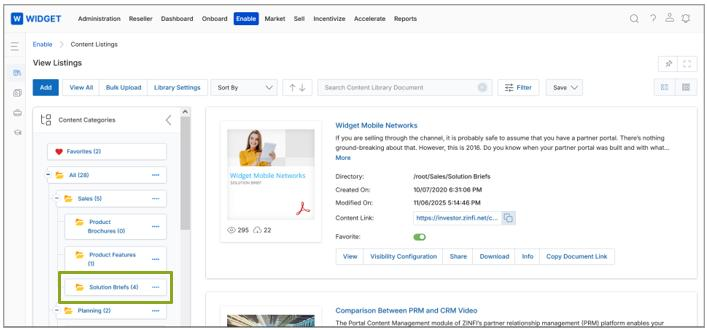
View Contents
- Click Add to add new content or documents. A new page opens to upload documents and add them to the Content Library.
- Click Library Settings to configure partner-facing display options. The admin can configure:
- The Layout View of Categories, Sub-categories, and Contents in the Partner Portal View Contents Page.
- A My Collection Category folder where Partner-users can store favorite/important documents and share the collection folder with other UPM Users.
- The ability to Enable creation while sharing — allowing partners to create new Prospects or Contacts while sharing content via email from a single window.
Library Settings Fields
| Setting | Description |
|---|---|
| Partner Layout | Two options: Default View — partners view content in List View or Thumb View (Tree View is only available in Default View); Folder View — partners view content via a Windows Explorer-style window with folders representing categories and sub-categories. |
| My Collection for Partners | When enabled, creates a My Collection category folder visible to partners on the View Contents page. Partners can transfer contents, share the collection with other UPM Users, and create sub-categories within it. |
| Enable creation while sharing | When enabled, allows partners to create new Prospects or Contacts and share content via email with them from a single window instance. |
| Enable Full Category Name | When enabled, category names (normally truncated) are displayed in full in the Category Tree. The out-of-the-box character limit for category names is 80 characters. When deactivated, names are truncated. |

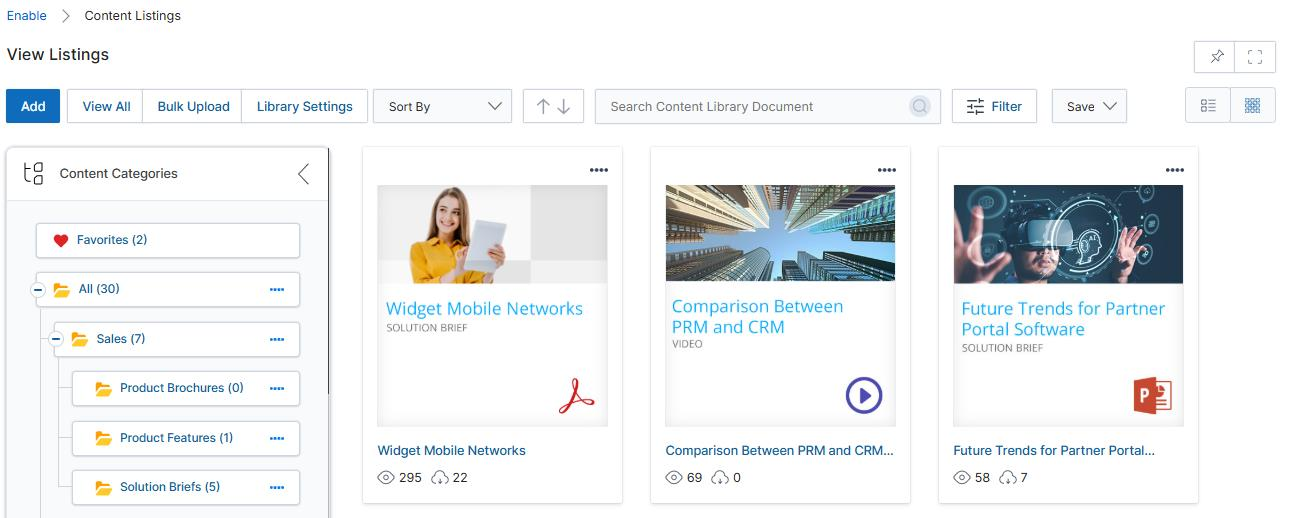
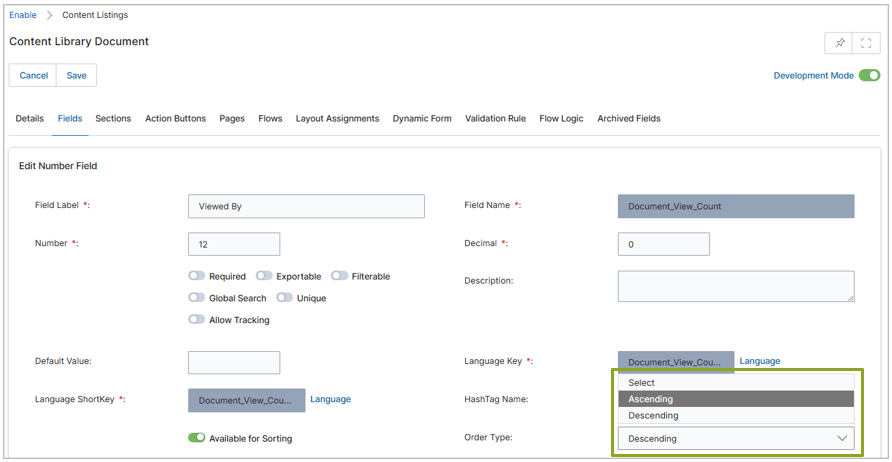
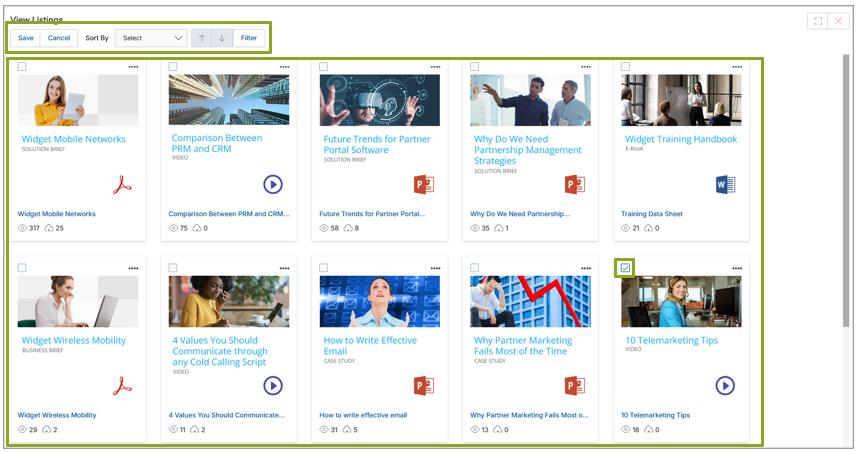
- Click Sort By to sort documents by Created On, Modified On, Downloaded By, Viewed By, or Listing Name.
- The Sorting Order Buttons (Ascending ↑ / Descending ↓) sort contents in ascending or descending order. Arrow indicators remain inactive when no Sort By criterion is selected.
- Click Filter to display the Filter pane with searchable parameters for finding specific content.
- The Clear Filter option removes any previously applied filters and restores the full content collection.
- Click Tree View to browse content via an accordion-style folder hierarchy. Numbers in parentheses beside each folder indicate the document count. Click any category or sub-category to view its documents.
- Click List View (lined icon) or Thumb View (waffle icon) in the upper right to change the visual layout of content.

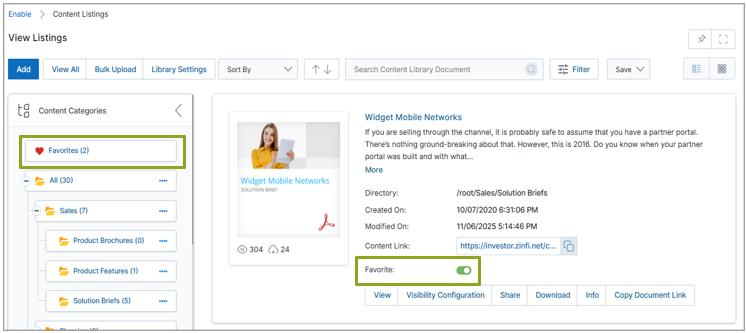
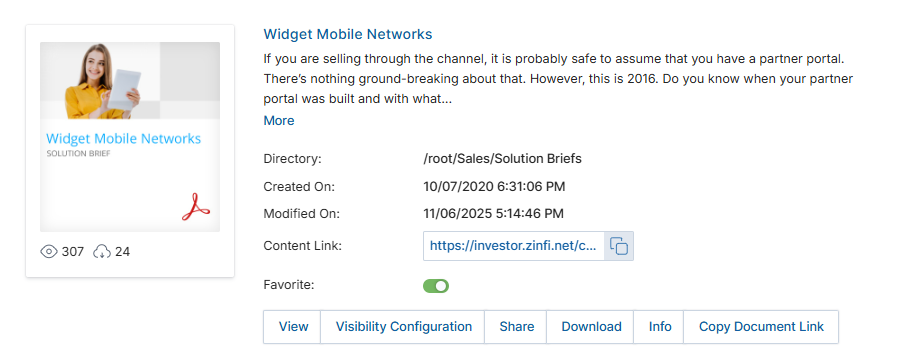
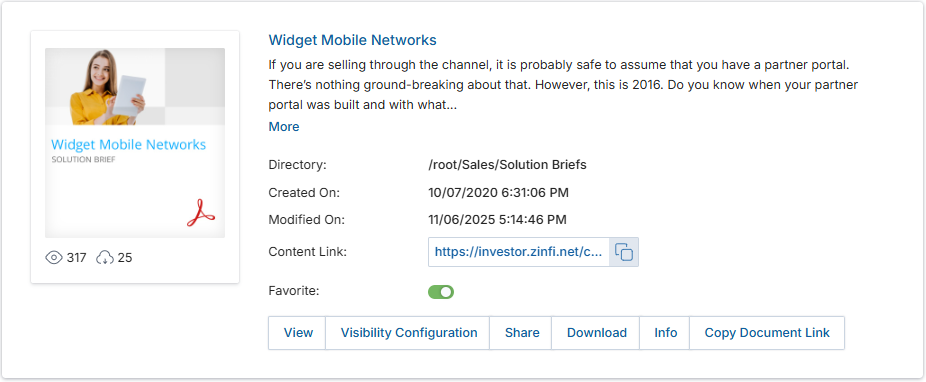
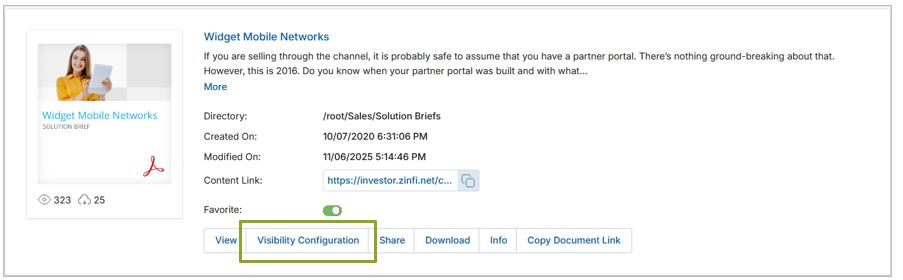
- Each content listing in the library displays the following information:
| Element / Button | Description |
|---|---|
| Thumbnail Image | Shows the document thumbnail. Clicking it opens a preview popup from which the document can be downloaded. |
| Document Title | Title of the document. Clicking it opens the same preview popup. |
| Directory | The root URL path to this document in the portal. |
| Created By | Name of the user who uploaded this document. |
| Created On | Date the document was originally uploaded. |
| Modified On | Date the document was last edited or modified. |
| Content Link | Auto-generated shareable link that can be embedded in web landing pages or marketing materials. |
| View Counter | Total number of times this content has been viewed. Represented by an Eye icon below the thumbnail. Increments each time the View button is clicked, or each time the content is accessed externally via the Copy Document Link. Also increments on portal page refresh. |
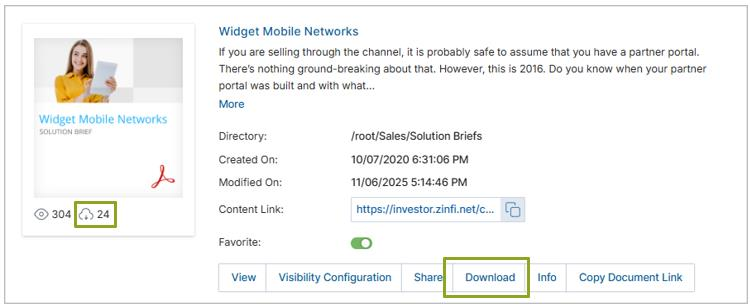
| Download Counter | Total number of times this content has been downloaded. Represented by a Download icon below the thumbnail. Updates when content is downloaded from the card list view or the preview page. |
| Favorite | Toggle to add the document to the Favorites category in the Category Tree. Enabling/disabling reflects in the Favorites document count. |
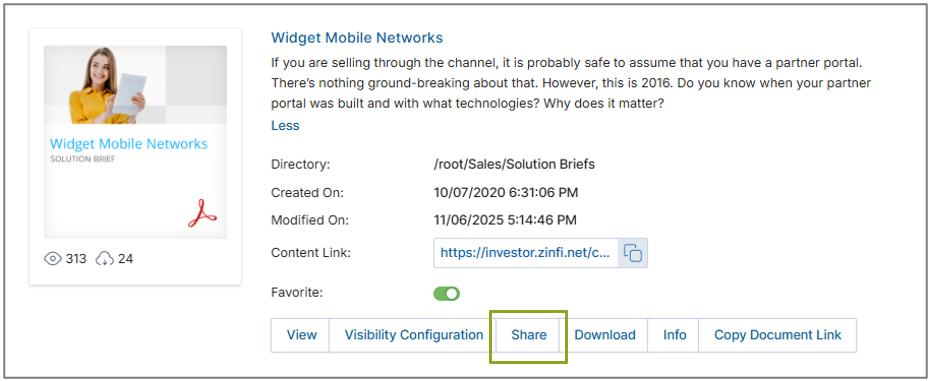
| View (button) | Opens a popup preview from which the document can be shared and downloaded. |
| Share (button) | Opens a popup to share the content with an end user. |
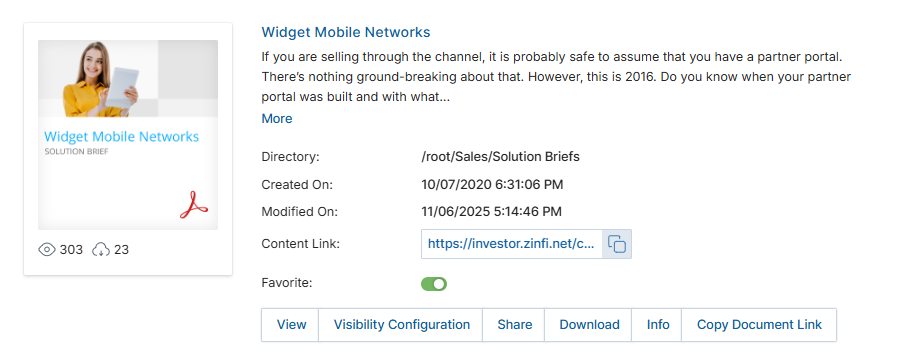
| Info (button) | Opens the View Listing slide-in panel on the right with full document details. |
| Visibility Configuration (button) | Opens the panel to assign country, language, and user/group access with read-only or read-write permissions. |
| Download (button) | Downloads the document directly to the user's device. |
| Copy Document Link (button) | Copies the document's public URL to the clipboard for external sharing. |
Visibility Configuration
The Visibility Configuration panel lets administrators control exactly who can see each piece of content.

| Section | Description |
|---|---|
| Country | Select the countries where this content will be visible to logged-in users. |
| Language | Select the languages associated with this content — users logged in with these language settings will have visibility. |
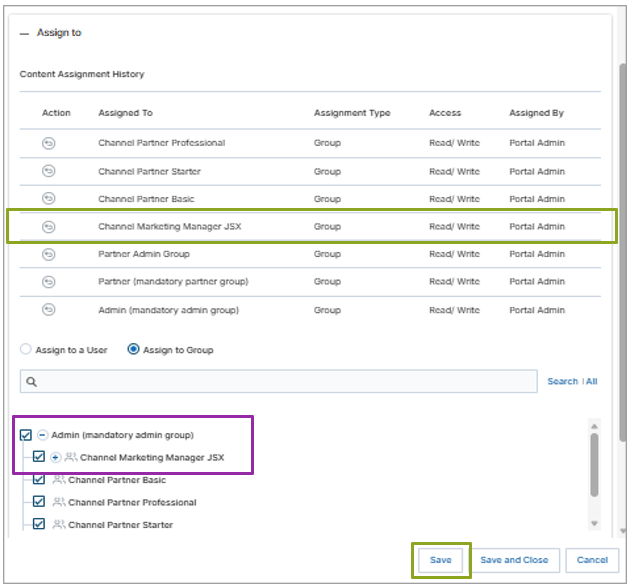
| Assign To | Assign content to individuals (by name) or Groups with Read Only or Read/Write permissions. The Content Assignment History section shows previous assignments. |
- Open the Visibility Configuration panel from the content listing.
- Select Countries, Languages, and User/Group.
- Select the desired groups and click Save. The selections are permanently saved and pre-populated on next access.
- A "Visibility configuration has been done" confirmation message is displayed after saving.
- The Visibility Configuration window remains open after clicking Save. Click Save and Close to apply changes and close the panel simultaneously.
Filter Panel
Clicking Filter displays the Filter pane on the right side of the library. The Filter Panel helps users narrow down content based on different attributes for quick location of specific documents.
Each filter row has three components: Column Name (the attribute to filter by), Operator (how the system evaluates the search — Contains, Equal, Starts With, etc.), and Search Text / Value (the actual value to search for).
| ID | Filter Row | Description |
|---|---|---|
| (1) | Category | Filters content based on its assigned category (e.g., Core, Demo, Training). |
| (2) | File Type | Filters by file format — MP4, PDF, PPT — selected from predefined options. |
| (3) | Is Private? | Filters by privacy status (public or private). Uses Equal operator with True/False. |
| (4) | Languages | Filters content by available language options (English, Spanish, etc.). |
| (5) | Listing Name | Searches by the title of the content listing — useful when you know the document name. |
| (6) | Search | Performs a general keyword-based search across multiple fields. |
| (7) | Search Keywords | Filters based on tagged keywords added during upload (e.g., "Marketing," "Demo"). |
| (8) | Tags | Filters using predefined metadata tags for faster categorization. |
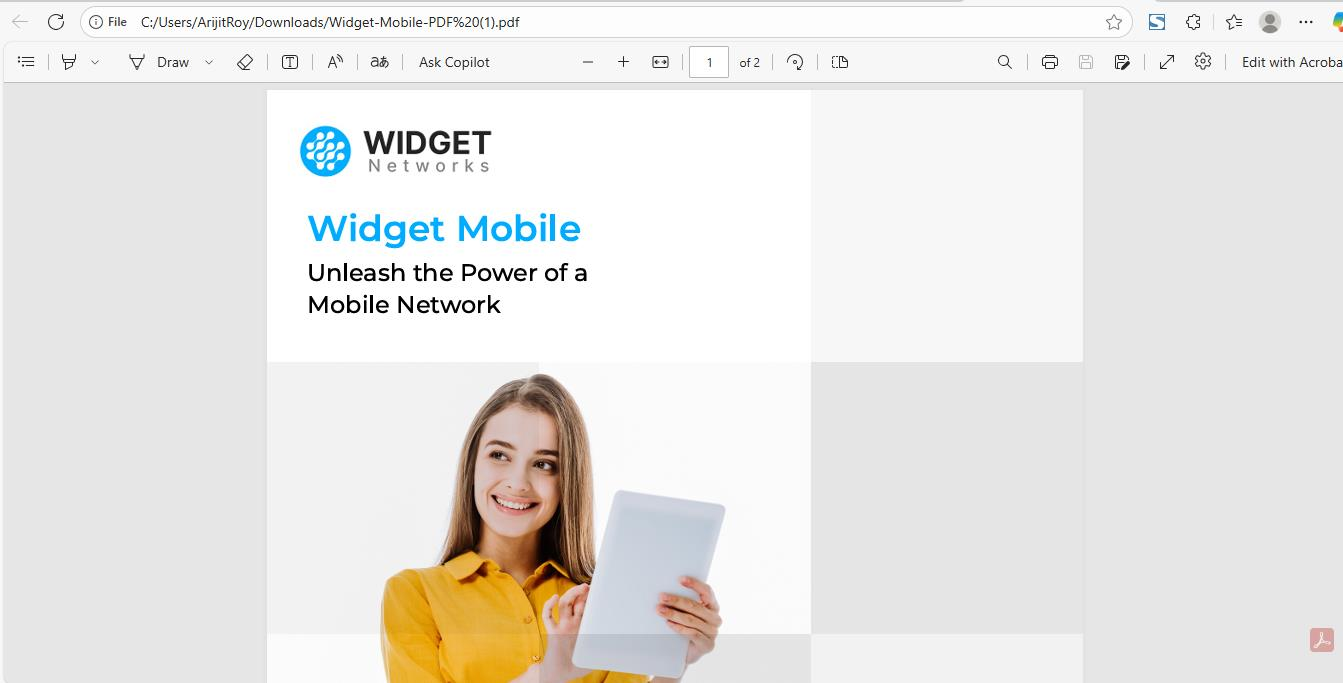
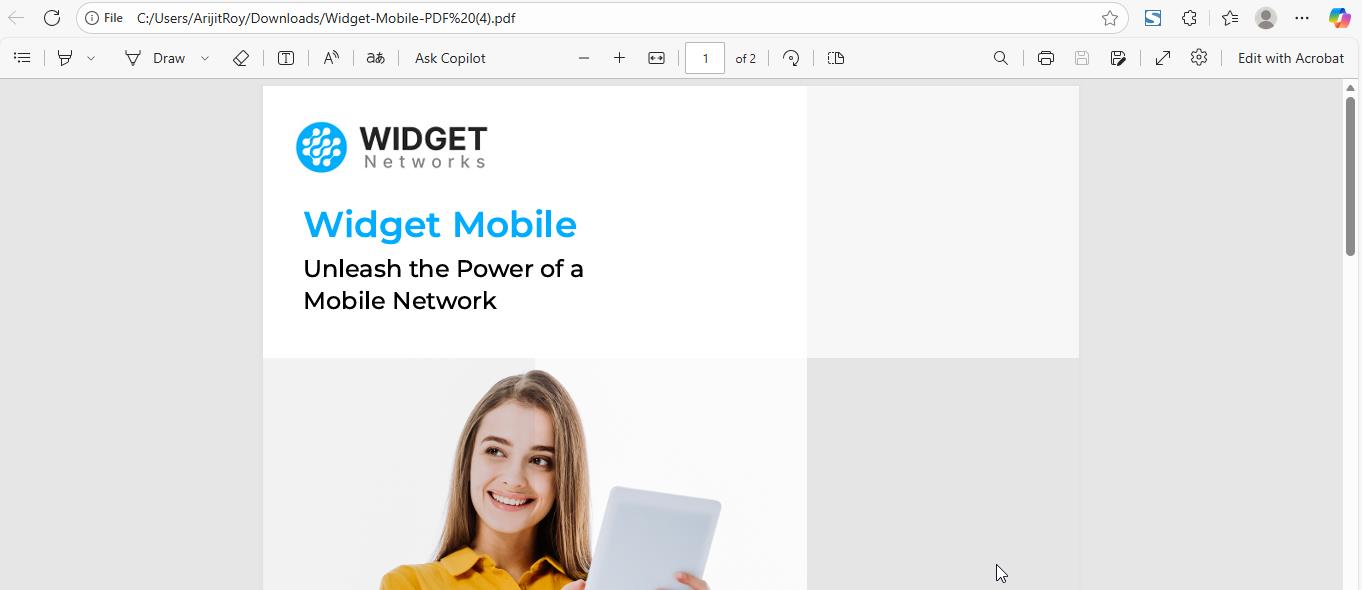
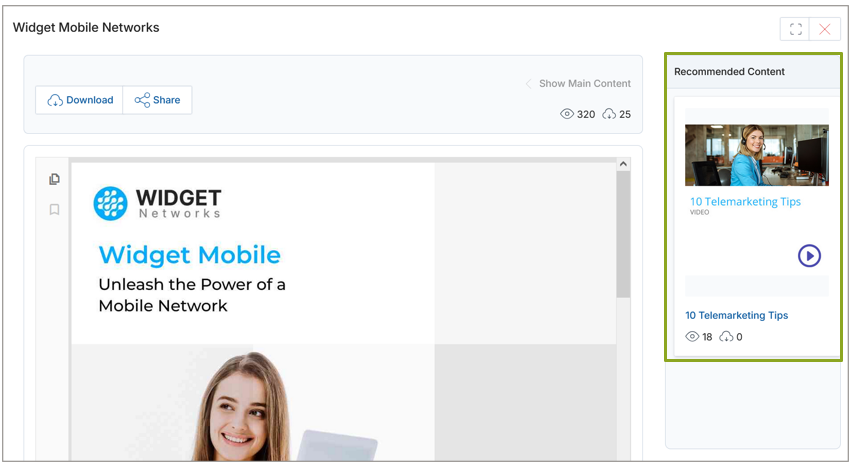
Previewing Content
- In each document listing, locate the View button, Thumbnail Image, and Document Title.
- Click any of these to open a popup window previewing the content. Scroll up or down to see various pages or slides in that document type.
- For document files (doc, ppt, pdf, etc.) — options to Download and Share are available at the bottom of the preview window. For podcast or video files, the preview window allows playback and downloading.
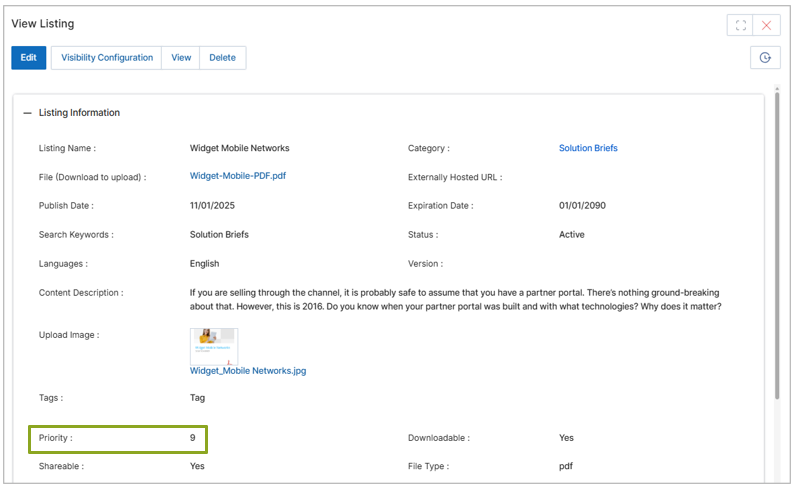
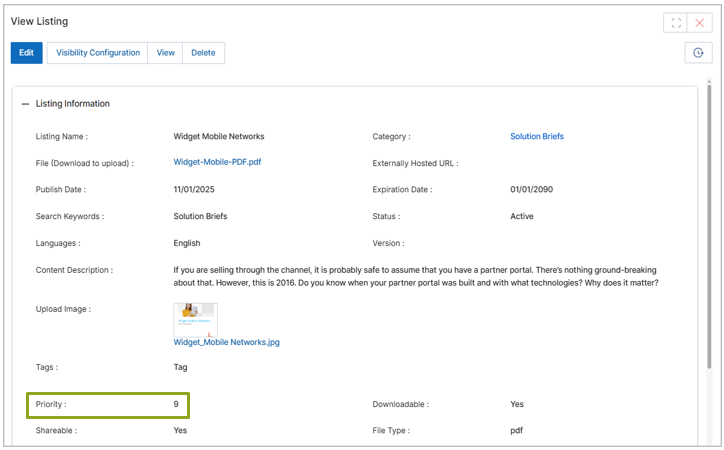
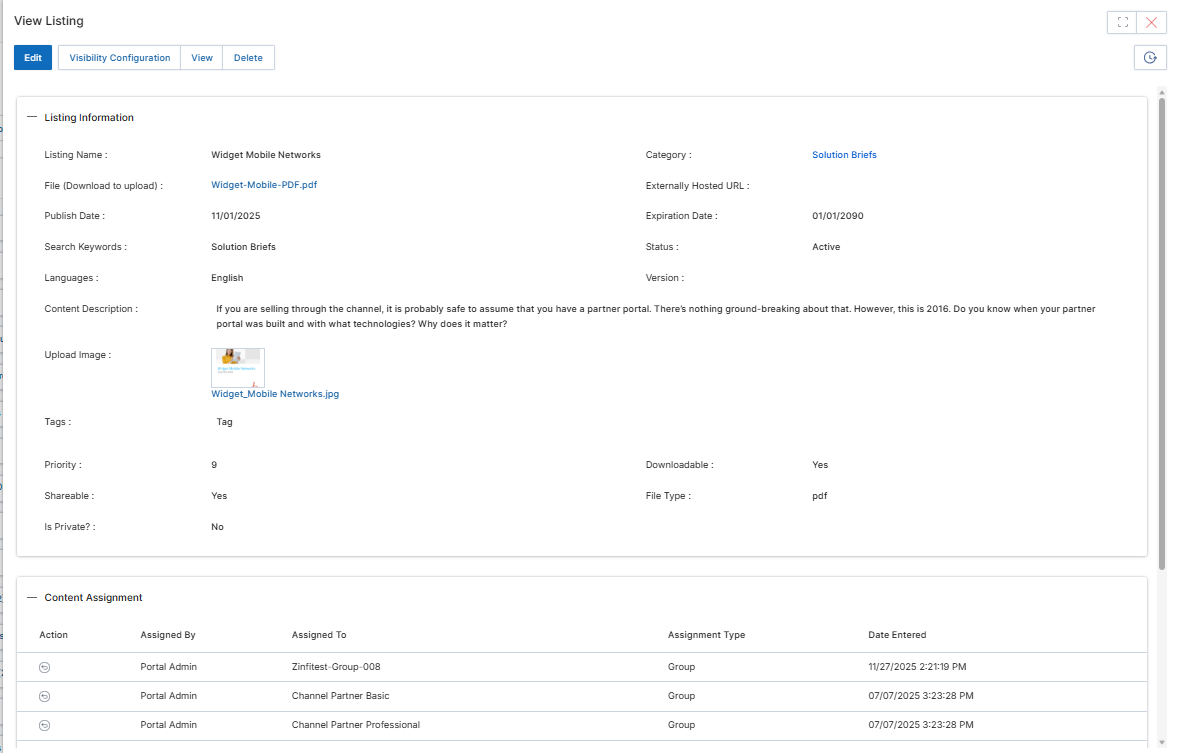
View Content Details
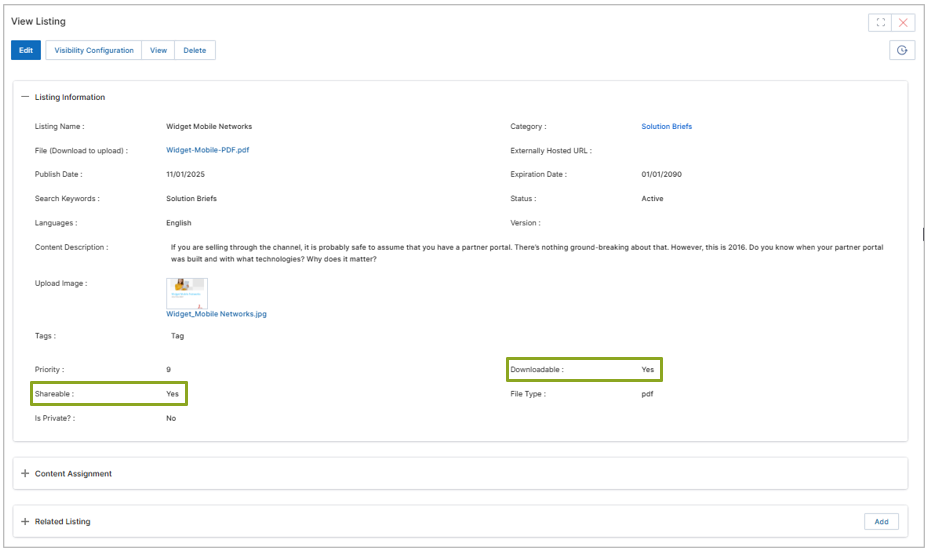
- Click the Info button on any document to open the View Listing slide-in panel from the right.
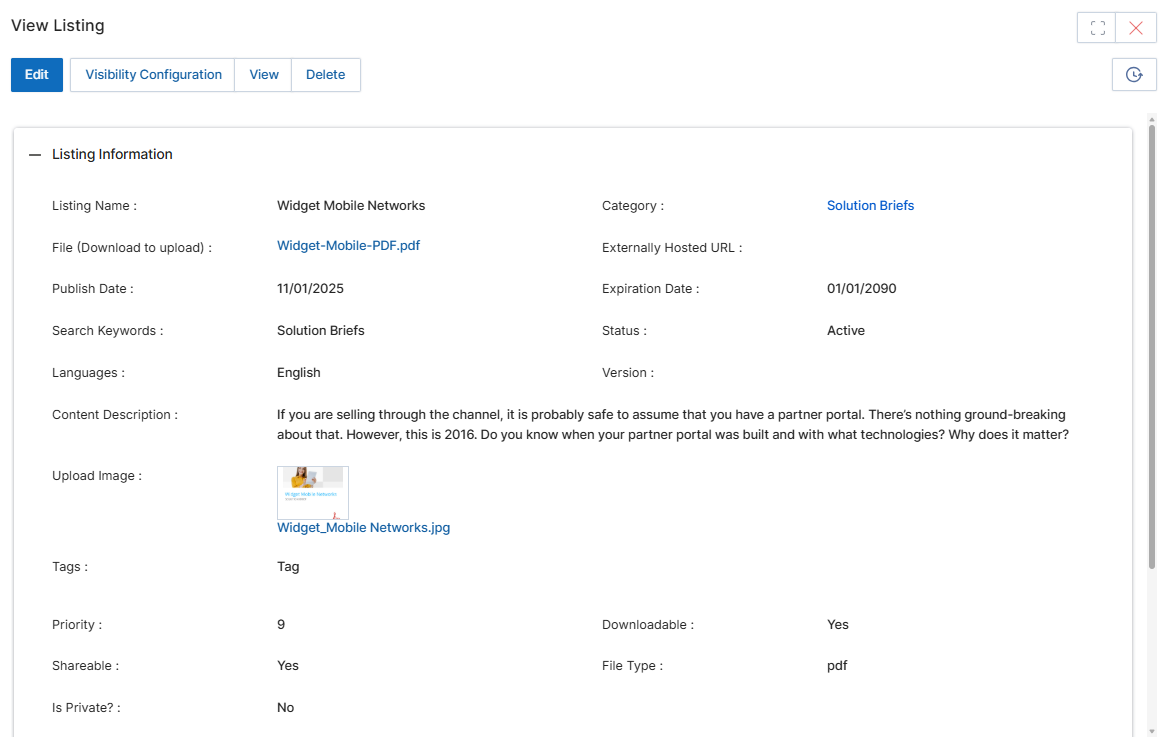
- The panel top area provides Edit, View, and Delete action buttons.
- The Listing Information section contains the following fields:
| Field | Description |
|---|---|
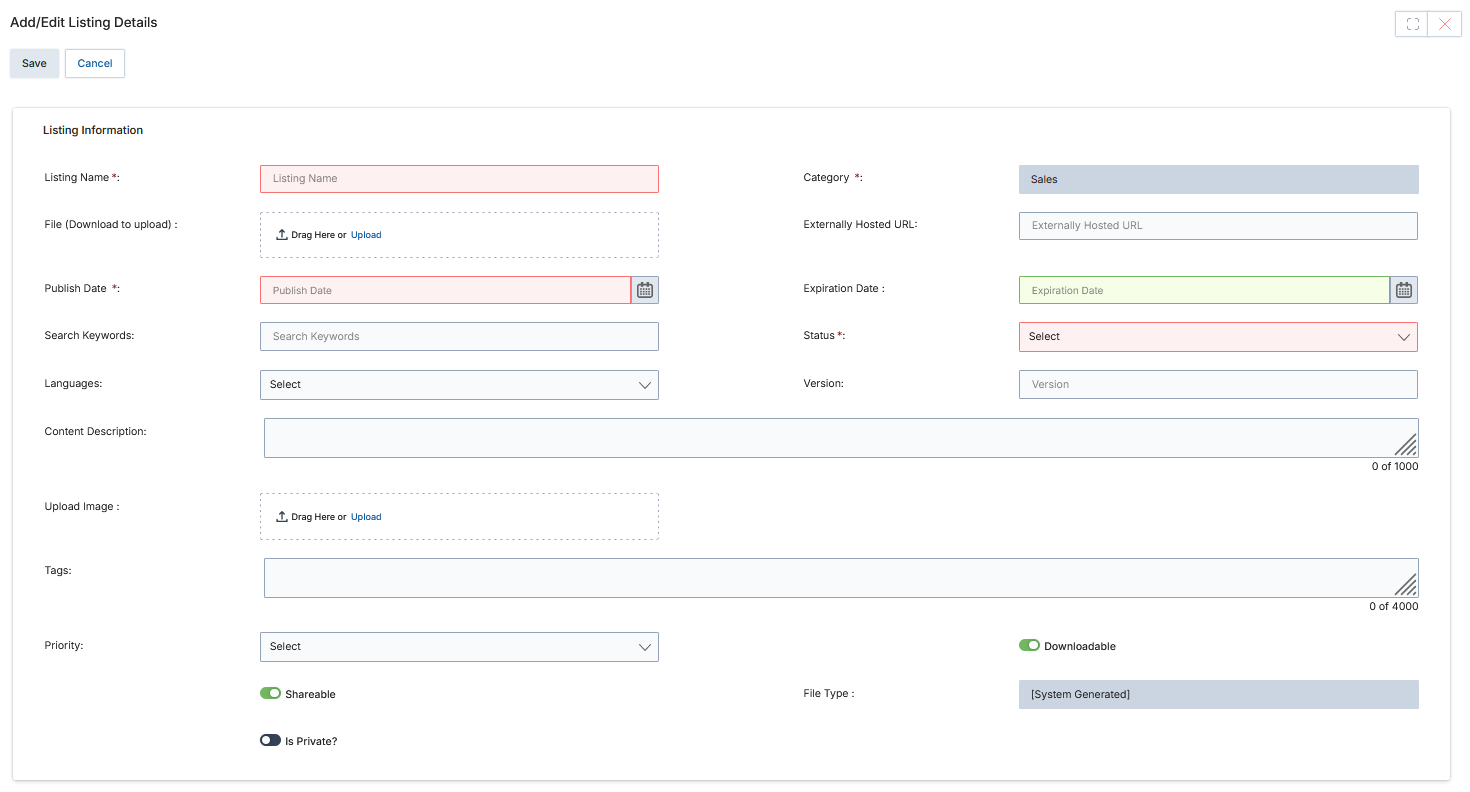
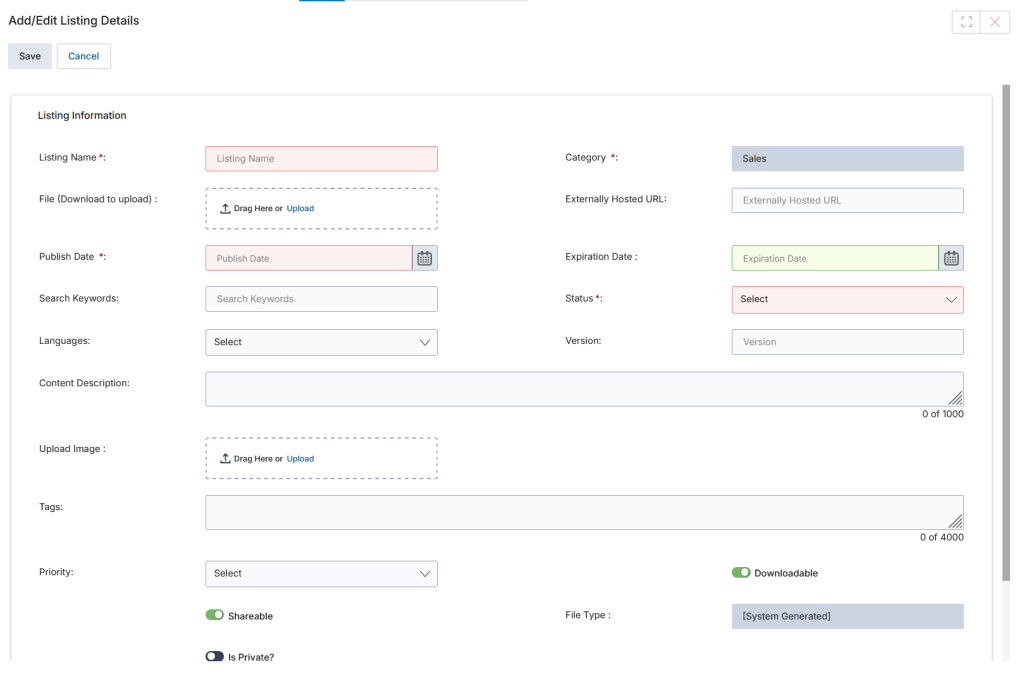
| Listing Name | The title or display name of this document. |
| Primary Category | The Category or Sub-Category where this document appears. |
| File | The uploaded document file (Browse button in edit mode). Audio/video formats supported: WMP, MP4, MOV. |
| Externally Hosted URL | If not uploading a physical file, provide the URL to an externally hosted document. |
| Publish Date | Date when this document becomes active and visible in the Content Library. |
| Expiration Date | Date when this document expires and is hidden from the Content Library. |
| Search Keywords | Keywords associated with this document, searchable via the Filter panel. |
| Status | Set to Active, Pending, or Draft. |
| Language | Which user language settings / system UI languages can see this document. |
| Version | Optional version number for this document. |
| Upload Image | When a PDF, PPT, Excel, Word, or image file is uploaded in the File field, the system automatically recognizes the first page/image and uses it as the thumbnail (.png). This thumbnail appears in the View Content section. |
| Content Description | Full description of this document, displayed in the Content Library. |
| Tags | Words tagged with this document to aid filter-panel searches. |
| Priority | Numerical value controlling listing order. Documents with the same priority are sorted by Modification Date (ascending). |
| Downloadable | Toggle to allow/prevent partner downloads. Enabled by default for new content. |
| Shareable | Toggle to allow/prevent partners from sharing this content. Enabled by default for new content. |
| Is Private | When False (default), the content link allows external access without UPM login. When True, users are redirected to the UPM Login page. |
| File Type | System-generated based on the uploaded file format. |
- Content Assignment — shows the history of who this document has been assigned to for visibility or editing rights.
- Related Listing — displays contents recommended and associated with this document by the Admin. Partners can only view recommended content when both the parent and recommended content are assigned to them. Click Add in this section to associate related documents from the View Contents picker.
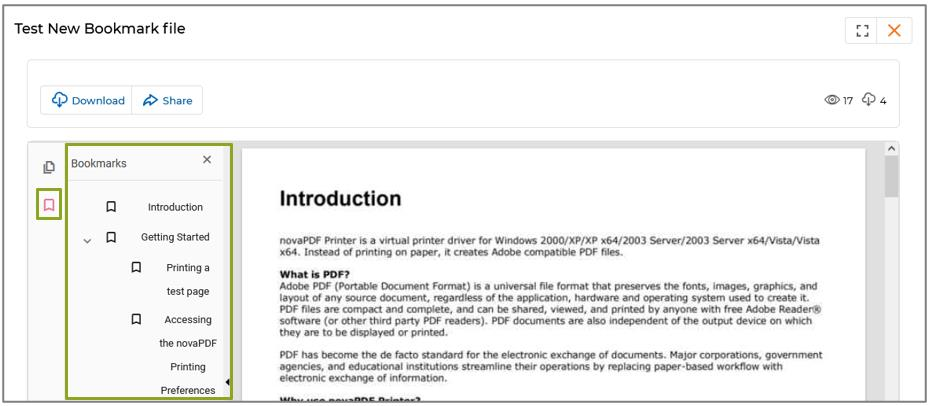
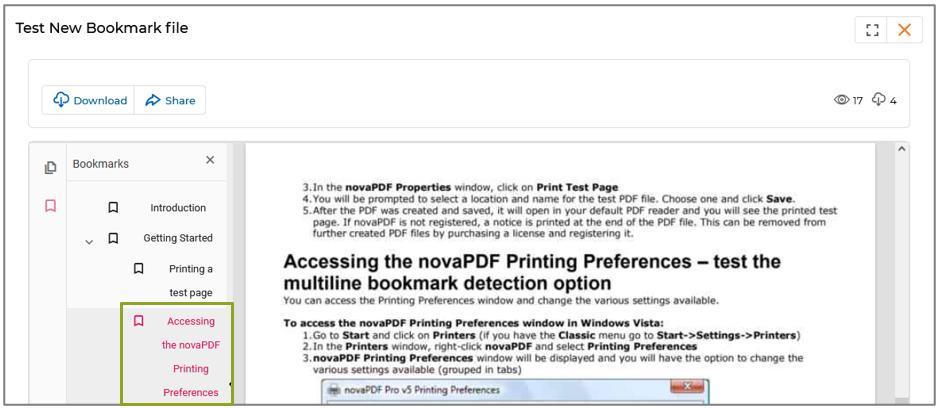
View Bookmarks
- Admins can upload PDF content to the Content Library with bookmarks, which allow users to jump quickly to specific sections or pages.
- Bookmarks act like a table of contents and can be used to reach key points, chapters, or headings within the document.
- Bookmarks are displayed in a sidebar within the preview window and can be clicked to instantly navigate to the corresponding part of the PDF.
Sharing the Content
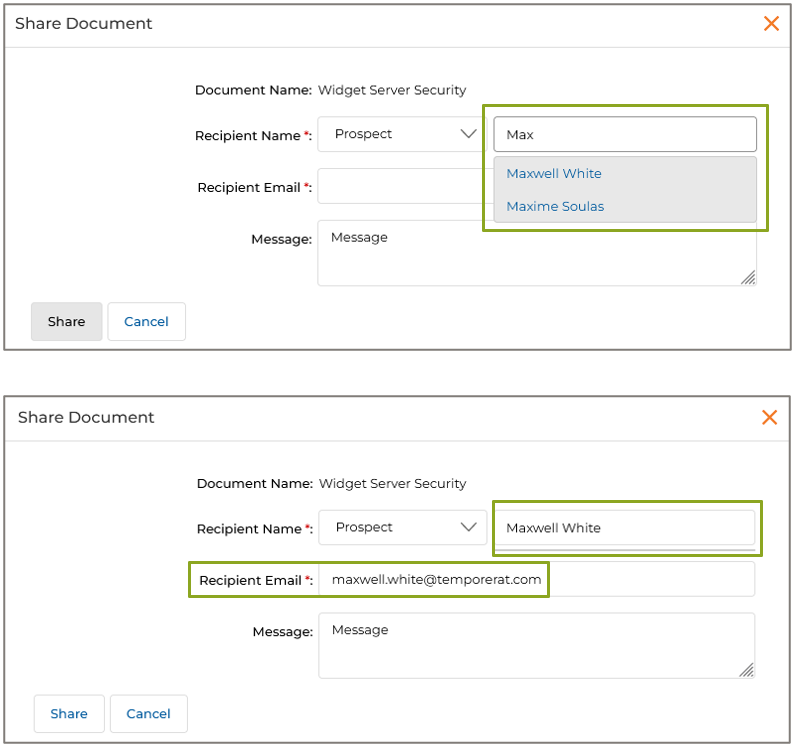
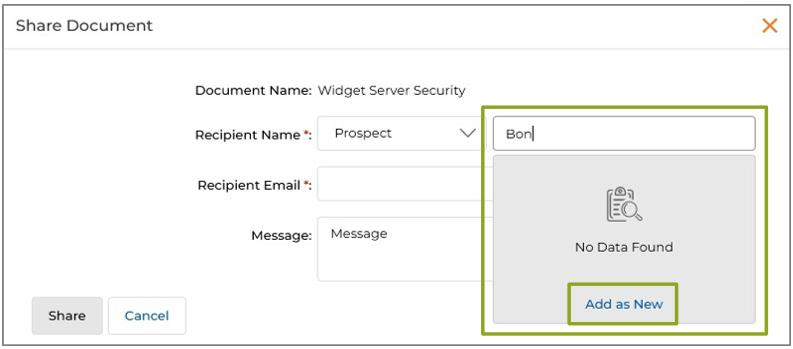
The Share button gives admins and partners the ability to share any listed content directly with an end user via email.
- Click the Share button on any content listing to open the Share Document popup.
| Field | Description |
|---|---|
| Document Name | Automatically populated from the content listing name. |
| Recipient Name | Select the application (Prospect or Contact) from the dropdown, then type the recipient's name. Typing the first three characters auto-suggests matching names. |
| Recipient Email | Auto-filled when a recipient is selected from the autocomplete list. |
| Message | Optional personal message to accompany the shared content. |
- If the recipient is not found after typing three characters, click Add as New to reveal additional fields.
- Clicking Add as New reveals additional fields: Company Name, Company Country, Company State, and Company City.
- After filling all fields, click Save & Share. The new Prospect/Contact is created and saved simultaneously, and they receive the shared content via email.
Tags and Multi-Keyword Search in Library
Tags and search keywords enhance the Filter Functionality of UPM to provide faster search capability. While uploading new content, both Tags and Search Keywords can be specified in the Add/Edit Content page.
- Saved tags and keywords are displayed in the View Contents page.
- Clicking Filter in the View Contents page opens the Filter pane. Selecting Tags or Search Keywords as a filter parameter displays matching content.
Collapsible Tree View Panel
Navigate to Enable > Content Library > Content Listings to reach the View Contents page, where the Category Tree is displayed on the left.
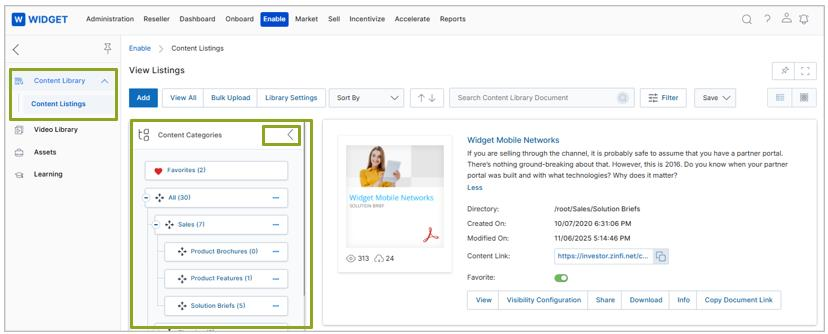
- Click the arrow beside Content Categories to compress or expand the Category Tree panel.
- When the tree is collapsed, the full-width content area expands accordingly.
- UPM retains the tree panel state based on your last session. On next login, the tree opens in the same state it was left.

Manage Categories via Content Library — Category Tree
From the View Contents page, administrators can create, edit, and organize categories directly from the Category Tree panel — without leaving the content listing view.
Creating & Editing Categories from the Tree
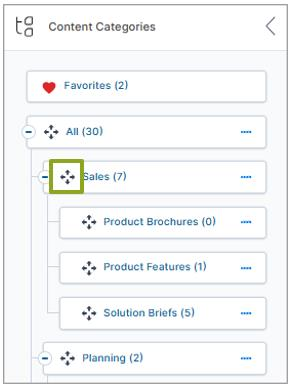
- Navigate to Enable > Content Library > Content Listings to open the View Contents page.
- Hover over the Category Tree. A four-directional arrow appears beside each category, allowing you to drag and drop categories and sub-categories to reorder them.
- Click the four dots (….) beside any category to open the context menu.
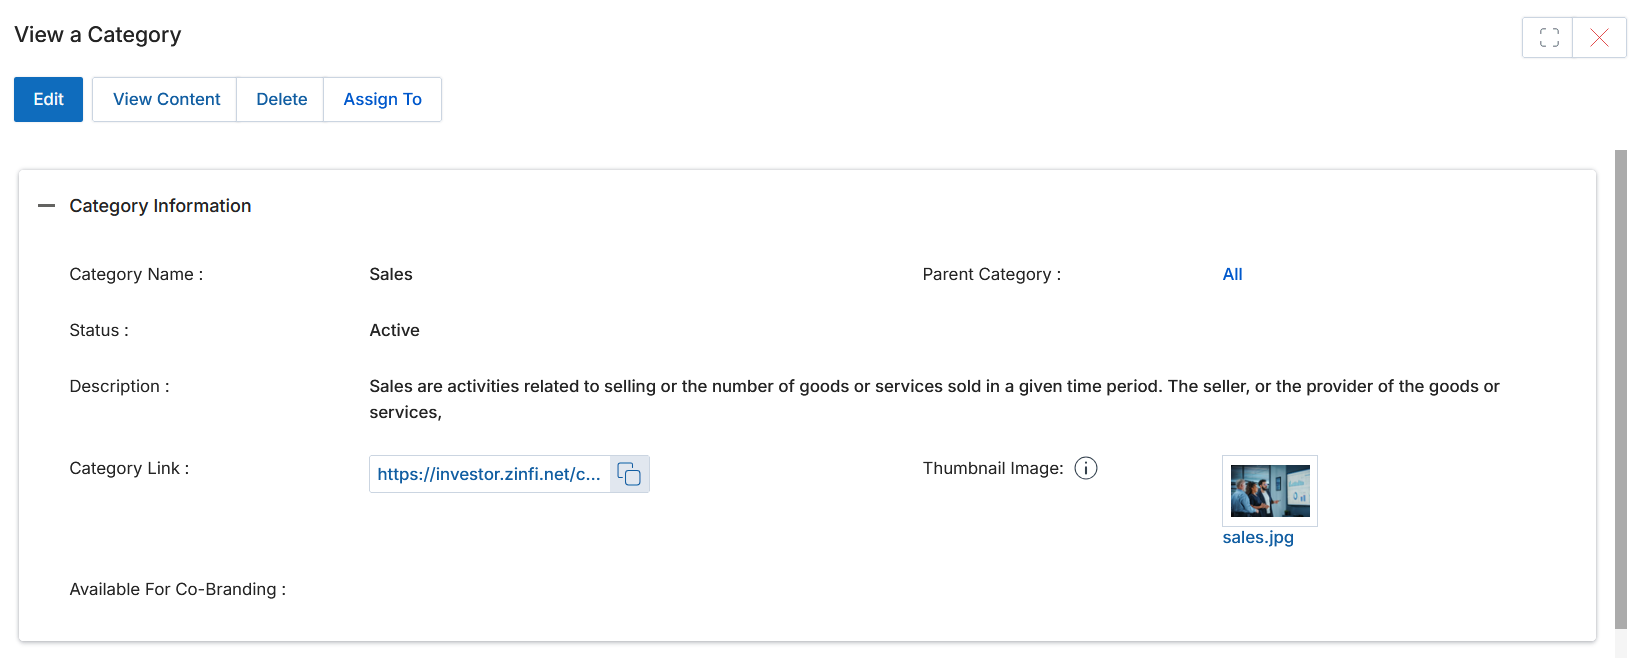
- Click View Details to open the View a Category panel.
- Click Edit to open the category for editing.
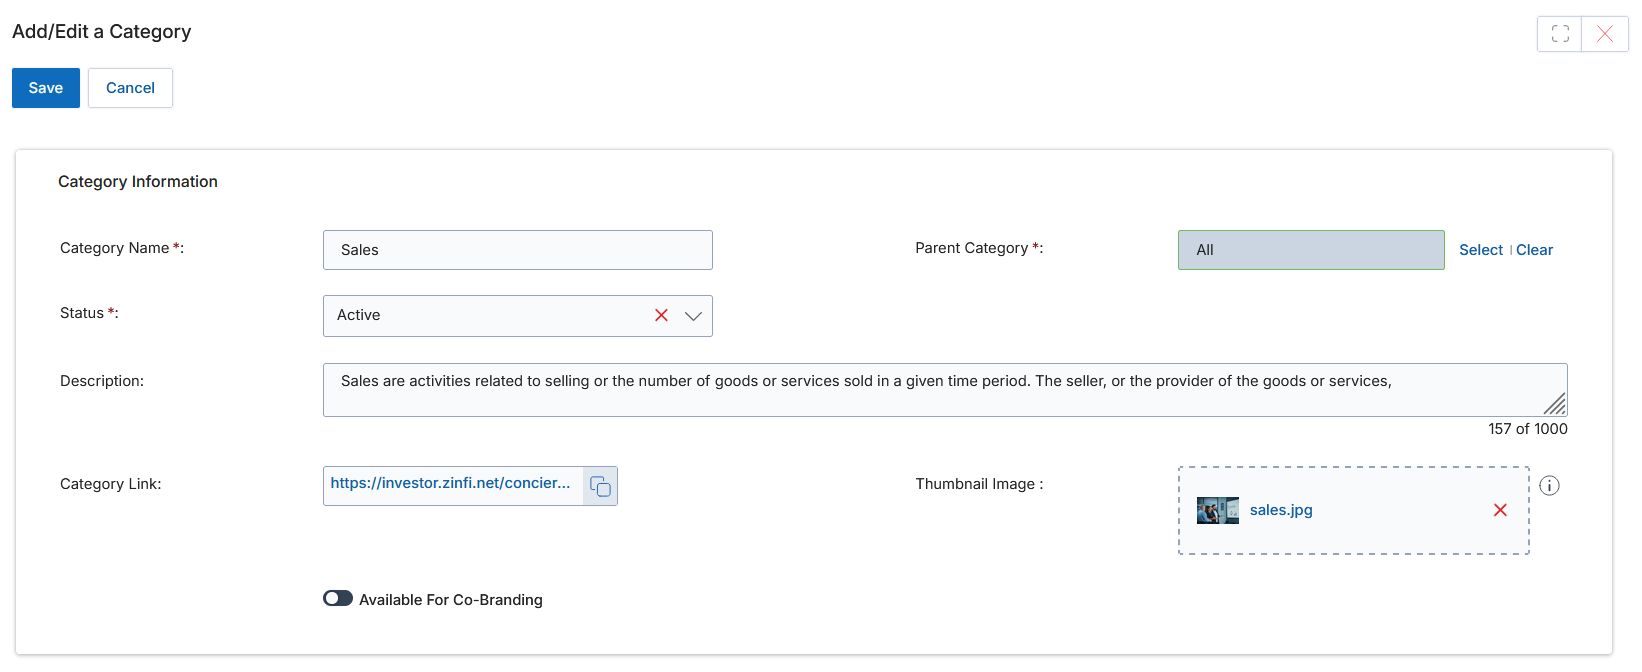
- Fill in Category Name, Parent Category, Status (Active/Inactive), Description, and Thumbnail Image.
- Click Sublink in the context menu to create a new sub-category. This opens the Add/Edit a Category form with the parent pre-populated.

- After filling in all required details, click Save. The new category appears immediately in the Category Tree.
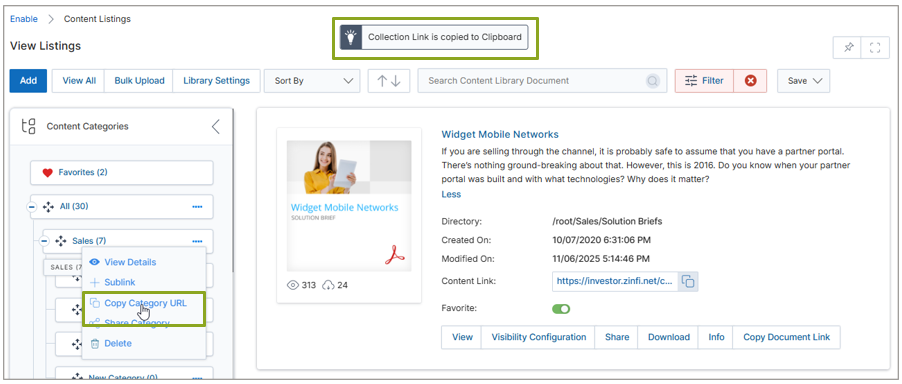
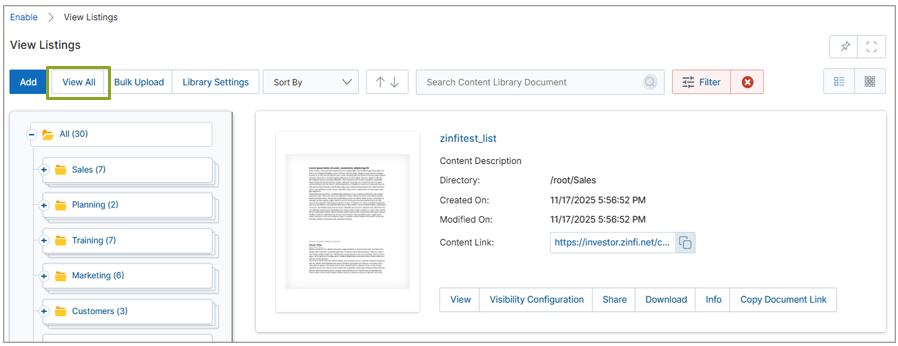
- Copy Category URL — copies the URL of the category to the clipboard. Opening this URL in a new tab shows only the contents of that specific category. An alert informs the user; clicking View All clears the filter and shows all categories.
- Share Category — shares the entire Content Library Category and its contents with a Prospect or Contact via email.
- Click Delete to permanently delete the category or sub-category.
Manage Categories
Manage Categories is where you manage categories, sub-categories, and the content files housed within each. Navigate via Enable > Content Library > Manage Categories.
Creating & Editing Categories
- Navigate to Enable > Content Library > Manage Categories.
| Field | Description |
|---|---|
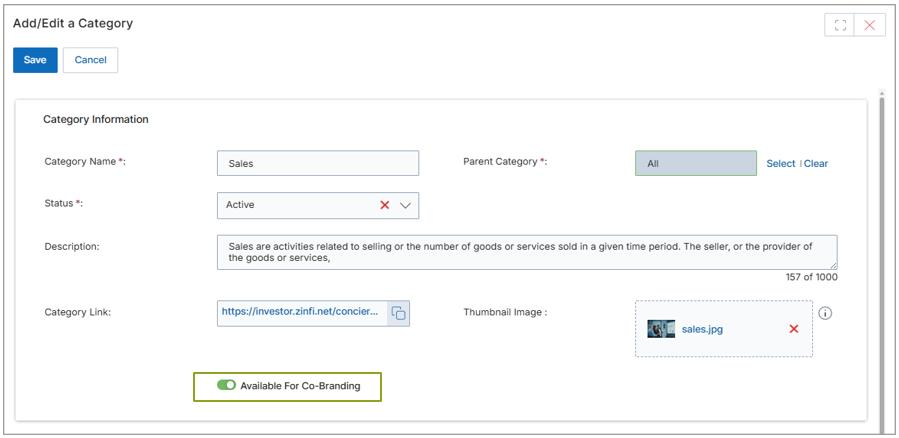
| Category Name | The display name of the category. |
| Parent Category | The name of the parent category (if applicable). |
| Status | Active, Inactive, or Draft. |
| Description | Short description of the category, visible on the listings page. |
| Sort Order | The order in which this category appears in the hierarchy tree. |
| Category Link | Auto-generated deep link providing logged-in UPM users direct access to this category page. |
| Available For Co-Branding | When enabled, images/logos in this category are available to assigned partners for co-branding asset selection. |
The Contents section displays all documents associated with this specific category. Clicking the Add button opens the Add/Edit Listing Details panel to add new content to the category.
- Click Edit in the View a Category page to edit the category. The Add/Edit a Category form opens.
- The Contents list shows all documents currently in this category. You can edit them or add new ones.
Creating & Managing Content
Adding a New Content Document
- In the Contents section of a category, click the Add button.
- Fill in all fields in the Add/Edit Listing Details form:
- Click Save when done. The document appears in the Contents list.
- Navigate back to the View Contents page to find your document and configure its Visibility Configuration.
- In Visibility Configuration, select Countries, Languages, and Groups, then click Save.
Bulk Upload
The Library Application integrates with the UPM Import Engine to allow bulk import of library content and associated metadata. The import engine supports library records in standard .xlsx format along with content files (PDF, Docx, etc.) uploaded as a ZIP archive, organized per the category tree.
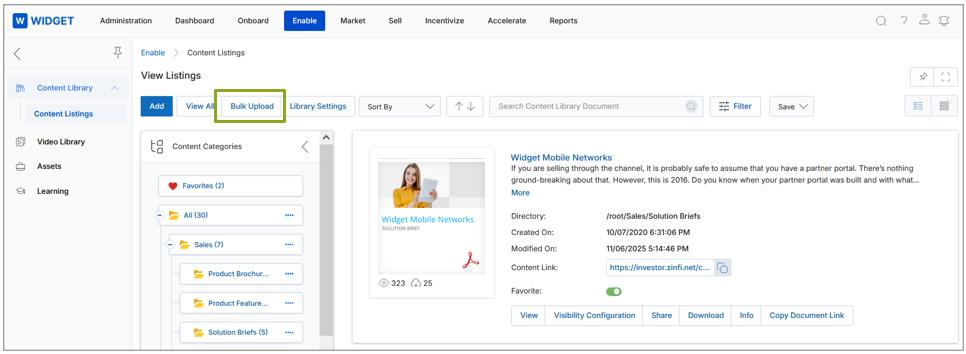
- Navigate to Enable > Content Library > Content Listings.
- Click Bulk Upload on the View Listings page to reach the View Bulk Uploads page.
- The View Bulk Uploads list page displays all bulk upload instances. Click any bulk upload name to view its XLSX file, ZIP archive, and upload status.
Uploading Contents in Bulk
The Bulk Upload feature requires two files uploaded simultaneously:
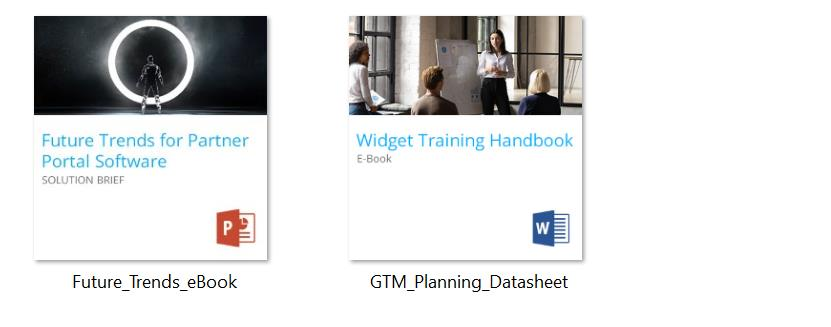
- A ZIP file containing all content assets and thumbnail images, organized in a specific folder structure: one main folder containing two subfolders — one for Content Files and one for Thumbnail Images.
- A metadata file (Excel/CSV) defining file attributes, tags, visibility rules, and category paths for each content item.
The system validates both files — checking ZIP structure, file counts, and metadata completeness — before accepting and processing the upload.
Accessing the Sample Metadata Template
- Click Import on the View Bulk Uploads page to open the View Imports page.
- Click Download Sample Data to download the sample Excel file. Fill in the required record details in the respective columns.
Metadata File Field Reference
| Field | Description | Mandatory |
|---|---|---|
| Name | Name of the content. | Yes |
| TreePath | Folder path of the content in the category tree. | Yes |
| ImagePath | File path or name of the thumbnail image (e.g., Newimage1.jpg). | — |
| LinkUrl | URL or filename of the content file to upload (e.g., Con022.pdf). | — |
| Languages | Language of the document (e.g., English). | — |
| PublishDate | Date the content becomes visible to partners (e.g., 29-12-2025). | Yes |
| Expired_Date | Date the content expires. Leave blank for content that never expires. | — |
| StatusId | Content status. Set to Active for partner visibility; other options include Draft. | Yes |
| UrlLink | Externally hosted URL when no physical file is provided. | — |
| Version | Version number (e.g., 1, 2, 3). | — |
| SearchKeywords | Comma-separated keywords for filter-panel search. | — |
| Priority | Numeric priority value from 1 to 10. | — |
| Is_Manual_Thumbnail | Set to Yes if ImagePath is provided; No to use the default file-type icon as thumbnail. | Yes |
| Tags | Predefined metadata tags to aid content filtering and retrieval. | — |
| VisibilityCountry | Country names where content is visible (e.g., USA, France). Use exact country names as accepted by UPM. | Yes |
| VisibilityLanguage | Language names for content visibility (e.g., English, Japanese). | Yes |
| AssignedTo | Group name (e.g., Partner (mandatory partner group)) or user name for content visibility assignment. | Yes |
| AssignedType | Set to Group if AssignedTo is a group; User if it is a user name. | Yes |
| DescriptionText | Description of the content. | — |
| Download | Whether content is downloadable: Yes or No. | Yes |
| Sharable | Whether content is shareable: Yes or No. | Yes |
| IsPrivate | Whether content requires UPM login for external access: Yes or No. | Yes |
Add a Bulk Upload
- Click Add on the View Bulk Uploads page.
- On the Add/Edit a Bulk Upload page, fill in the following fields:
| Field | Description |
|---|---|
| Name | A descriptive name for this bulk upload instance. |
| Content List | Upload the XLSX metadata file listing document parameters for each content item. |
| Content Zip | Upload the ZIP archive containing the content files and thumbnail images in the prescribed folder structure. |
| Status | System-generated: Pending while processing; Complete post-approval. |
- Click Save. The system performs automated validation — checking ZIP structure, file count, and metadata field completeness. Status turns to Pending immediately.
- Post-approval, the Status changes to Complete.
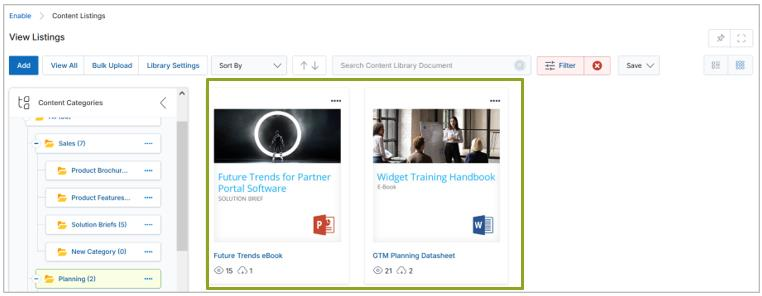
- Click View Contents and select the desired categories to view the uploaded documents and files.
Error Log while Uploading Bulk Contents
If the metadata spreadsheet does not follow the prescribed format, a validation error is triggered in UPM.
- A Validation Error appears in the Content Library Bulk Upload Log section of the View Bulk Upload page — even if the Status shows Complete in the Bulk Upload Information section.
- Review the error message to identify the issue. A common example: under VisibilityCountry, writing "United States" instead of "USA" triggers a Validation Error because the country name format is incorrect.
- Correct the spreadsheet and re-upload.
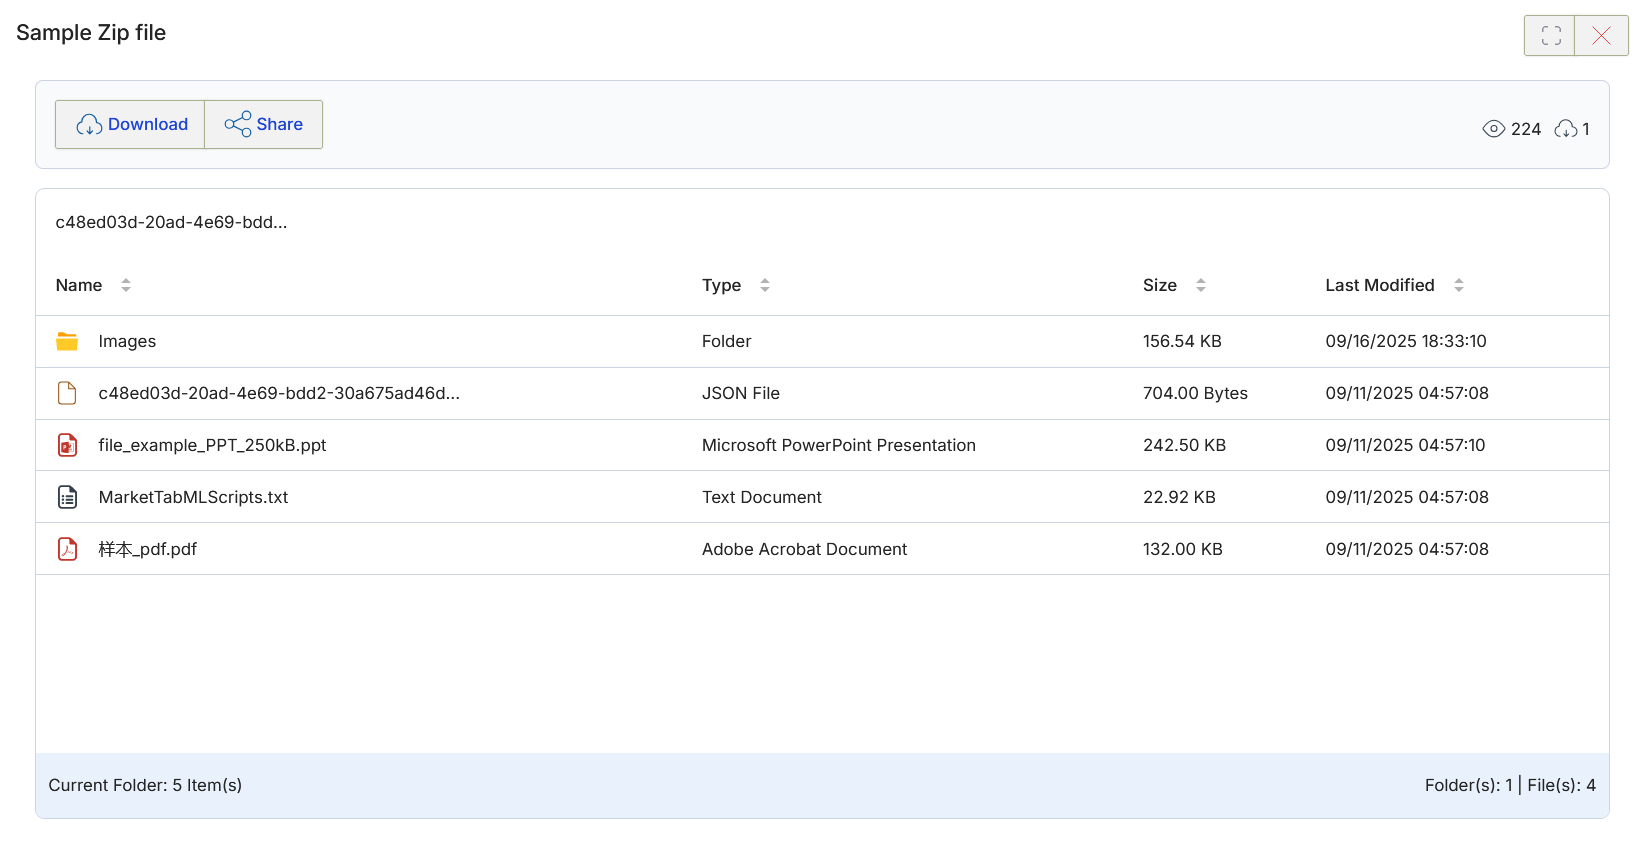
ZIP File Support and Preview in Content Library
The ZIP File Support and Preview feature allows administrators and partners to upload ZIP files as content items and preview their contents directly within the portal — without downloading them first.
- Upload a ZIP file as a content item to the library.
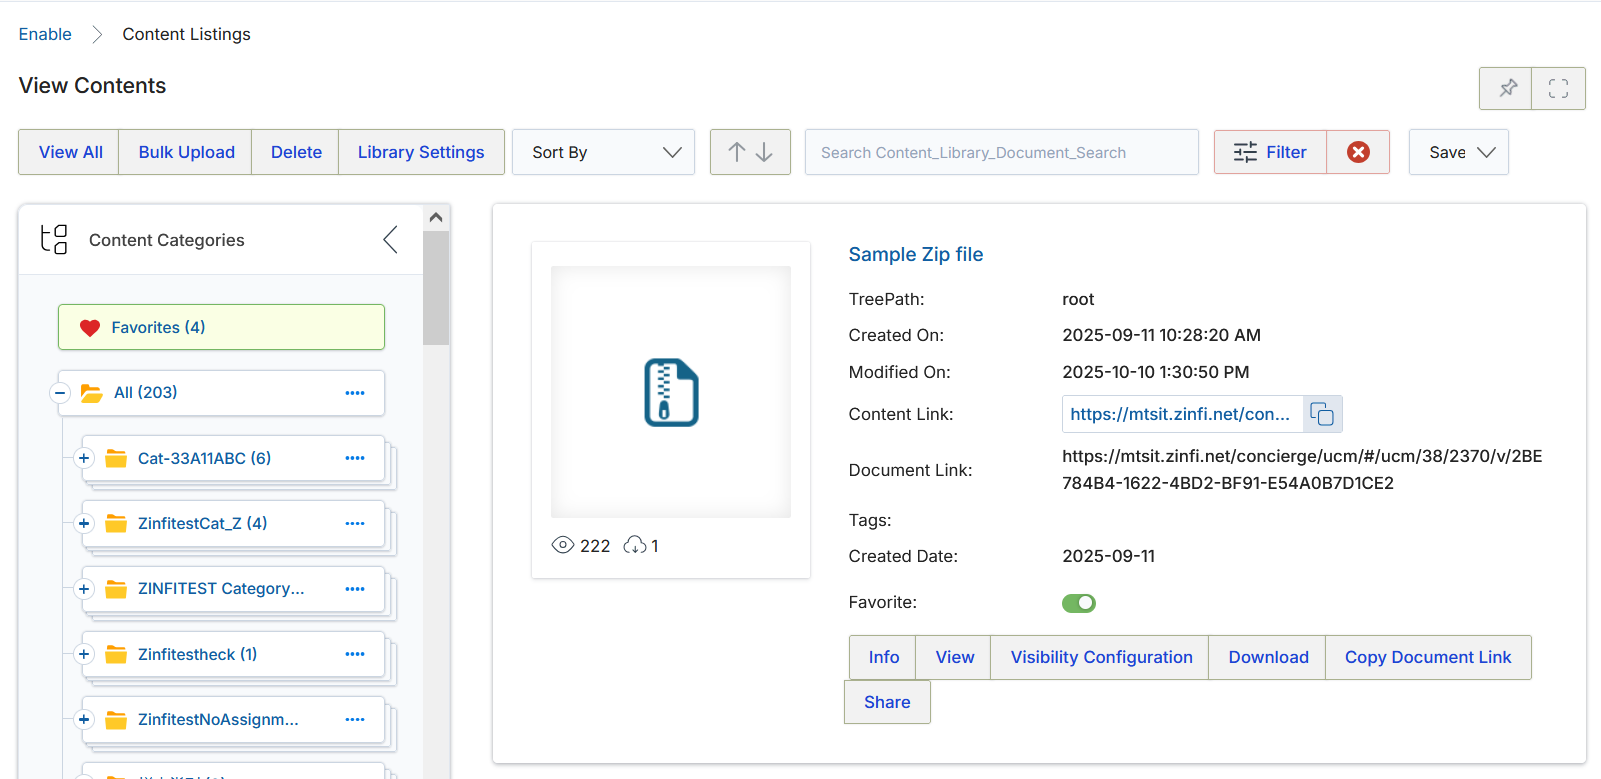
- Click the View button on the ZIP file listing to open the built-in ZIP file viewer.
- The viewer displays the ZIP file's folders and files in a File Explorer-style structured view, showing Name, Type, Size, and Last Modified date.
- Click into sub-folders to confirm that nested contents are viewable.