Introduction
Efficient partner contract management allows OEMs and vendor organizations to sell via the channel faster, make smarter supplier decisions, and reduce legal risks and costs. ZINFI's UPM platform includes a Partner Contracts Management application that dynamically manages and monitors all contractual documents that channel partners sign during the various phases of the partner engagement cycle.
Using the Partner Contracts Management application, your organization can automate and streamline complex processes associated with managing partner contracts in different regions, with different partner types, encompassing different program rules. With this application, your organization can:
- Sign up new partners with contracts and categorize them based on partner type, geographic location, and other factors.
- Sign up existing partners for new programs.
UPM's Alerts & Notification Management application is fully integrated with the Partner Contracts Management application, so you can automatically notify your channel partners of a new contract assignment and prompt them to review and sign the document(s) digitally or manually.
Partner Contracts Management
The Partner Contracts Management application allows your organization to upload new contracts and categorize them based on partner type, geographic location, and other factors. System alerts automatically notify channel partners of new contract assignments and prompt them to review and sign documents digitally or manually.
Group & Signee Management
The Partner Contracts Management application allows your organization to manage partner contacts who are responsible for signing a specific contract. Using granular signee management features, you can track the progress of each participating partner in the contract signing process.
Group & Signee management features also allow you to efficiently create contracts within a multi-level channel partner ecosystem, assigning contracts to specific partner contacts or partner groups based on the partner engagement process.
Managing Contract Templates
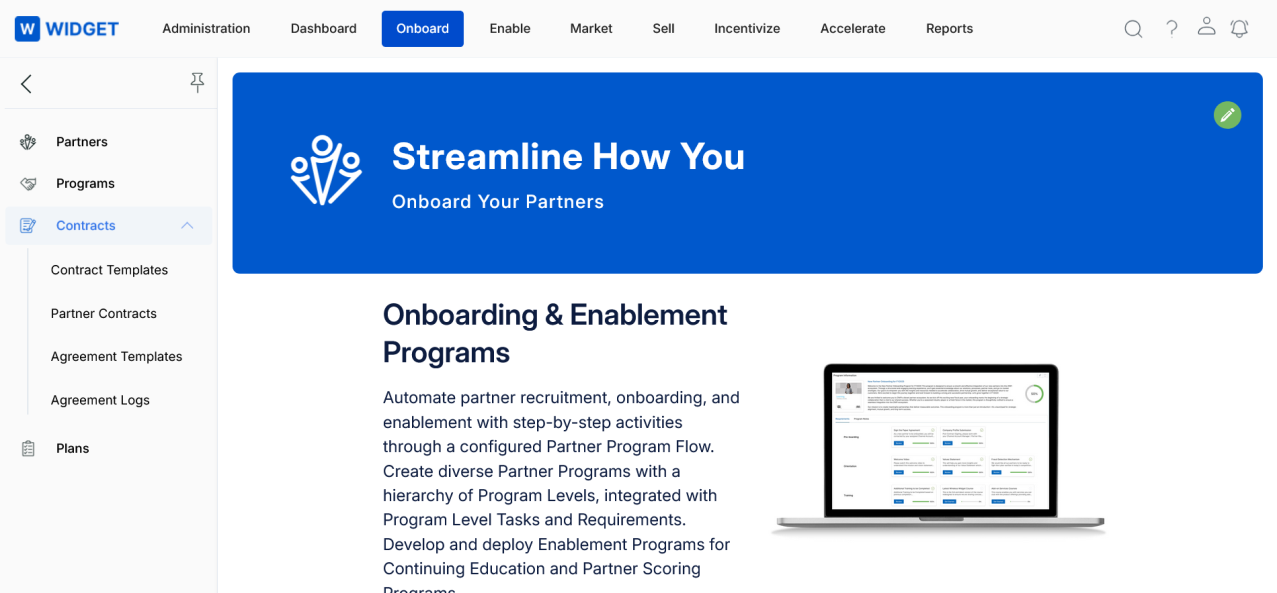
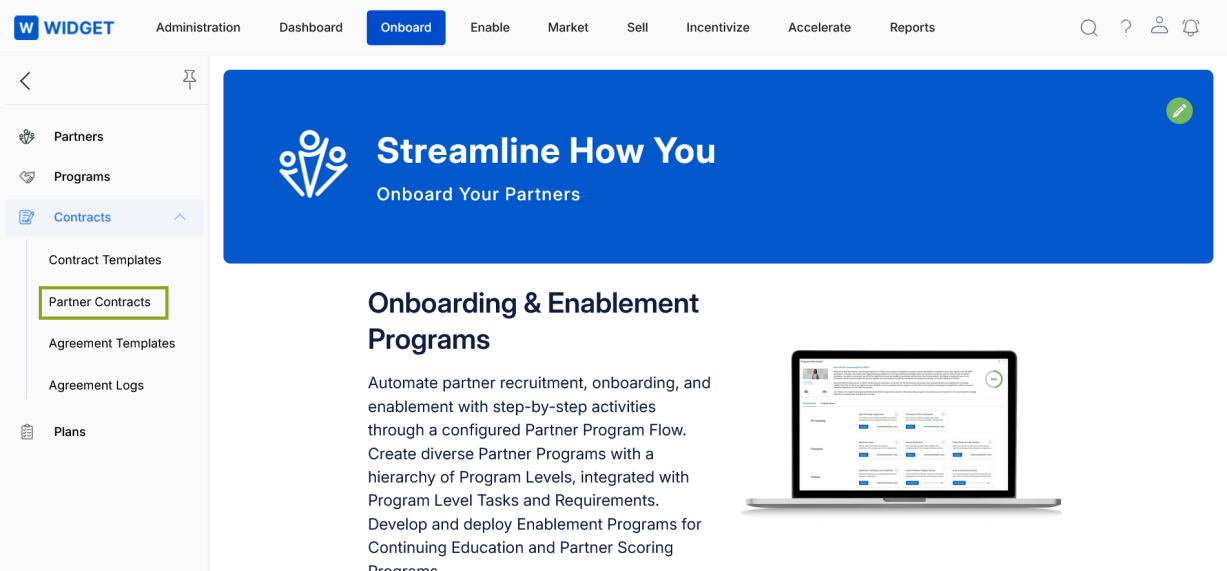
Navigate to Onboard > Contracts > Contract Templates from the left menu bar to access Contract Template management.
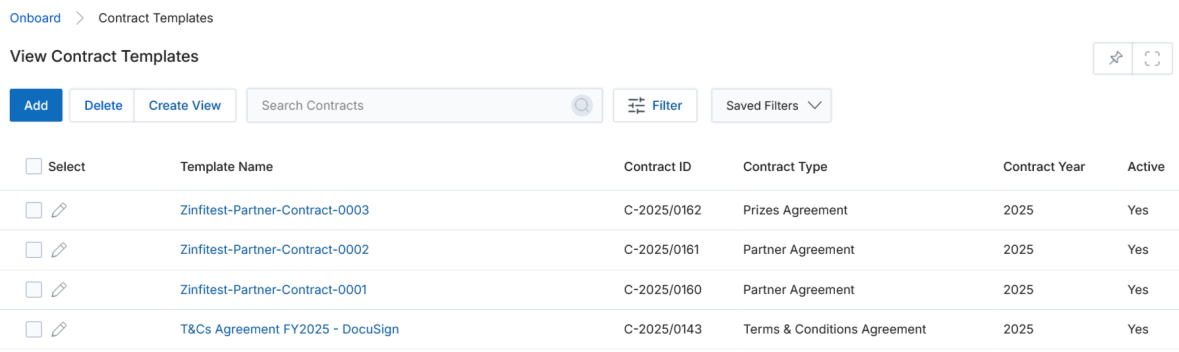
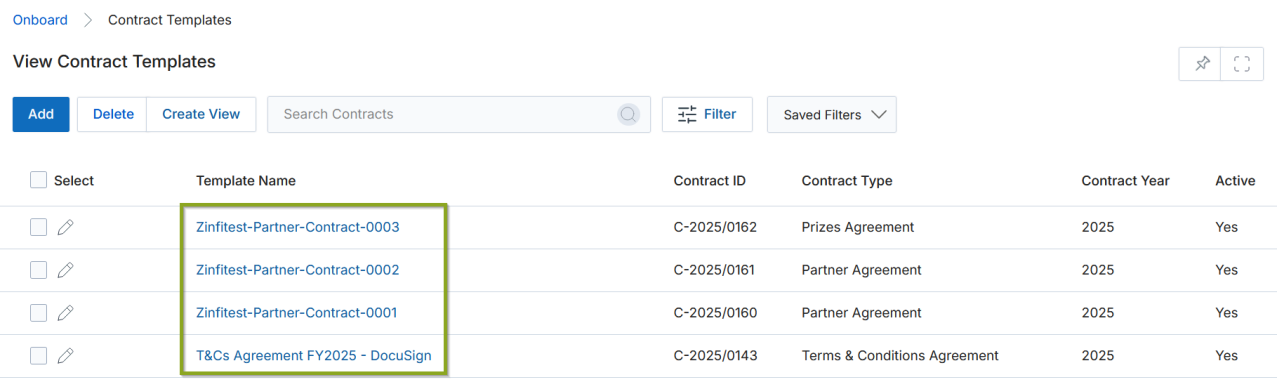
View Contract Templates
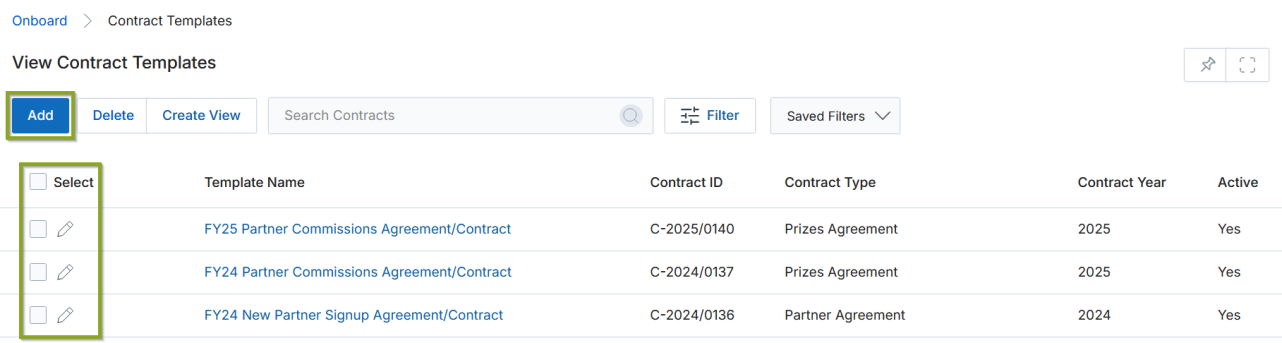
Administrators can create contract templates for Partner Accounts and Groups based on the value (Yes/No) configured for DocuSign with Account in Portal Settings. Selecting Contract Templates navigates to the View Contract Templates page, displaying all templates created for Partner Accounts and Groups.
The top part of the page provides the following actions:
- Add — Opens a new page to add a new record.
- Delete — Deletes selected records from the listing page.
- Create View — Lets you create a custom view with a selected set of columns.
- Search — Opens a pop-up window where you can enter search criteria to find desired records.
- Clear Search — Clears the current search.
- Saved Searches — Shows a list of saved searches. When selected, options to Edit (update the search name) or Delete (remove the search) are displayed.
For each record in the grid: clicking Edit (Pen icon) opens the record in edit mode; clicking any linkable item navigates to its details page.
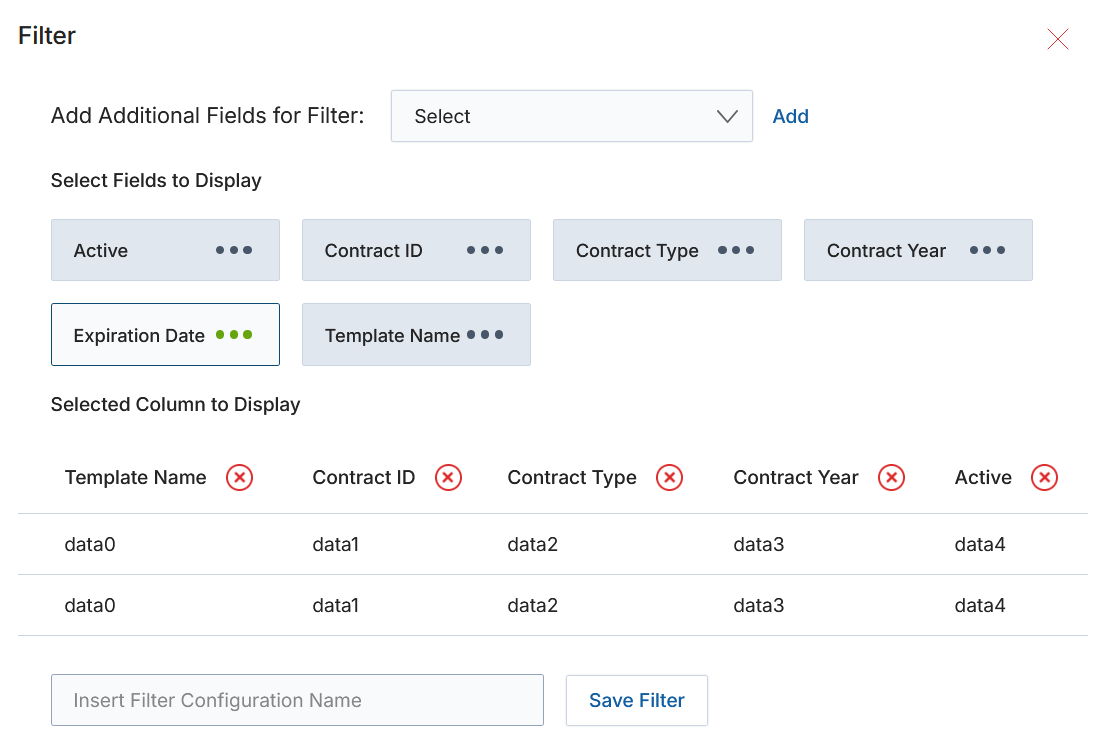
Create New View
- Choose an additional field and click Add.
- Click on Green Dots to select the fields to display.
- Selected columns appear in the table preview. Click the cross button to remove a column from the display list.
- Provide a View Name, then click Save Filter to create the new view.
View Contract Template Details
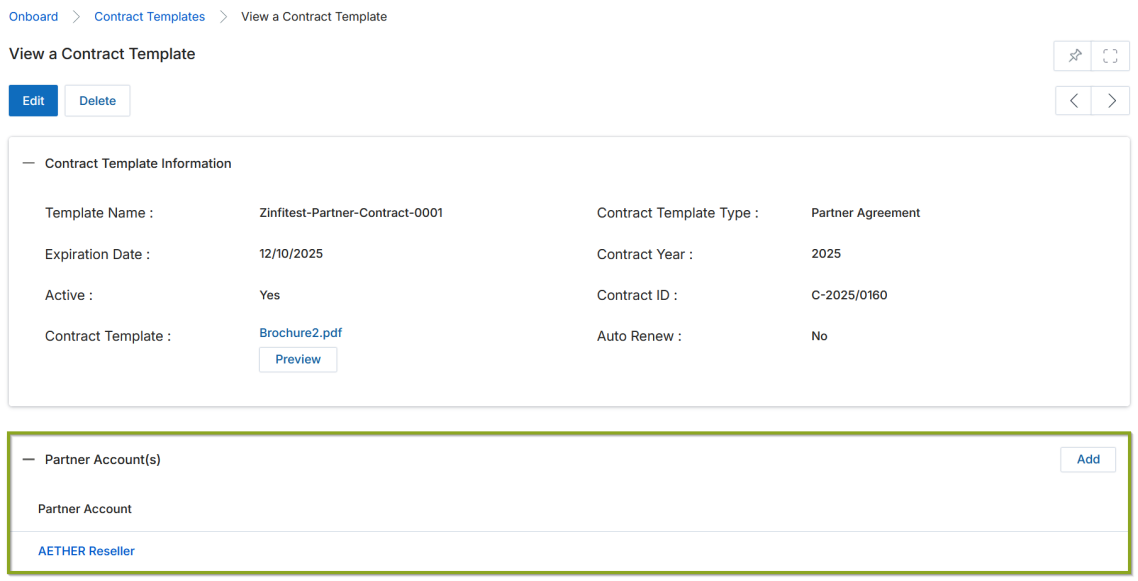
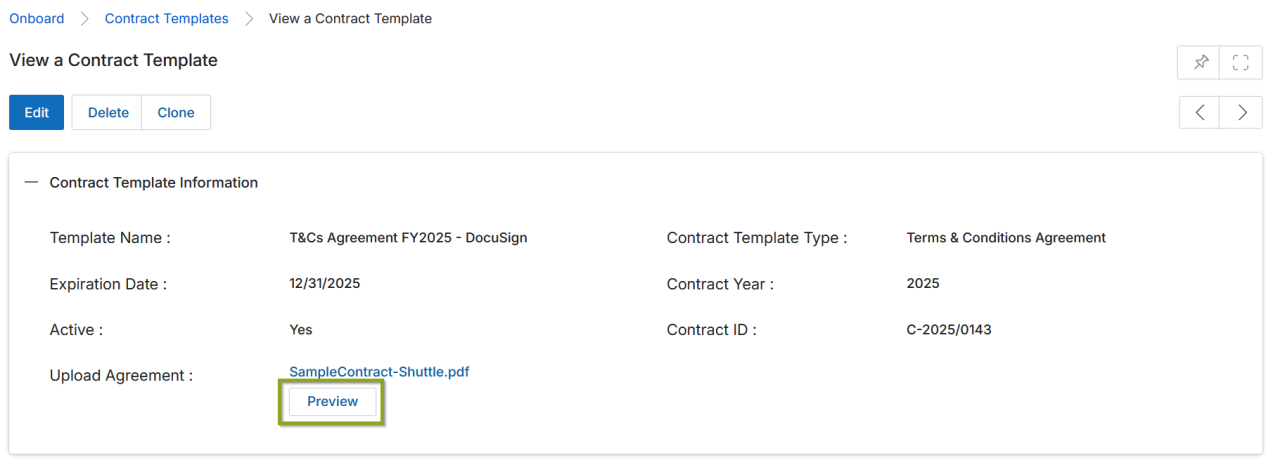
Clicking the name of a Contract Template in the listing opens its details page. The top part of the page provides Edit and Delete buttons. The Contract Template Information section contains the following fields:
| Field | Description |
|---|---|
| Template Name | User-friendly name of the template. |
| Contract Template Type | Type of contract between the OEM and partner (e.g., Partner Agreement, Prizes Agreement, Terms & Conditions Agreement, Distributor Agreement). |
| Expiration Date | Date when the contract expires. |
| Contract Year | Year of the contract. |
| Active | Yes = contract is active; No = contract is inactive. |
| Auto Renew | Yes = contract is automatically renewed one year after expiry. |
| Contract ID | Unique reference number for identification. |
| Upload Agreement | The contract document uploaded in PDF format. |
The details page will display a dedicated related list — either Assigned Groups or Partner Account(s) — depending on whether the template was created for Groups or Partner Accounts.
Contract Template with Assigned Groups
Displays all partner user groups assigned to the contract template, enabling group members to review and sign the contract as required. Assigning contracts to a group ensures streamlined acceptance and signing by designated members within the group.
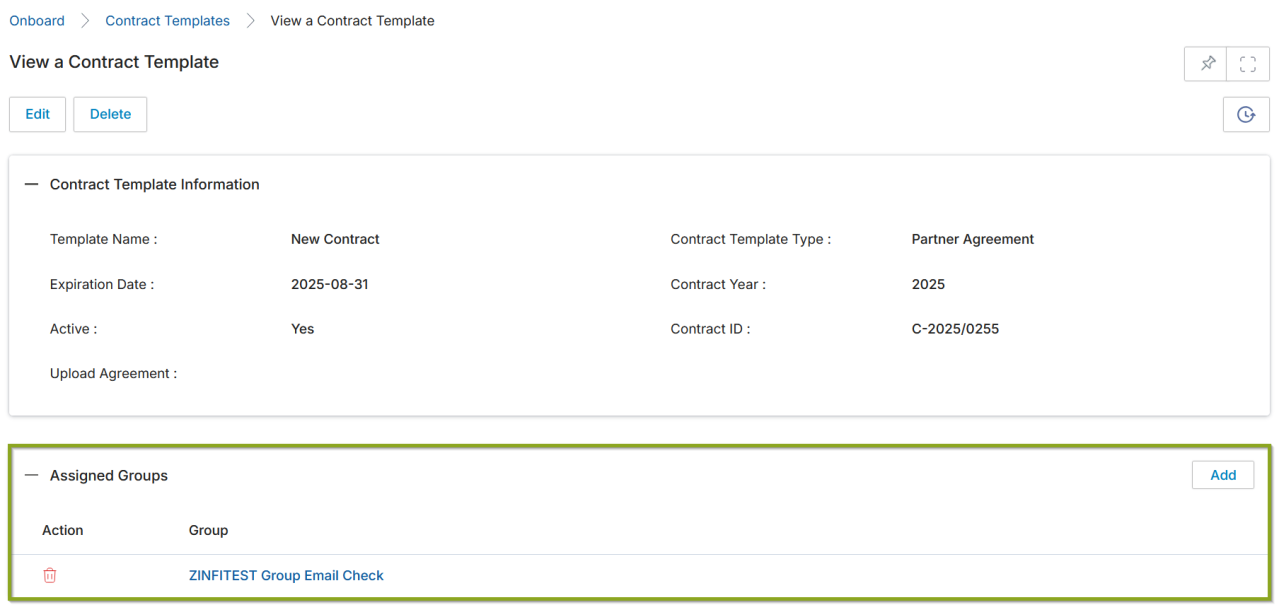

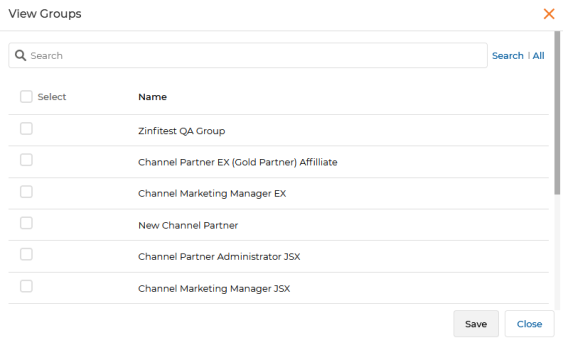
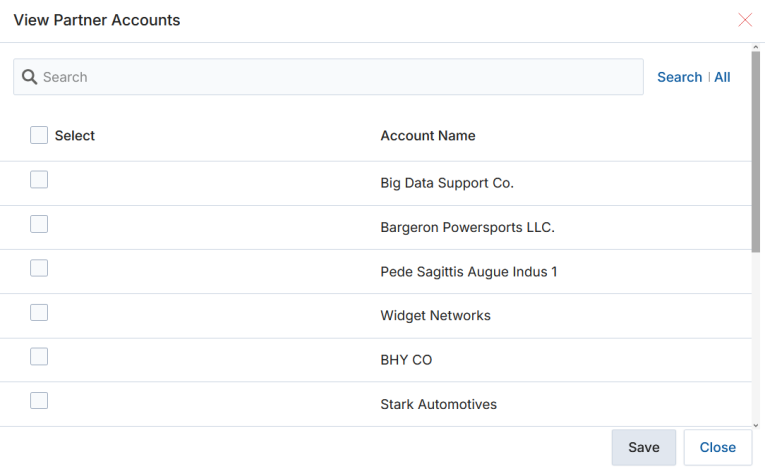
To assign groups, click Add. A popup window opens displaying available partner user groups. Check the groups to assign and click Save. To disassociate a group, click the trash icon on its row.
Contract Templates with Partner Accounts
This functionality ensures that pre-configured signees from the Partner Account can electronically sign contracts in a defined sequence. Administrators must configure signees for a Partner Account before associating the account with a specific template. If signees are not assigned beforehand, an error message is displayed.

Configuring Multi-Party Signee Flow
Admins define signing sequences, ensuring automated DocuSign envelope generation and notifications. Contracts are finalized once all signatories complete the process in order.
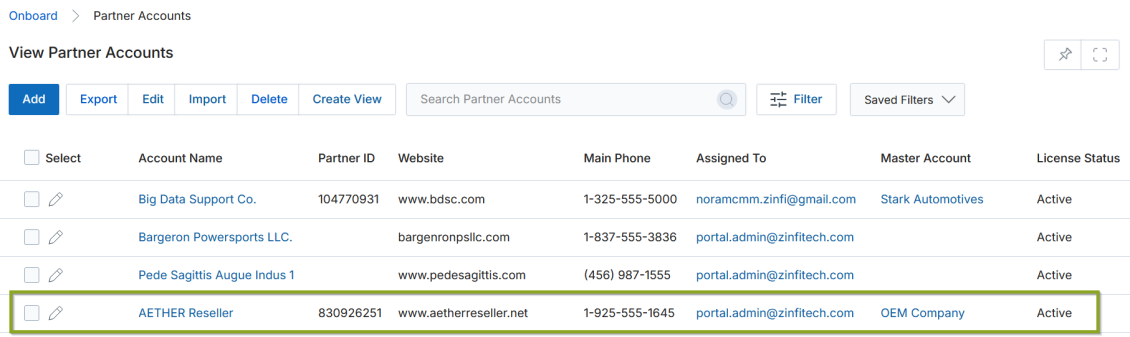
- Navigate to Partners > Partners > Partner Accounts to open the Partner Accounts listing page.
- Click the name of a specific Partner Account to open its details page. A Signees related list is available here.
- Click Add in the Signees section to open the Add/Edit a Signee page, where you can designate signatories from either the Partner or Admin side.
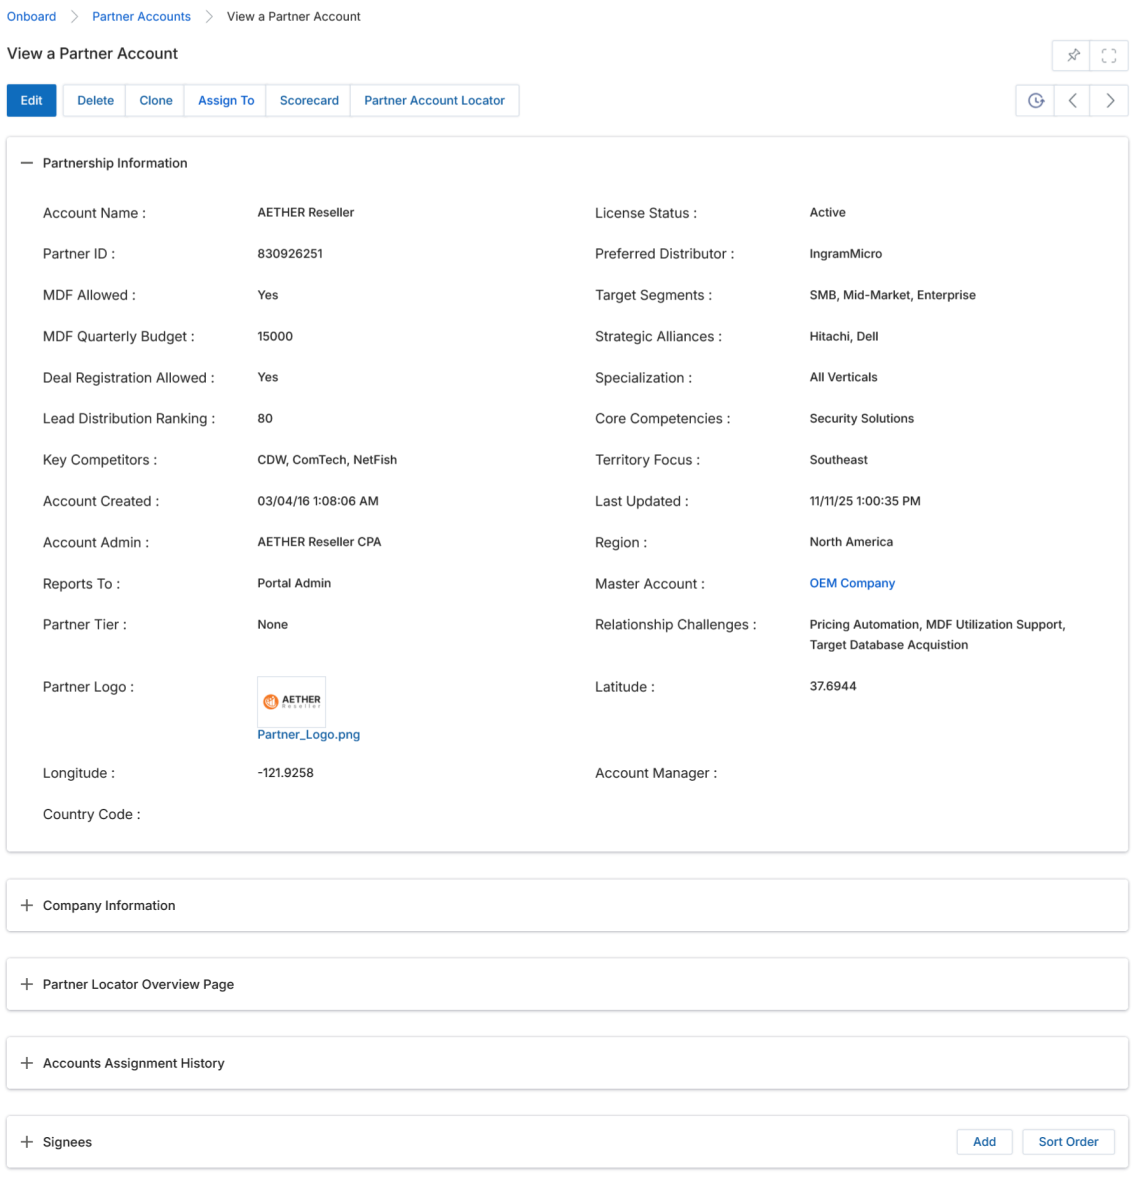
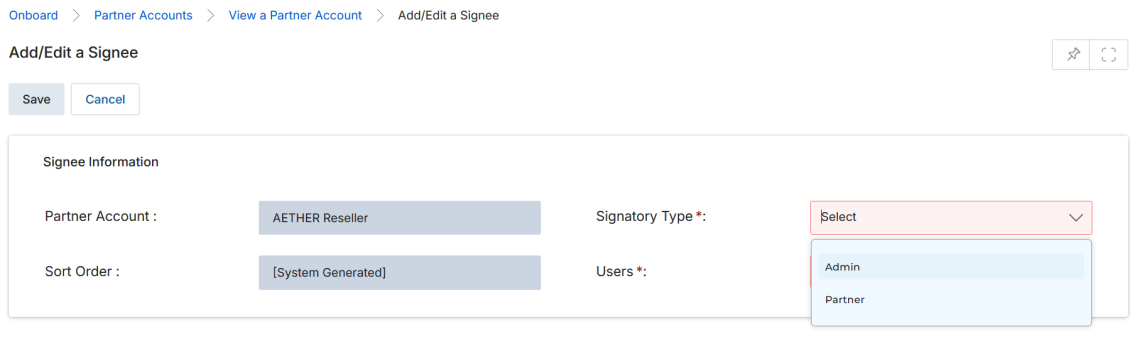
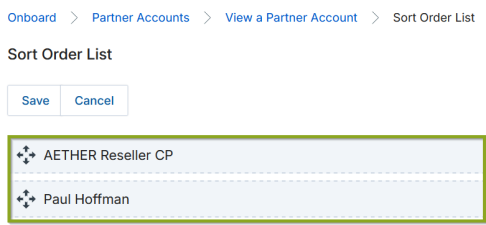
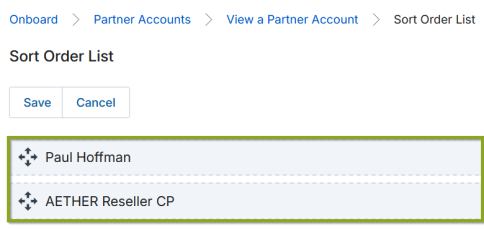
Based on business requirements, you can add multiple signees from both the Admin and Partner sides for all contractual agreements associated with a Partner Account. The Sort Order functionality allows you to define the signing sequence. When signatories are added to the Signees list, the sequence is automatically assigned based on saving order. Modify it by clicking Sort Order and rearranging via drag-and-drop.
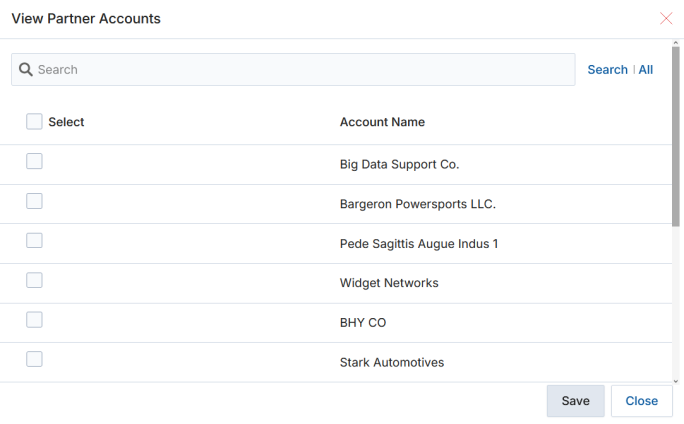
Once signatories are assigned to a Partner Account, that account can be linked to any Contract Template via the Partner Account(s) related list. The Partners Contracts related list on the template details page shows all partner contracts generated from that template.

Add / Edit a Contract Template
To edit an existing template, click the pencil icon. To add a new template, click the Add button at the top of the View Contract Templates page. Two types of Contract Templates can be created:
- DocuSign-Integrated Contract Template — DocuSign is a digital signature platform that allows users to sign contracts electronically.
- Normal Contract Template (Without DocuSign) — The Admin creates templates without integrating DocuSign; partners sign manually.
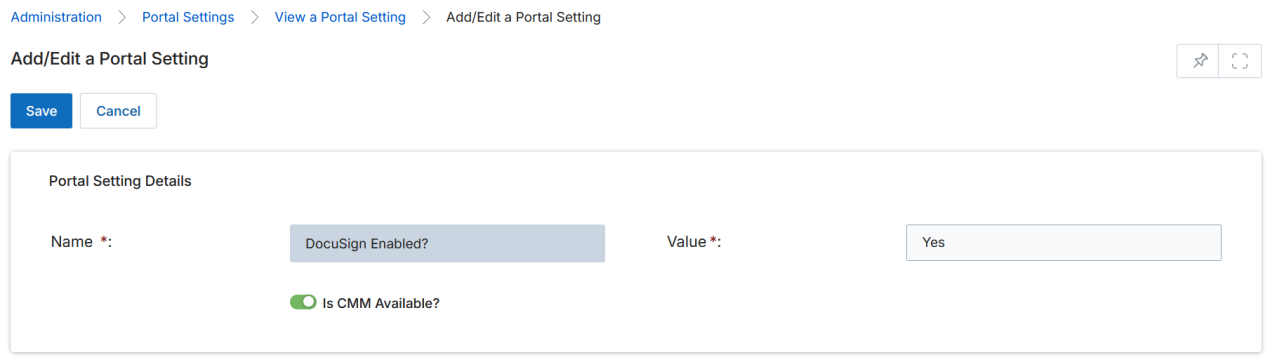
Whether DocuSign is enabled is controlled in Administration > CMS > Portal Settings. If the DocuSign Enabled? setting is set to Yes, the admin can create DocuSign-integrated templates. If disabled, only Normal Contract Templates are available.
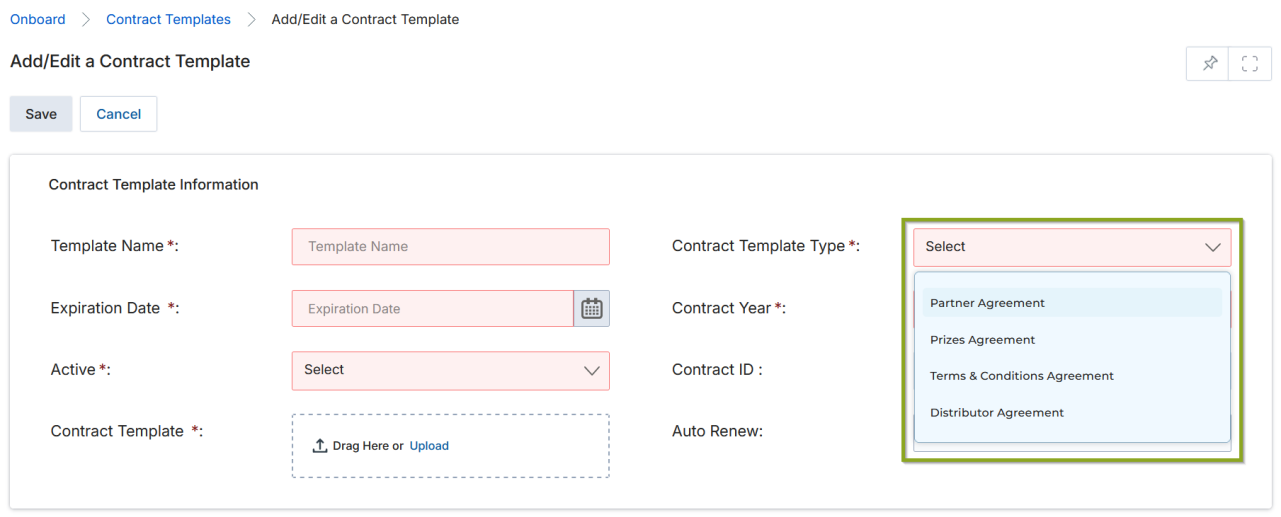
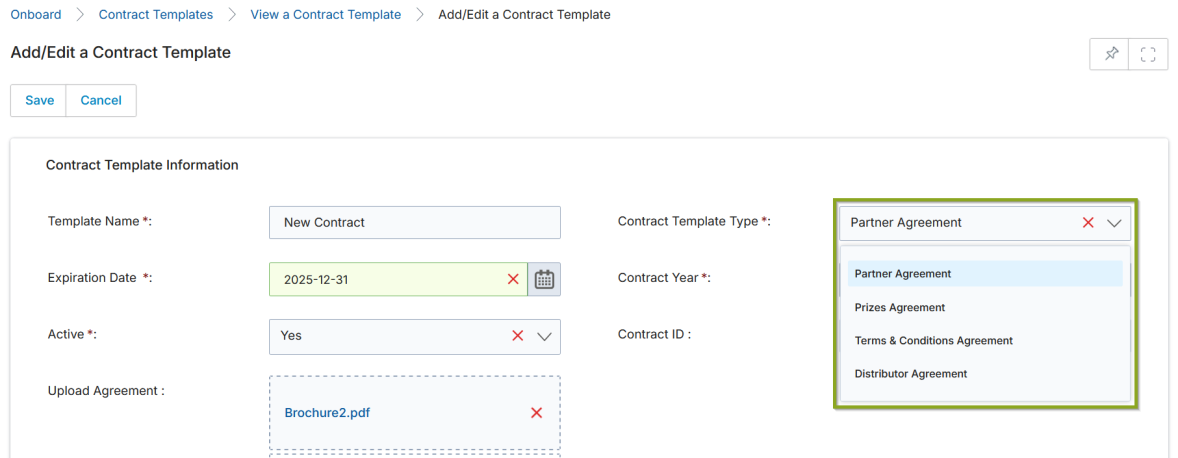
Adding a DocuSign-Integrated Contract Template
After clicking Add, you are redirected to the Add/Edit a Contract Template page. Select the desired contract type. Available types are: Partner Agreement, Prizes Agreement, Terms & Conditions Agreement, and Distributor Agreement. Fill in the required fields:
| Field | Description | Required |
|---|---|---|
| Template Name | User-friendly name for the template. | Yes |
| Contract Template Type | Type of contract (Partner Agreement, Prizes Agreement, etc.). | Yes |
| Expiration Date | Contract expiration date. | Yes |
| Contract Year | Year of the contract. | Yes |
| Active | Active status: Yes or No. | Yes |
| Contract ID | Unique reference number (system-generated). | Auto |
| Contract Template | Upload the contract document in PDF format. | Yes |
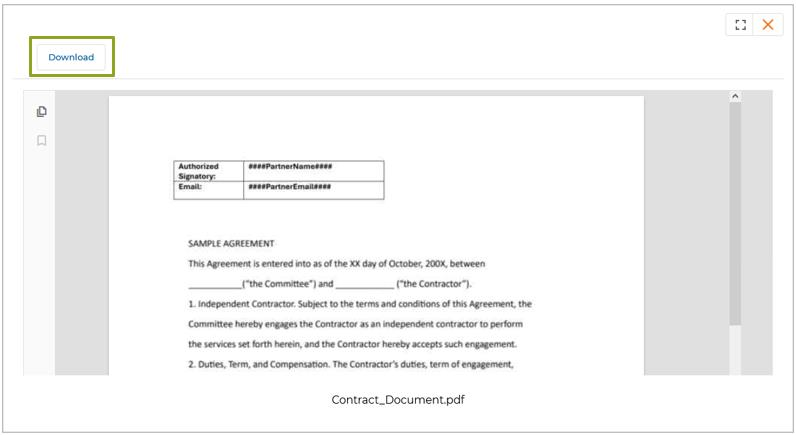
Click Save to create the template. Once saved, the Admin can preview and download the uploaded contract by clicking the Preview button on the View a Contract Template page.

Configurable Hashtags in Contract Templates
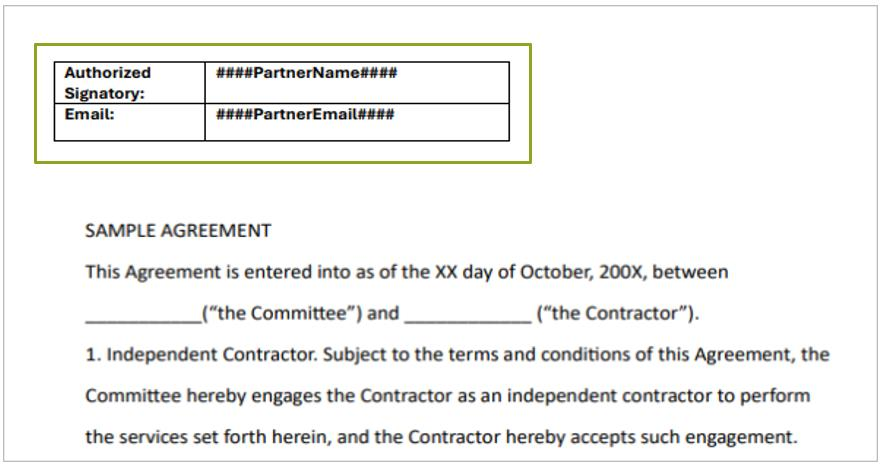
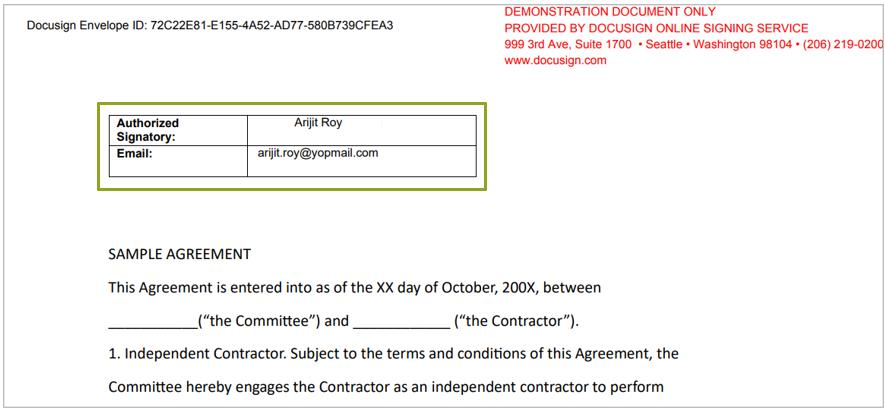
When customizing a contract template, the UPM portal Admin can dynamically generate partner-specific content by embedding designated hashtags (hashcodes) in the contract document. The system automatically populates these values when the contract is viewed or signed by the partner.
The Contract template is embedded with relevant hashtags to populate partner contact information dynamically when the recipient receives it. The template and hashtags can be managed by the Admin only. Common hashtags include ####PartnerName#### and ####PartnerEmail####. Once the template is assigned to the designated partner, the hashtags are replaced with the actual partner values.
Adding a Normal Contract Template (Without DocuSign)
When DocuSign is not enabled, the Add/Edit a Contract Template form does not include the Contract Template upload field (since no PDF envelope is sent). The form fields are otherwise identical:
| Field | Description | Required |
|---|---|---|
| Template Name | User-friendly name for the template. | Yes |
| Contract Template Type | Type of contract. | Yes |
| Expiration Date | Contract expiration date. | Yes |
| Contract Year | Year of the contract. | Yes |
| Active | Active status: Yes or No. | Yes |
| Auto Renew | Yes = contract auto-renews one year after expiry. | No |
| Contract ID | Unique reference number. | Auto |
Assign to Groups
Once a template is saved, it is assigned to preferred Partner Group(s), turning it into a contract for those partners. From the View a Contract Template page, click Add in the Assigned Groups section, select the groups, and click Save.

Managing Partner Contracts
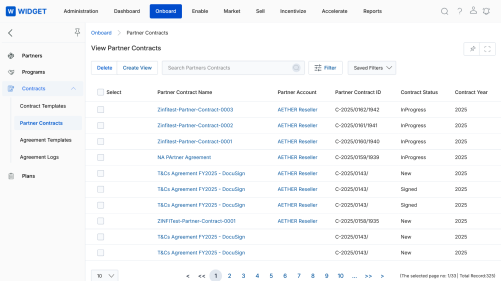
The Partner Contracts section is where you access signed and submitted contracts from partners or other users and review them for approval or rejection. Navigate to Onboard > Contracts > Partner Contracts.
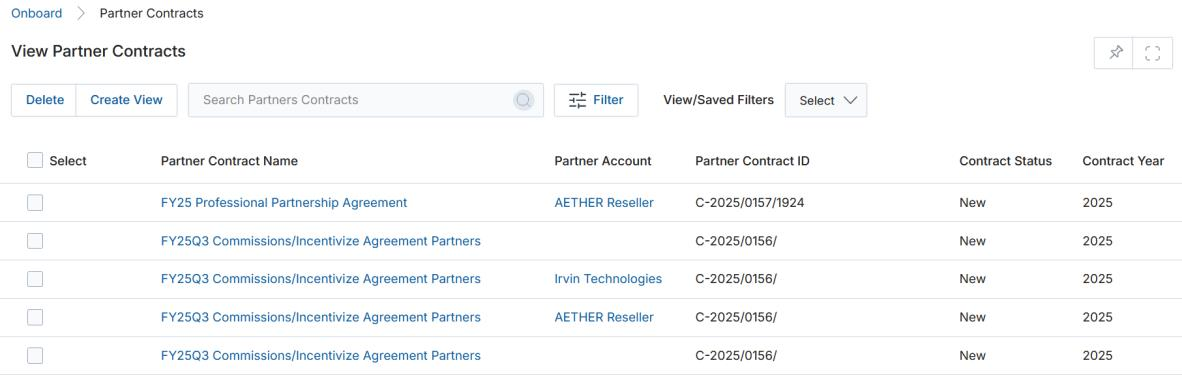
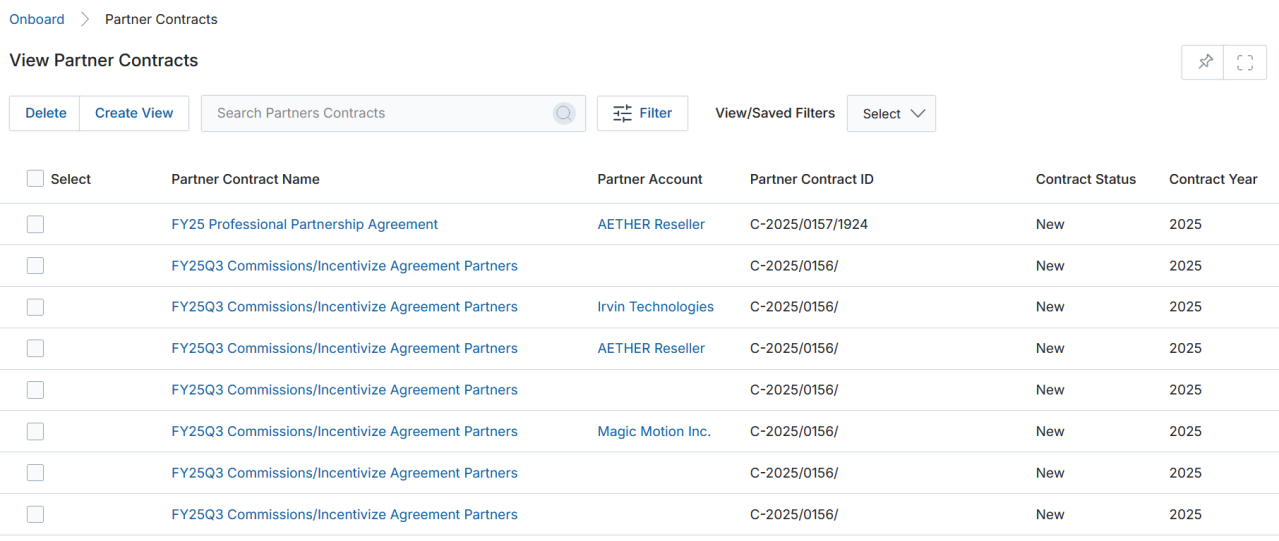
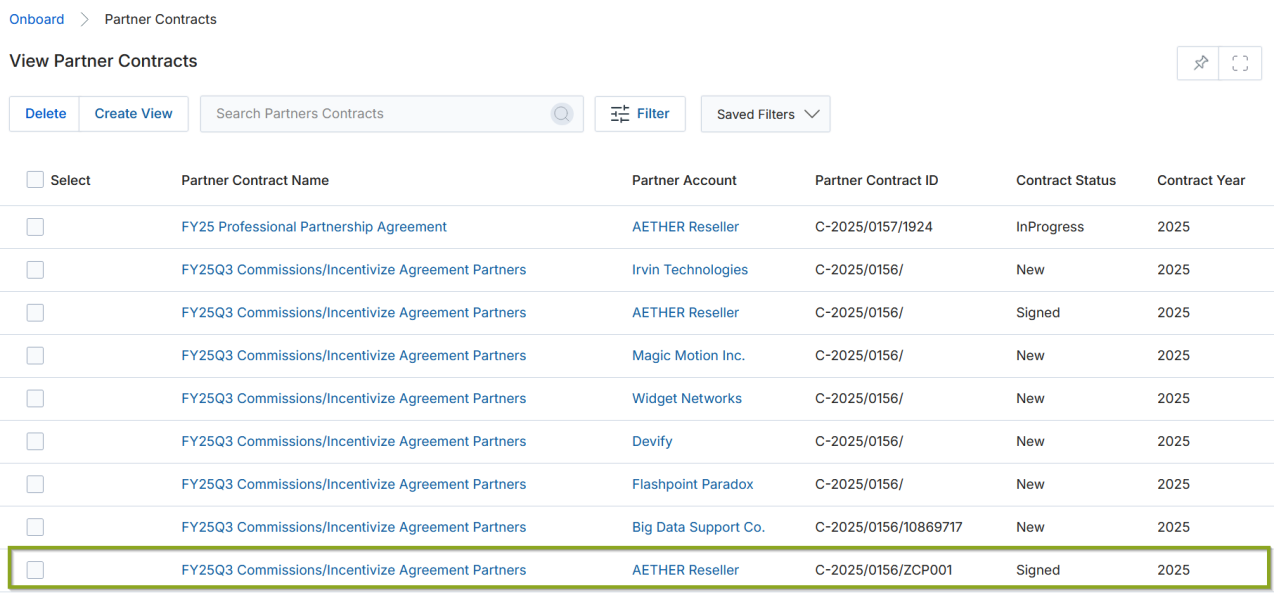
View Partner Contracts
The View Partner Contracts page lists all partner contracts. The top part of the page provides:
- Delete — Deletes selected records.
- Create View — Creates a custom view with a selected set of columns.
- Search — Opens a pop-up for search criteria entry.
- Clear Search — Clears the current search.
- Saved Searches — Shows saved searches; select to Edit or Delete them.
For each record: clicking Edit (Pen icon) opens edit mode (only available for contracts with Status = New); clicking any linkable item navigates to its details page.
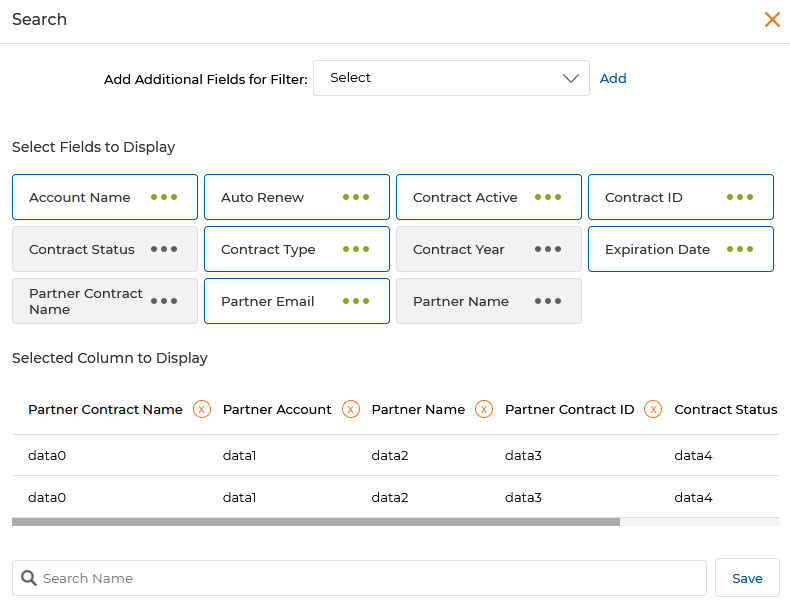
Create New View (Partner Contracts)
The Create New View for Partner Contracts provides a broader set of filterable fields including Account Name, Auto Renew, Contract Active, Contract ID, Contract Status, Contract Type, Contract Year, Expiration Date, Partner Contract Name, Partner Email, and Partner Name.
View Partner Contract Details (DocuSign-Integrated)
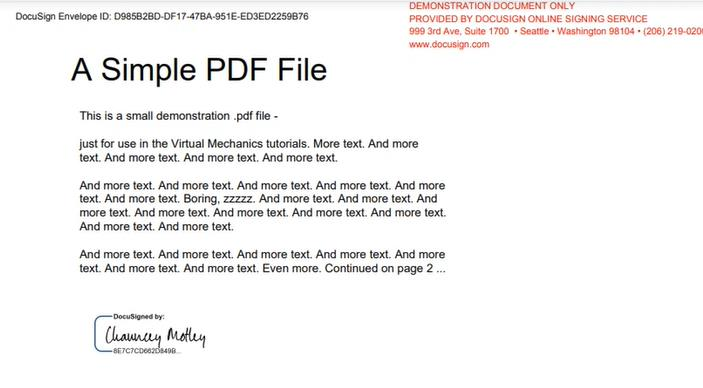
Click the Name/Title of any contract in the listing to open its details page. For DocuSign-integrated contracts, a Download Contract button appears at the top, opening the signed contract via DocuSign.
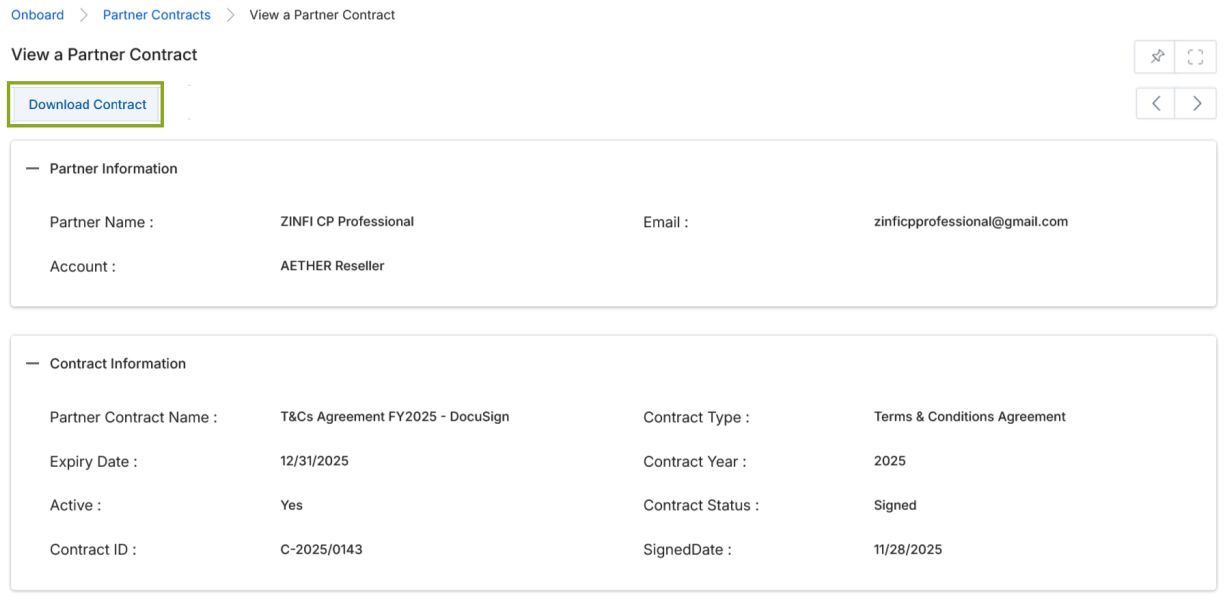
The Partner Information section contains:
| Field | Description |
|---|---|
| Partner Name | Name of the partner contact. |
| Official email address of the partner contact. | |
| Account | Name of the partner company. |
The Contract Information section contains:
| Field | Description |
|---|---|
| Partner Contract Name | User-friendly name of the partner agreement. |
| Contract Type | Type of contract: Partner Agreement, Prizes Agreement, Terms & Conditions Agreement, or Distributor Agreement. |
| Expiration Date | Contract expiry date. |
| Contract Year | Year of the contract. |
| Active | Yes = active; No = not active. |
| Auto Renew | Yes = auto-renewed one year after expiry. |
| Contract Status | Current status: New, Approved, Signed, or Pending Approval. |
| Contract ID | Unique reference number for identification. |
| Signed Date | Date the contract was digitally signed. |
View Partner Contract Details (Without DocuSign)
For non-DocuSign contracts, clicking the contract name opens the View a Partner Contract page. In addition to the Partner Information and Contract Information sections, a Contract Terms section is displayed containing the uploaded signed contract PDF and a Preview button.
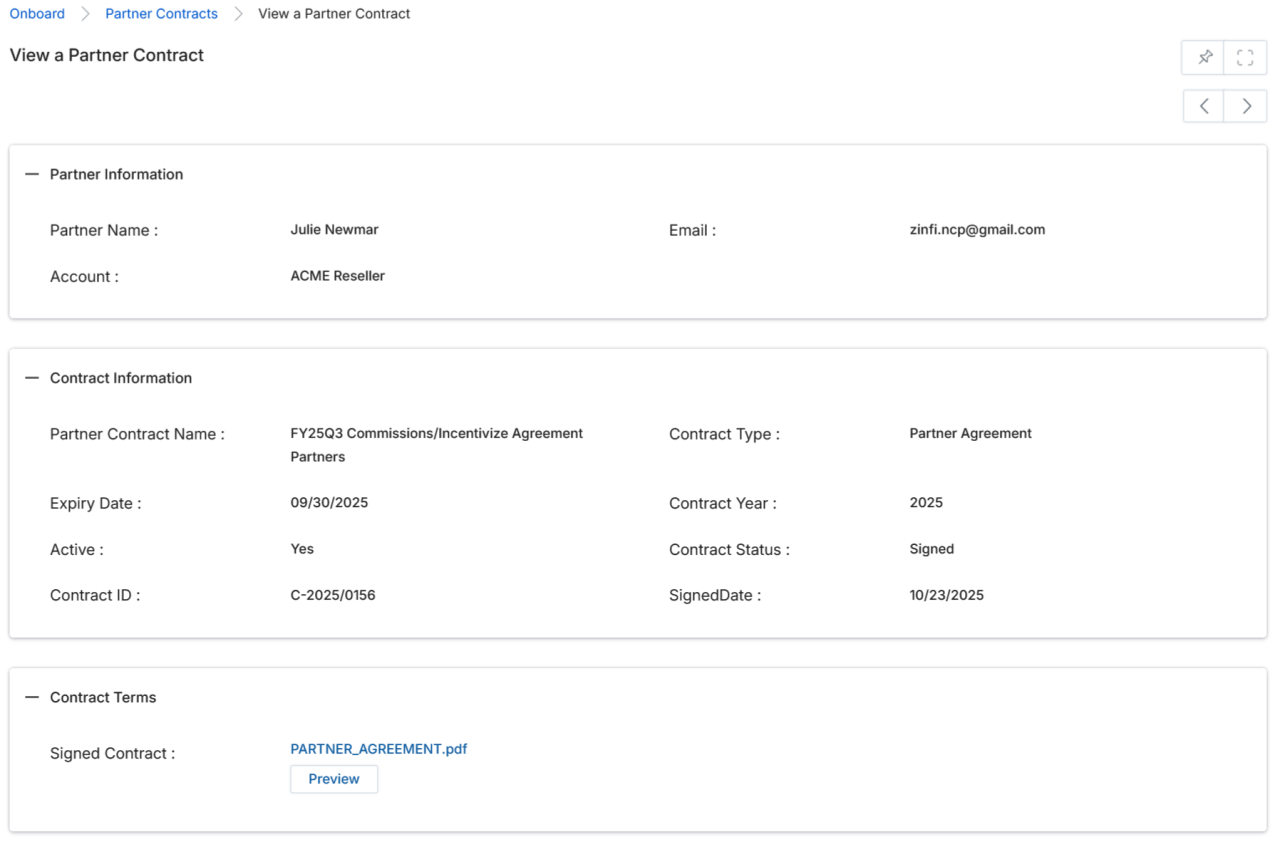
The Contract Terms section contains:
| Field | Description |
|---|---|
| Signed Contract | The uploaded signed contract PDF, with a Preview button to view it inline. |
| Introduction Text | Introductory text of the contract. |
| Accepted Text | Acceptance text of the contract. |
| Terms & Conditions | Terms and conditions of the contract. |
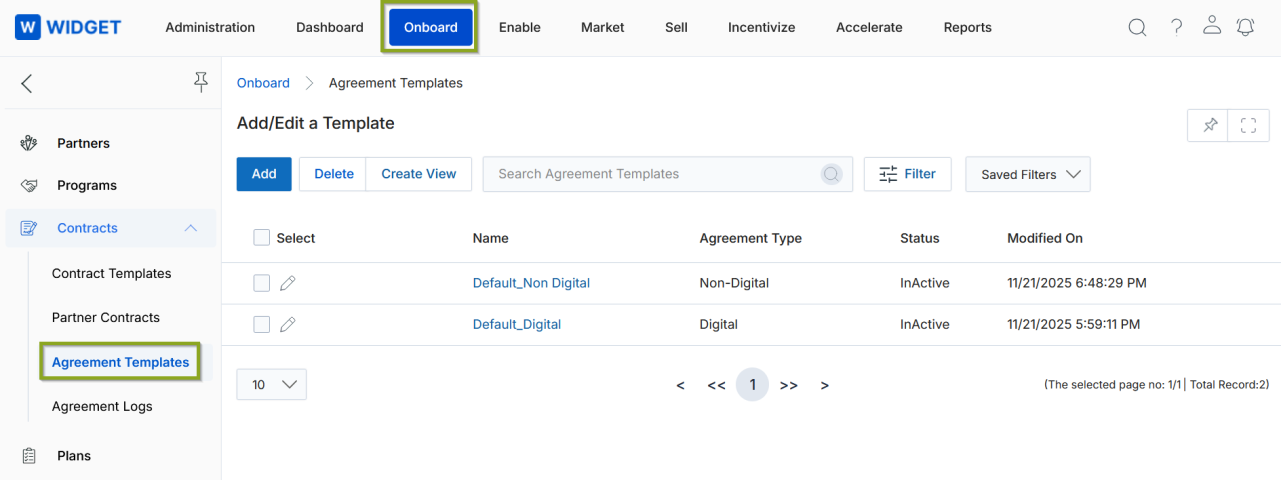
Agreement Templates
Agreement Templates control the agreement screen that partners see when they first log in to the UPM portal. Navigate to Onboard > Contracts > Agreement Templates to manage templates.
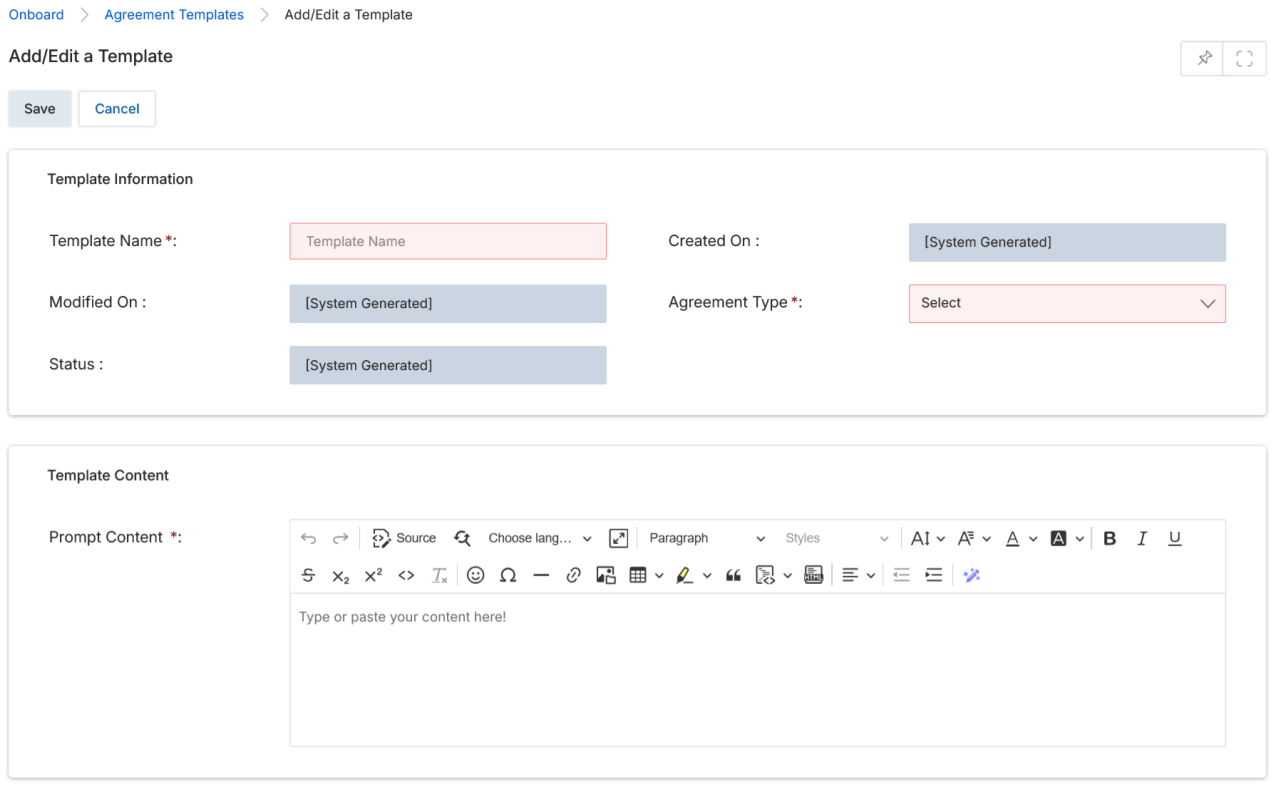
To create a new template, click Add, which opens the Add/Edit a Template page.
Fill in the required fields:
| Field | Description | Required |
|---|---|---|
| Template Name | Name of the Agreement Template. | Yes |
| Status | Active or Inactive — system-generated until activated. | Auto |
| Created On | Date the template was created — system-generated. | Auto |
| Modified On | Date the template was last modified — system-generated. | Auto |
| Agreement Type | Digital — Requires DocuSign integration; sends a DocuSign envelope for e-signature. Non-Digital — Sends a system-generated email with a copy of the accepted agreement. | Yes |
| Upload DocuSign File | PDF file to send via DocuSign (Digital agreements only). | Conditional |
| System Email | Email template used for non-digital agreements. | Conditional |
| Prompt Content | The agreement text displayed to partners when they log in to the UPM portal. Supports rich-text formatting. | Yes |
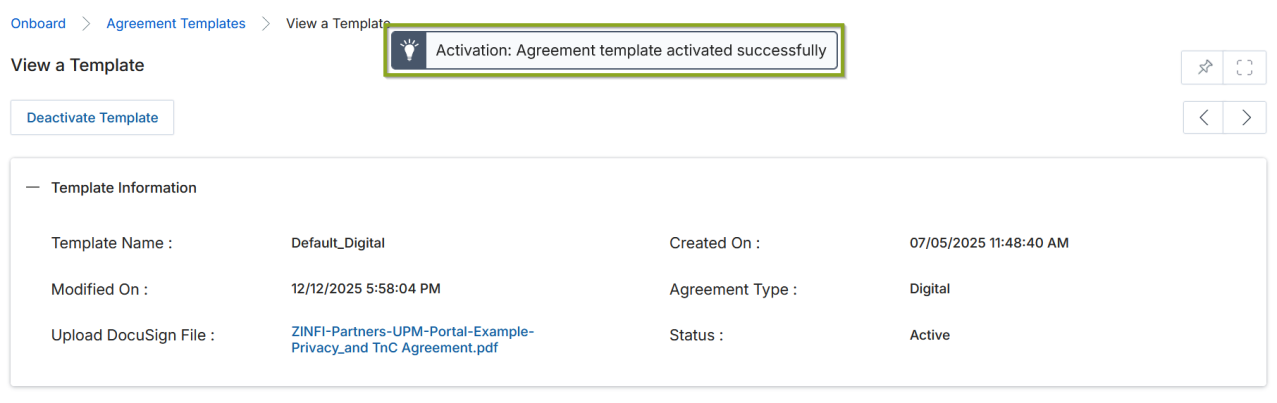
Once done, click Save, then click Activate Template to make it live.
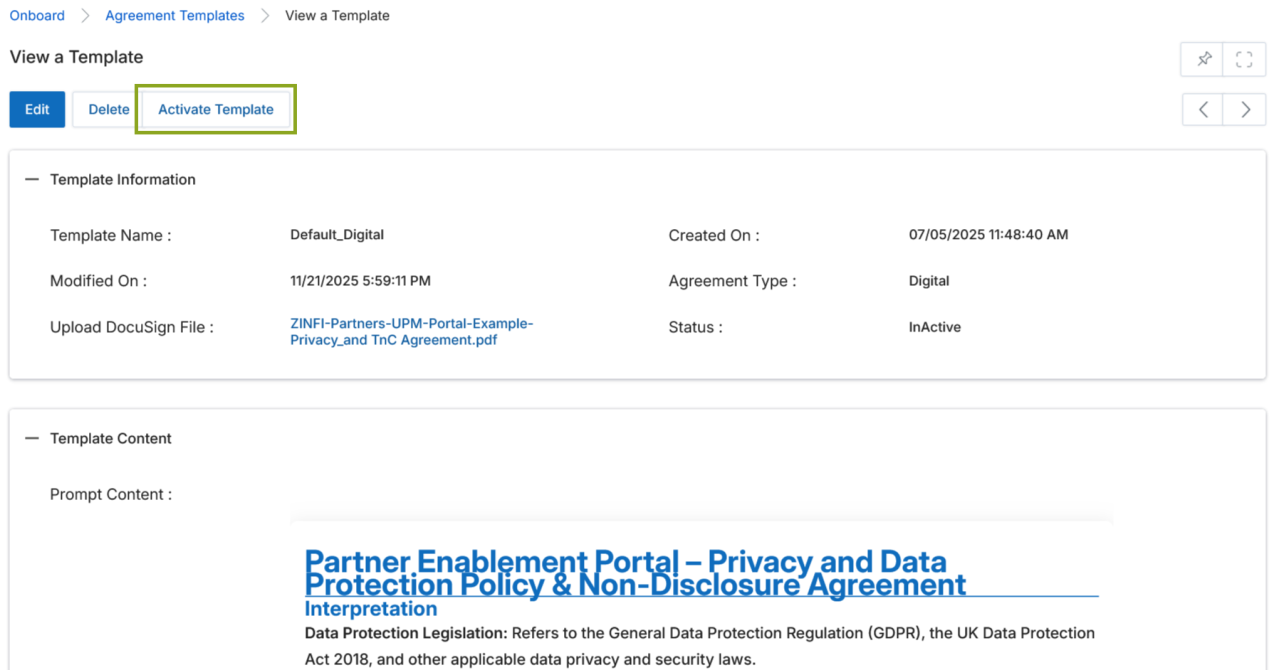
Only one template can remain active at any given time. If an existing template is already active, attempting to activate a new template triggers an error. You must first deactivate the currently active template before enabling another.
Once the template is successfully activated, a confirmation message appears on screen indicating the activation is complete.
Partner Experience — Digital Agreement Flow (DocuSign)
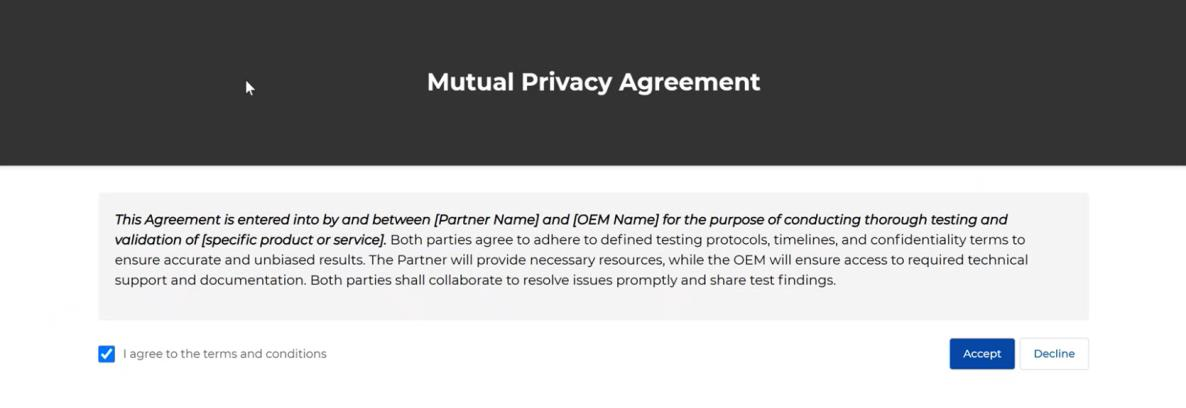
- Partner logs in and sees the agreement screen with the configured Prompt Content.
- The partner selects the I agree to the terms and conditions checkbox and clicks Accept.
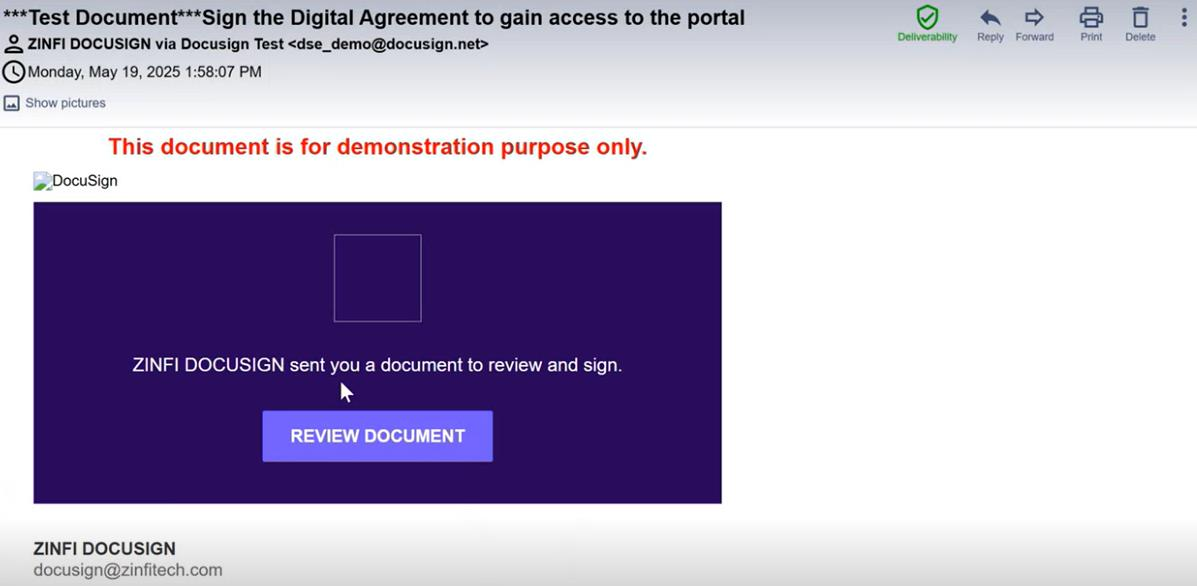
- The partner receives a DocuSign email with a Review Document link.
- The partner reviews the document and completes the digital signature process.
- Upon successful signing, a confirmation message appears on the UPM screen. Once the partner clicks OK, access to the UPM portal is granted.
Partner Experience — Non-Digital Agreement Flow
- Partner logs in and sees the agreement screen.
- The partner selects the I agree to the terms and conditions checkbox and clicks Accept.
- A confirmation message appears on the UPM screen. Once the partner clicks OK, portal access is granted.
- The partner receives a copy of the accepted agreement via email.
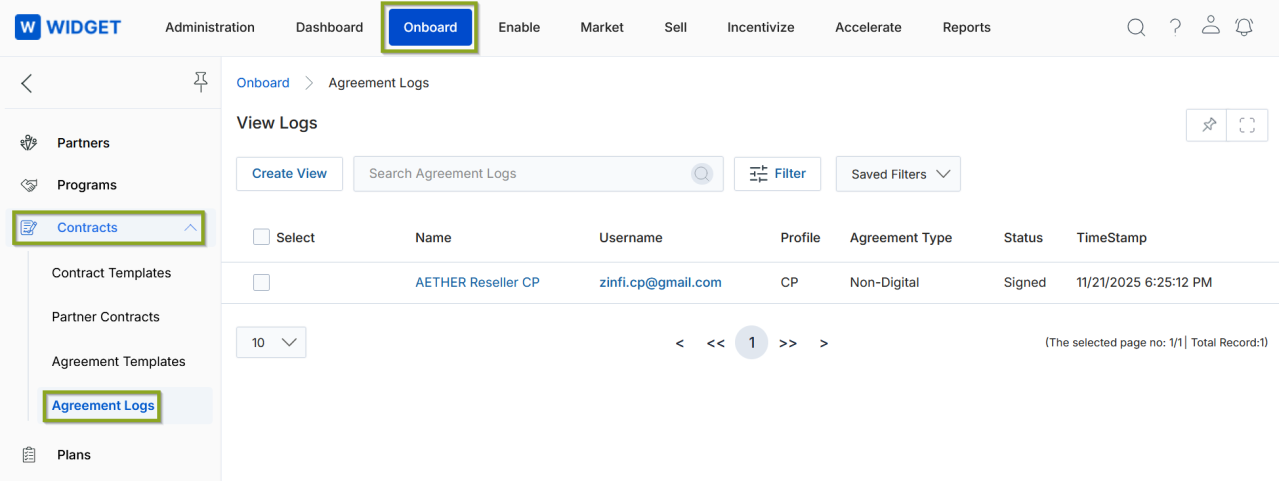
Agreement Logs
Navigate to Onboard > Contracts > Agreement Logs to view the View Logs page, which lists all agreements signed so far. Columns include the partner name, username, profile, agreement type, status, and timestamp.
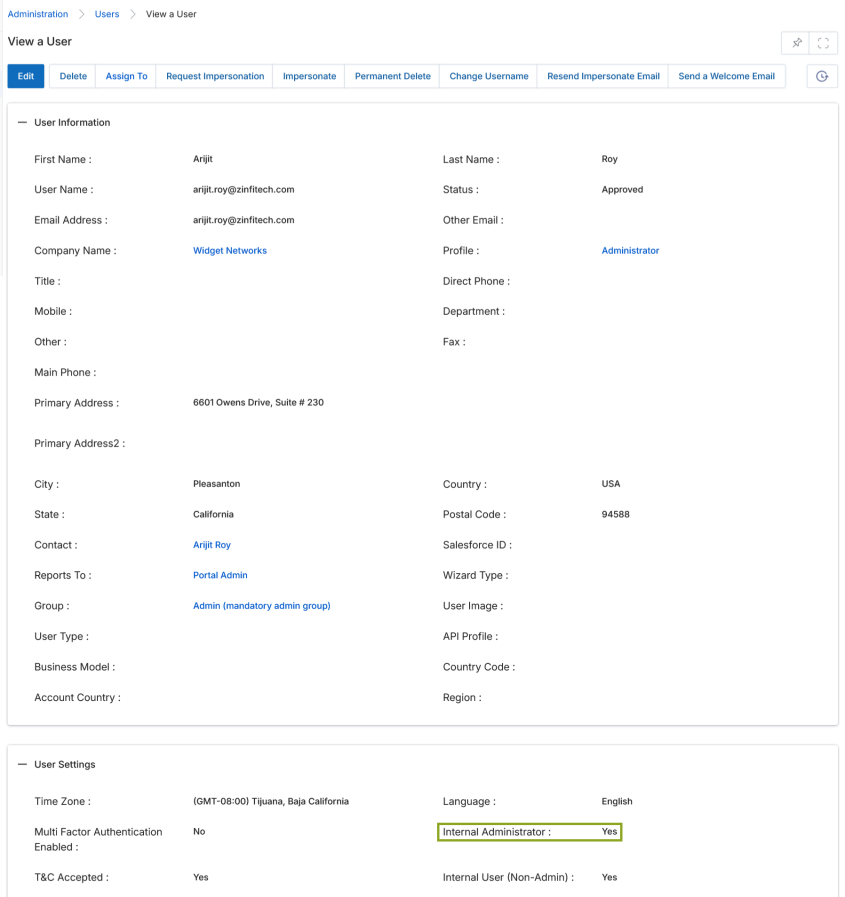
Only OEM internal administrators can manage Agreement Templates and Agreement Logs. To verify a user's internal administrator status, check the Internal Administrator field on their User record (Administration > Users > View a User).