Introduction
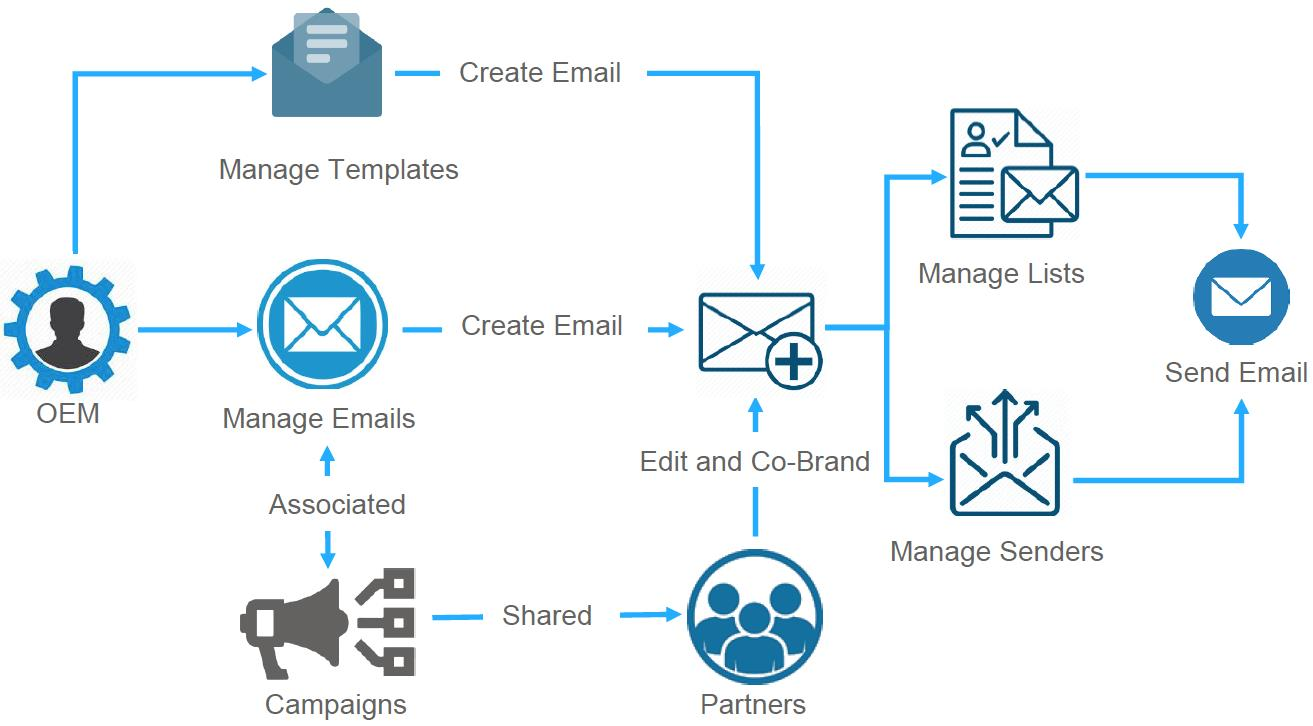
With UPM's Email Marketing Management application, you can easily design your own emails and newsletters, save them as templates and share them with your partners, who can then customize them with their own images, logos, and color schemes to fit their brand. Utilizing the data from your UPM instance, you can personalize emails to create effective marketing campaigns and add hyperlinks to redirect recipients to your web pages, social media, and microsites.
ZINFI's UPM connects with your existing marketing tools through UPM's Connectors application and allows you to identify leads that convert and track the ROI from your marketing spend. The application measures basic marketing analytics such as open rates, close rates, and clicks on calls-to-action — and also identifies which campaigns generate the highest conversion rates by comparing marketing spend to deals generated.
Benefits
- Higher conversion rates — Nurture leads through several pipeline stages using the email automation tools.
- Seamlessly synced and unified contacts — Duplicate contacts are eliminated; the platform keeps track of both vendor and partner contacts and combines lists automatically.
- Highly personalized emails — Identify which emails your leads engage with most and replicate those campaigns for similar customer profiles.
- Better ROI visibility — Calculate the true return on each email campaign by comparing marketing spend to the number of deals and revenue generated.
- Better segmentation — Pull customer data from the reporting engine to organize and segment mailing lists by sales pipeline stage, then personalize messaging for very specific audiences.
Outgoing Emails
Accessing Outgoing Emails
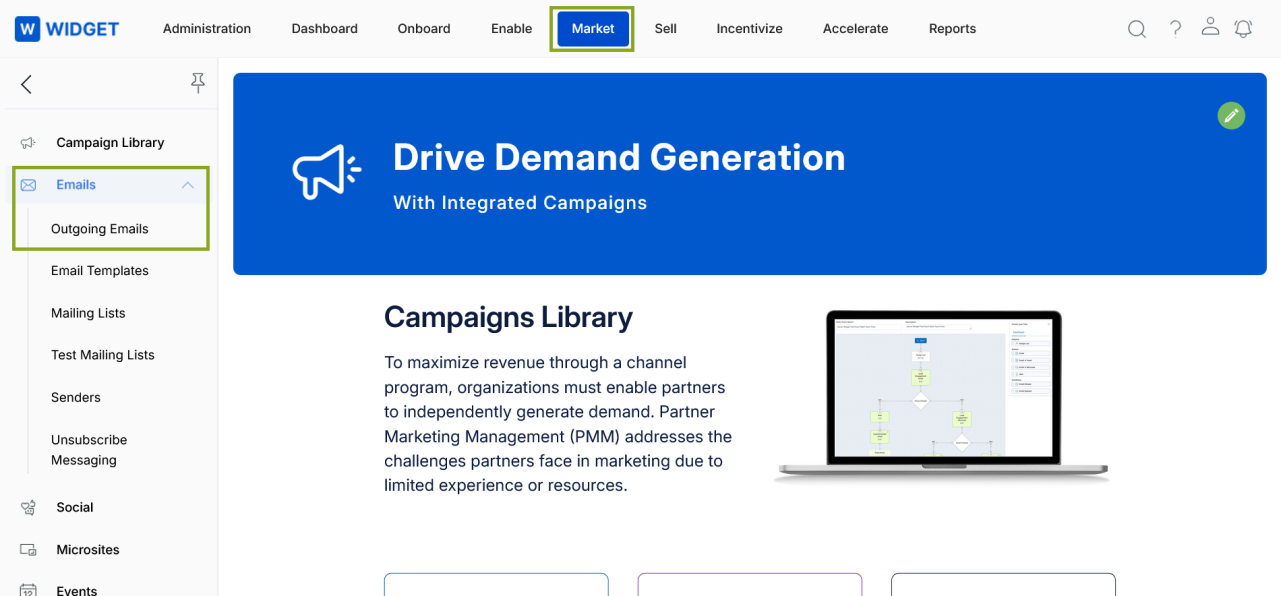
- Click Market on the top menu.
- Click Emails > Outgoing Emails in the left menu bar.

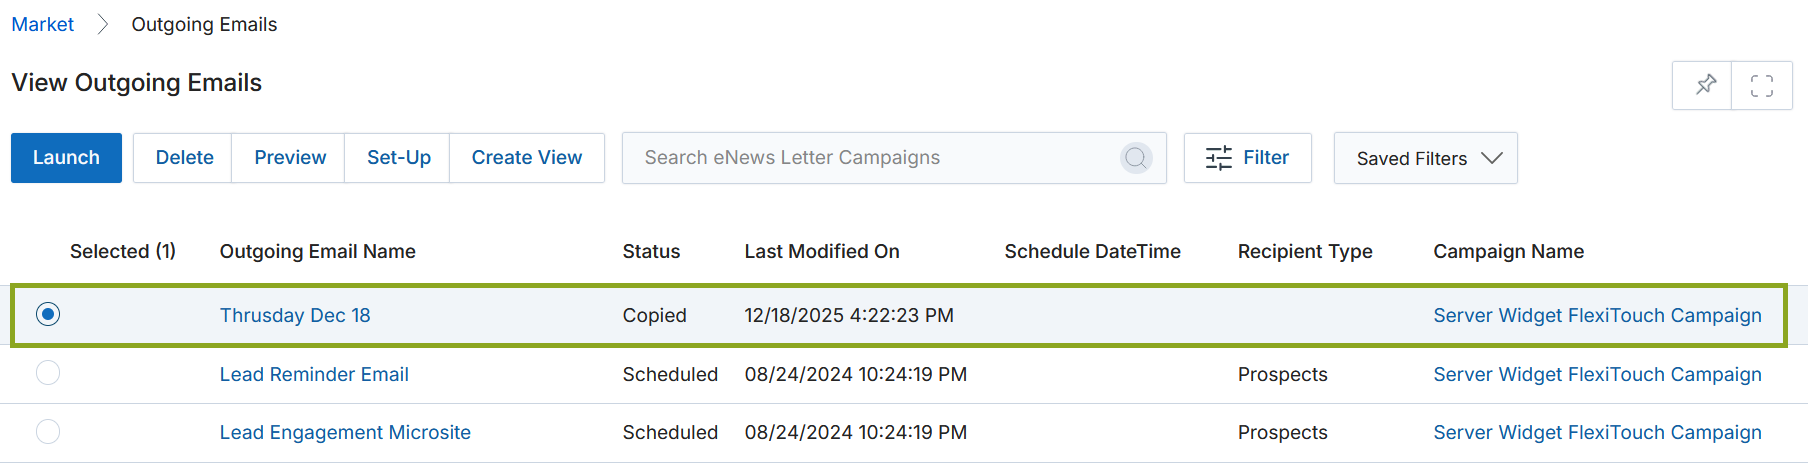
View Outgoing Emails
Clicking Outgoing Emails opens the listing page showing all existing email records with their status, schedule date, recipient type, and campaign association.

The action bar at the top of the page provides the following options:
- Preview — Shows a preview of the selected email.
- Clone — Creates a duplicate copy of the email in editable mode.
- Launch — Opens the Launch Email Campaign page to configure and send the email.
- Delete — Deletes the selected email(s) from the listing.
- Create View — Lets you create a custom view with a configurable set of columns.
- Search — Opens a search pop-up to filter emails by criteria.
- Clear Search — Clears the active search.
- Saved Searches — Shows saved filter configurations; each can be edited or deleted.
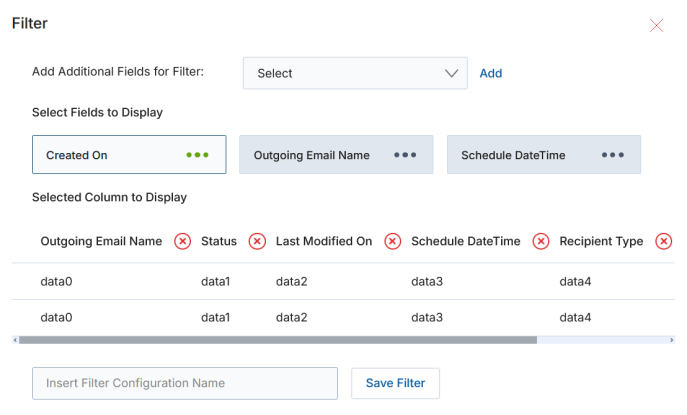
Create New View
- Choose an additional field from the dropdown, then click Add.
- Click the green dots to select which fields to display.
- Selected columns appear in the preview table. To remove a column, click its cross button.
- Provide a View Name and click Save Filter to create the new view.
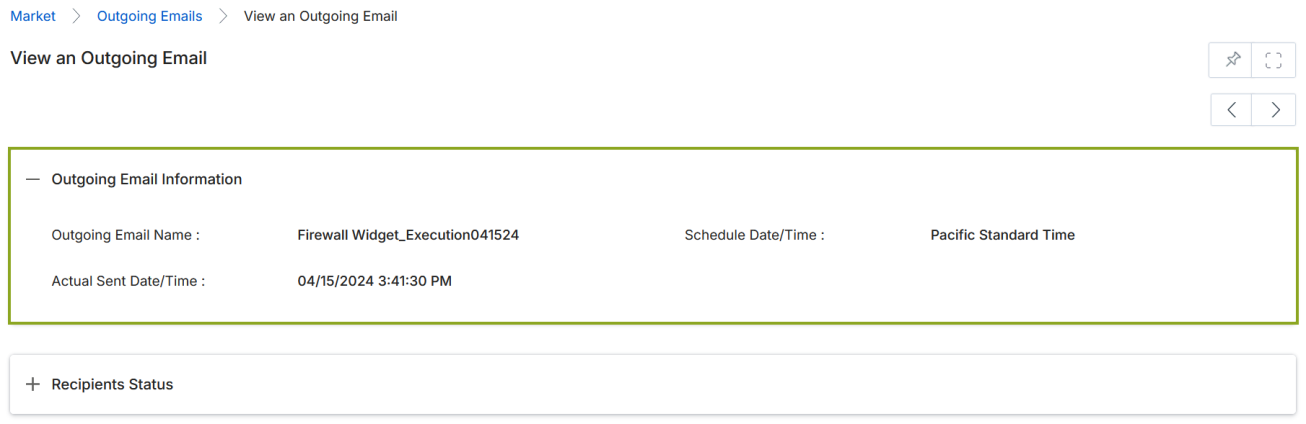
View Details of an Outgoing Email
Click the name of any email in the listing to open its detail page. The detail page contains two sections:
- Outgoing Email Information — shows the Outgoing Email Name, Schedule Date/Time, and Actual Sent Date/Time.
- Recipients Status — shows each recipient's Account Name, Name, Email Address, and delivery Status (e.g., B = Clicked or Email Sent).
Creating an Email Copy
Select a record in the Outgoing Emails list and click Set-Up to create an editable copy. Note: emails with a status of Draft cannot be copied.
The Copy Email page is a four-step wizard:
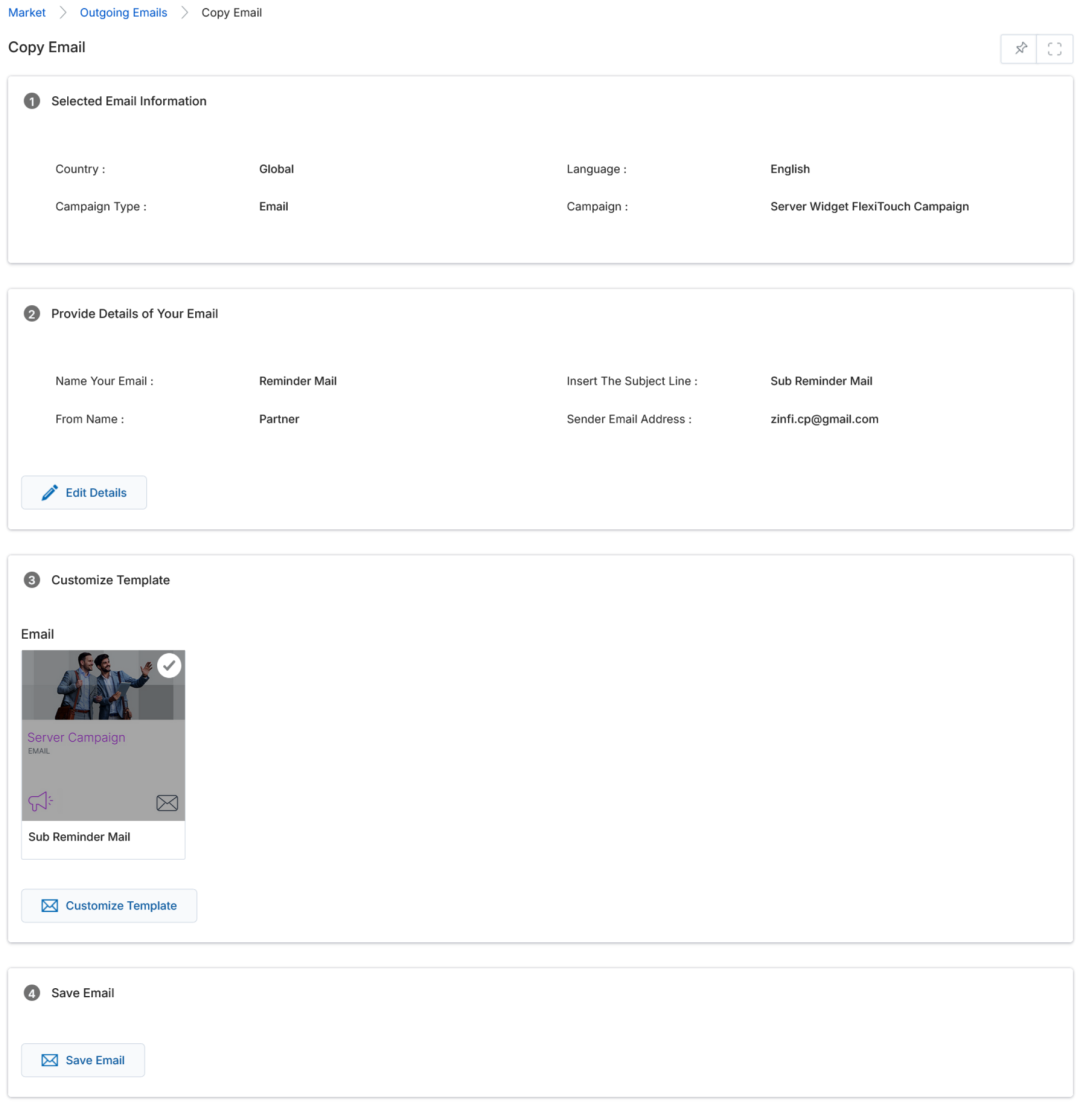
Step 1 — Selected Email Information is read-only and shows the Campaign Name, Campaign Type, Language, and Country the original email is associated with.
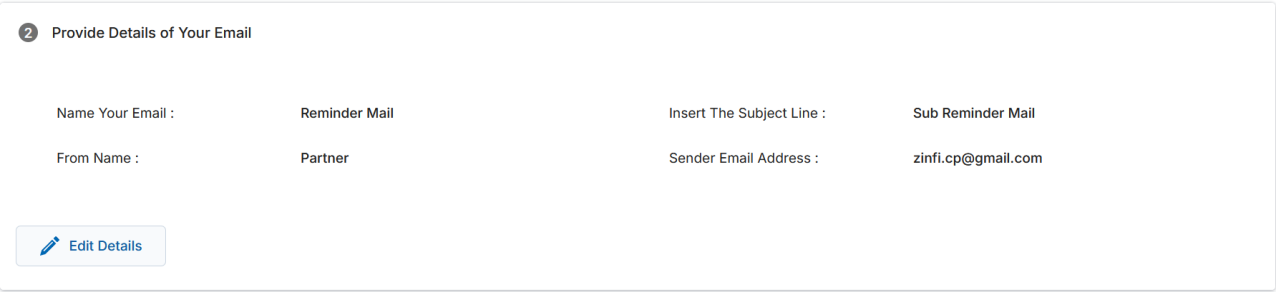
Step 2 — Provide Details of Your Email shows the email name, subject line, sender name, and sender email address. Click Edit Details to update any of these fields in a slide-out sidebar.

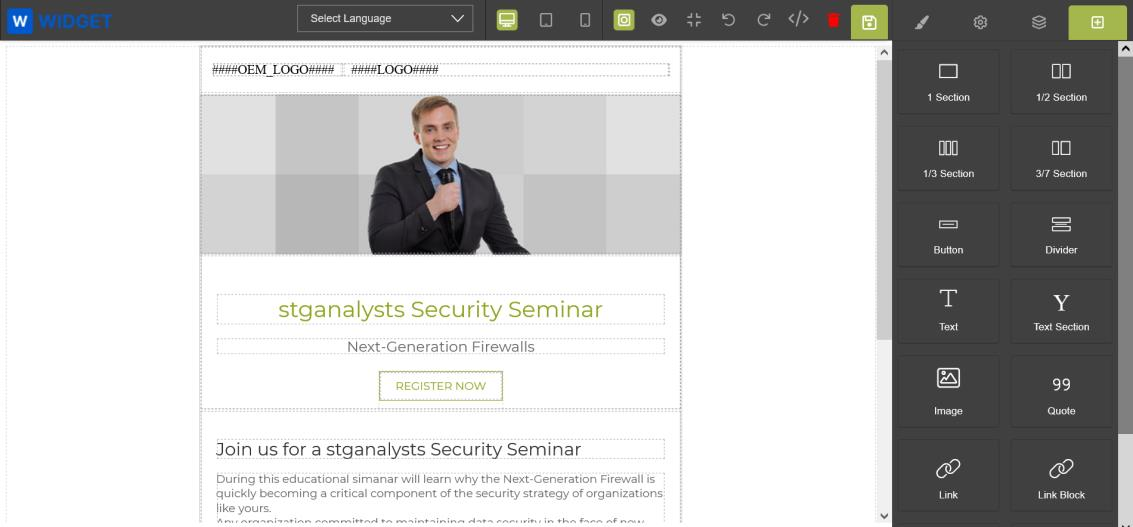
Step 3 — Customize Email Template lets you tailor the selected template using the state-of-the-art template editor. Click Customize Template to open the template in the slide-out editor. Clicking any image or text highlights that section for inline editing. Use Hashcodes (e.g., ####Name####, ####Email_Address####) to personalize with partner data from the User database.
Launch an Email
An email can only be launched when its status is Draft or Copied. Select the record in the listing and click Launch.
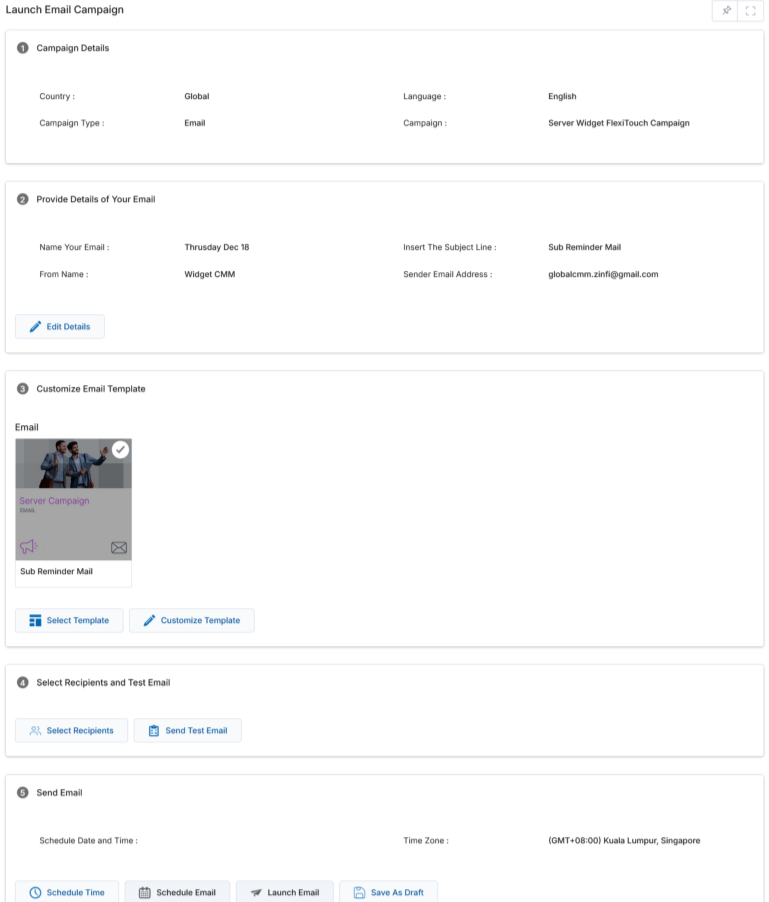
The Launch Email Campaign page is a five-step wizard:
| Step | Description | Editable? |
|---|---|---|
| 1 — Campaign Details | Read-only view of Campaign Name, Campaign Type, Language, and Country. | No |
| 2 — Provide Details of Your Email | Email name, subject line, sender name, and sender address. Click Edit Details to modify. | Yes |
| 3 — Customize Email Template | Change the template (Select Template) or edit its content (Customize Template) using the inline editor. | Yes |
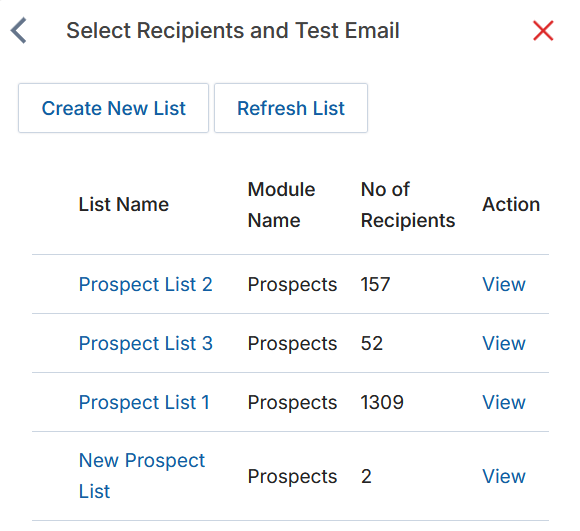
| 4 — Select Recipients and Test Email | Pick a mailing list of recipients and optionally send a test email to an internal list before launching. | Yes |
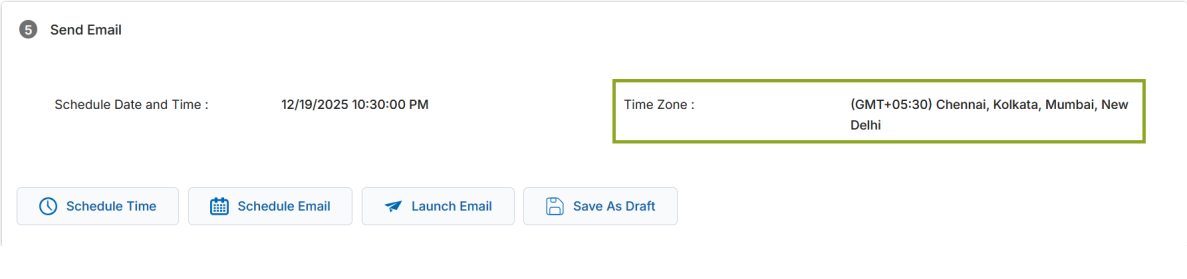
| 5 — Send Email | Schedule or immediately launch the email. Options: Schedule Email, Launch Email, Save as Draft. | Yes |
Step 4 — Select Recipients: click Select Recipients to open a slide-out panel listing all available mailing lists with their Module Name and No. of Recipients. You can also Create a New List or Refresh the List from this panel.
Step 5 — Send Email: The Time Zone from the user's profile is pre-populated. Click Schedule Time to set a specific date and time, then choose one of the three dispatch options:
- Schedule Email — queues the email for the scheduled time.
- Launch Email — blasts the email immediately.
- Save as Draft — saves the configuration as a draft without sending.
Unsubscribe Emails
Every email sent through the platform contains an unsubscribe link at the bottom. Recipients who click it are taken to a confirmation popup with two choices:
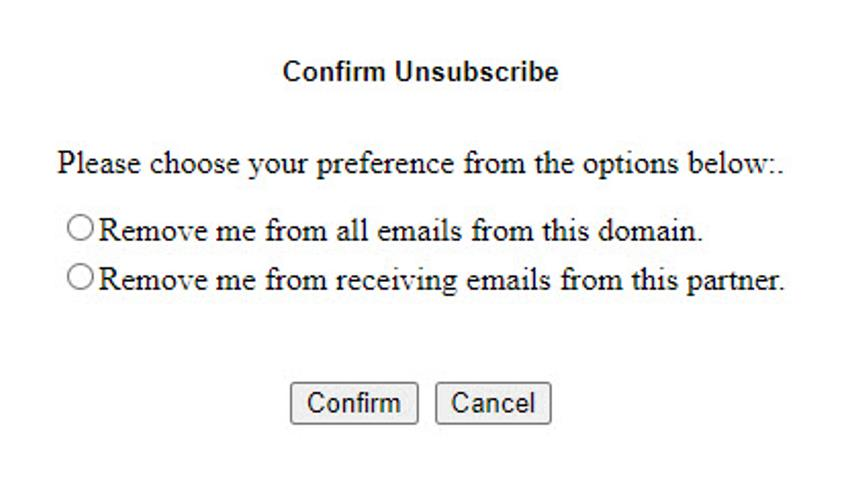
- Remove me from all emails from this domain — the recipient will no longer receive any emails from this platform regardless of partner.
- Remove me from receiving emails from this partner — the recipient opts out of emails from this specific partner only.
For both options, the system is updated automatically to restrict further emails per the chosen policy.
Email Templates
Accessing Email Templates
- Click Market on the top menu.
- Click Emails > Email Templates in the left menu bar.

View Email Templates
The Email Templates listing supports both List View and Thumb View, sortable by Created On, Modified On, or Email Template Name. Switch between tabs for Assigned to You (templates assigned by the admin) and Created by You.
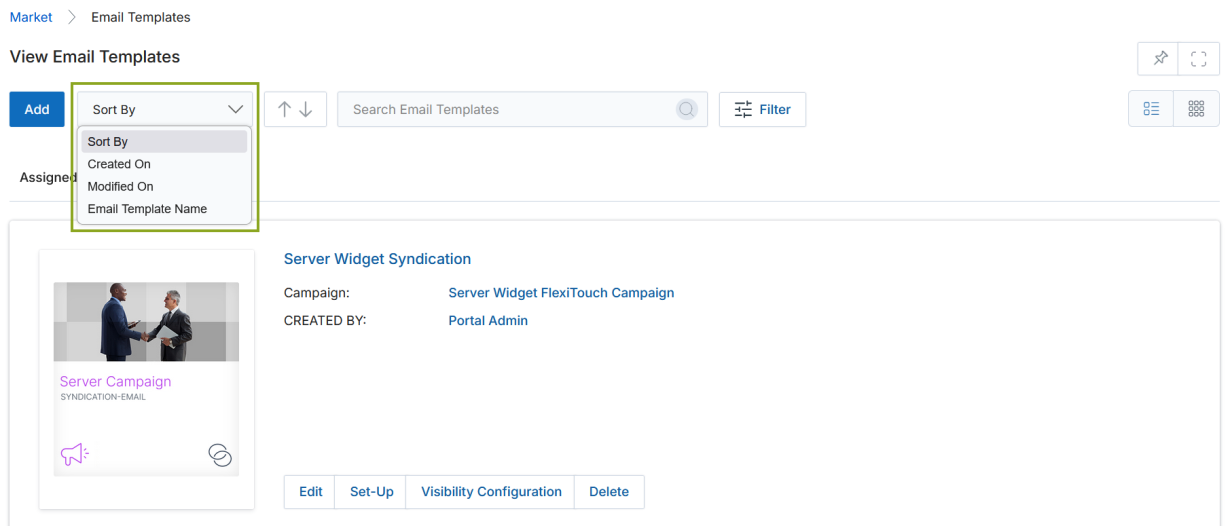

Available actions per template:
- Edit — Updates the template's metadata fields.
- Set-Up — Creates a duplicate copy of the template; the copy can then be modified before saving.
- Visibility Configuration — Associates countries, languages, and assignees (users or groups) to control who can see and use the template.
- Delete — Permanently removes the template.
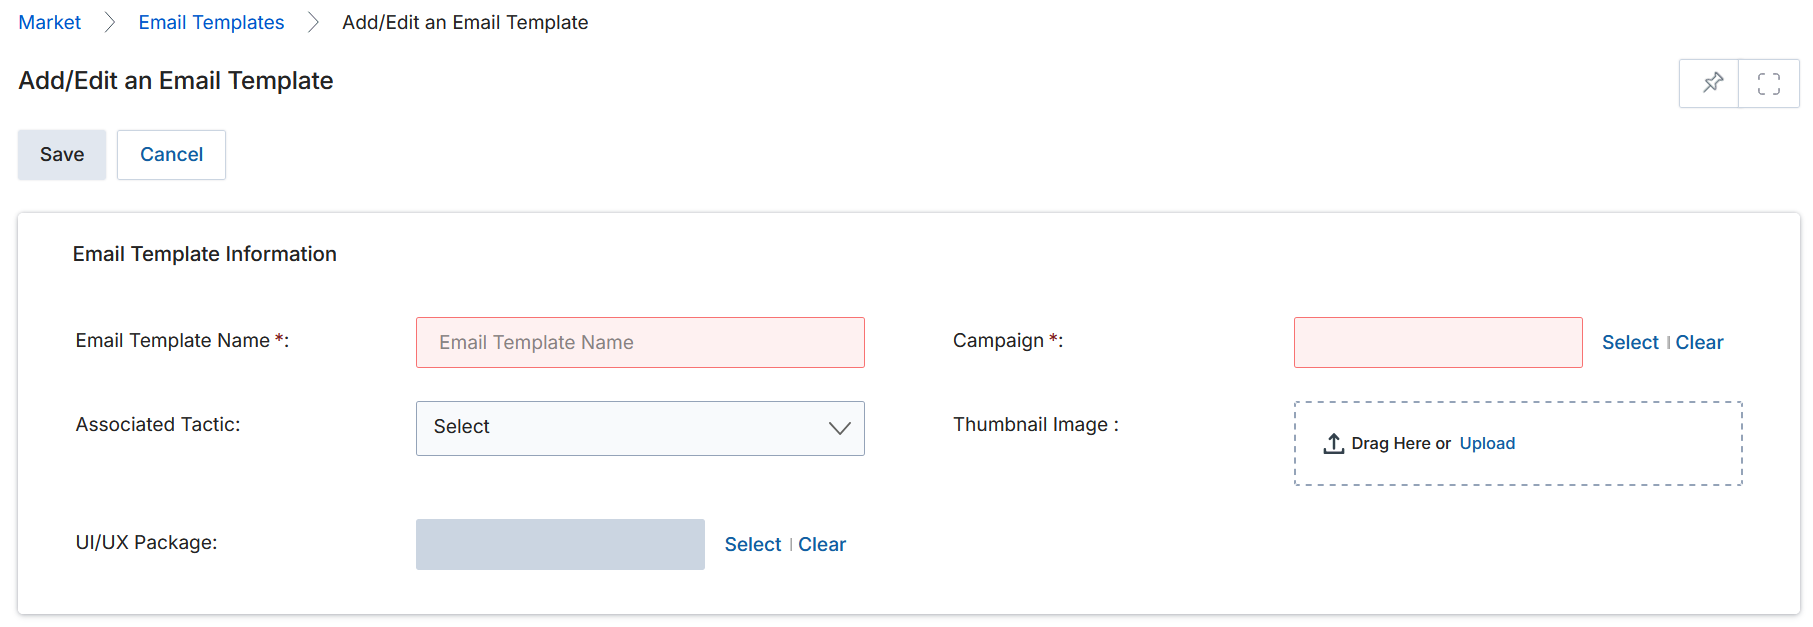
Add / Edit a New Email Template
Click Add to create a new template, or Edit on an existing template to modify its fields.
| Field | Description | Required |
|---|---|---|
| Email Template Name | Provide a descriptive name for the template. | Yes |
| Campaign | Select the campaign this template is associated with. | Yes |
| Associated Tactic | Choose the campaign type: Microsite, Event, Email, or Web Syndication. | No |
| Thumbnail Image | Upload a representative thumbnail image (drag-and-drop or browse). | No |
| Created by | Auto-populated with the name of the user creating the template. | Auto |
| UI/UX Package | Select the CSS/design package to apply to the template layout. | No |
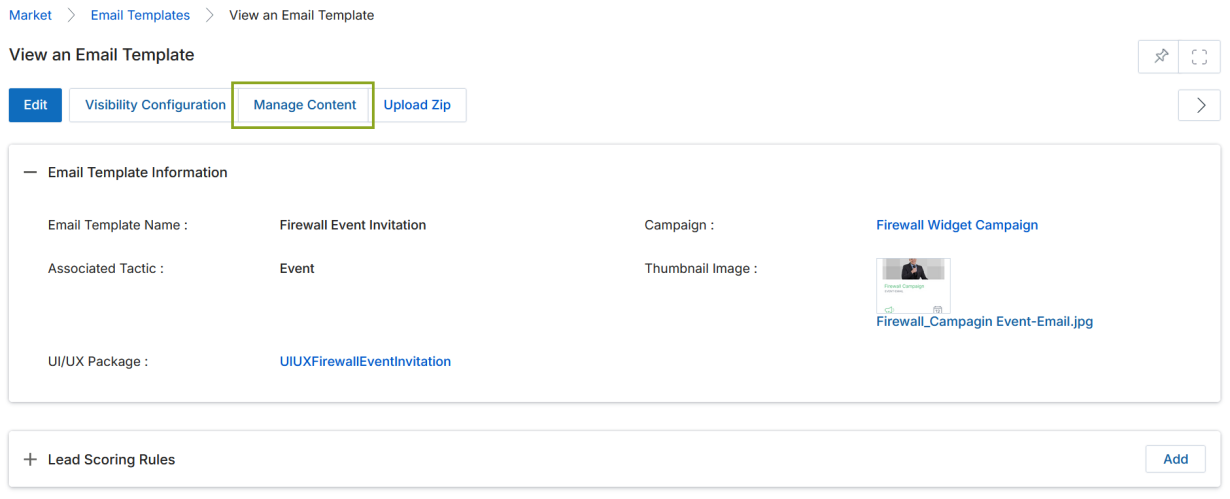
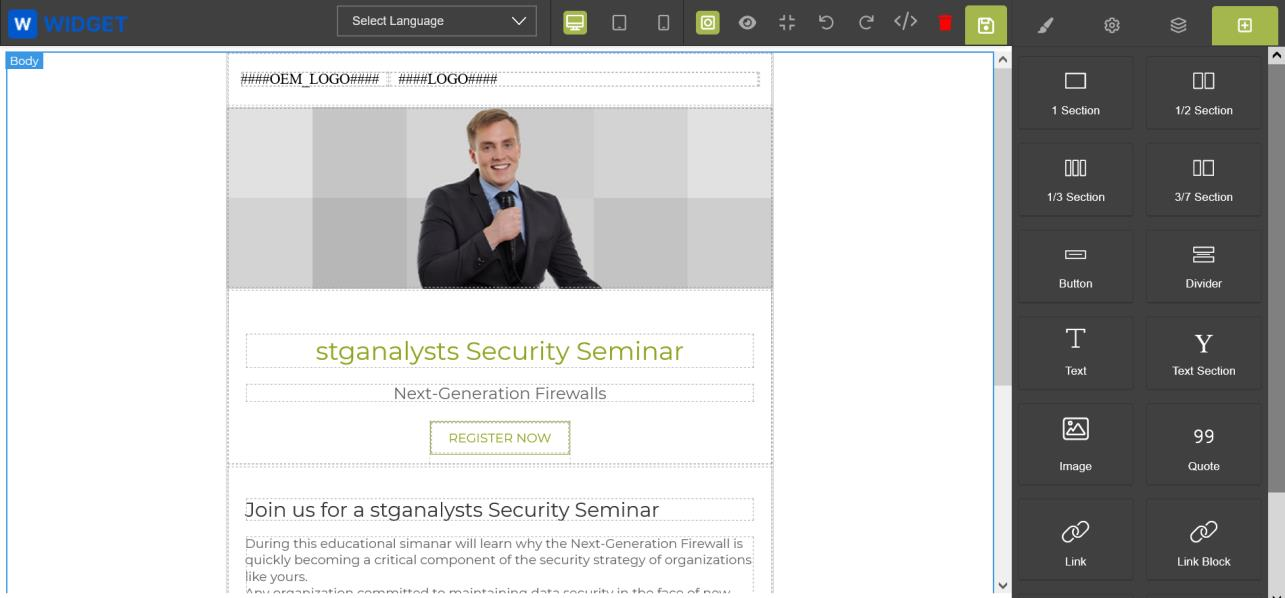
Creating & Managing Template Content — Drag & Drop CMS Editor
From the template listing, click the template title (in blue) to open the View an Email Template detail page, then click Manage Content to enter the Drag & Drop CMS Editor.

Two approaches to building template content:
- Drag components from the right sidebar (Sections, Buttons, Dividers, Text, Image, Quote, Link) onto the canvas, then click inside any element to access its editor tools.
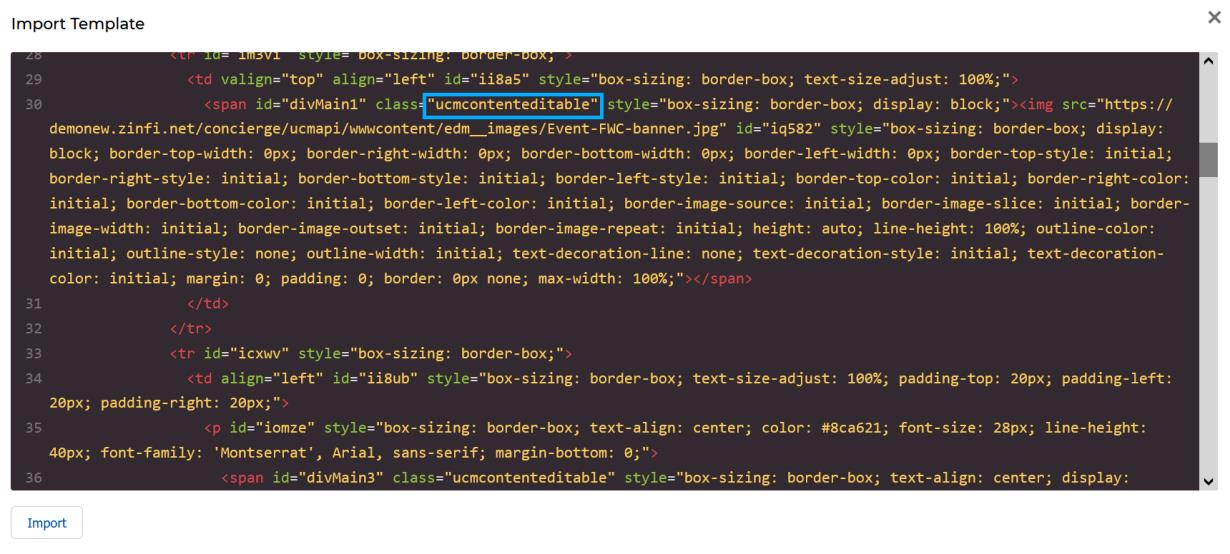
- Import HTML — click the HTML editor icon (
</>) to paste existing HTML directly into the Import Template window, then click Edit to render it.
Once content is on the canvas, editing options include:
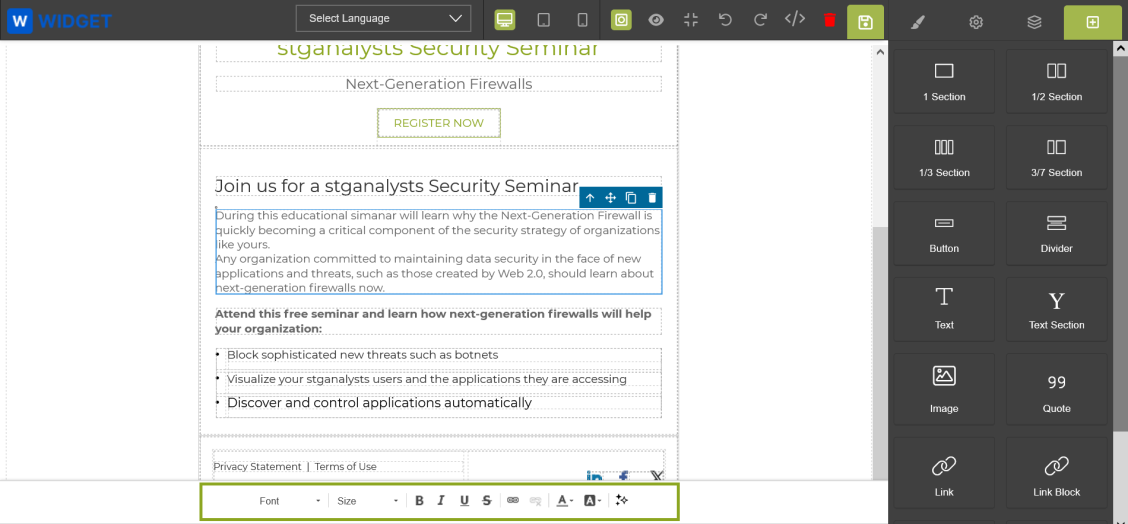
- Double-click a section — opens simple WYSIWYG tools for font, alignment, bold, italic, and color.
- Paint brush icon (right sidebar) — opens the full suite of dimension, typography, and decoration controls for the selected element.
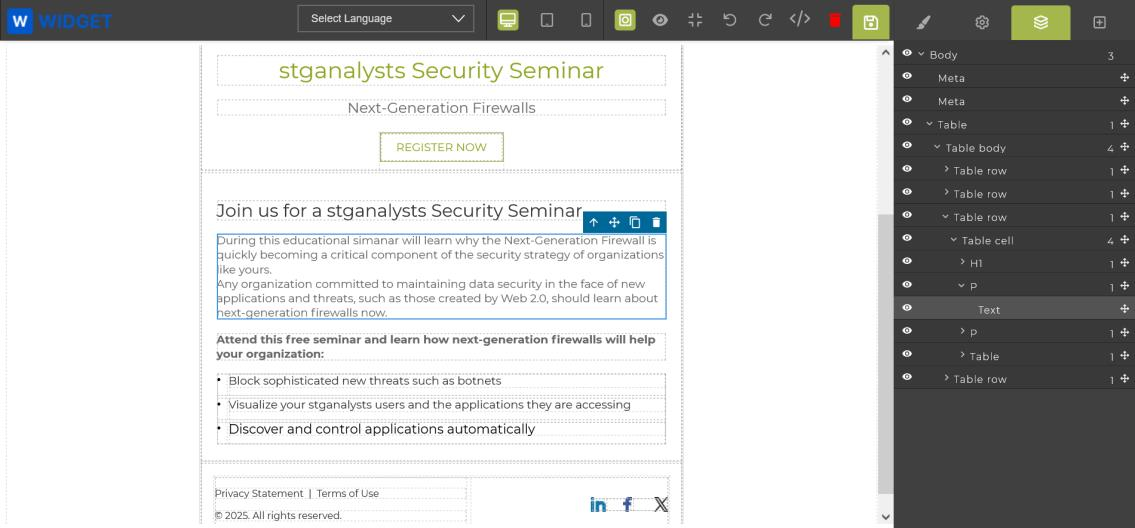
- Layer Manager — shows the full template structure as nested tables, columns, and rows.
To personalize a template with partner data, use Hashcodes in the template body. For example, ####Name#### inserts the partner's name, and ####Email_Address#### inserts their email address. Hashcode-driven templates work for both Single and Multi-Touch campaigns.
When finished editing, click the Save (disk) icon in the upper right of the editor to save your work.
Translating Your Email Template into Another Language
Use the built-in Google Translate plug-in to create a translated copy of any template for regional users.
- From the Email Templates listing, click Set-Up on the template you want to translate to make a copy.
- Click Edit Details to rename the copy (e.g., append the target language to the name).
- Click Save Email at the bottom without selecting Customize Template.
- Return to Emails > Email Templates and click the title of your new copy.
- Click Manage Content to enter the Drag & Drop CMS Editor.
- In the editor, click the Select Language dropdown in the centre of the editor toolbar.
- Choose the target language (e.g., Spanish). The entire template translates instantly.
- Review the translation for accuracy, then click the Save (disk) icon to save.
Making Zones/Sections Editable or Non-Editable
Admins can control which sections partners can customize and which are locked.
- In the Drag & Drop CMS Editor, select the section you want to control and click the HTML Editor icon.
- Locate the
<span>or<div>tag surrounding the section. - To make the section editable by partners — add
class="UPMcontenteditable"to the tag. - To make the section non-editable (locked) — remove the
class="UPMcontenteditable"attribute from the tag.
UPMcontenteditable class tag in the HTML marks a section as editable by partners.The Preview and Manage Contents view in the CMS Editor also lets you preview the template as it would appear on Desktop, Tablet, and Mobile devices — useful for checking layout before publishing.
Creating Lead Scoring Rules
Lead Scoring Rules assign point values to recipient interactions (email opens, clicks) — allowing the system to score leads based on engagement level.
- From the Email Templates listing, click the template title to open the detail page.
- Scroll to the Lead Scoring Rules related list at the bottom.
- Click Add to create a new rule, or the pencil icon to edit an existing one.
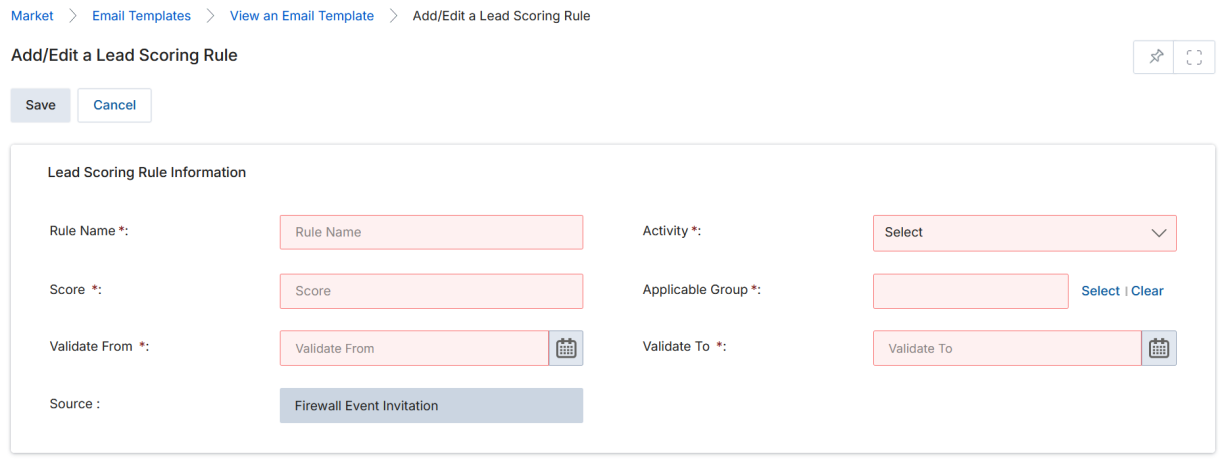
| Field | Description |
|---|---|
| Rule Name | A descriptive name for the scoring rule. |
| Activity | The trigger event: Open Email or Click Email. |
| Applicable Group | The User Group (Partner or Admin) sending this email template, to whom the rule applies. |
| Score | Point value assigned when the activity is triggered (e.g., 20, 35). |
| Validate From | The date from which this rule is active. |
| Validate To | The date until which this rule is active. |
| Source | Read-only. Auto-populated with the email template name. |

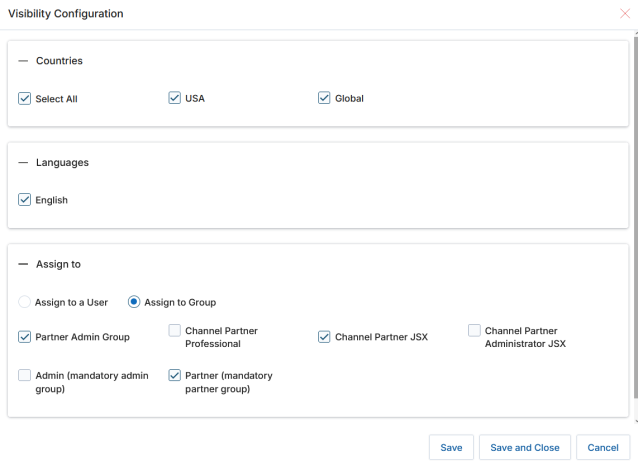
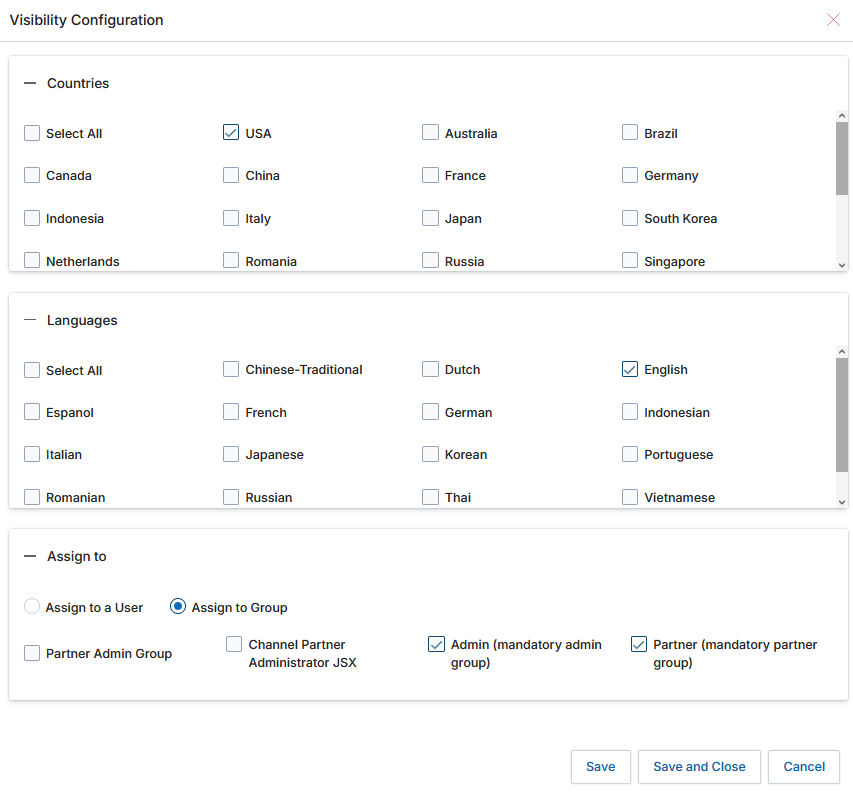
Audience Your Template(s) to the Right Users
Visibility Configuration controls which users and groups can see a given email template. Access it by clicking the Visibility Configuration button on the template detail page.
- Countries — which country-scoped portals can see this template.
- Languages — which language-configured users can access it.
- Assign to — specific individual users or user groups (e.g., Partner Admin Group, Channel Partner Professional).
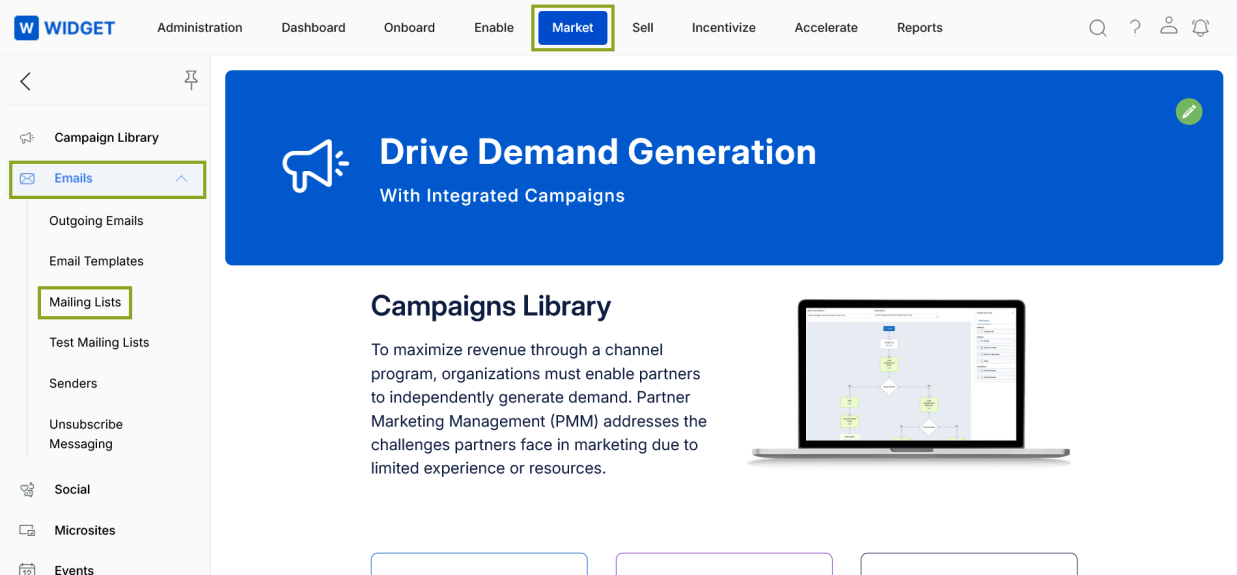
Mailing Lists
Accessing Mailing Lists
- Click Market on the top menu.
- Click Emails > Mailing Lists in the left menu bar.
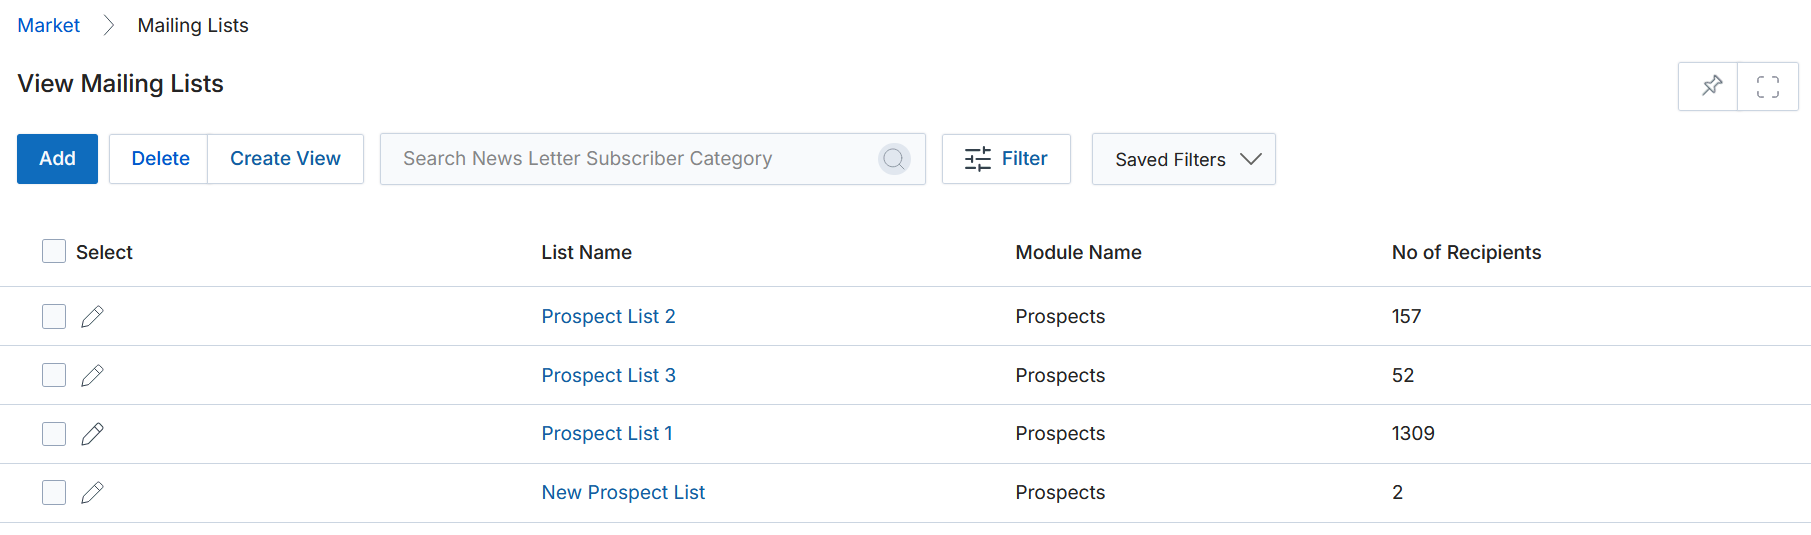
View Mailing Lists
The Mailing Lists page shows all lists with their List Name, Module Name (associated application), and No. of Recipients.
Top action bar options:
- Add — Create a new email list based on Module Name and audience.
- Delete — Remove selected lists.
- Create View — Customize the column layout of the listing.
- Filter — Open a search pop-up to find specific lists.
- Saved Filters — Access, edit, or delete previously saved search configurations.
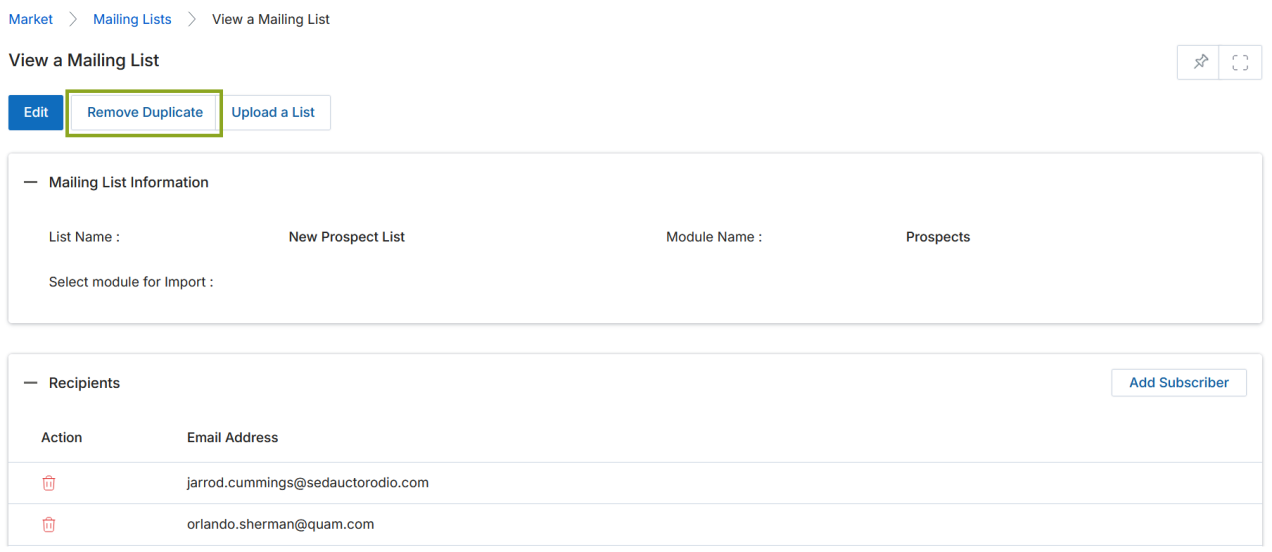
View List Details
Click any List Name to open the detail page. The detail page shows the Mailing List Information section (List Name, Module Name) and the Recipients section listing all email addresses in the list.

From the detail page you can:
- Edit — Update the List Name and Module Name.
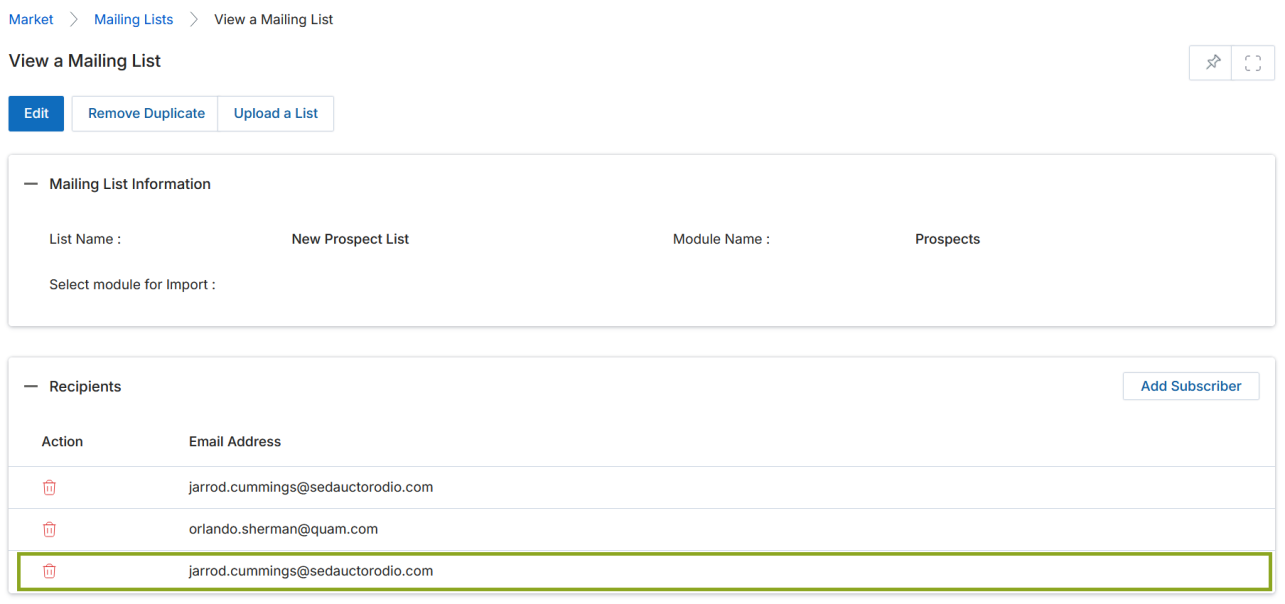
- Remove Duplicate — Automatically remove duplicate records based on email address.
- Upload a List — Import records from an XLSX file; imported records also appear in the relevant application listing (e.g., Prospects).
- Add Subscriber — Add individual recipients from the Recipient List popup.
Add / Edit an Email List
Click Add to create a new list, or the pencil icon on an existing record to edit it.
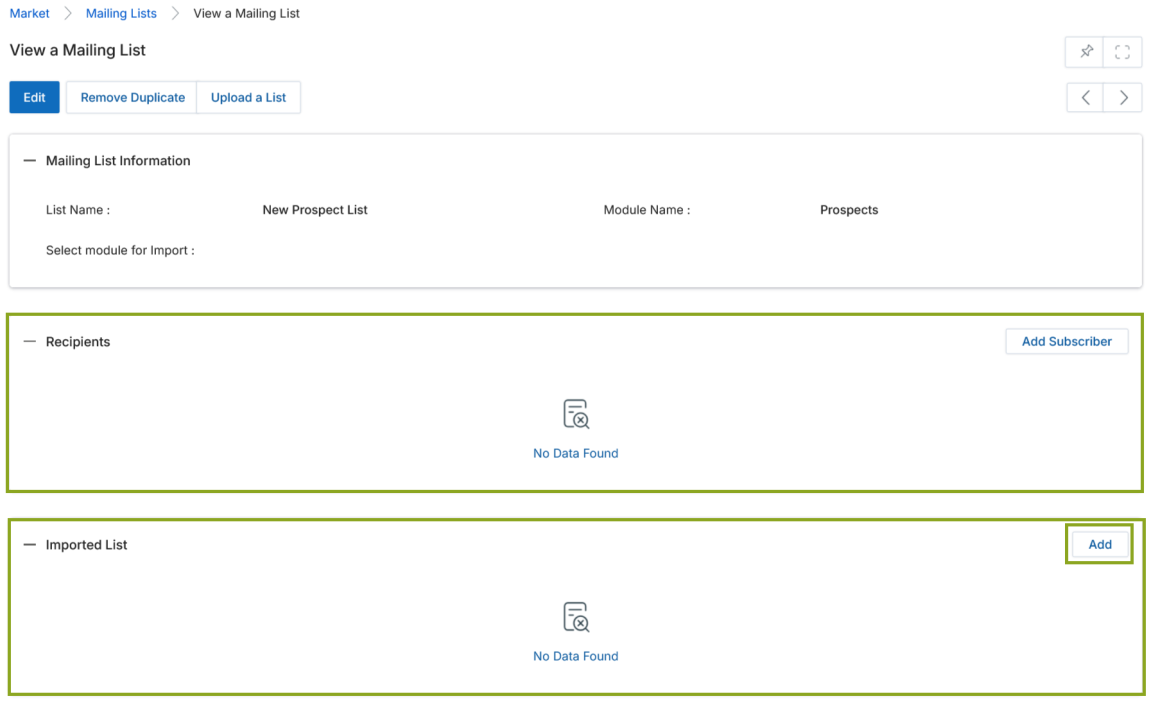
Adding Records in a Mailing List
Records can be added to a mailing list from imported files (bulk) or individually.
Adding from imported files:
- From the View a Mailing List detail page, click the Add button in the Imported List section.
- The View Imports popup opens — select the desired import and click Save.
- The imported records appear in the Recipients section and the Import Engine link appears in the Imported List section.
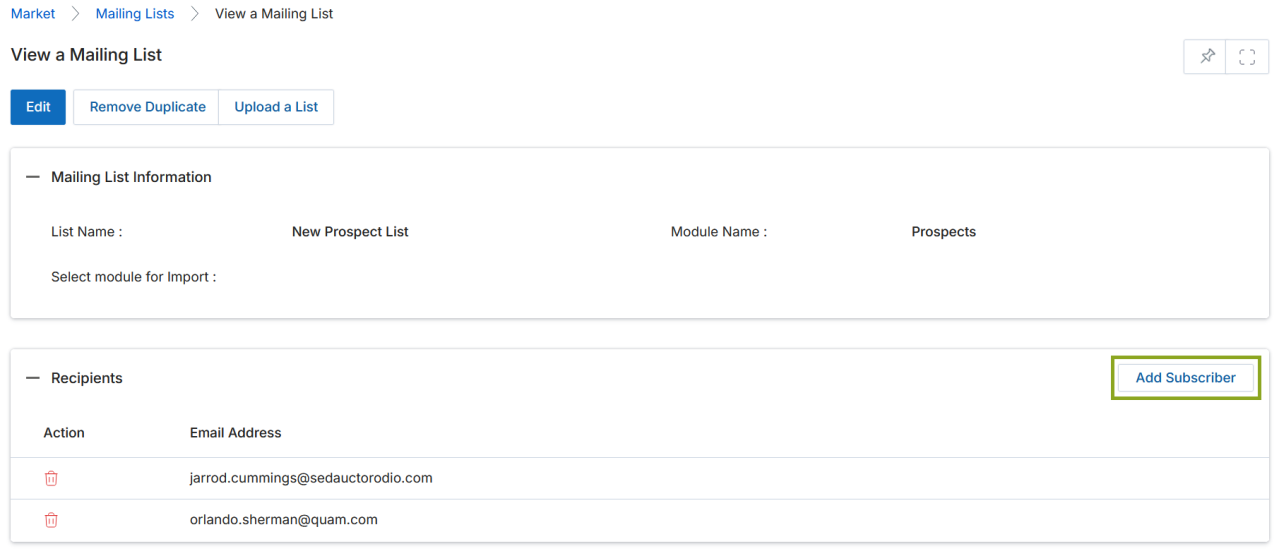
Adding individual subscribers:
- Click Add Subscriber in the Recipients section.
- The Recipient List popup opens — search for and select a record, then click Add.
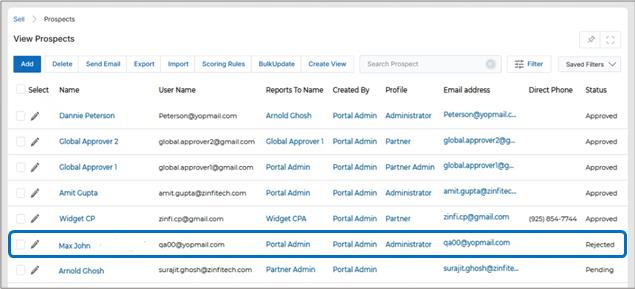
When a list of records is imported to create a Mailing List, the same records are also added to the application for which they were selected (e.g., importing Prospects adds them to the Prospects listing page in Sell). The same set of records can be reused across multiple mailing lists.
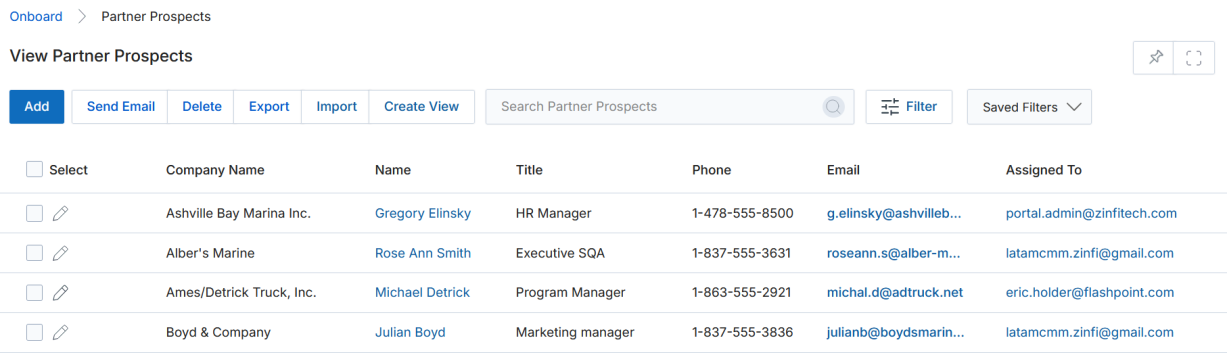
Bounce Checker
At the time of uploading a partner or end-user list, UPM automatically runs it through the bounce checker tool to validate email addresses before sending. Invalid email addresses are flagged in the Email Verification column and can be deselected before use.
- Partner lists (uploaded by vendors) — Onboard > Partners application > Partner Prospects.
- End-user lists (uploaded by partners) — Sell zone > Leads application > Prospects.
Auto-Block Users Based on Bounce Rate
Any UPM user whose email campaign generates a bounce rate exceeding 5% of the total list size will be automatically blocked from accessing the UPM portal. The blocked user receives a system email notification and must contact the portal admin to restore access.
Test Mailing List
Before launching an email campaign, a test email is sent to an internal recipient list to verify that the email layout, design, and links are working correctly across webmail clients, email clients, and mobile apps.
Accessing Test Mailing Lists
- Click Market on the top menu.
- Click Emails > Test Mailing List in the left menu bar.

View Test Emails
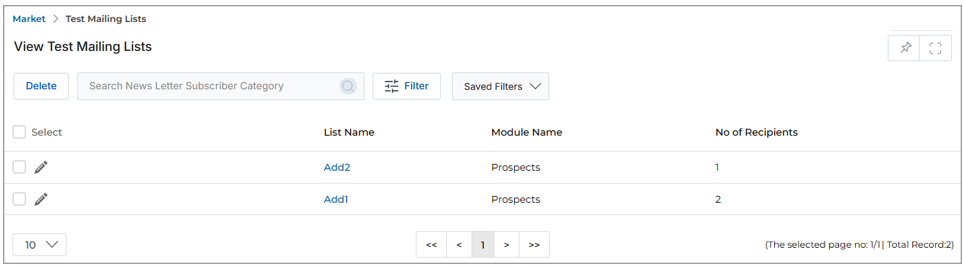
The View Test Mailing Lists page displays all test lists with their List Name, Module Name, and No. of Recipients. Click any List Name to open the detail page.
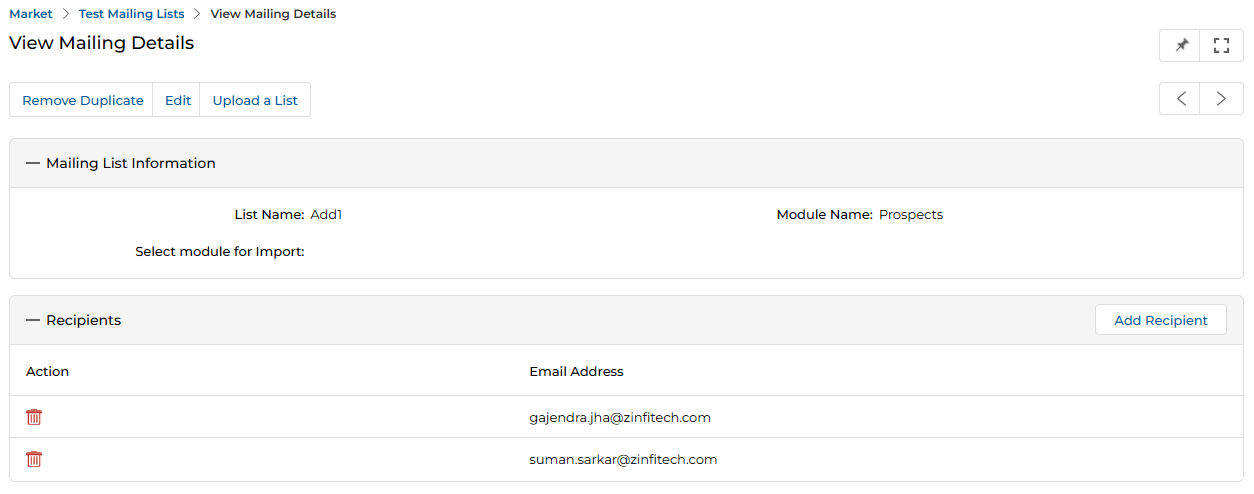
View Test Email Details
The detail page for a test mailing list shows:
- Mailing List Information — List Name and Module Name.
- Recipients — all email addresses in the test list, with options to Add Recipient or delete individual recipients using the trash icon.
Available actions on the detail page:
- Edit — Update the list name.
- Remove Duplicate — Remove any duplicate entries from the test list.
- Add Recipient — Add a new internal test recipient to the list.
Senders
The Senders section manages the verified "From" email addresses that can be used when launching campaigns. Only addresses registered here are available in the Sender Email Address dropdown on the email launch forms.
Accessing Manage Senders
- Click Market on the top menu.
- Click Emails > Senders in the left menu bar.
View Senders
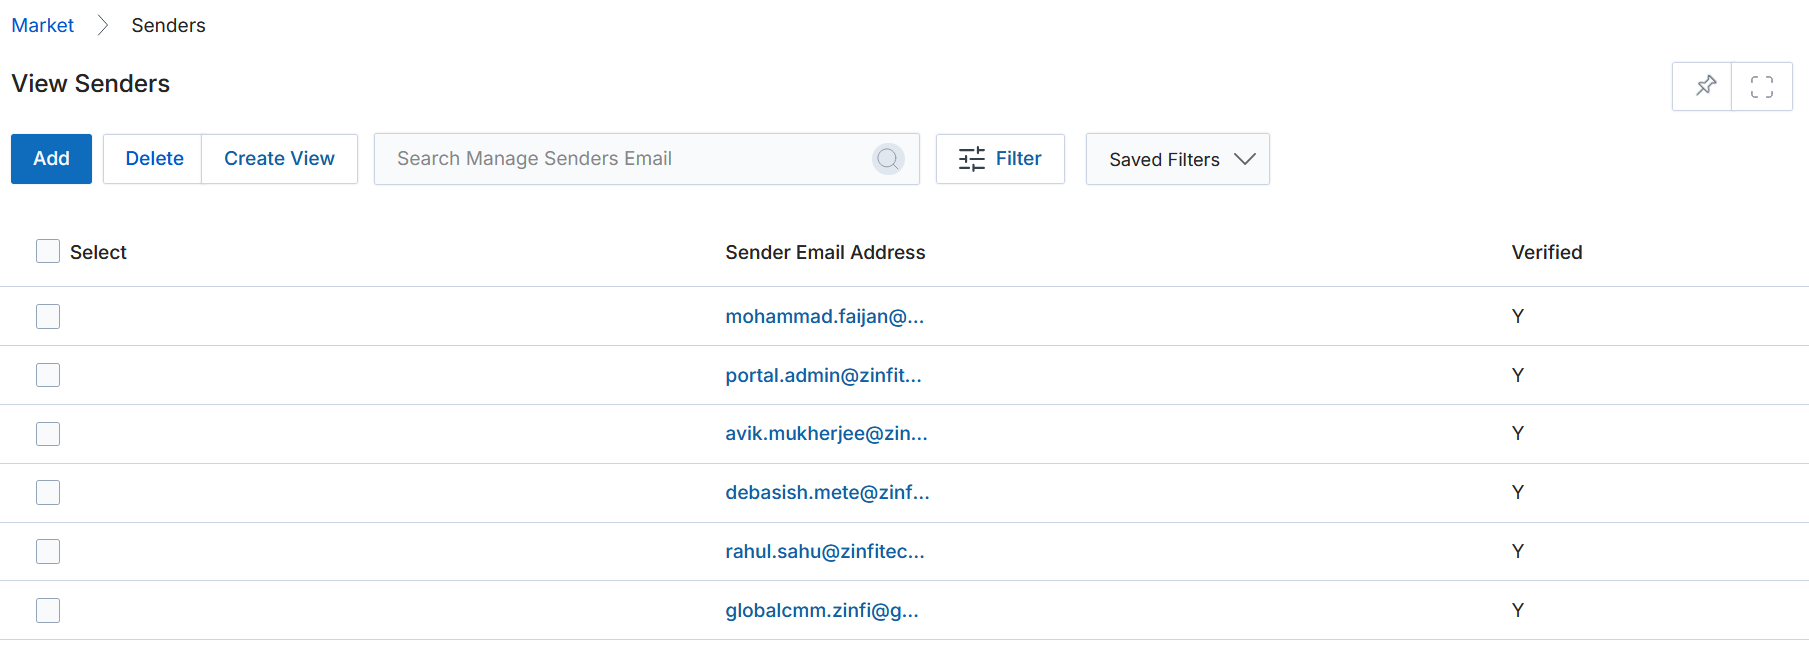
The View Senders listing shows all registered sender addresses with their Verified status (Y/N).

Available actions:
- Add — Register a new sender email address.
- Delete — Remove selected sender(s) from the list.
- Create View — Customize the column layout.
- Search / Clear Search / Saved Searches — Filter and find specific sender addresses.
- Edit (pen icon) — Edit an existing sender record.
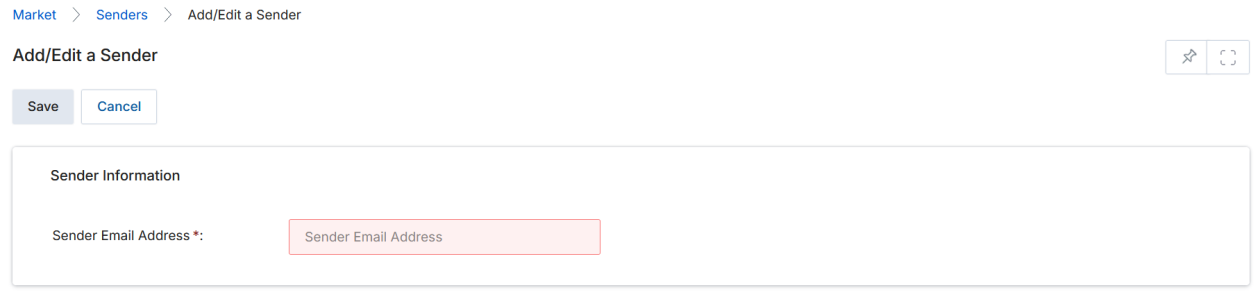
Add a Sender
- Click Add on the View Senders page.
- Enter the desired email address in the Sender Email Address field.
- Click Save to register the address, or Cancel to return without saving.