Introduction
A microsite is an individual web page or a small cluster of web pages that act as a separate entity for a brand. A microsite typically lives on its own domain, but some microsites operate as a subdomain.
Microsites can be used to help brands achieve a number of things. You can use them to highlight a specific campaign, target specific buyer personas, tell a story, or inspire a specific call-to-action. Designed to be specific in nature with a narrow focus on a topic or issue, microsites allow your organization to highlight products and promotions across the channel through your partners. Content included in microsites is often shareable and interactive, incorporating graphics, videos, and integration across the web for a more holistic experience.
The Microsite & Landing Page Management module of ZINFI's UPM enables your organization to easily set up co-branded microsites or landing pages which partners can use to engage their prospects and customers via single-touch or multi-touch digital drip campaigns.
The module also supports Showcases (accessed via Web Syndication), which are product and content showcase pages that partners can use to syndicate vendor-approved content — including products, documents, and contact forms — directly to their own web presence.
- Microsites — Full co-branded multi-page websites tied to a campaign; ideal for roadshows, product launches, and drip campaigns.
- Showcases (Web Syndication) — Product-centric syndicated pages; ideal for embedding into partner portals with drag-and-drop product cards.
Manage Microsites — Overview & Navigation
The Manage Microsites section covers navigating to the microsite library, browsing and filtering microsites, configuring visibility, and accessing microsite details.
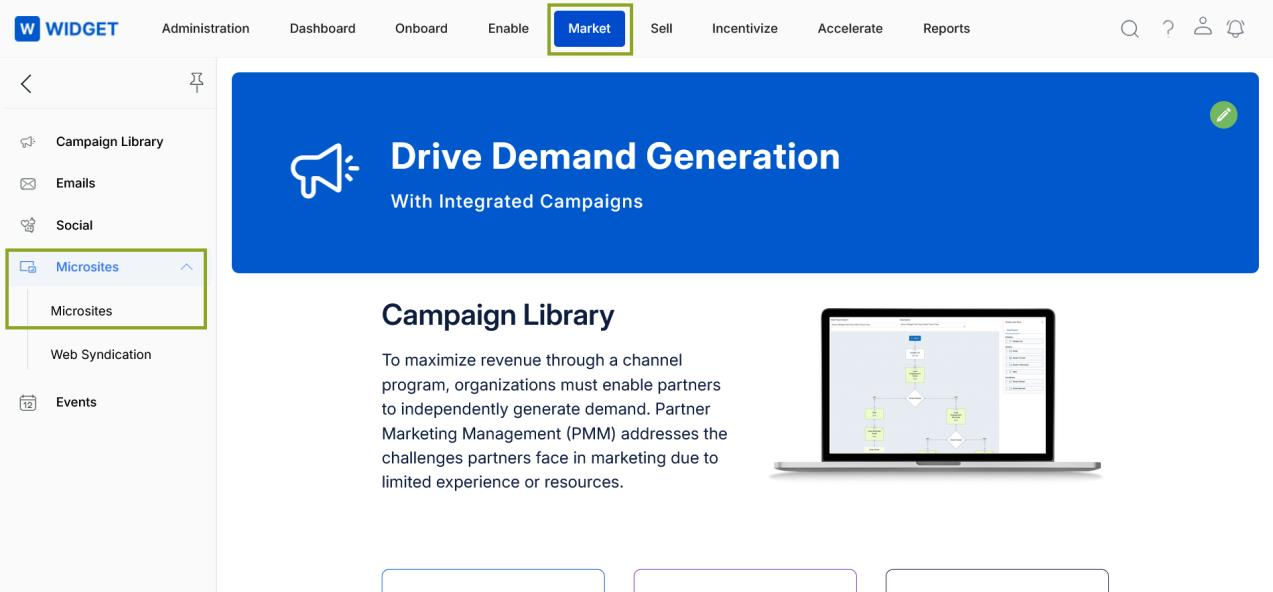
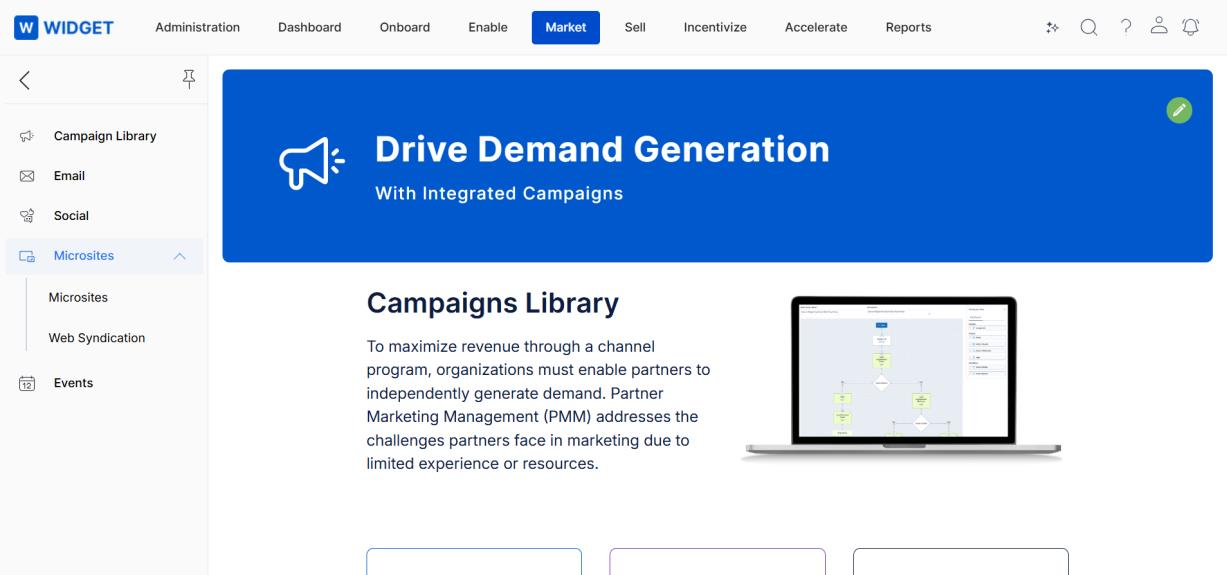
2.1 Accessing Microsites
- Click Market in the top navigation menu.
- Click Microsites > Microsites in the left sidebar.
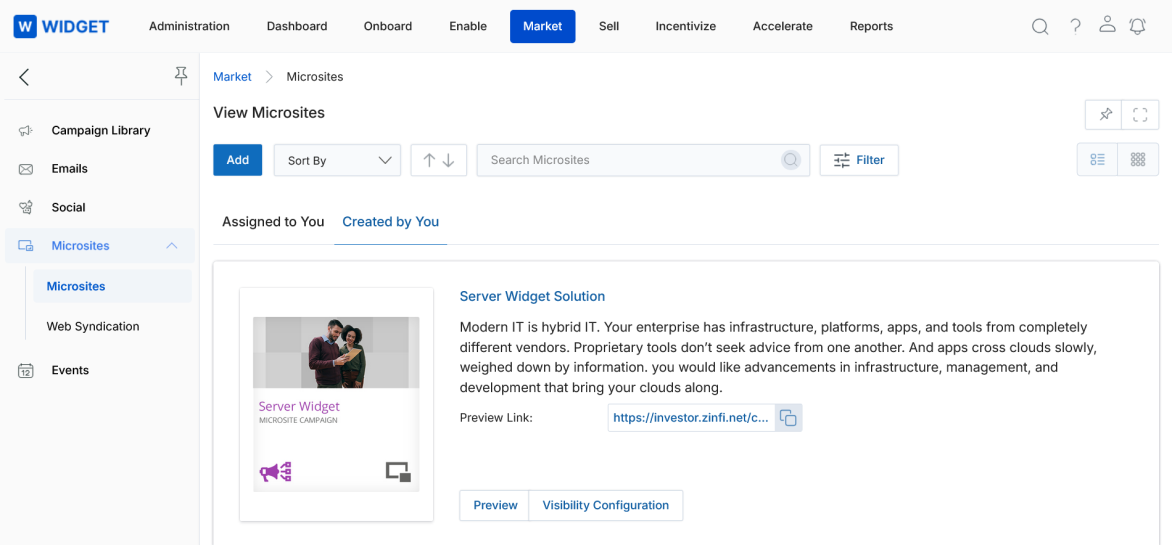
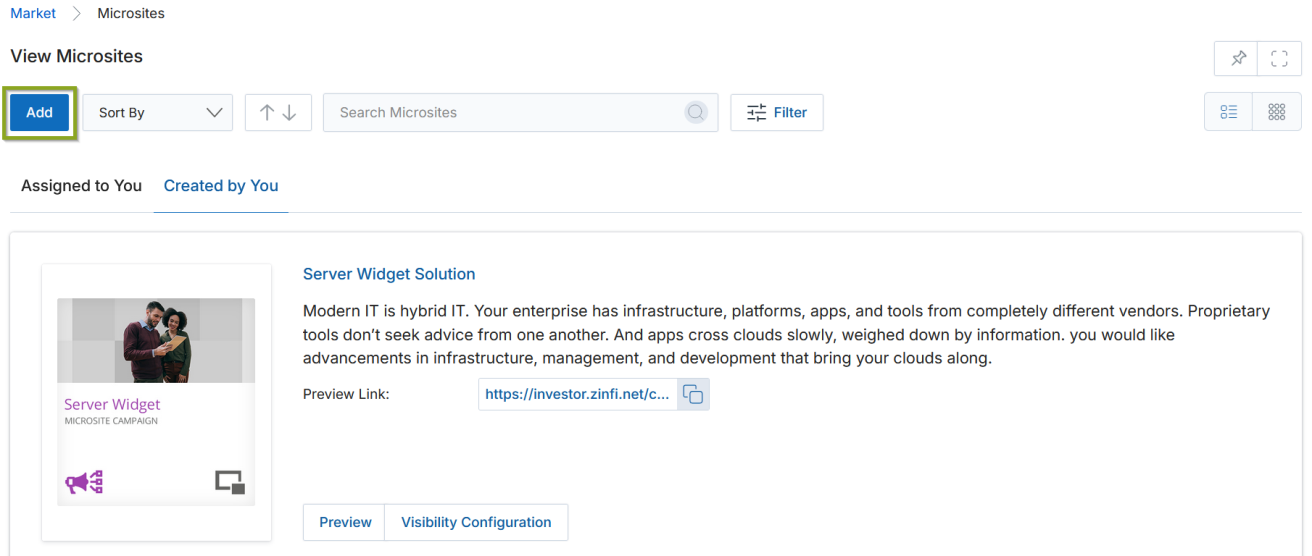
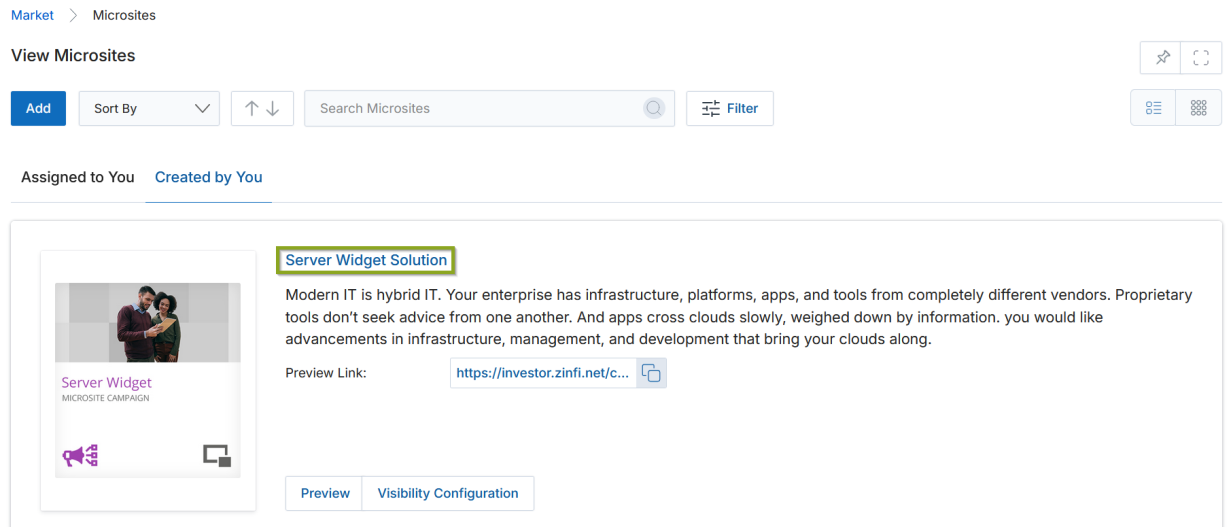
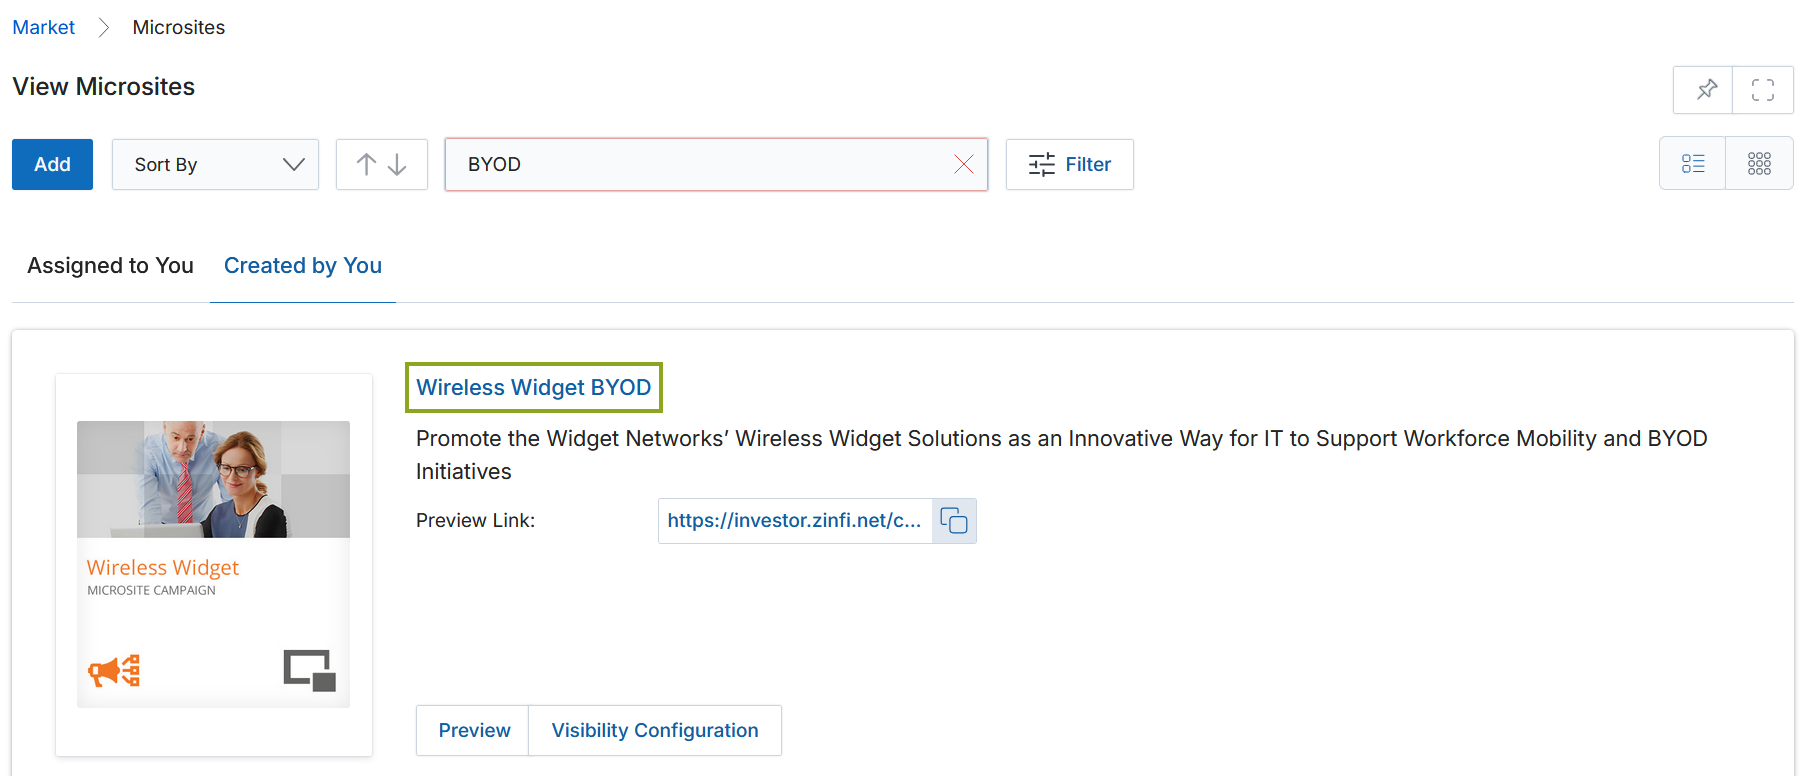
2.2 View Microsites
- Click Add to open a new microsite creation page.
- Click Sort By to sort the list by Created On, Modified On, or Microsite Name.
- Click the Assigned to You tab to view microsites assigned by OEM users, or the Created by You tab to view microsites you have added to the library.
- Toggle between List View and Thumb View using the icons in the upper-right of the page.
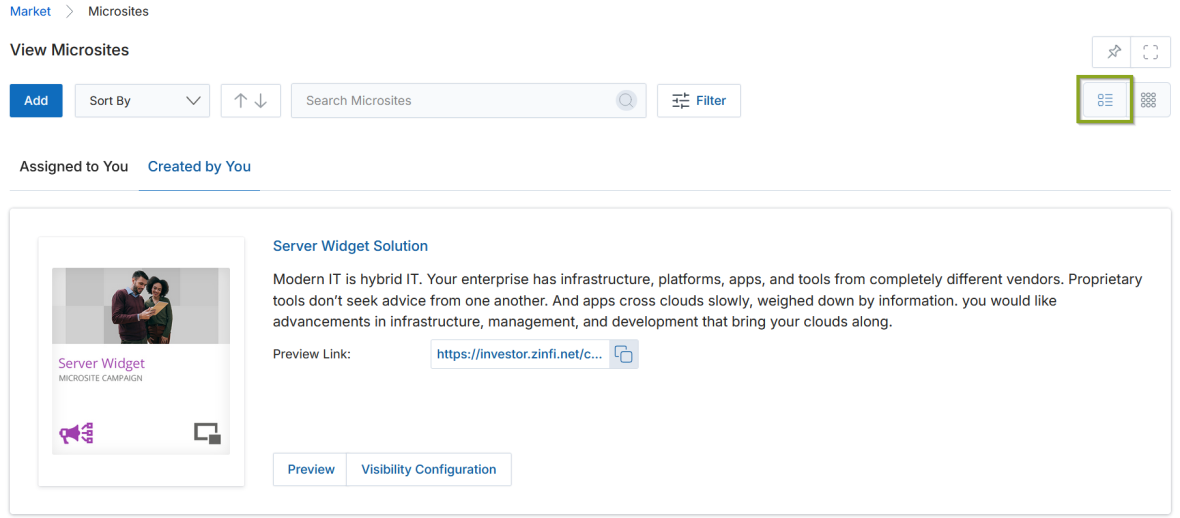
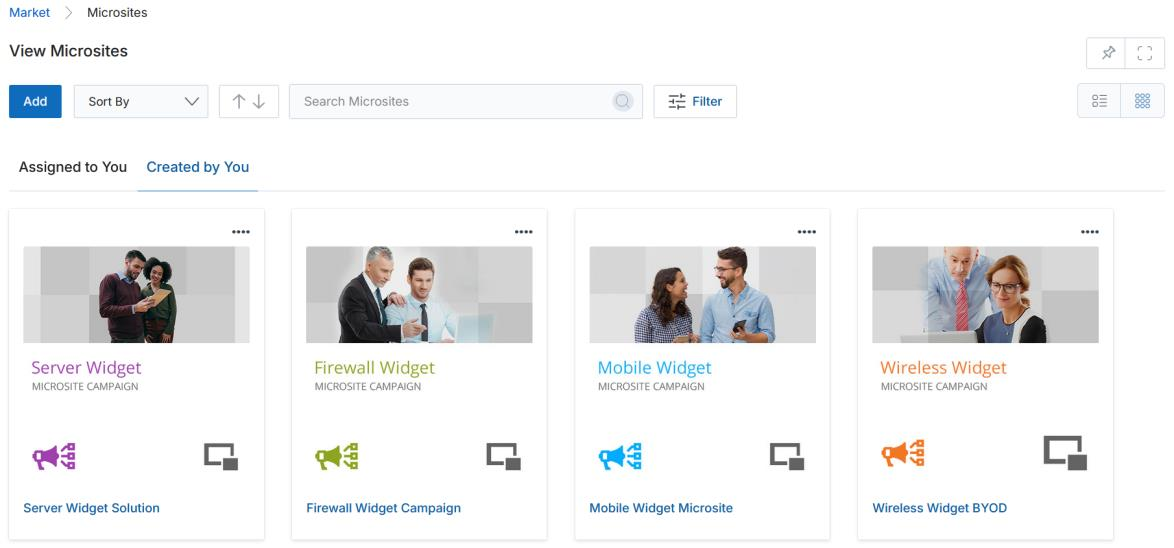
In the Thumb View, click the four dots (⋯) in the upper-right corner of a card to access Preview and Visibility Configuration. In List View, these buttons are already visible.
2.3 Visibility Configuration
To specify visibility criteria — Country, Language, and User/Group assignment — click Visibility Configuration on any microsite card or from the View Microsite detail page. Once the popup opens, choose your Countries, Languages, and Assignees, then click Save.

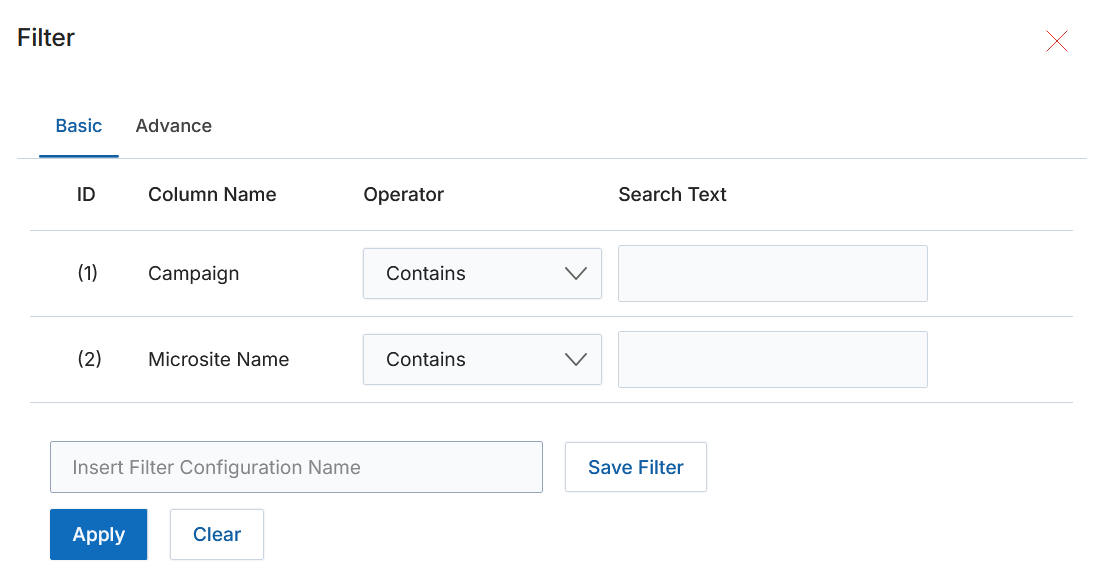
2.4 Filtering Microsites
To search for a specific microsite, click the Filter button to open the filter pane. Click the X icon to close it. Filter parameters include:
- Campaign — Searches for microsites associated with a specific campaign.
- Microsite Name — Type a keyword to search by name or title. Click Apply to show matching microsites.
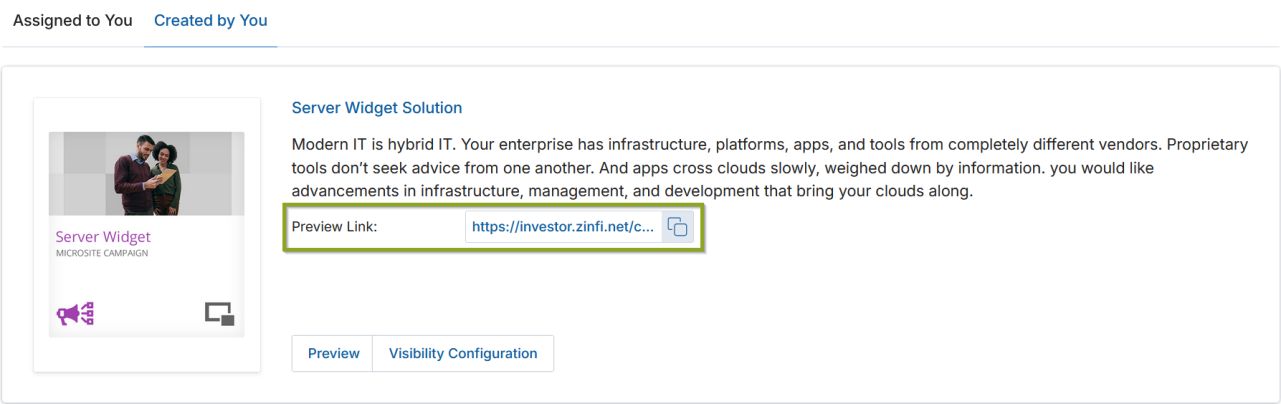
2.5 Preview Link & Clipboard
Each microsite card shows a Preview Link field. Click the clipboard icon next to the URL to copy it, or click the link itself to open the microsite preview in a new tab.
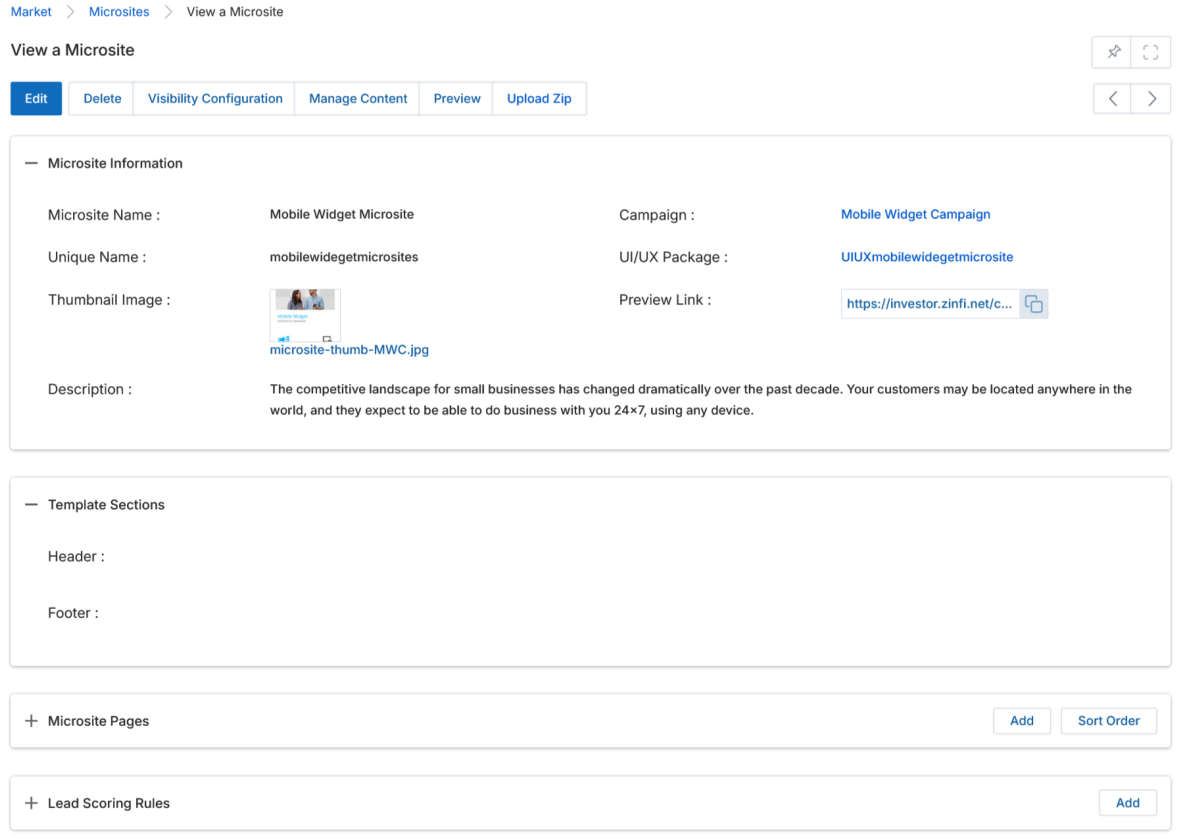
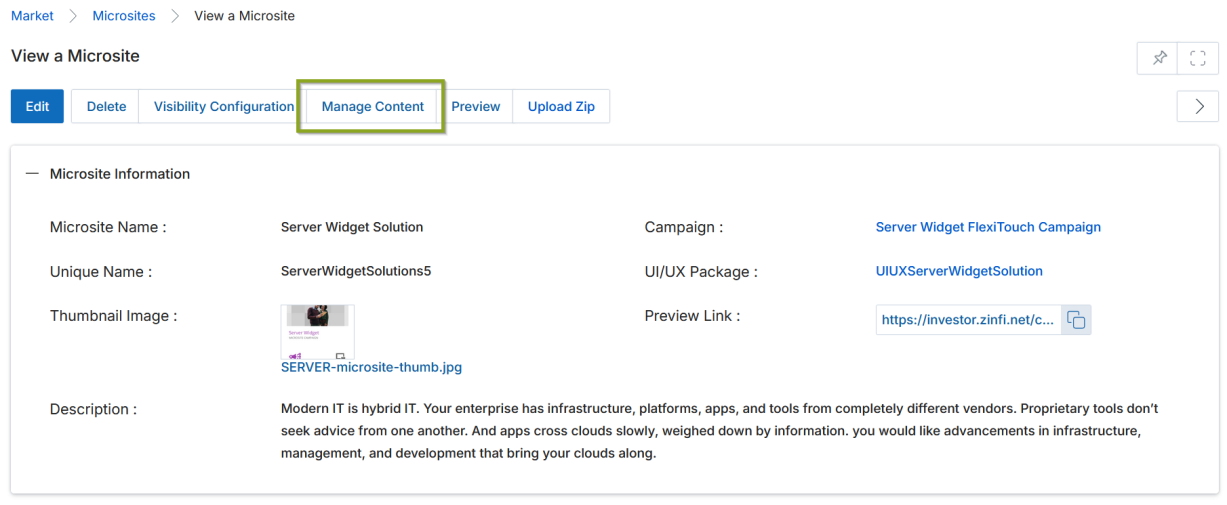
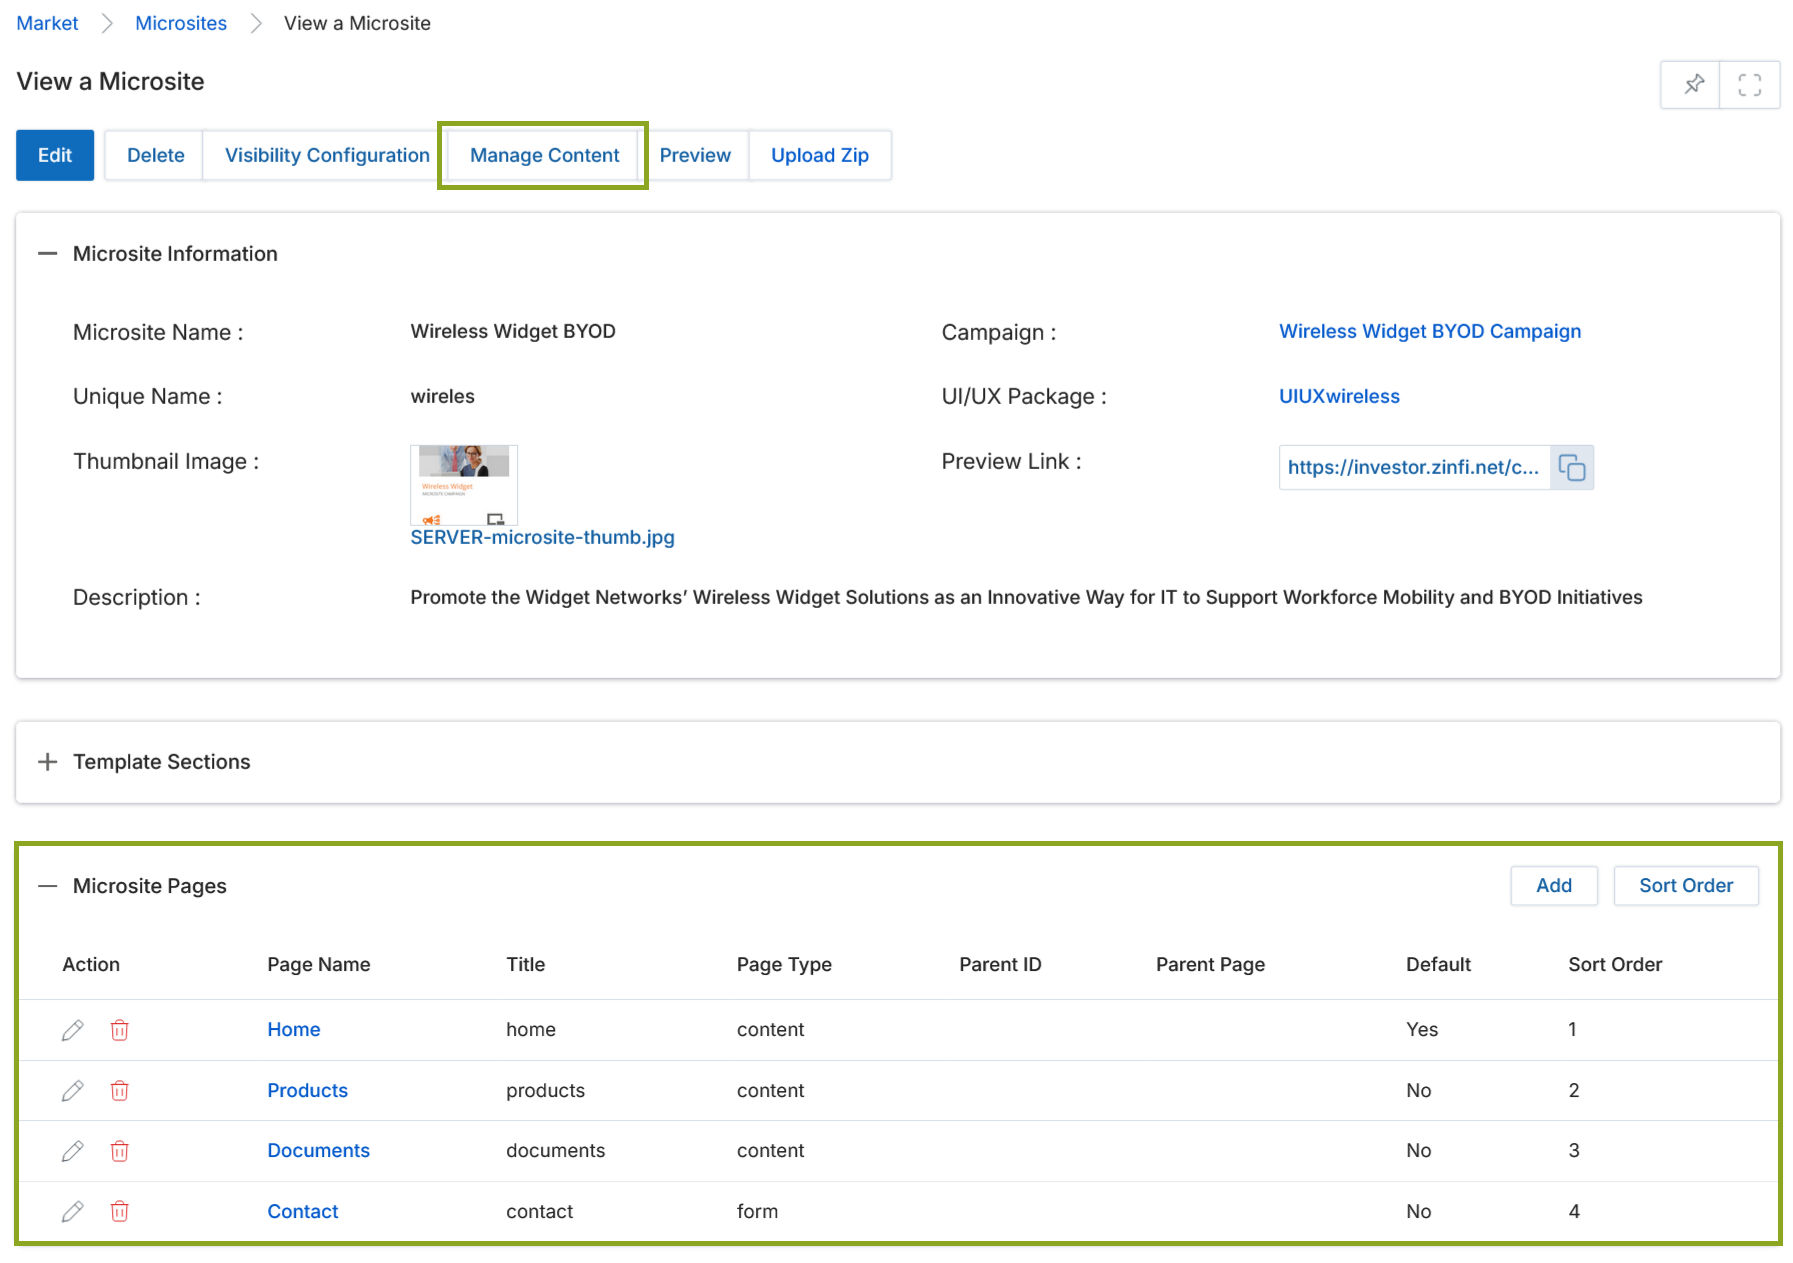
View Microsite Details
Clicking the blue title of any microsite in the list navigates to the View a Microsite detail page, where you can edit all attributes, manage microsite pages, and create lead scoring rules.
3.1 Action Buttons
- Edit — Opens the Add/Edit Microsite form to modify all microsite details.
- Delete — Removes the microsite from the library.
- Visibility Configuration — Specifies Country, Language, and User/Group visibility criteria.
- Manage Content — Launches the Drag & Drop CMS Editor for full page template editing.
- Preview — Displays the rendered microsite before publishing.
- Upload ZIP — Uploads microsite assets in zip format.

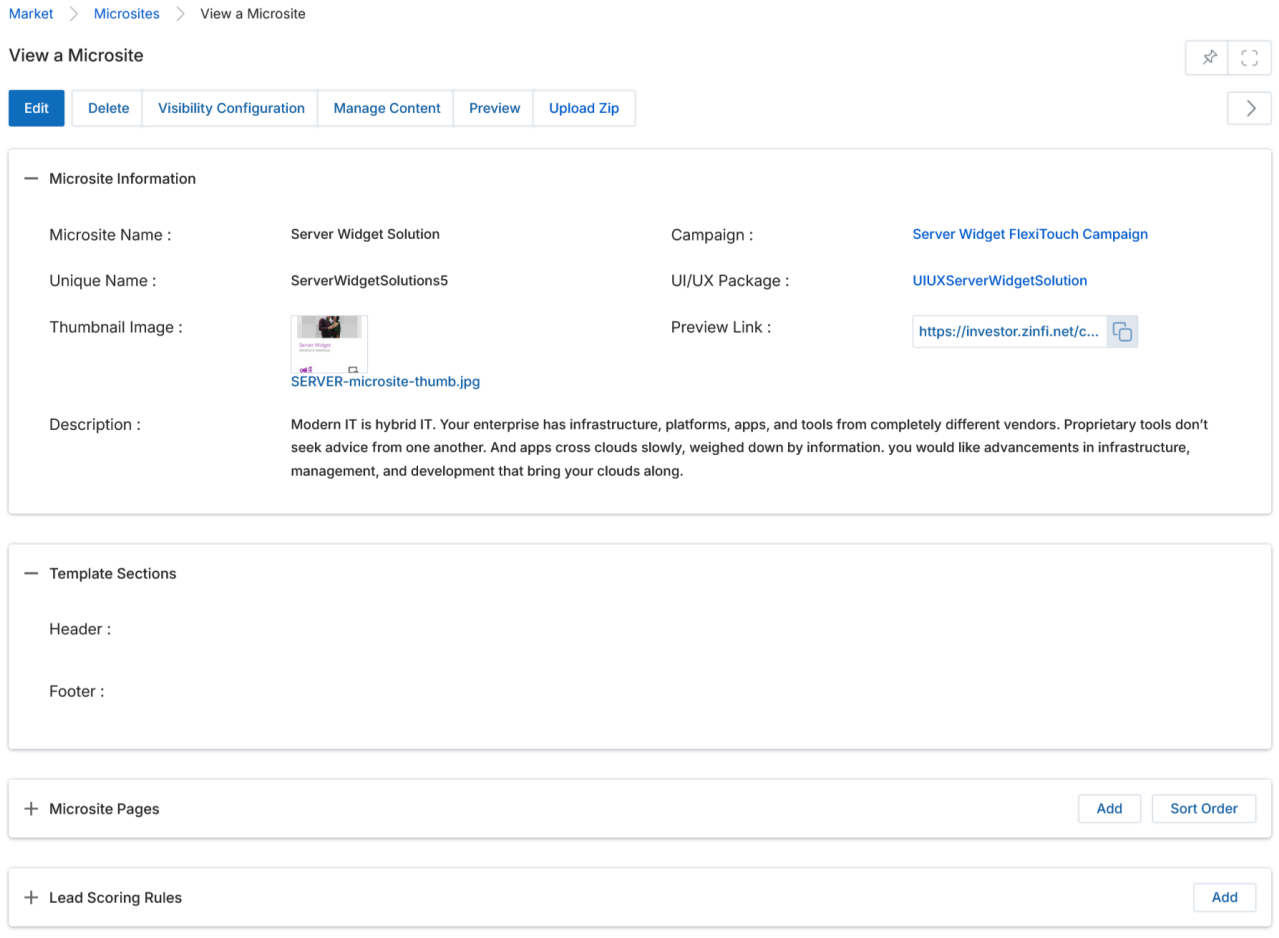
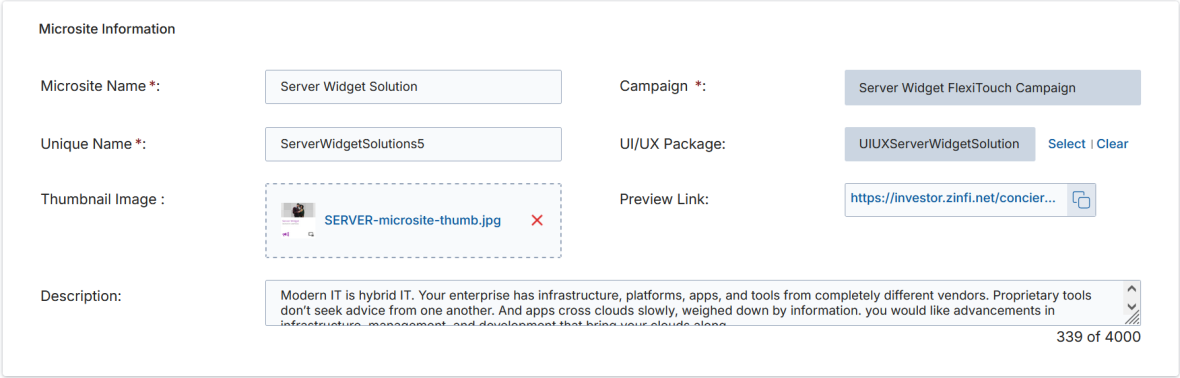
3.2 Microsite Information Fields
| Field | Description |
|---|---|
| Microsite Name | The display name of the microsite. |
| Campaign | The campaign associated with this microsite. |
| Unique Name | A unique, partner-friendly URL slug for the microsite. |
| UI/UX Package | The design package applied to microsite pages. |
| Thumbnail Image | Click Browse to upload the thumbnail image from your computer. |
| Preview Link | The microsite URL; use the clipboard icon to copy it for sharing. |
| Description | A brief description of the microsite shown on the microsite card. |
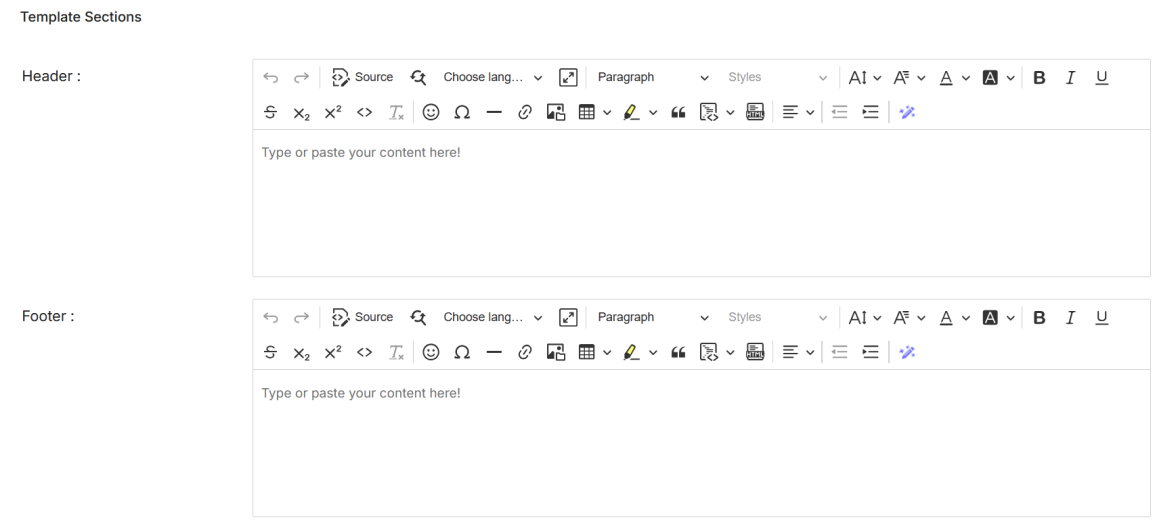
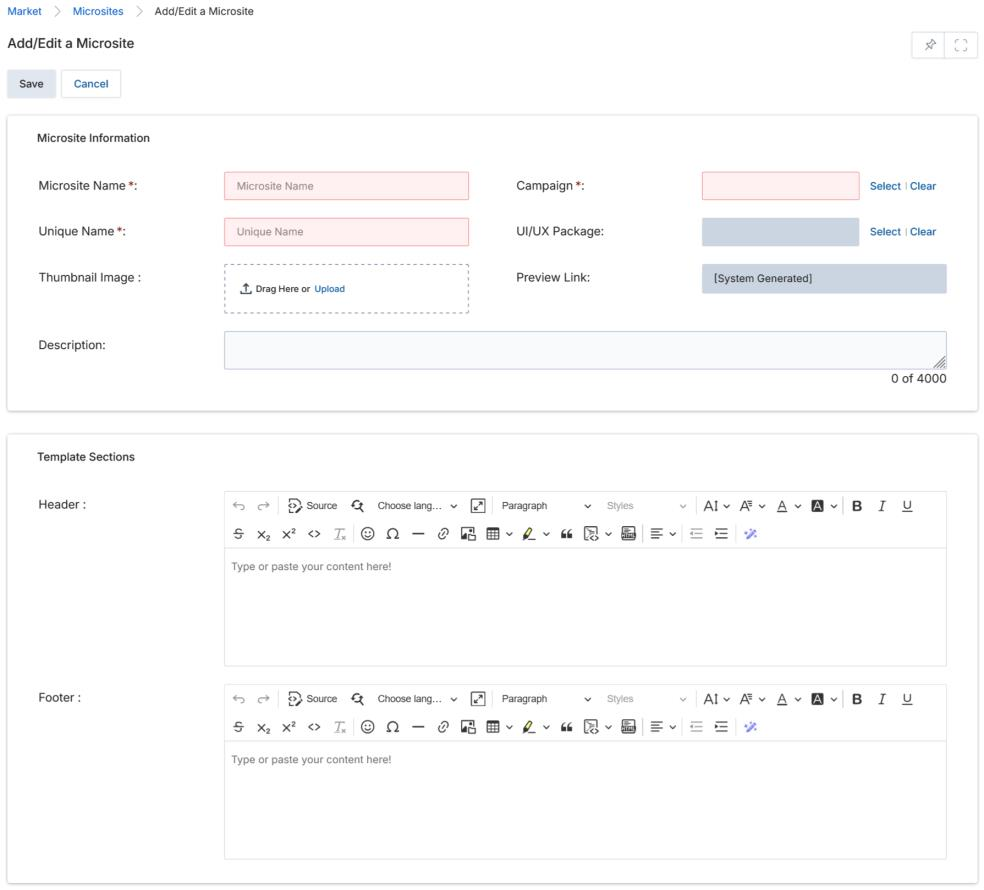
3.3 Template Sections
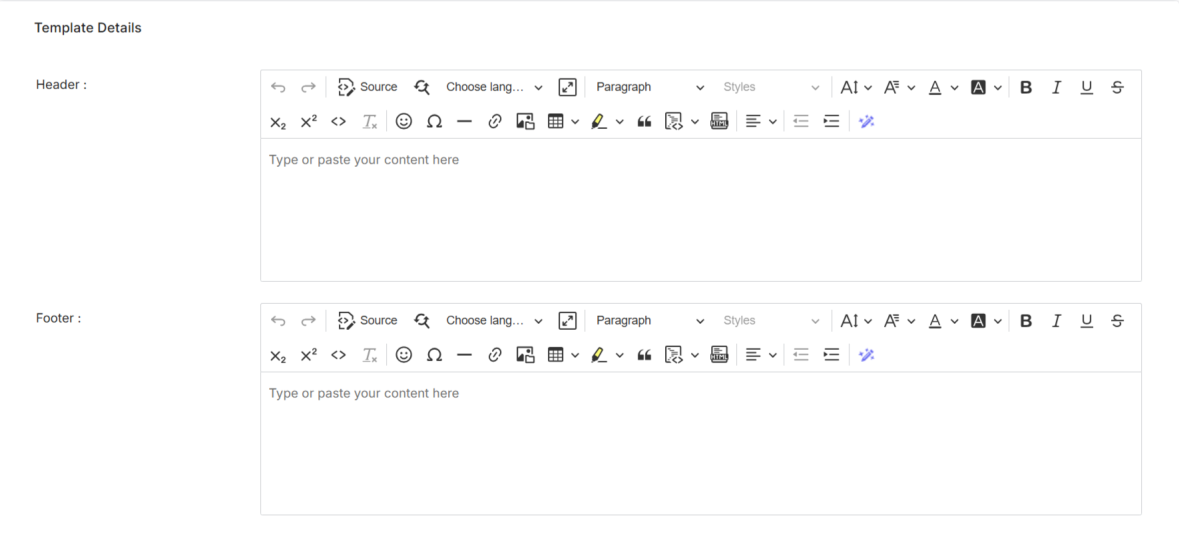
The Template Sections panel provides WYSIWYG editors for the Header and Footer of the microsite email template:
- Header — Designs the top margin area of the microsite.
- Footer — Designs the bottom margin area of the microsite.
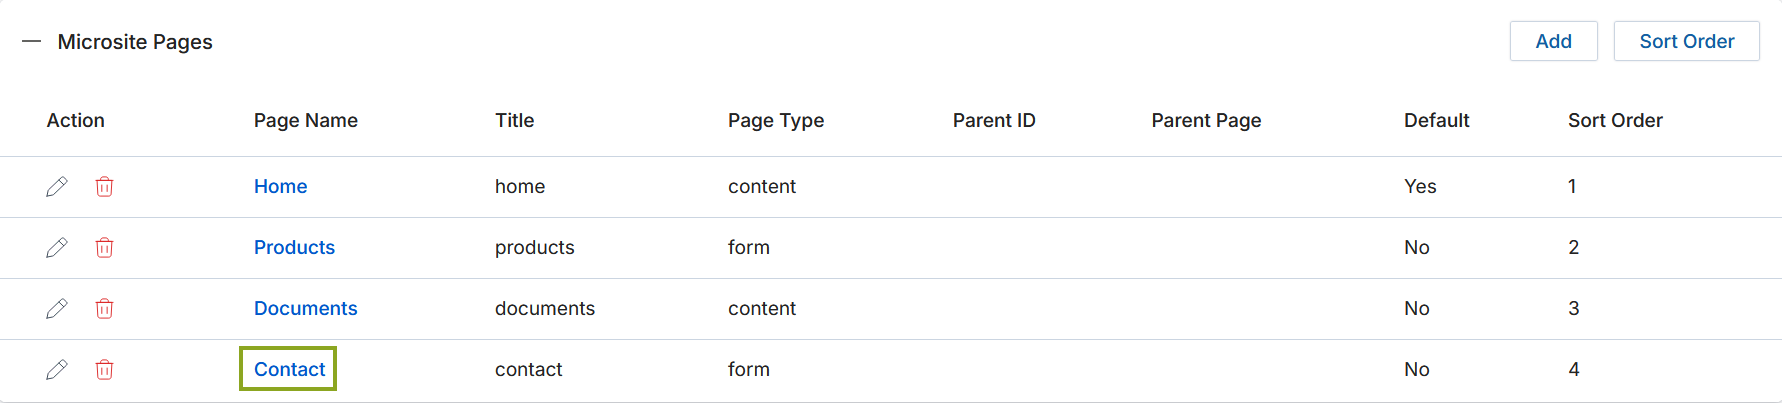
3.4 Microsite Pages
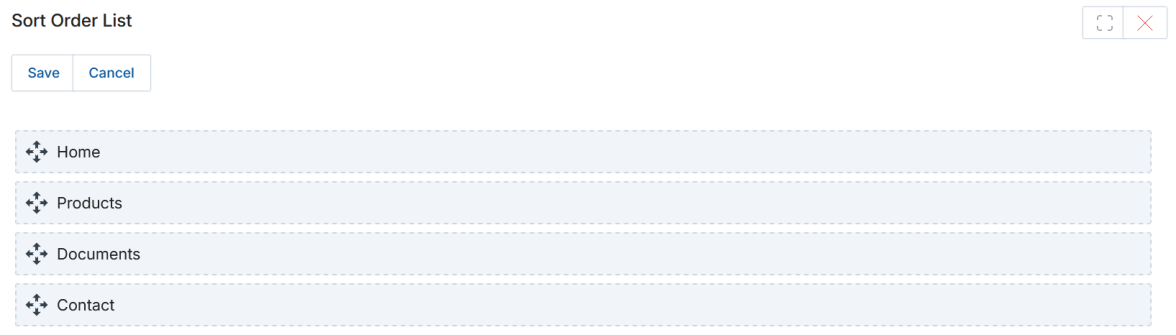
The Microsite Pages section lists all pages for the selected microsite. Click Add to create a new page, or the pencil icon to edit an existing page. The Sort Order button opens a drag-and-drop reorder panel.
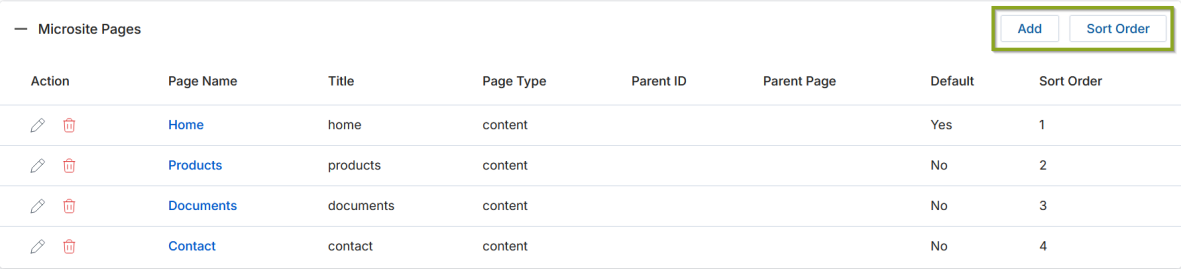
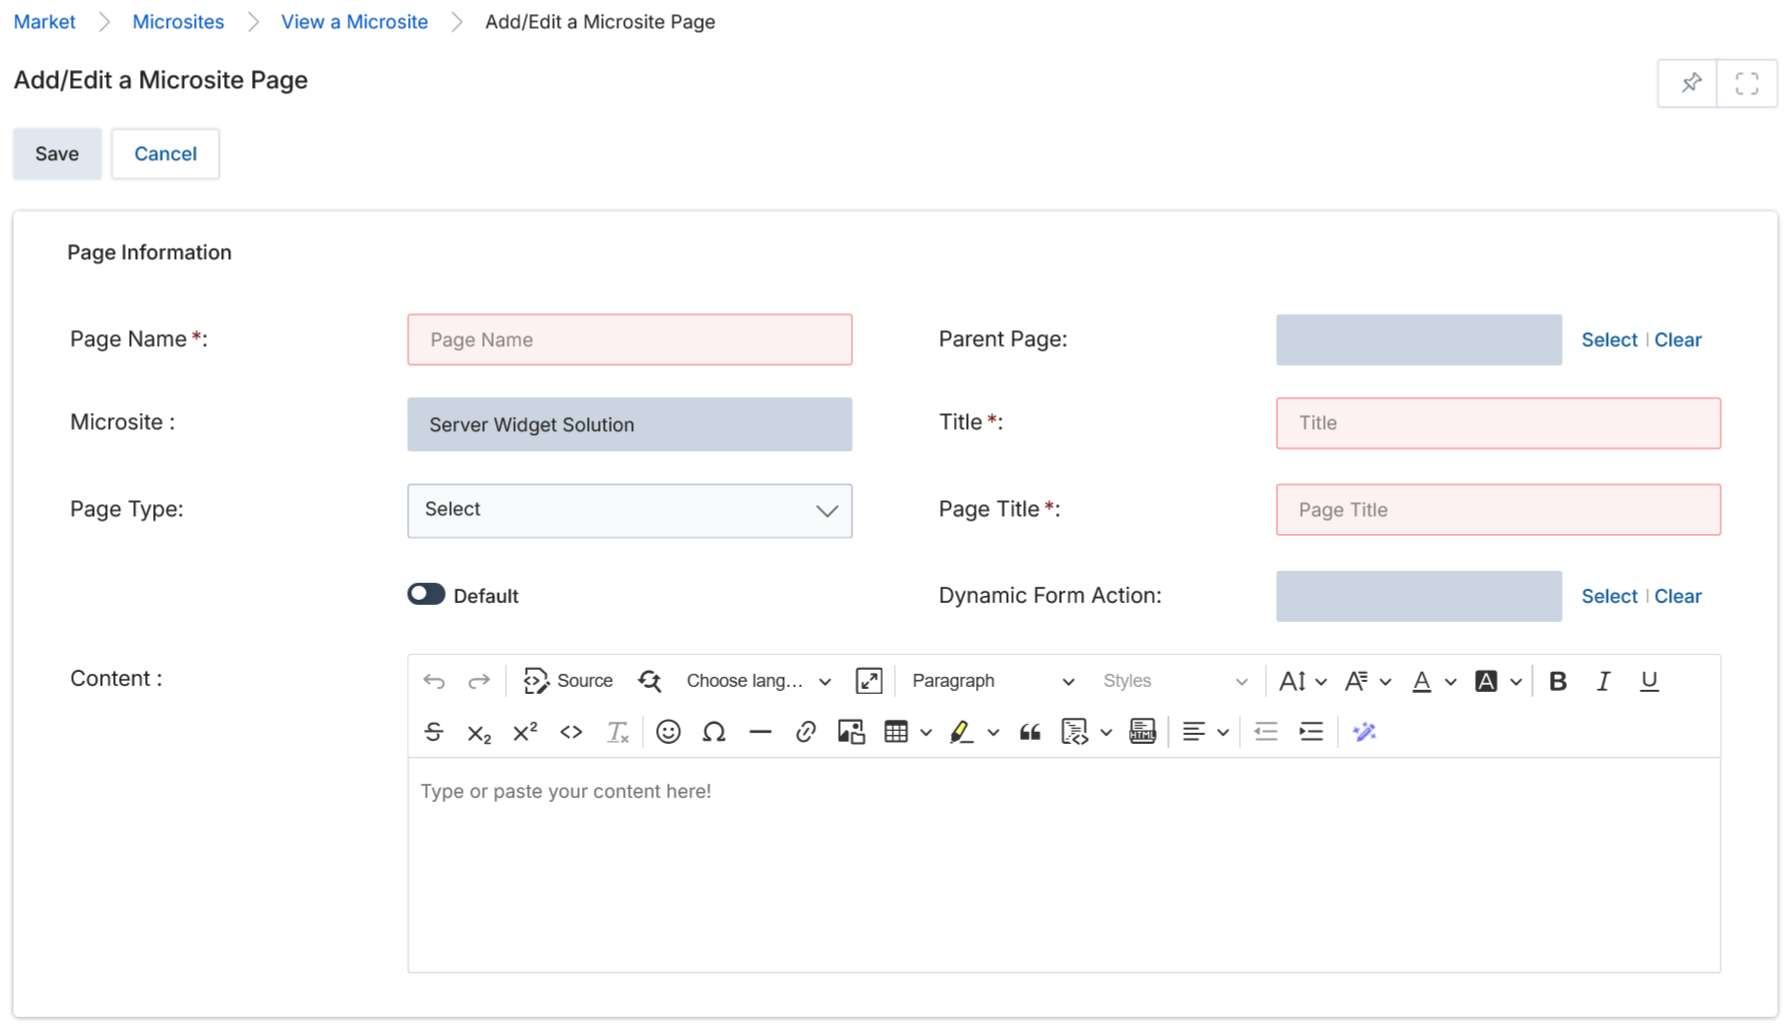
Microsite Page Information Fields
| Field | Description |
|---|---|
| Page Name | The internal name of the microsite page. |
| Parent Page | The page under which this page sits in the navigation hierarchy. |
| Microsite | The microsite to which this page belongs. |
| Title | The page title displayed in the browser. |
| Page Title | The display title of the page. |
| Page Type | Content — Static page type. Form — Dynamic page type that supports HTML form submission via HTTP POST. |
| Default | When enabled, sets this as the default landing page for the microsite. |
| Dynamic Form Action | Associates a dynamic UPM form with this page. The form's module must match the page's intended use (e.g., Prospect, PartnerContacts). |
| Content | The WYSIWYG content editor for building the page HTML inline. |
3.5 Lead Scoring Rules
Lead Scoring Rules define point values for specific partner or prospect activities on the microsite. Click Add to create a new rule, or the edit icon to modify an existing one.
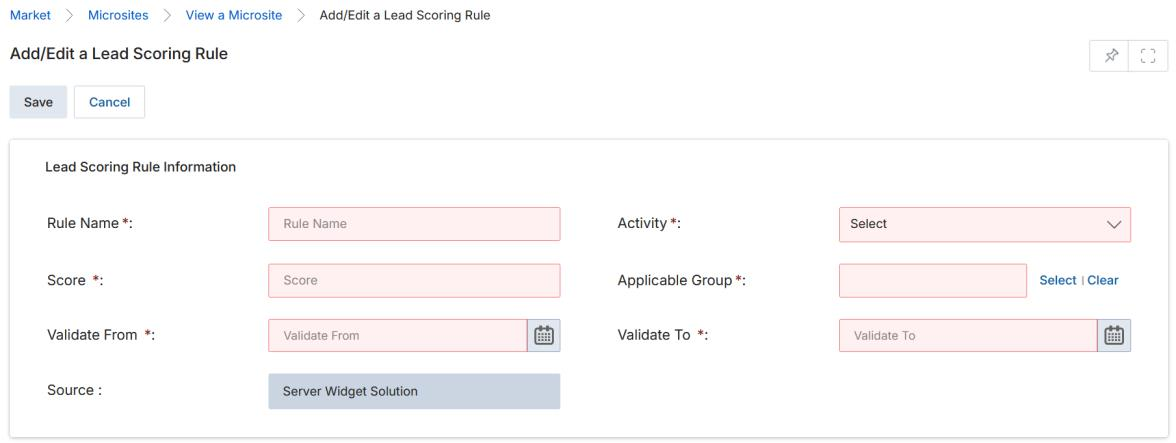
| Field | Description |
|---|---|
| Rule Name | The name of the scoring rule. |
| Activity | The triggering activity: Form Submission, Revisit, or Resubmission. |
| Applicable Group | The User Group (partner or admin group) to which this rule applies. |
| Score | The numeric lead score value (e.g., 20, 35) assigned to the activity. |
| Valid From | The start date for this rule. |
| Valid To | The expiration date for this rule. |
| Source | Read-only field showing the microsite name. Cannot be changed. |
Add/Edit a New Microsite Listing
To add a new microsite, click Add on the View Microsites page. The Add/Edit a Microsite form is divided into two sections: Microsite Information and Template Sections.
- Click Add on the View Microsites page.
- Fill in the Microsite Information section: Microsite Name, Unique Name, Associated Campaign, Thumbnail Image, UI/UX Package, and Description.
- Optionally add header/footer content in the Template Sections WYSIWYG editors.
- Click Save to create the microsite.
- After saving, you can add pages (see Section 5) and create Lead Scoring Rules (see Section 3.5) from the microsite detail page.
4.1 Using the WYSIWYG Editor
The WYSIWYG editor is available in the Template Sections (Header/Footer) and in microsite page Content fields. The toolbar is self-explanatory. Click the Source button (upper-right of the toolbar) to switch to raw HTML mode and edit directly in HTML. Unclick Source to return to the rendered view. Use the insert image tool (the "mountain scene" icon) to add images at the cursor position.
Creating & Editing Microsite Pages
Microsite pages are built and edited using the Drag & Drop CMS Editor, accessed by clicking Manage Content on the View a Microsite page. The CMS Editor also supports Google Translate for multilingual content and HTML zone locking for partner customization control.
5.1 Accessing the CMS Editor
- In the View Microsites list, click the blue microsite title to open the View a Microsite page.
- Click the Manage Content button. The Drag & Drop CMS Editor opens.

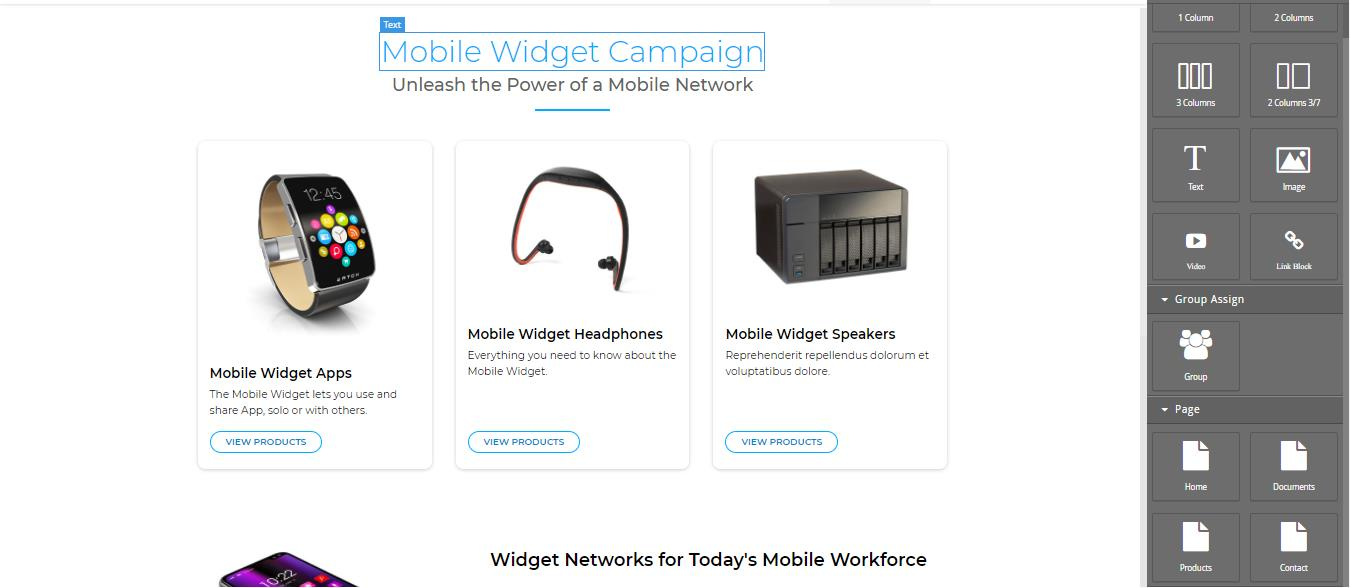
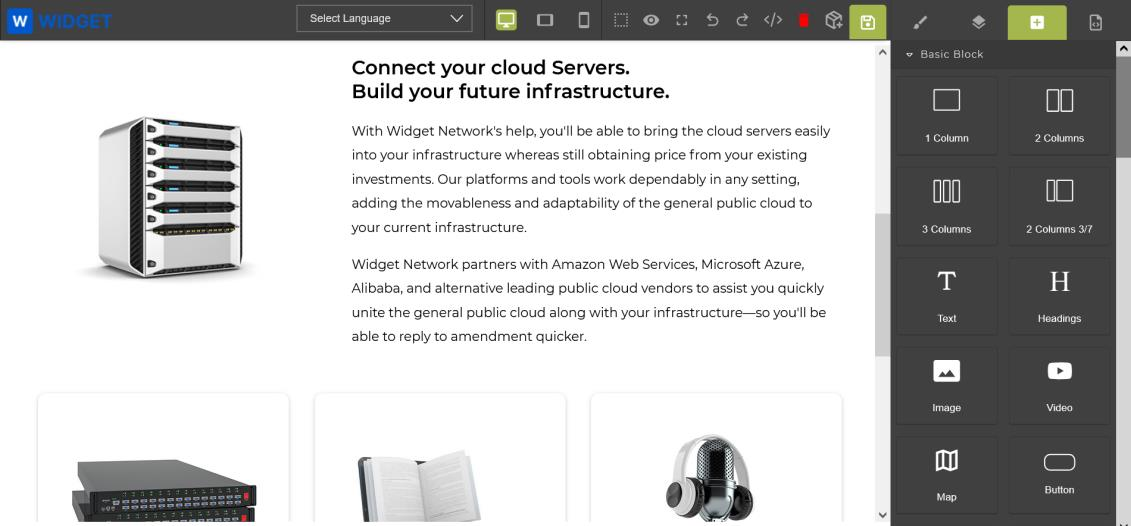
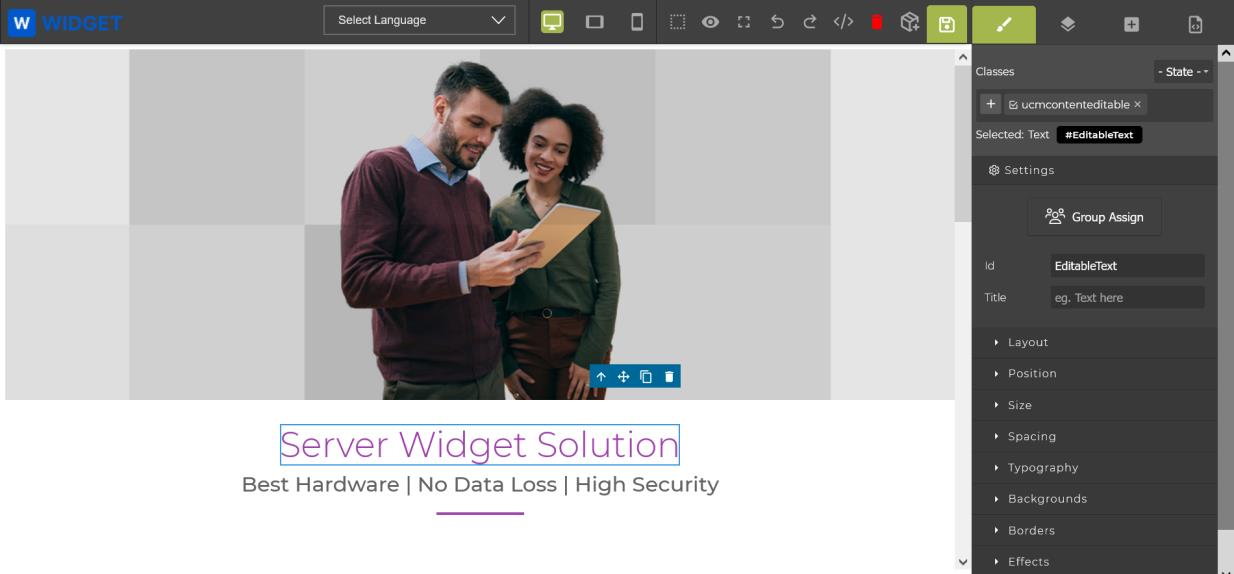
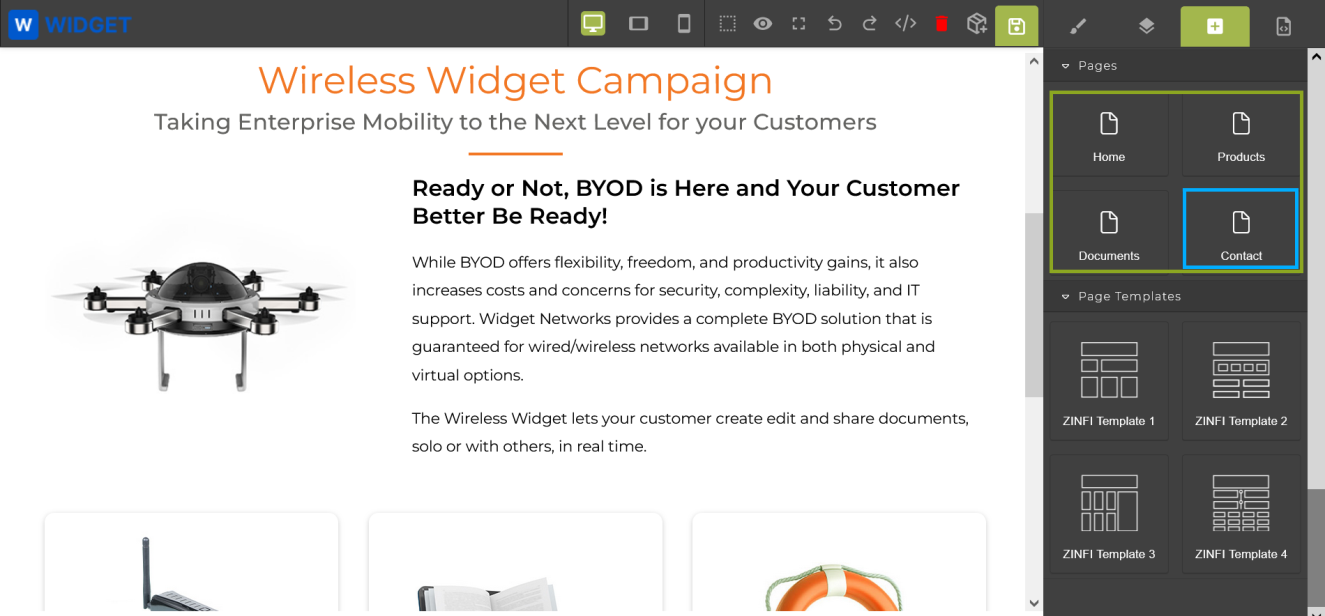
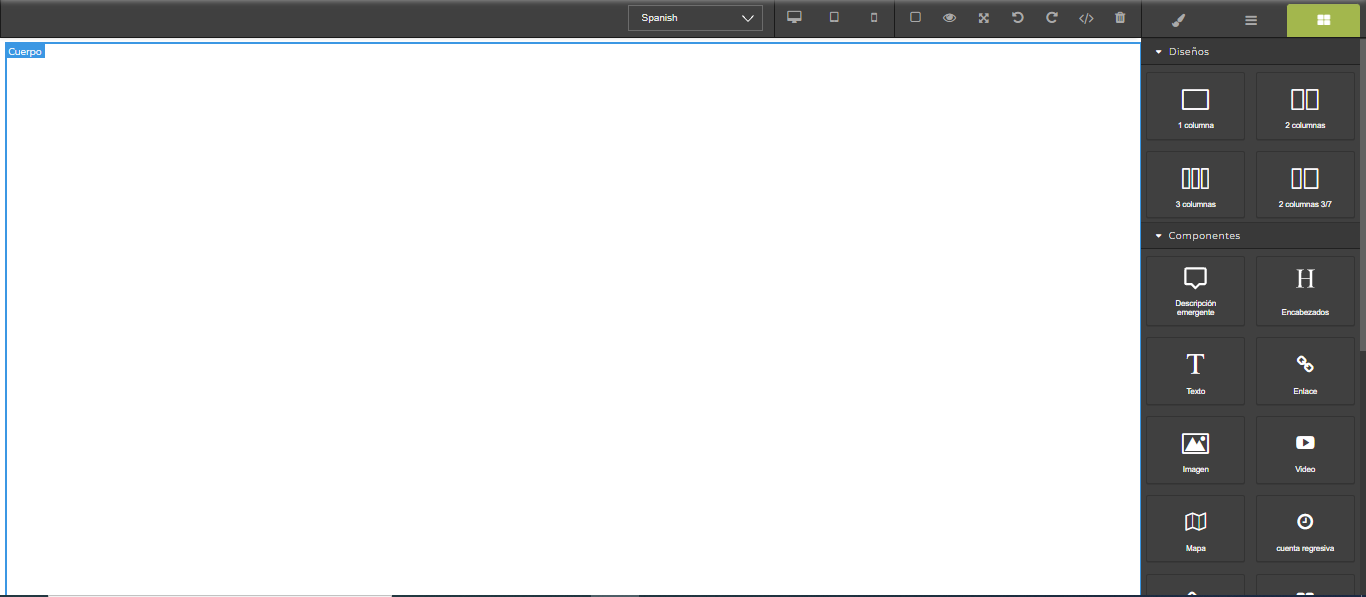
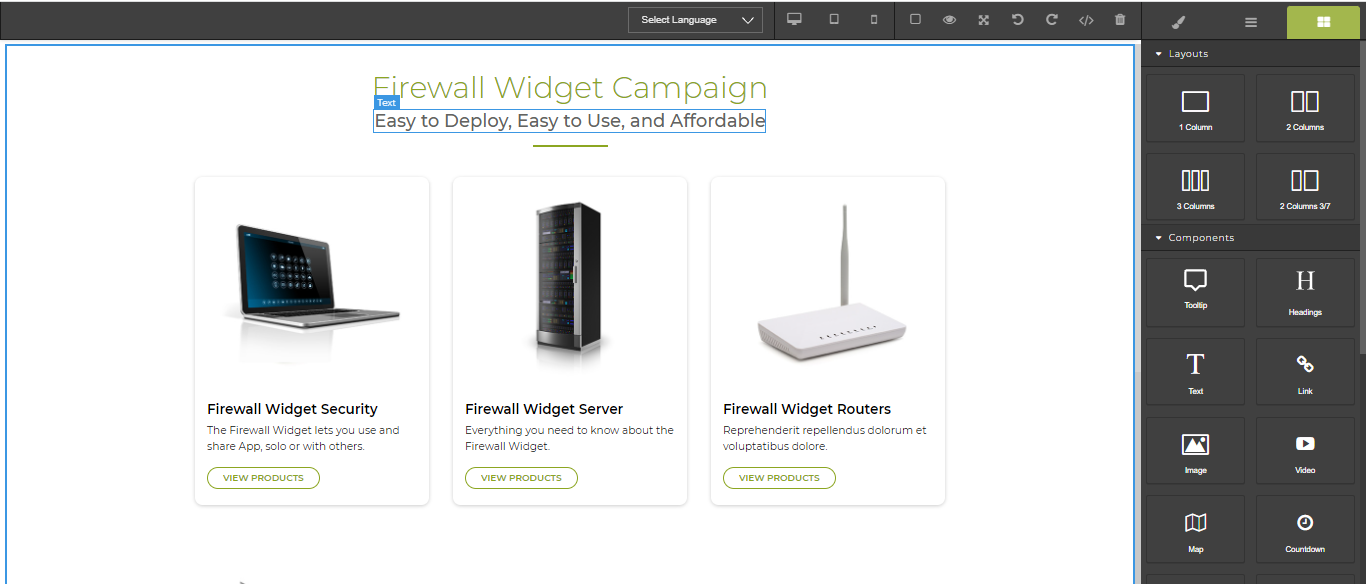
5.2 Drag & Drop CMS Editor Tools
- Use the right-hand sidebar to drag layout components (1 Column, 2 Columns, 3 Columns, Text, Heading, Image, Video, Map, Button, etc.) onto the canvas to build out the page structure.
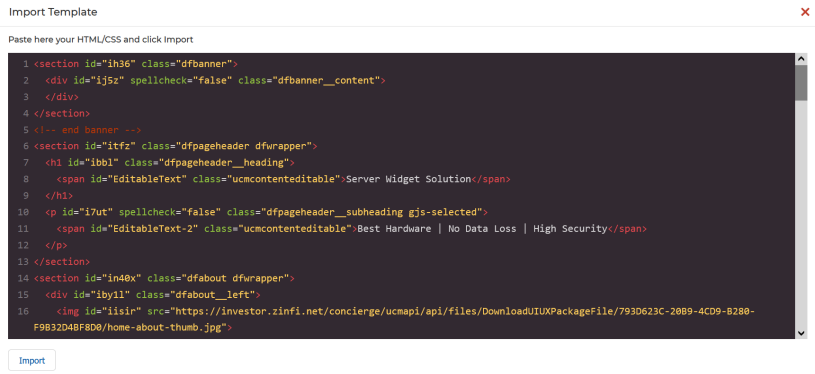
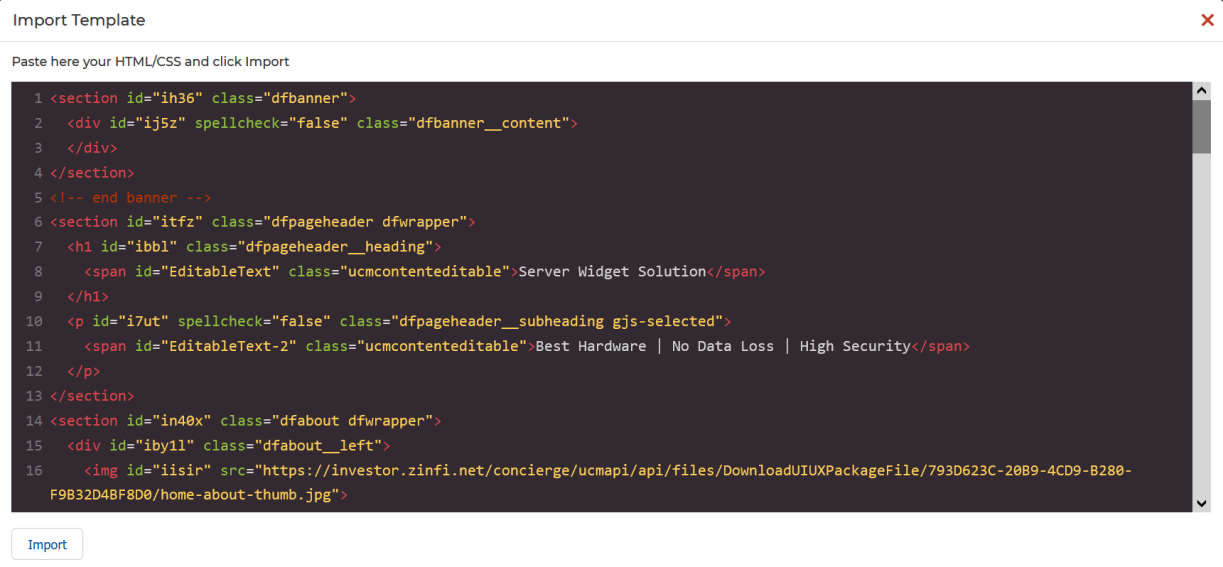
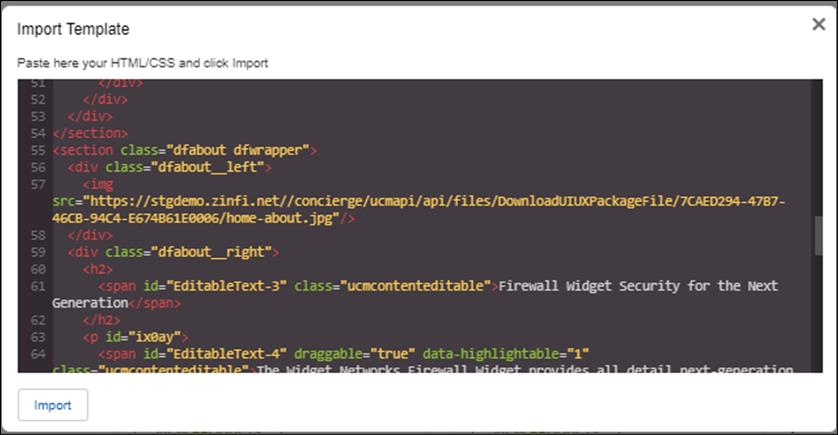
- Alternatively, click the HTML Editor icon to open the Import Template window, paste pre-built HTML/CSS, then click Import to render it.
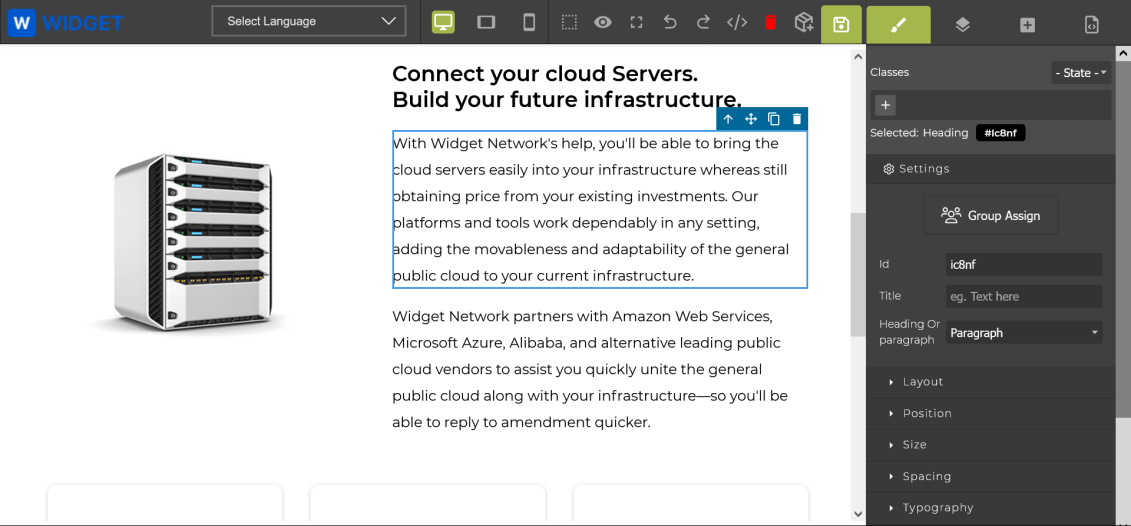
- Click any element on the canvas to access basic tools: move (drag), duplicate, or delete that section.
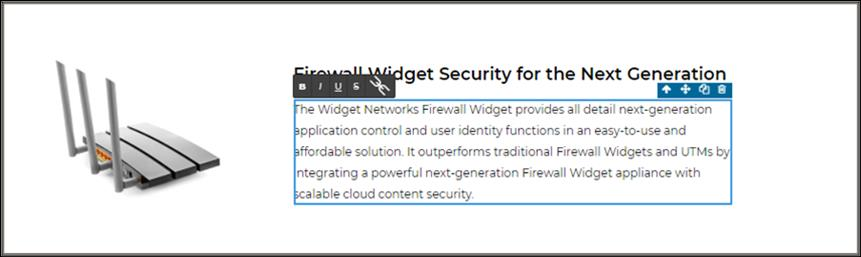
- Double-click any section to activate inline WYSIWYG editing for that element.
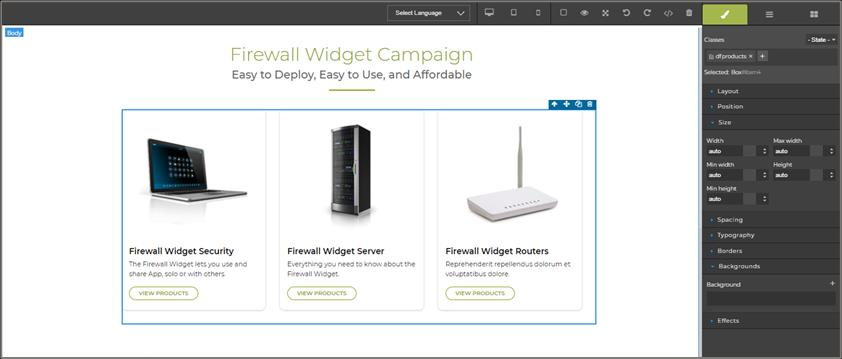
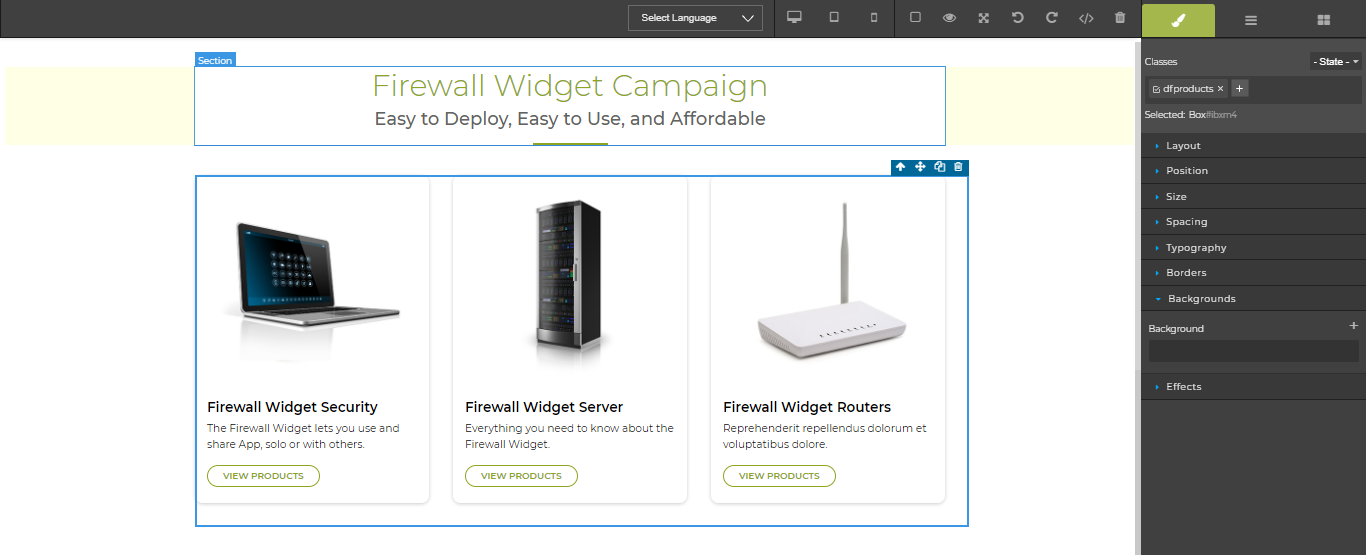
- Click the paint brush icon in the right sidebar to access the full style panel: dimension management (size, padding, margins), typography (font size, family, color, alignment), and decoration (borders, backgrounds).
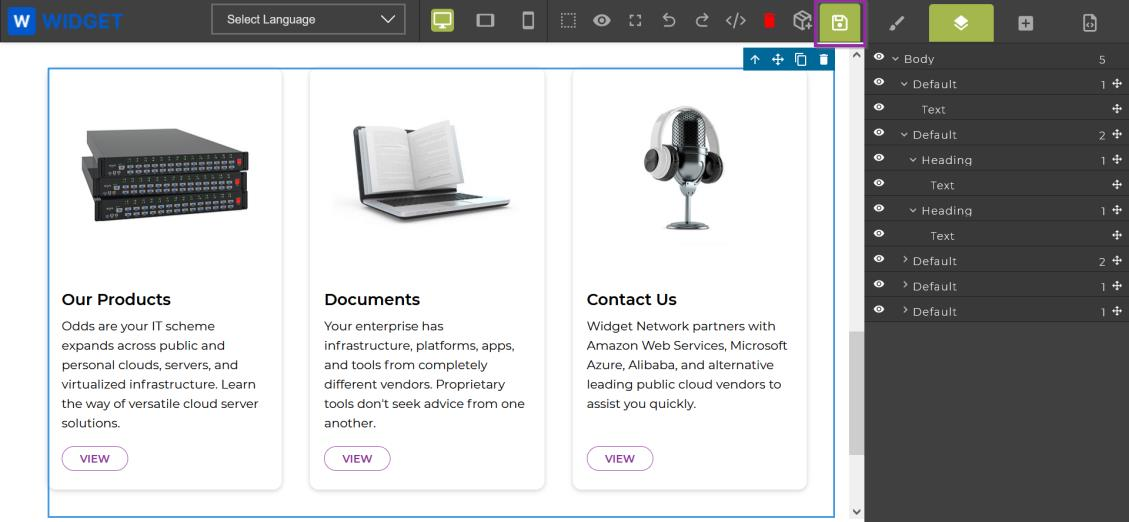
- Click the Open Layer Manager tool to view the template structure (tables, columns, rows).
- Click the disk icon (upper-right) to save your work.


5.3 Translating Your Microsite into Another Language
- In the View Microsites list, click the blue title of the microsite you want to translate.
- Click Manage Content to open the Drag & Drop CMS Editor.
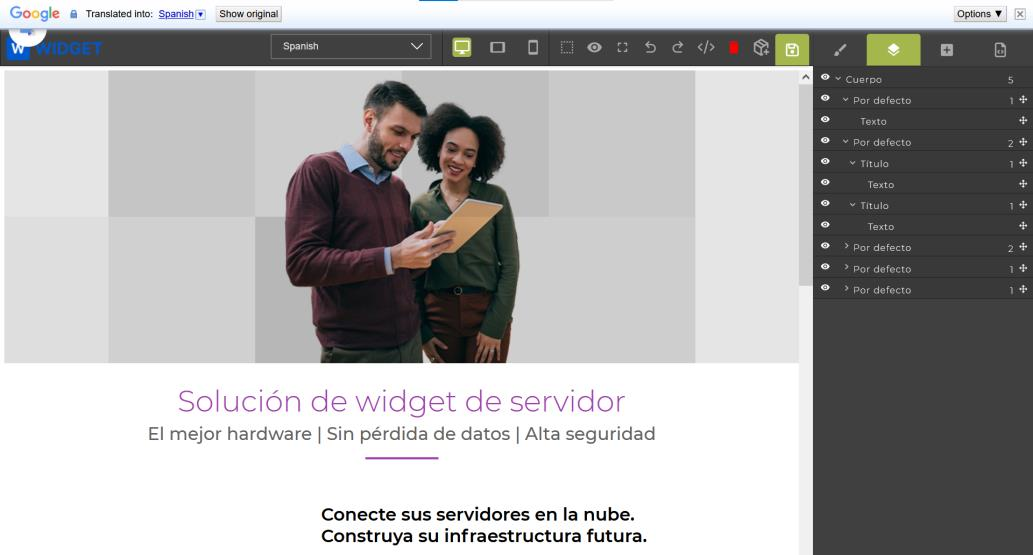
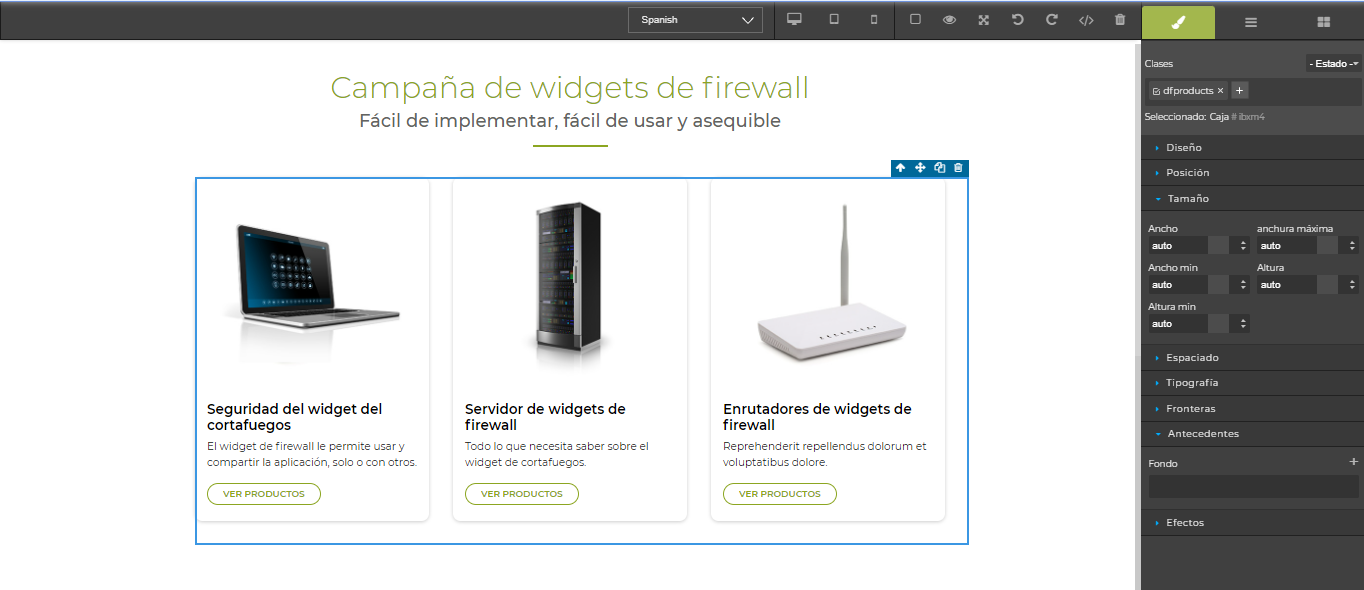
- Click the Select Language dropdown in the Google Translate toolbar (located in the middle of the editor window).
- Select the target language (e.g., Spanish) — the page content is instantly translated.
- Review the translation for accuracy, then click Save.
5.4 Making Zones/Sections Editable or Non-Editable
Control which sections partners can customize by managing the ucmcontenteditable CSS class in the HTML editor:
- In the CMS Editor, select the element you want to lock or unlock and click the HTML Editor icon.
- Locate the
<span>or<div>tag surrounding the content you want to control. - To make content editable by partners: add
class="ucmcontenteditable"to the tag. - To make content non-editable (locked): remove the
class="ucmcontenteditable"snippet from the tag.

Tagging a Dynamic Form to a Microsite Page
Dynamic forms can be embedded into specific microsite pages to capture prospect or partner information. The form data is stored in the appropriate UPM module (e.g., Prospects, PartnerContacts).
6.1 Prerequisites
6.2 Tagging Steps
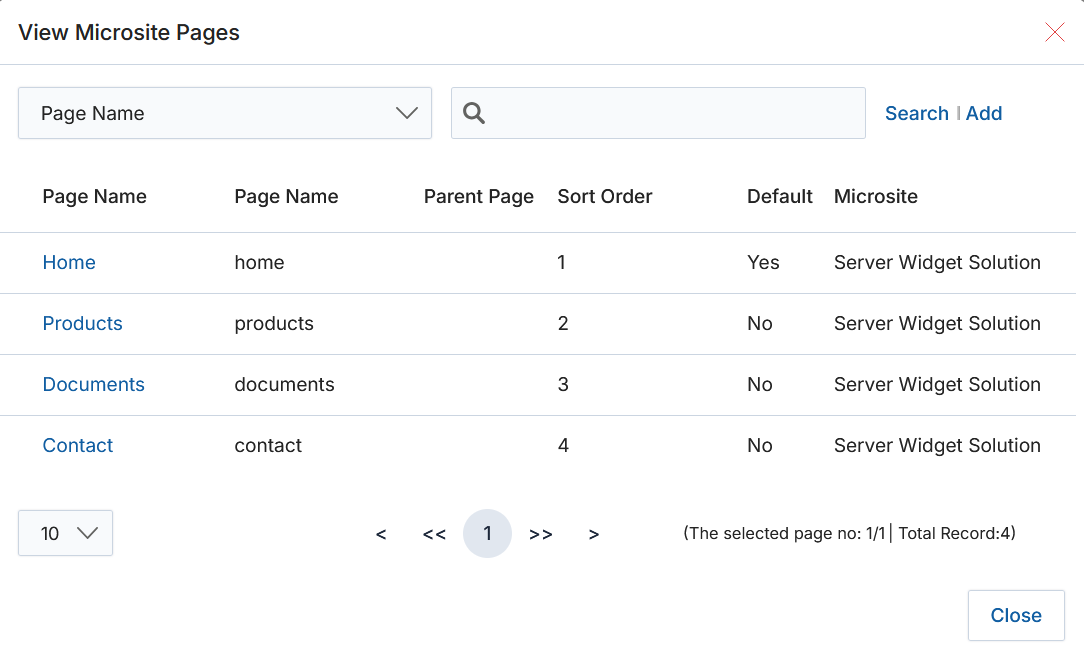
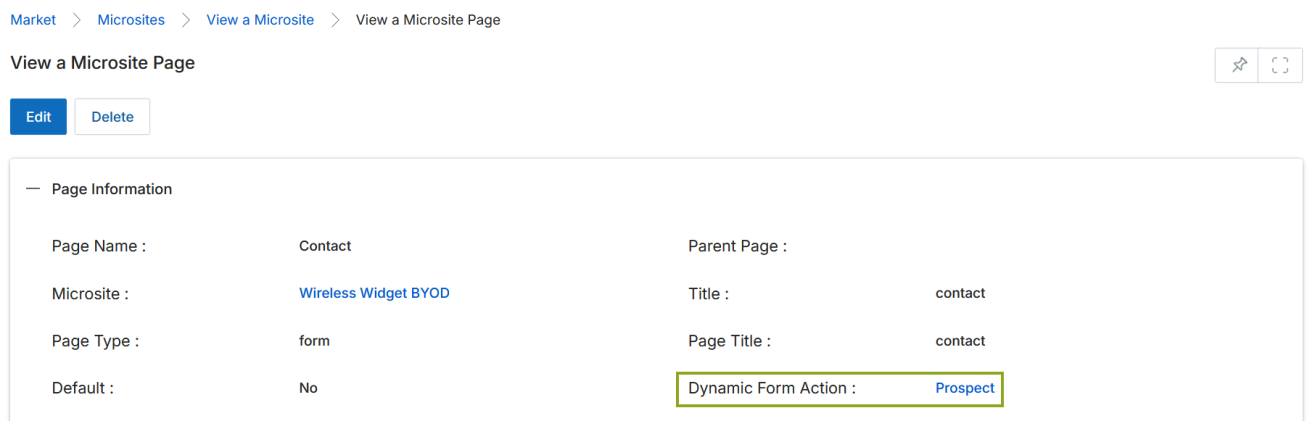
- In the View Microsites page, click the name of the microsite you want to integrate the Dynamic Form with.
- On the View a Microsite page, scroll to the Microsite Pages section and identify the page to associate with the form (e.g., Contact page). Confirm the page has Page Type: form and the correct Dynamic Form Action (e.g., Prospect) set.
- Return to the View a Microsite page and click Manage Content to open the CMS Editor.
- In the CMS Editor, navigate to the target page using the page selector in the lower-right corner.
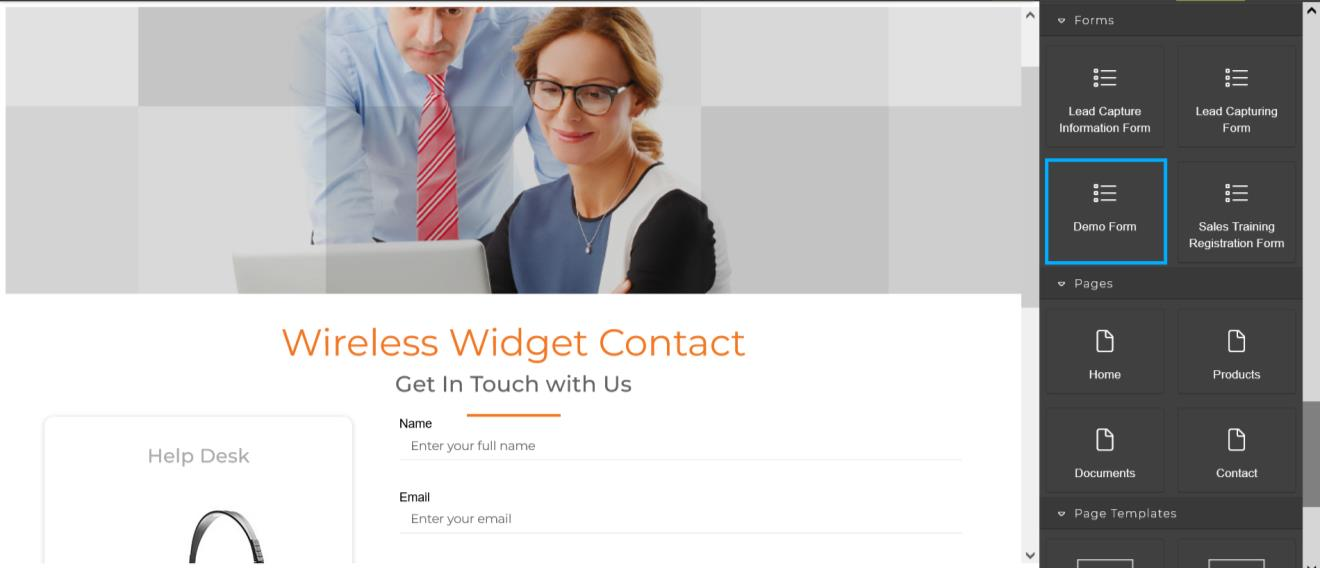
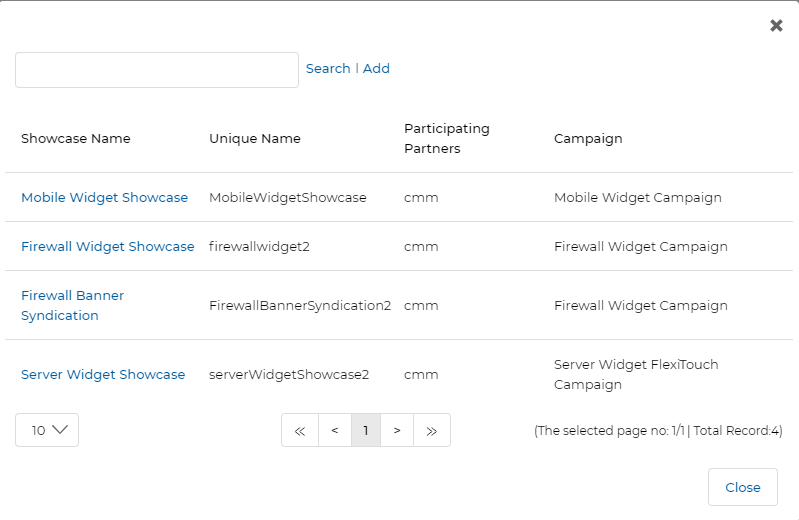
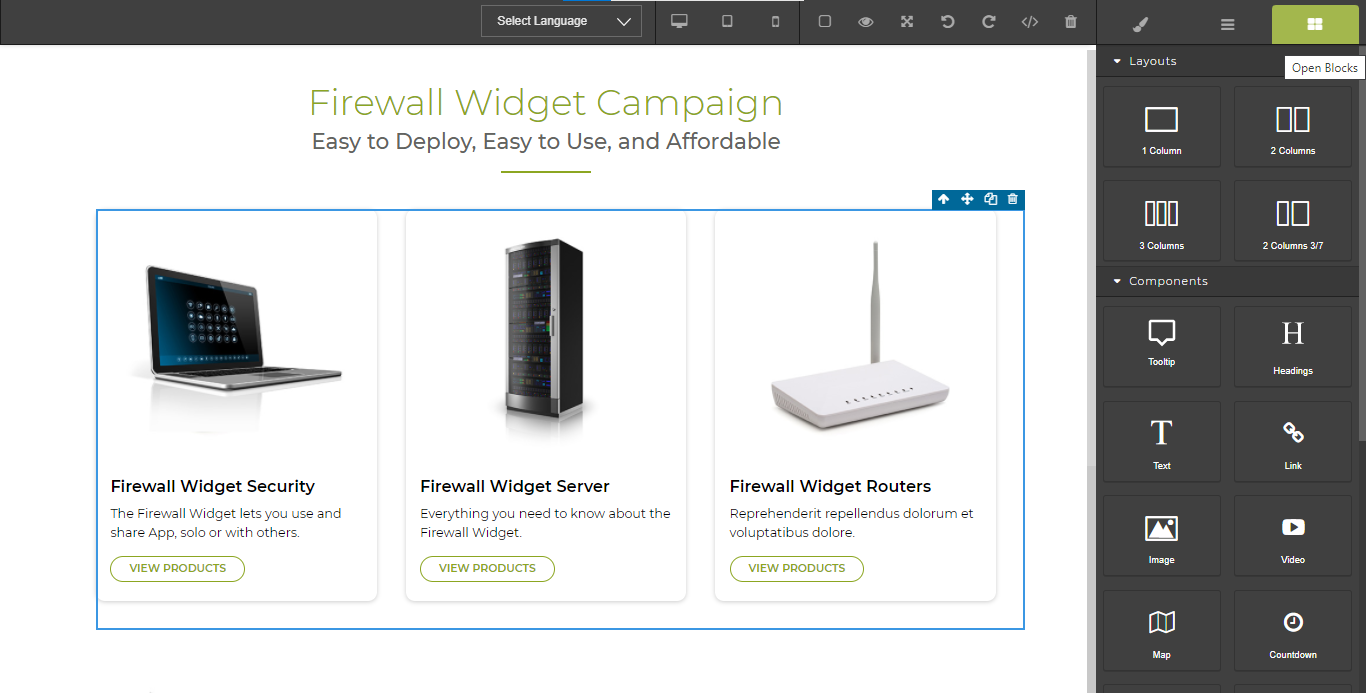
- Click the Open Blocks button (far right). Scroll to the Forms section.
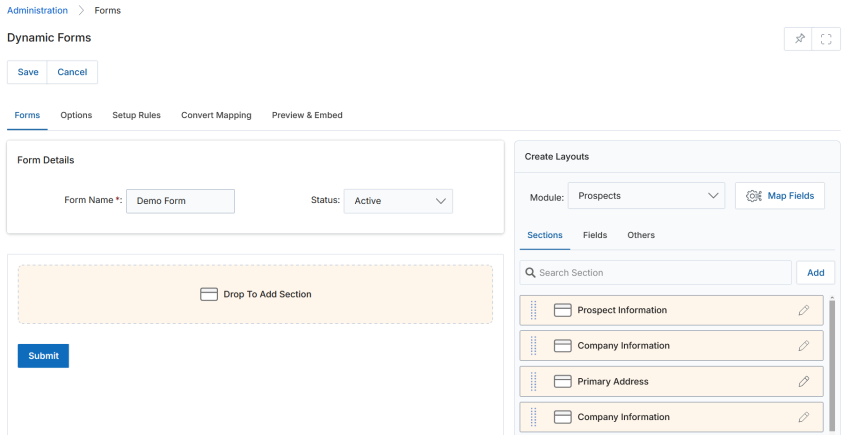
- Drag the desired Dynamic Form (e.g., Demo Form) from the Forms panel and drop it into the blank space on the canvas.
- Click the Save button.
Manage Showcases — Overview & Navigation
Showcases (Web Syndication) are co-branded, product-centric pages that partners can embed or syndicate to capture prospects. They are accessed separately from microsites via the Web Syndication sub-menu.
7.1 Accessing Showcases
- Click Market from the top navigation menu.
- Click Microsites > Web Syndication from the left menu bar.
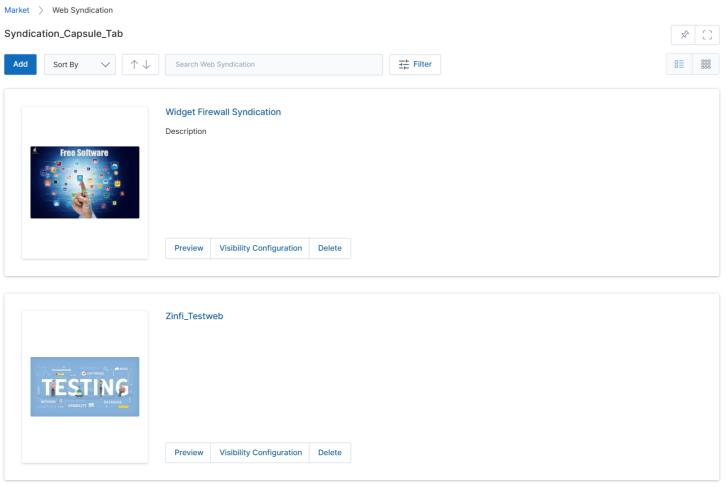
7.2 View Showcases
- Click Add to open a new Showcase creation page.
- Click Sort By to sort by Showcase Name, Created On, or Modified On.
- Toggle between List View and Thumb View using the icons in the upper-right.

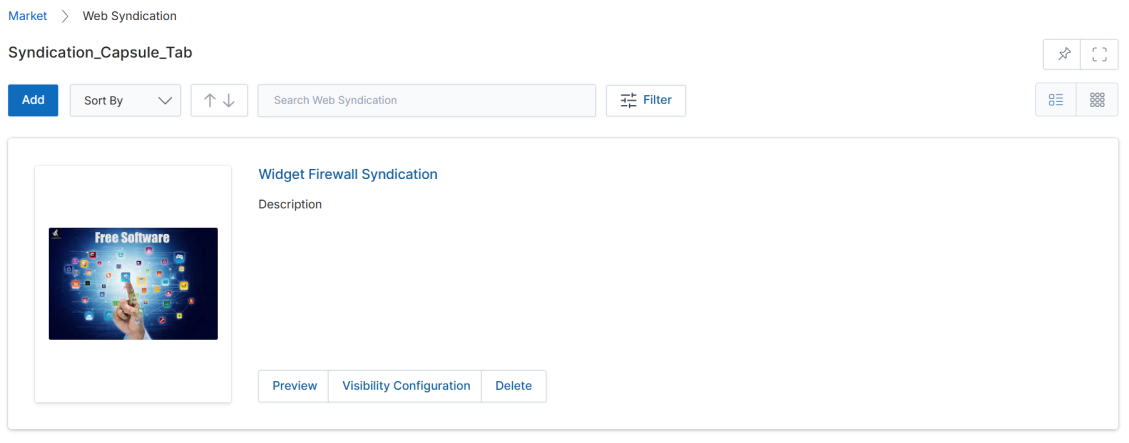
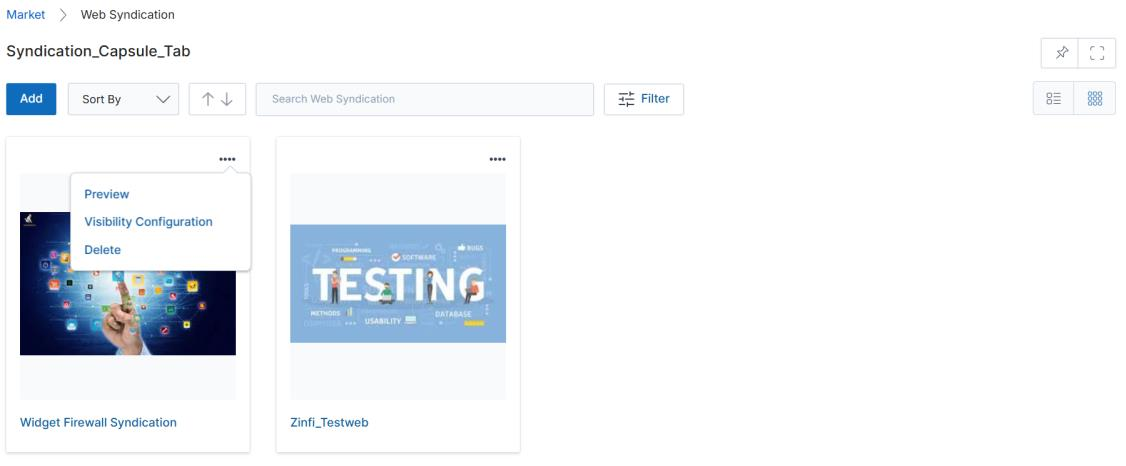
In the Thumb View, click the four dots (⋯) to access Preview, Visibility Configuration, and Clone. In List View, these actions are already visible.
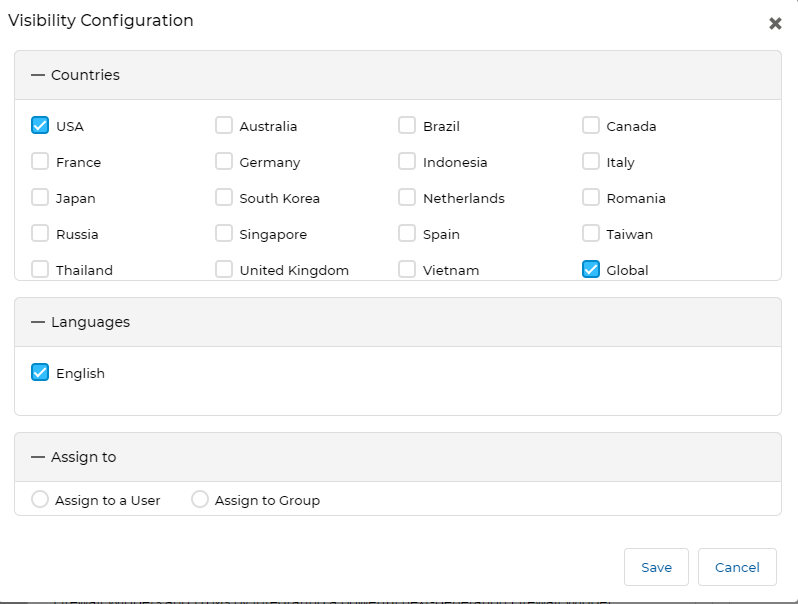
7.3 Visibility Configuration
Click Visibility Configuration to associate Countries and Languages with a showcase and optionally assign specific users or groups.
7.4 Filtering Showcases
Click the Filter button to open the filter pane. Filter parameters include:
- Campaign — Search by associated campaign.
- Country — Filter by country visibility.
- Languages — Filter by language visibility.
- Showcase Name — Type a keyword to search by name. Click Apply to filter.
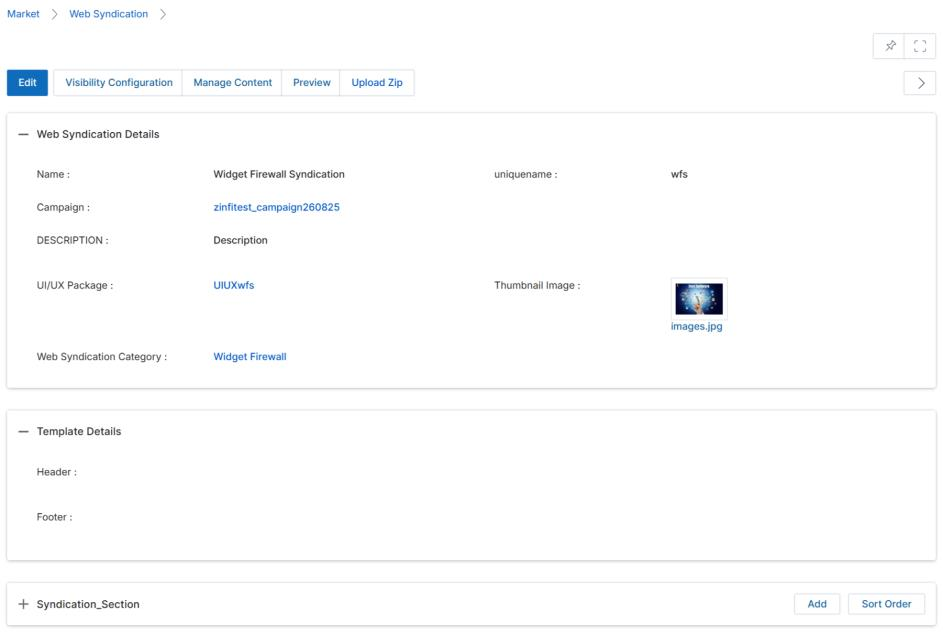
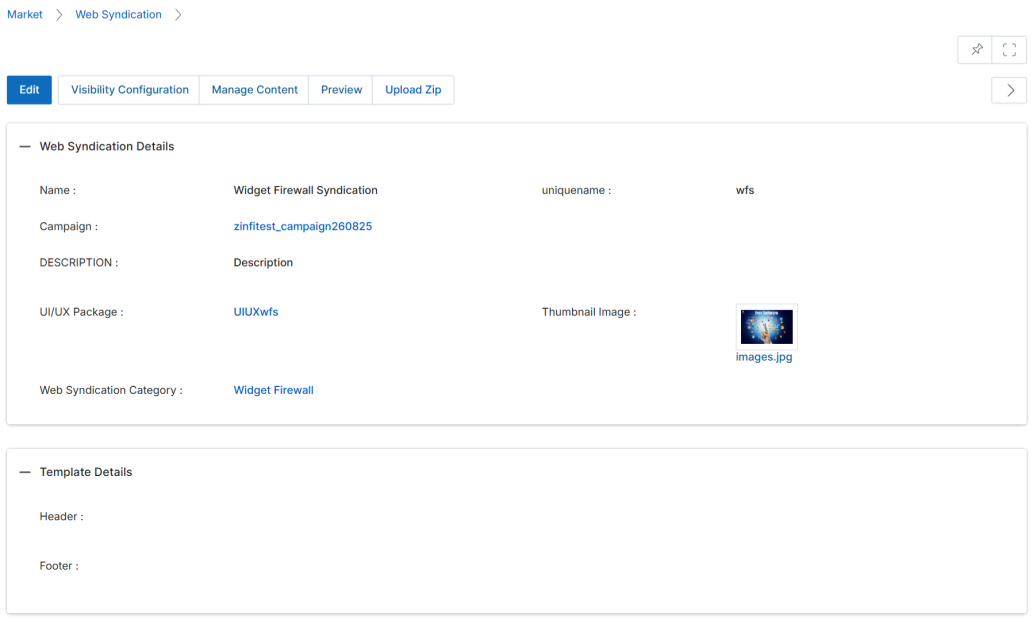
View Showcase Details
Clicking the blue showcase title navigates to the View Showcase Details page, where you can edit showcase metadata, manage syndication section pages, and set lead scoring rules.
8.1 Action Buttons
- Edit — Opens the Add/Edit form to modify showcase content or layout.
- Visibility Configuration — Associates Countries, Languages, and User/Group assignments.
- Manage Content — Opens the CMS Editor for syndication page content.
- Preview — Displays the showcase before publishing.
- Upload Zip — Uploads syndication content as a zip file.

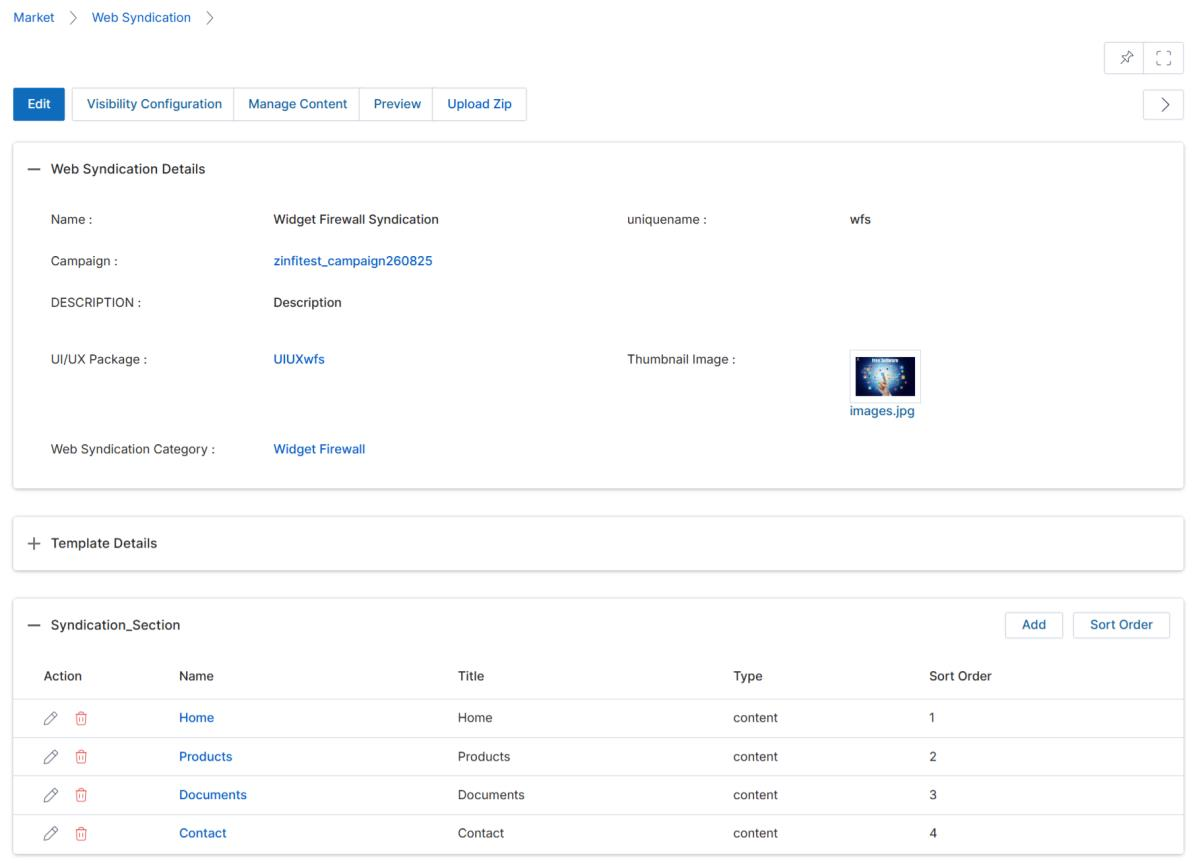
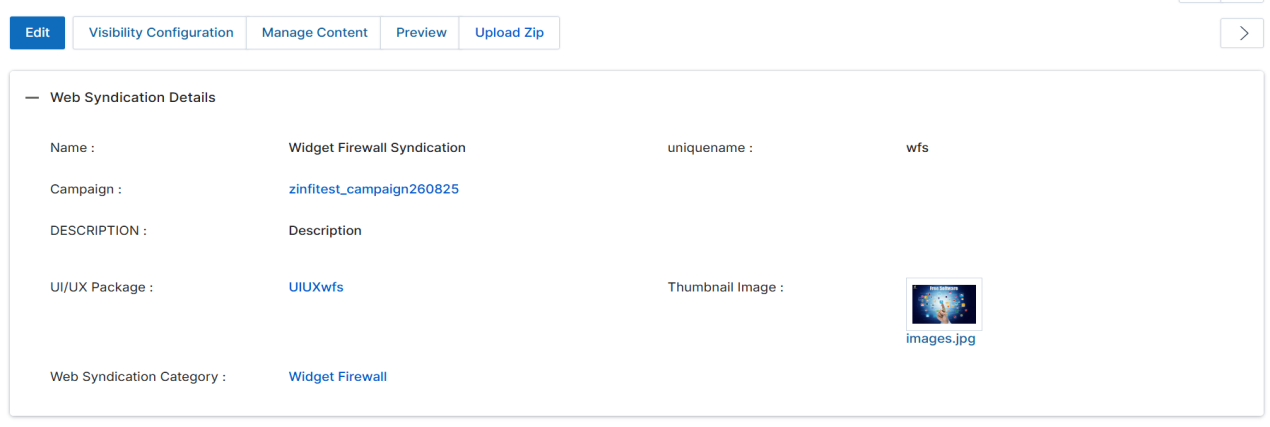
8.2 Web Syndication Details Fields
| Field | Description |
|---|---|
| Name | The name of the Showcase. |
| Campaign | The campaign associated with this Showcase. |
| Unique Name | A unique, partner-friendly name for the Showcase URL. |
| UI/UX Package | The design package applied to Showcase pages. |
| Thumbnail Image | Click Browse to upload a thumbnail from your computer. |
| Description | A brief description of the Showcase. |
| Web Syndication Category | The product category associated with this Showcase. |
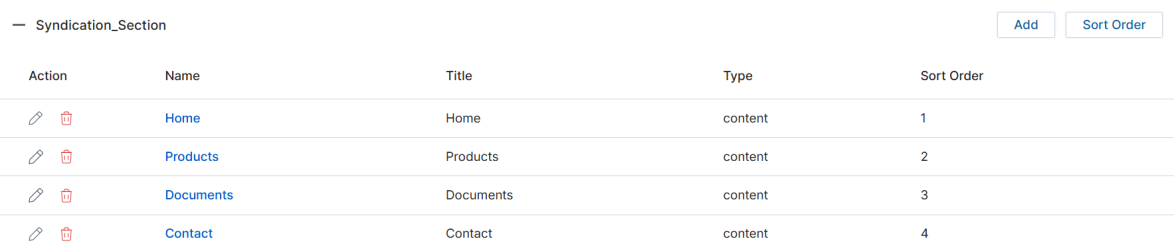
8.3 Syndication Section (Showcase Pages)
The Syndication Section lists all pages for the selected Showcase. Click Add to create a page, or the pencil icon to edit an existing one.
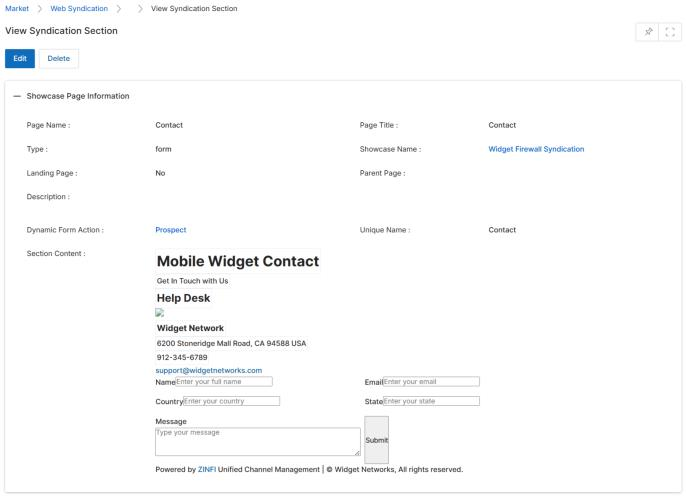
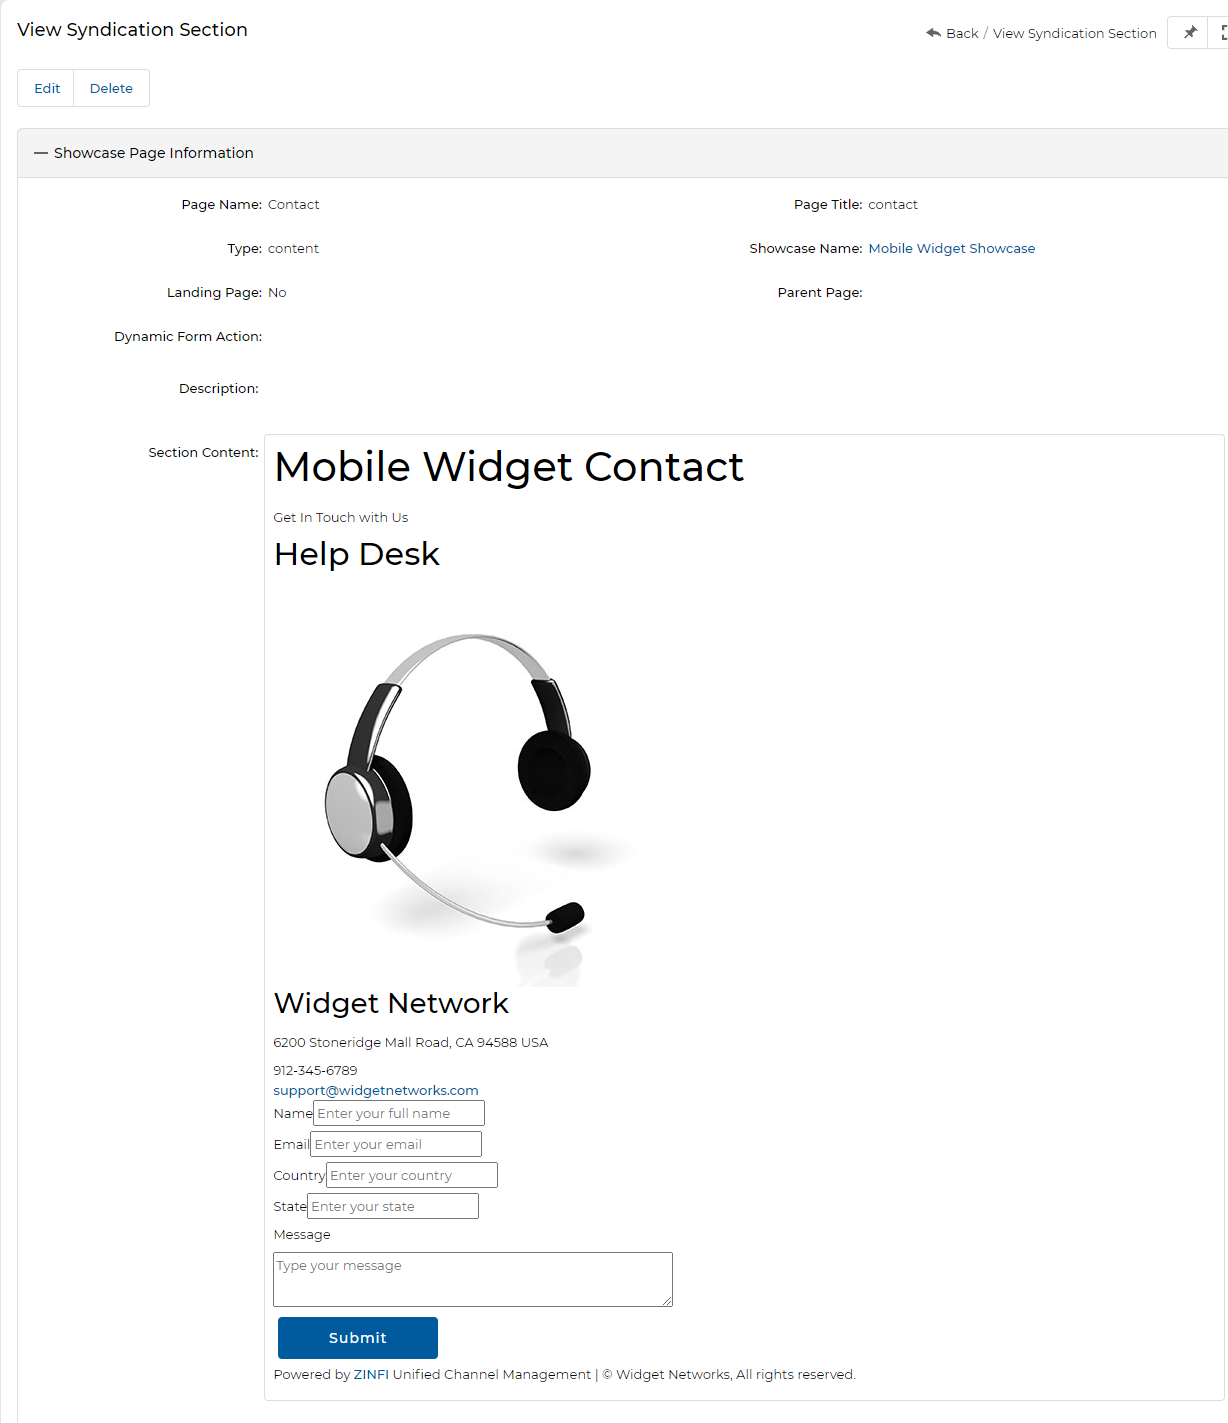
Showcase Page Information Fields
| Field | Description |
|---|---|
| Page Name | The internal name of the showcase page. |
| Landing Page | Check to make this the default landing section. |
| Page Title | The display title of the page. |
| Parent Page | The page under which this page sits in the hierarchy. |
| Showcase Name | The Showcase associated with this page. |
| Page Type | Content — Static page. Form — Dynamic page supporting form submission. |
| Dynamic Form Action | Associates a UPM Dynamic Form with this page (module must match the form's module). |
| Description | A short description of the showcase page. |
| Section Content | The WYSIWYG editor for page content. |
8.4 Lead Scoring Rules
Lead Scoring Rules for showcases follow the same pattern as microsites. Click Add to create a new rule or the edit icon to modify an existing one.

Add/Edit a New Showcase Listing
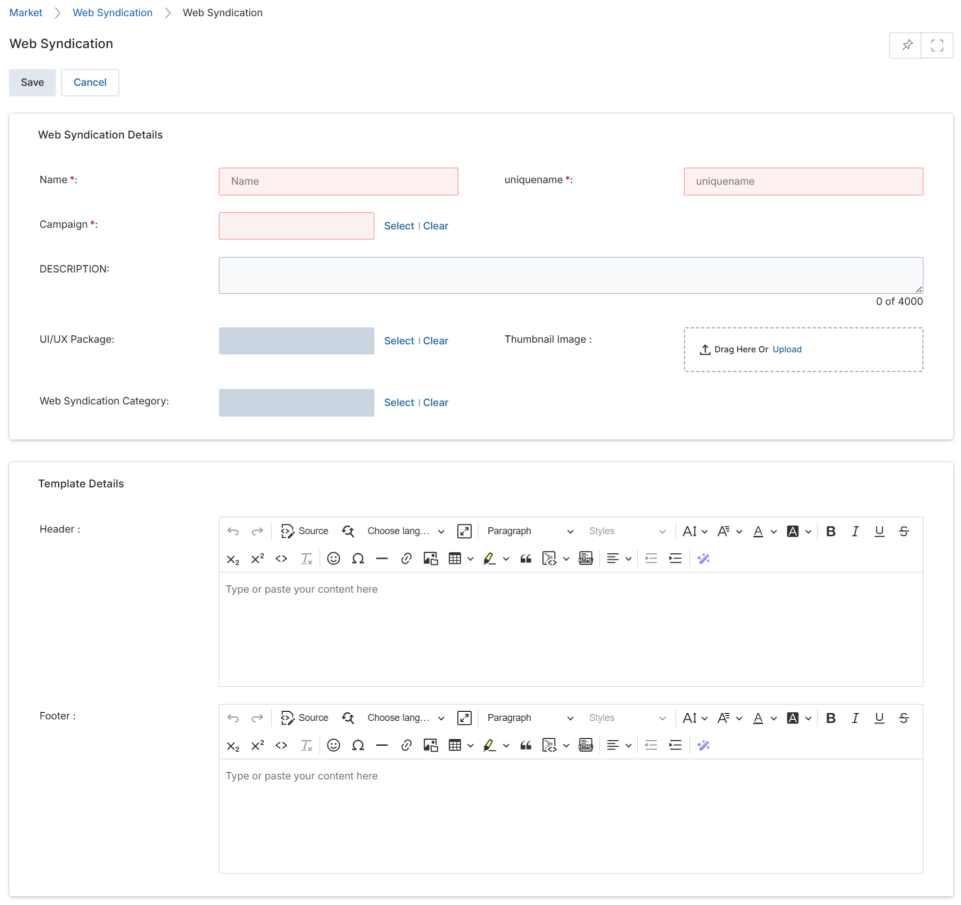
To add a new Showcase, click Add on the View Showcases page. The form requires Web Syndication Details and Template Details (Header/Footer).
- Click Add on the View Showcases page.
- Fill in the Web Syndication Details: Name, Unique Name, Associated Campaign, UI/UX Package, Web Syndication Category, Thumbnail Image, and Description.
- Optionally add header/footer content in the Template Details WYSIWYG editors.
- Click Save. The showcase appears in the View Showcases list.
- After saving, add pages to the Syndication Section and create Lead Scoring Rules from the showcase detail page.
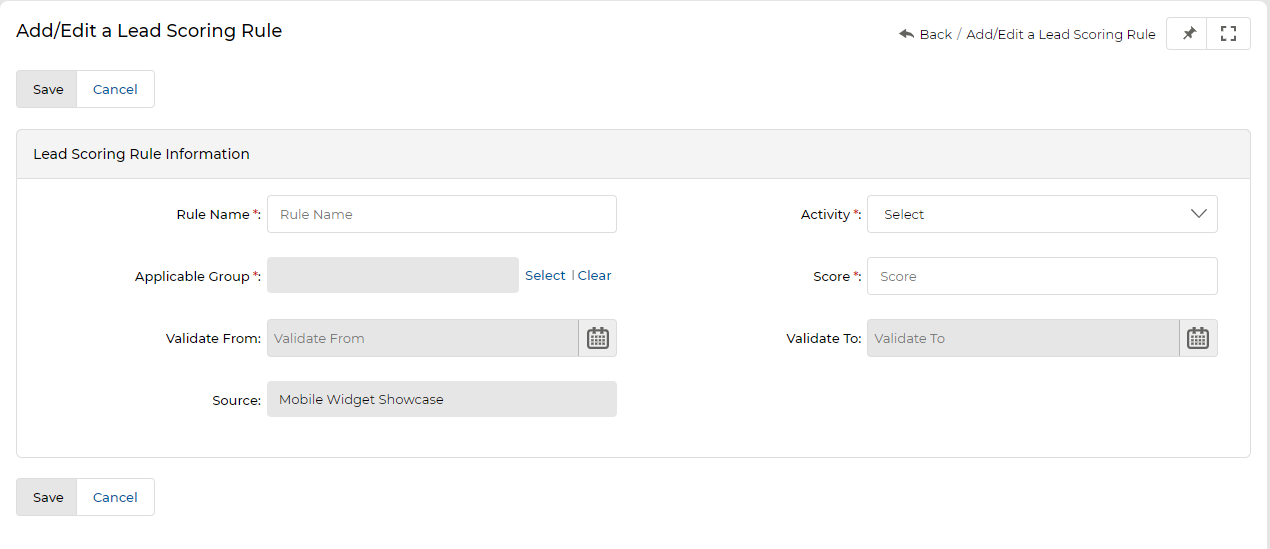
Creating & Managing Showcase Pages
Showcase pages use the same Drag & Drop CMS Editor as microsites, but with an additional Products category in the Open Blocks sidebar that allows drag-and-drop product placement.
10.1 Accessing the CMS Editor
- In the View Showcases list, click the blue showcase title.
- Click Manage Content to open the Drag & Drop CMS Editor.
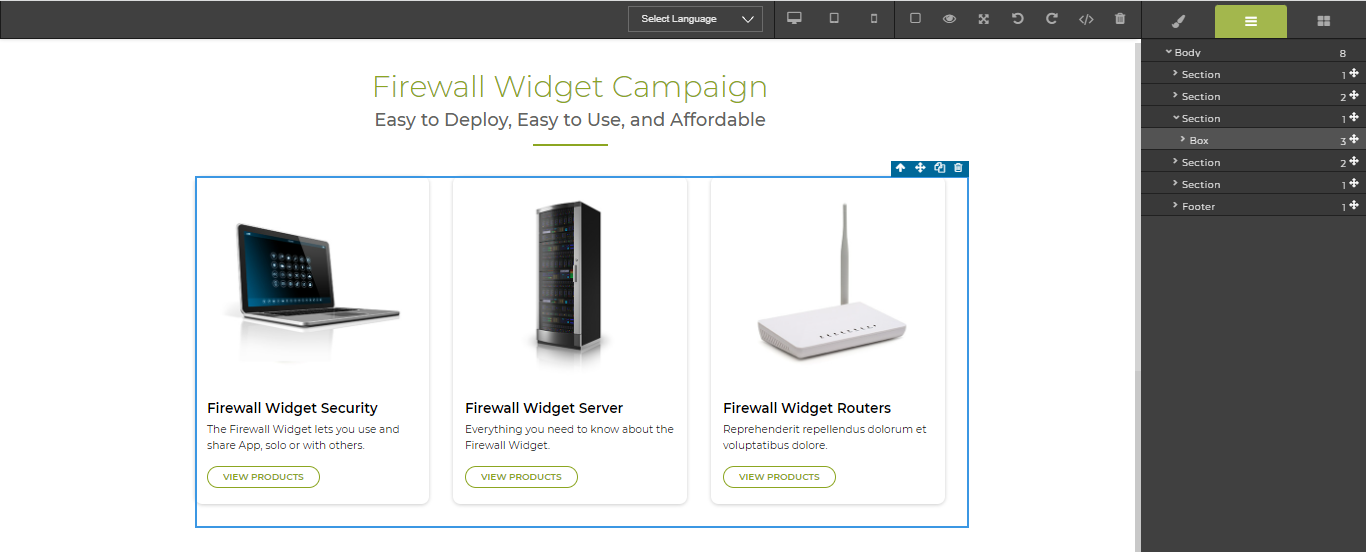
10.2 CMS Editor Tools
The Showcase CMS Editor works identically to the Microsite CMS Editor (see Section 5.2) with drag-and-drop layout components, HTML import, inline WYSIWYG editing, the paint brush style panel, and the Layer Manager.
10.3 Translating into Another Language
- In the View Showcases list, click the showcase to translate.
- Click Manage Content to enter the CMS Editor.
- Click the Select Language dropdown in the Google Translate bar.
- Select the target language (e.g., Spanish) — the page instantly translates.
- Review and click Save.
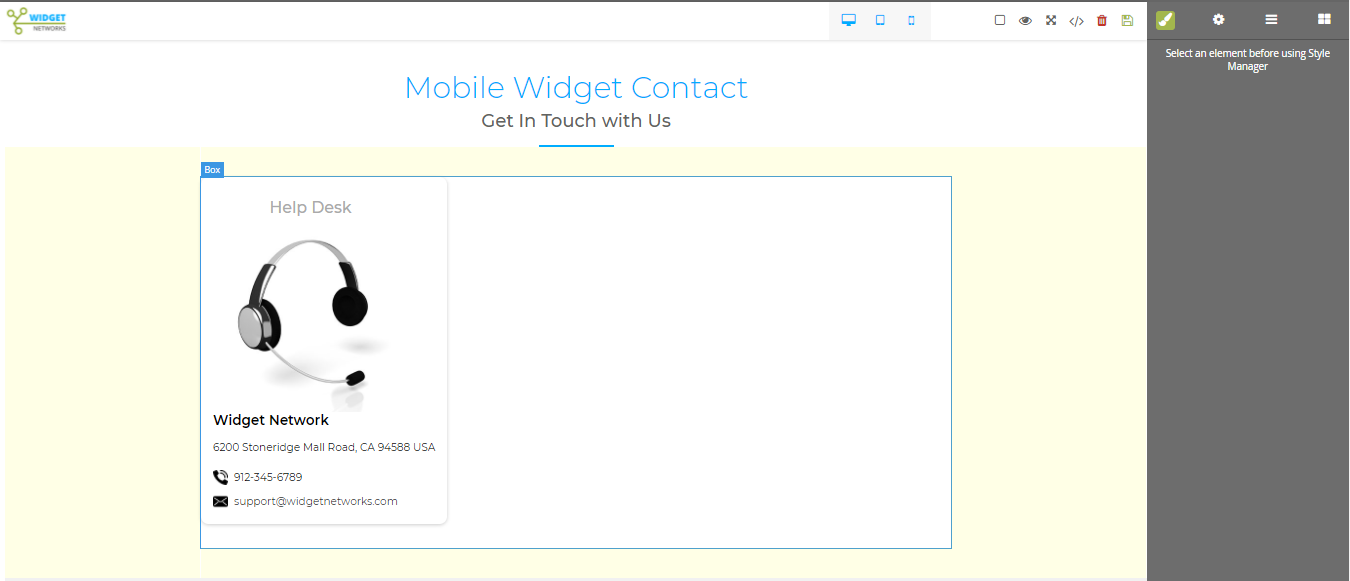
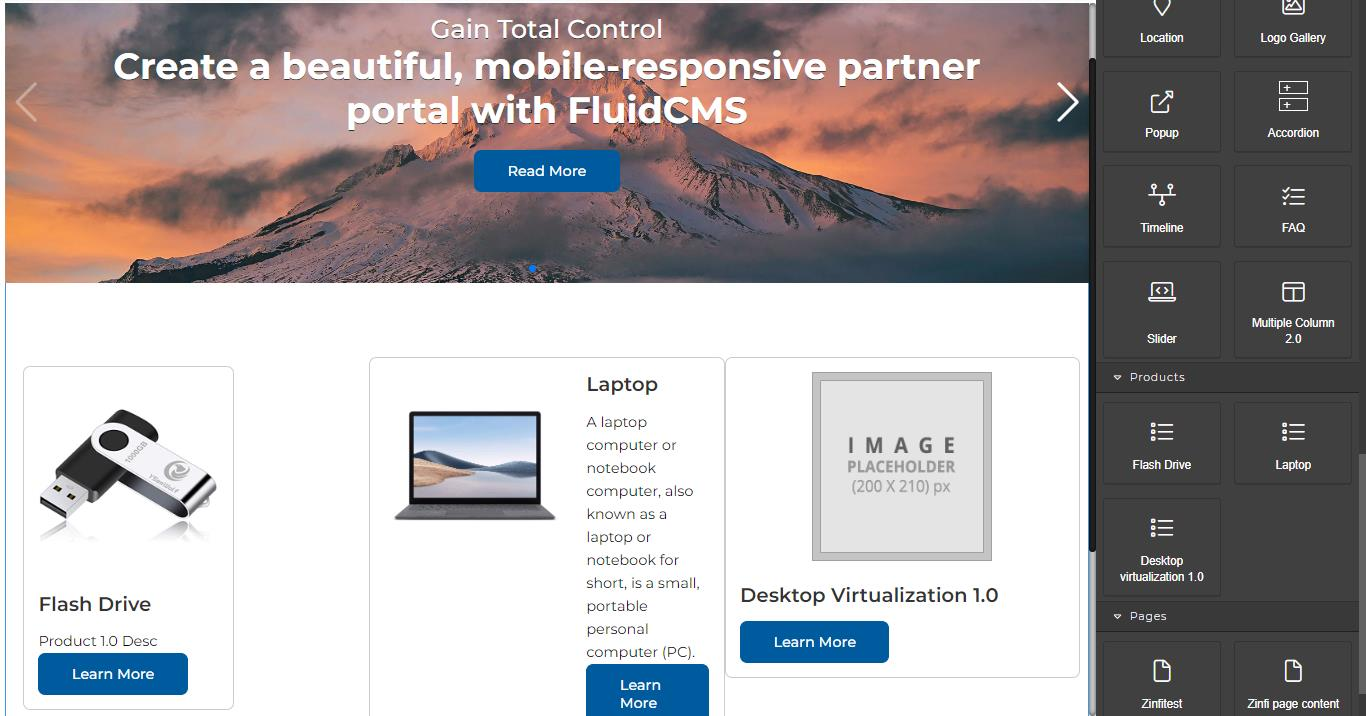
10.4 Adding Products to a Showcase
Products are pre-configured with Thumbnail Images, Names, and Short Descriptions in the CMS Object Browser. Admins can add products to any Showcase canvas through a simple drag-and-drop process.
- Click the showcase name to open its detail page, then click Manage Content.
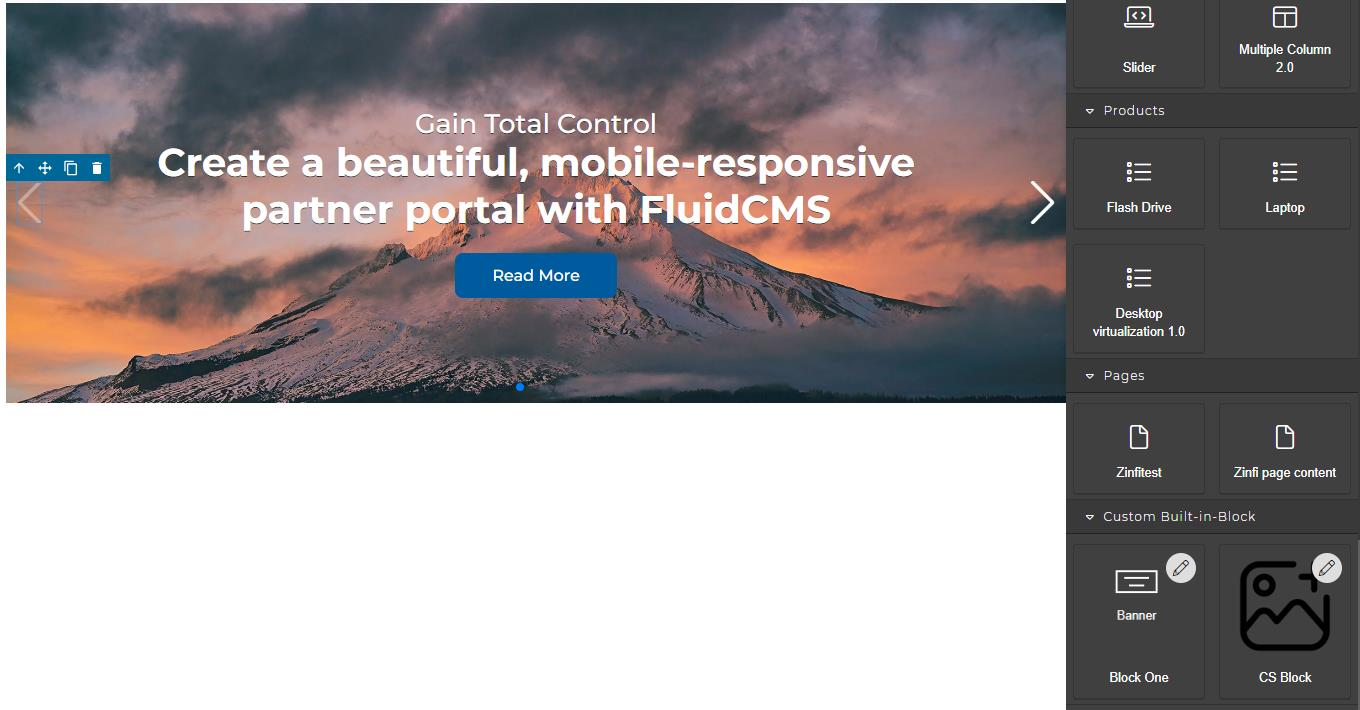
- In the CMS Editor, the Products category in the right sidebar lists all products assigned to or created by you (e.g., Flash Drive, Laptop, Desktop Virtualization 1.0).
- Drag the desired product card from the Products category panel and drop it onto the canvas.
- Click Save.


10.5 Making Zones/Sections Editable or Non-Editable
The same ucmcontenteditable / UPMcontenteditable class pattern applies to Showcases:
- In the CMS Editor, select the element and click the HTML Editor icon.
- Find the
<span>or<div>tag for the content you want to control. - To make editable by partners: add
class="UPMcontenteditable"to the tag. - To lock (non-editable): remove the
class="UPMcontenteditable"snippet.
Associating a Dynamic Form to a Showcase
A Dynamic Form can be tagged to a specific Showcase page to capture Prospect or partner information when a campaign executes. The process is identical to microsite form tagging.
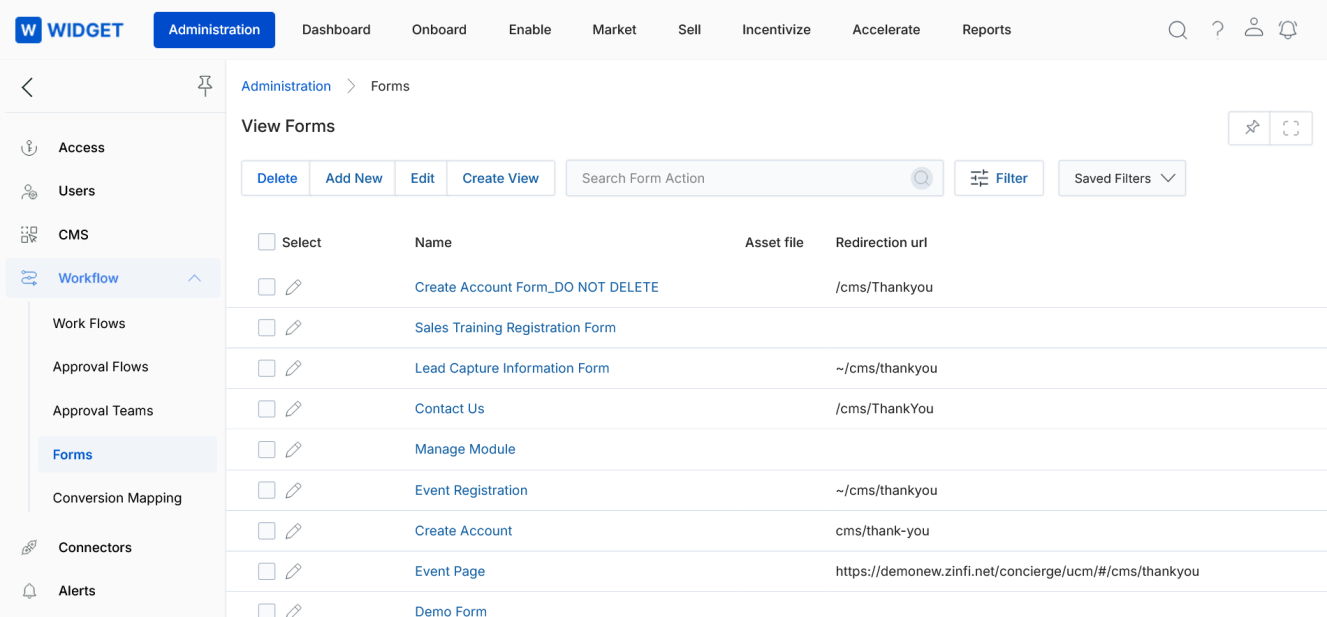
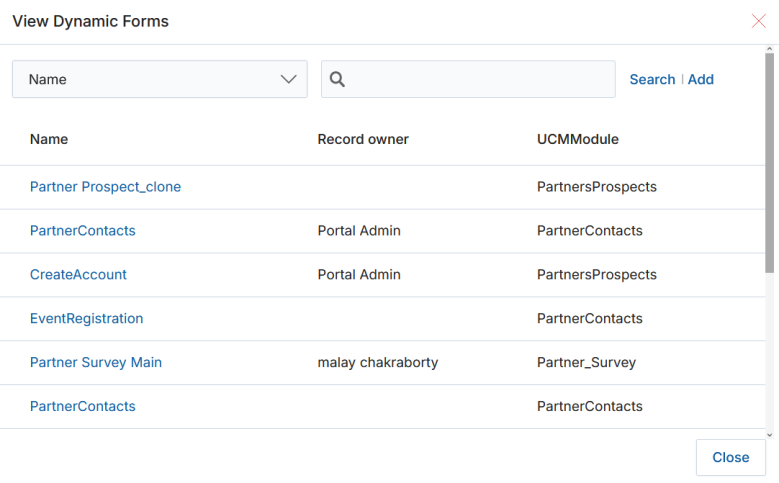
11.1 Viewing Dynamic Forms
To view all available Dynamic Forms, navigate to Administration > Workflow > Forms.
11.2 Prerequisites
11.3 Tagging Steps
- In the View Showcases page, click the name of the Showcase you want to integrate the form with.
- On the Showcase detail page, scroll to the Syndication Section and identify the page to associate with the form (e.g., Contact page). Confirm Page Type: form and Dynamic Form Action: Prospect are set on that page.
- Click Manage Content to open the CMS Editor.
- Navigate to the Contact page using the page selector in the lower-right corner of the editor.
- Click the Open Blocks button, scroll to the Forms section.
- Drag the desired Dynamic Form (e.g., Demo Form) from the Forms panel and drop it into the blank space on the canvas.
- Click Save.