Overview
Extending ZINFI UPM's adaptive software-as-a-service (aSaaS) to smartphones and tablets via native apps gives your organization a strong competitive advantage that can help drive revenue and enhance the partner and customer experience remotely. Whether viewing up-to-the-minute account or contact information, updating an opportunity, or scheduling an activity, the UPM Mobile Native Application provides mobile, secure, and instant access to vital customer and partner information and the productivity tools field professionals need to succeed.
The Progressive Web Apps (PWA) Mobile App combines the functions of the native app with the accessibility of the UPM portal. UPM Mobile Progressive Web Apps use modern web capabilities to deliver fast, native-app experiences with no app store downloads required, and all the goodness of the web portal. Currently supported mobile platforms: Android (check compatible versions).
Please Note: The UI experience of the UPM Mobile App and associated modules described in this guidebook are for demo purposes. The UI experience and the associated modules may vary as per your organization's UI branding and availability of modules as per respective licensing.
Benefits of Using the UPM Mobile App
- Fast and responsive app performance optimized for mobile networks.
- Full UPM access at your fingertips — most information and productivity tools needed for effective channel management are available on the go.
- Clean, familiar interface — smartphone-optimized UI featuring the ZINFI UPM interface and inviting color palette.
- Configurable and personalizable — application settings can be tailored to match unique organizational requirements and user preferences.
- Task-oriented interactions — perform searches, multi-select list items, view related records, and access Quick Action menus quickly and easily.
Mobile Platform Usability
The UPM Mobile application enables you to access and work with your UPM data from Android devices — including mobile phones and tablets. With this mobile application, you can access and manage your Partners, Leads, Accounts, Contacts, Tasks, and Products, and access or analyze organizational performance.
Installation — Android
ZINFI UPM Requirements
You must have a valid and active ZINFI UPM Account for the specific Portal. The best experience can be achieved with UPM 13.12 Portal version or higher.
Android Requirements
You need Android 10 or a higher version on your Android phone with internet connectivity.
To install ZINFI UPM from Play Store
- Open the Play Store on your Android phone.
- Search for UPM (beta).
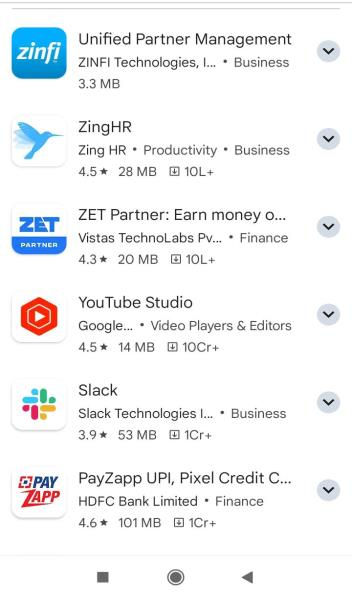
- Click on UPM (beta) in the product info screen, then click Install.
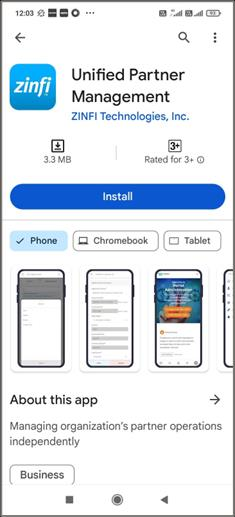
- Wait for the installation to complete. The status will change from Pending to showing Open and Uninstall buttons.
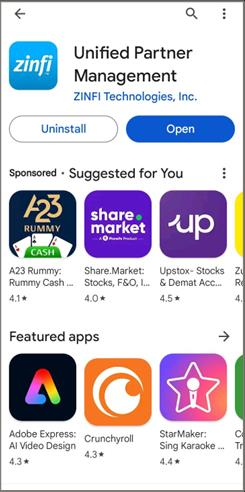
- Once the installation is complete, tap Open to run the UPM Mobile application.
Logging In
- Open the UPM mobile application you just installed. The welcome screen will prompt you for a Portal URL.
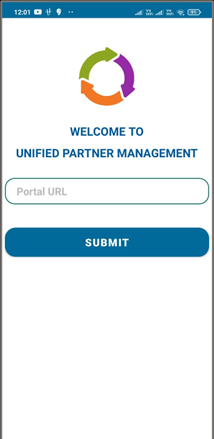
- Enter the UPM Portal URL provided by your vendor and click Submit.
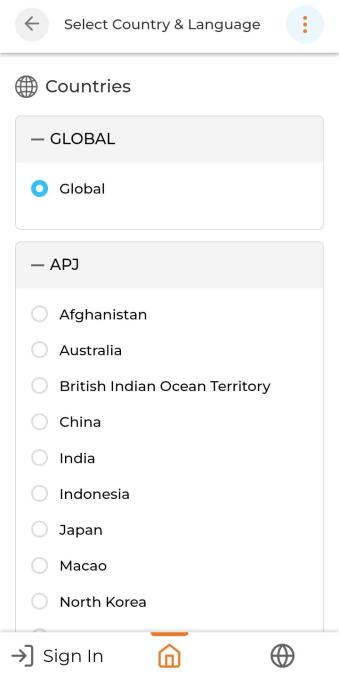
- Select your Country and scroll down to choose a Language. Then tap the three-dots icon in the upper-right corner and click Apply.
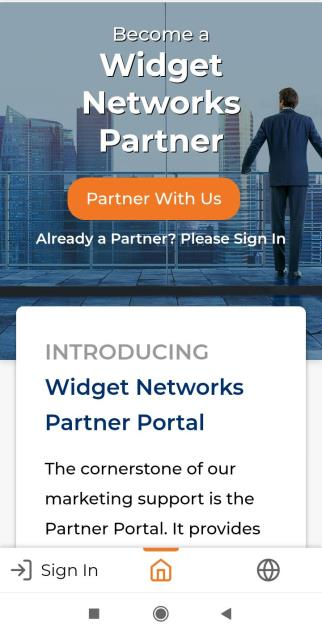
- You will be redirected to the introductory portal page. Click Sign In at the bottom of the page.
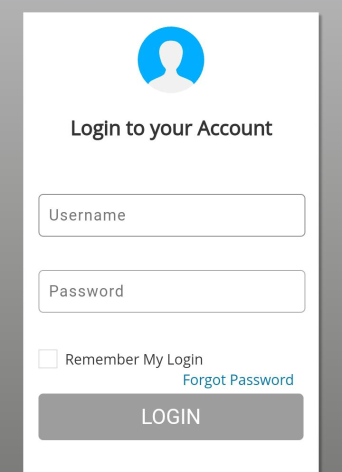
- Provide your Admin credentials (Username and Password) and click Login.
Mobile App Functionality
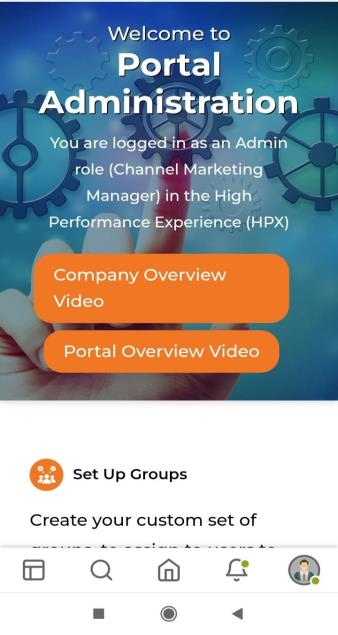
After logging in, the UPM Mobile app provides an intuitive navigation system using icons along the bottom bar and slide-out menus on both sides of the screen.
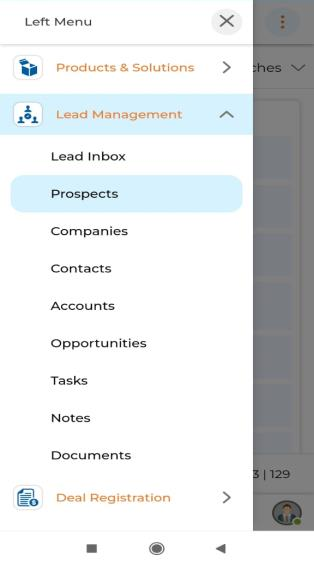
Navigating Applications
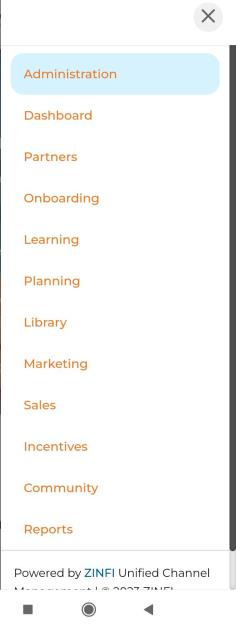
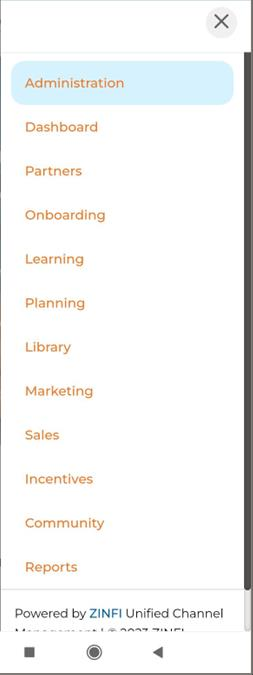
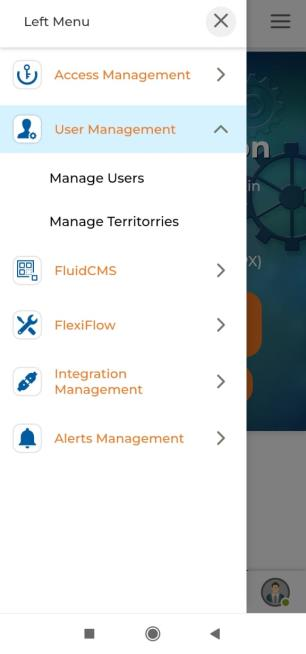
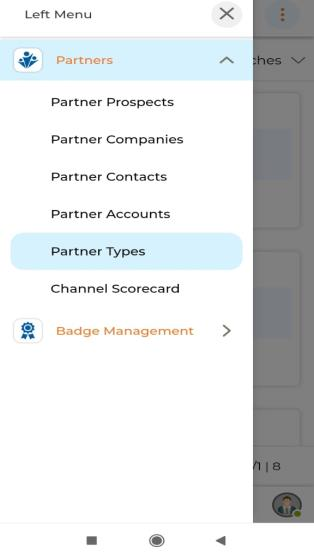
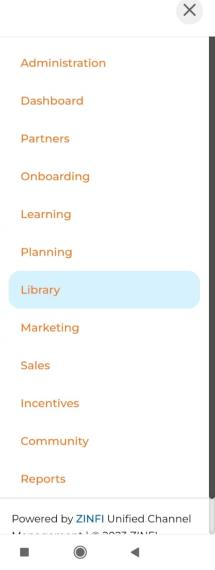
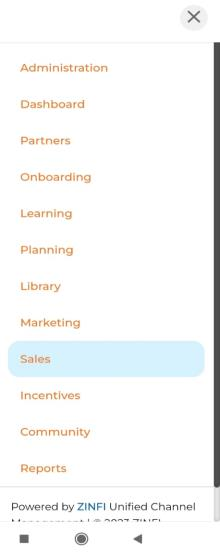
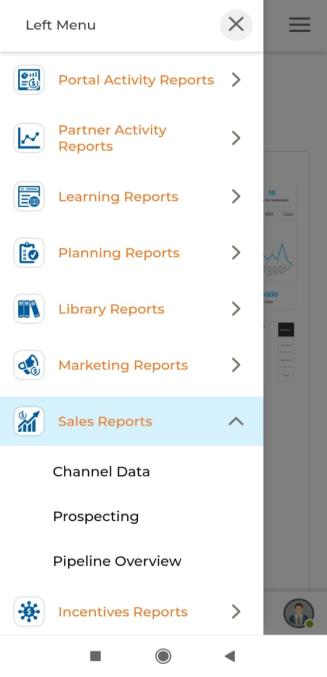
Each UPM zone — Administration, Partners, Library, Marketing, Sales, and Reports — provides module-level navigation through the right-hand menu, with sub-module shortcuts accessible via the left-hand slide-out menu. Within each list view, the three-dots icon provides context-sensitive actions such as Add, Delete, Export, and Bulk Import.
Administration
The Administration Zone provides easy-to-use tools to refine every aspect of channel operations — building portals or microsites, managing user and partner groups, and connecting to third-party applications.
User Management
The User Management module allows your organization to set up user accounts and associated groups, controlling which content each user can access via the partner portal.
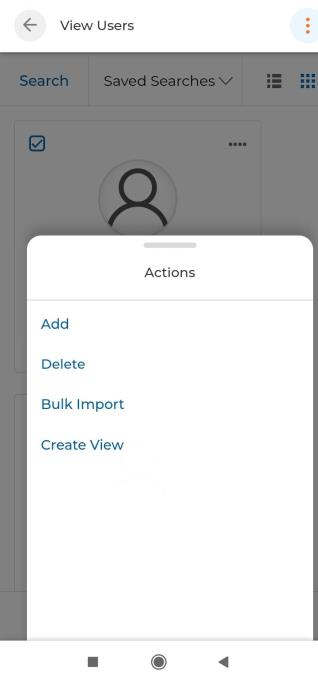
- Navigate to Administration → User Management → Manage Users to reach the View Users page showing all User Accounts.
- Tap the three-dots icon on the list page to access bulk actions: Add, Delete, Bulk Import, and Create View.
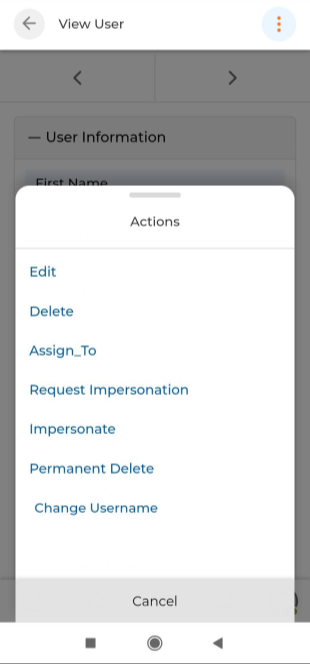
- Tap a user's name to open the details page.
- On the details page, the three-dots icon provides: Edit, Delete, Assign To, Request Impersonation, Impersonate, Permanent Delete, and Change Username.
Alerts Management
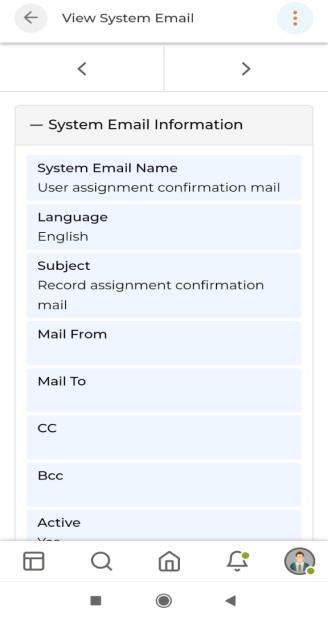
UPM Alerts notify users when specific events occur — such as receiving approval requests or comment replies. Alerts Management enables admins to create and maintain configurable business or ad-hoc alerts that take the form of email alerts.
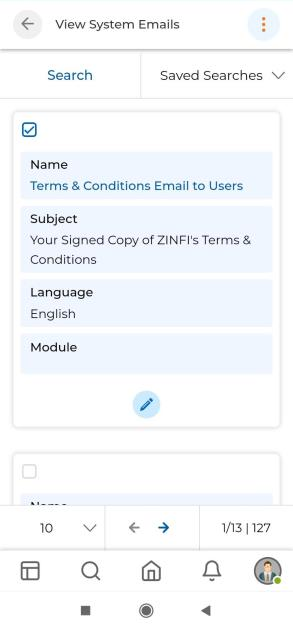
- Navigate to Administration → Alerts Management → Manage System Emails to view all System Emails.
- Use the three-dots icon to Add a new System Email or Delete an existing one.
- Tap a System Email name to open its detail page, where the three-dots icon provides: Edit, Delete, Clone, and Send Test Email.
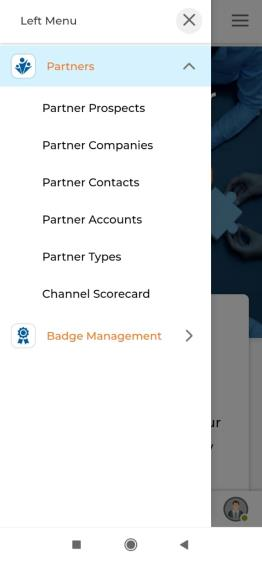
Partners
The Partners Profile Management module enables a unified approach to global partner management — quickly creating partner records including business information, prospect information, contacts, and accounts, while easily tracking sales history and channel program activities.
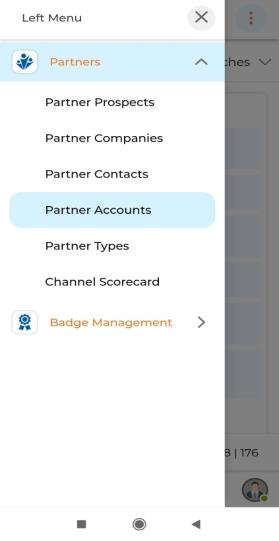
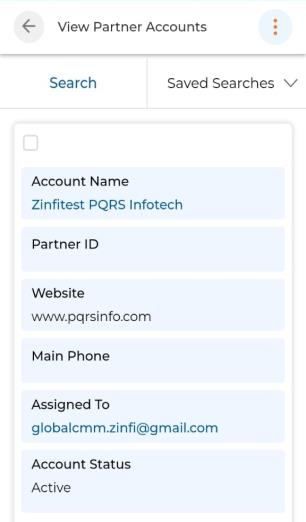
Partner Accounts
Partner Accounts are records of partner establishments you are currently doing business with. All Partner Contacts are associated with and listed under their respective Partner Accounts.
- Navigate to Partners → Partner Accounts to access the View Partner Accounts list.
- Three-dots actions on the list: Add, Delete, Export, Bulk Import, Assign To.
- Tapping an account name opens its detail page; three-dots actions there: Edit, Delete, Clone, Assign To.
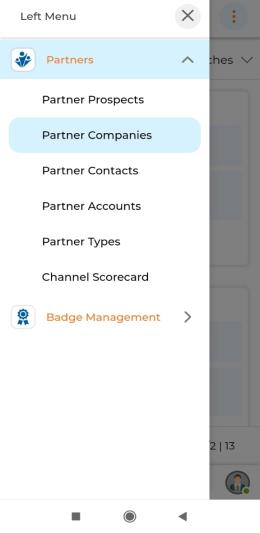
Partner Companies
Partner Companies lists all companies by name that your Partner Prospect records are associated with — representing potential partners you are recruiting or onboarding.
- Navigate to Partners → Partner Companies to access the listing.
- Use the Search button to find specific records; the pen icon lets you edit a selected record inline.
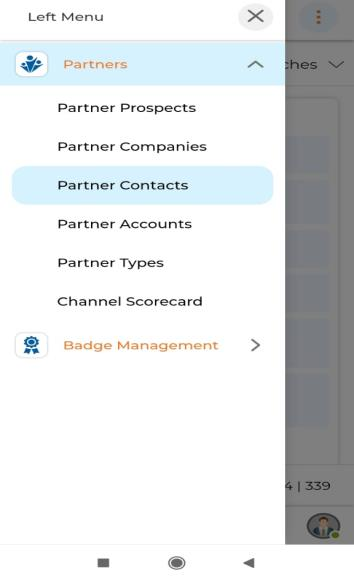
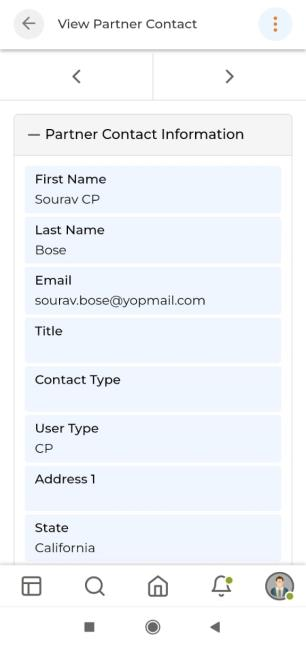
Partner Contacts
Partner Contacts are records of your partner reps (and internal Admin reps) that you are currently doing business with.
- Navigate to Partners → Partner Contacts to access the View Partner Contacts list.
- Three-dots actions: Add, Delete, Bulk Import, Assign To.
- On the detail page: Edit, Delete, Clone, Assign To.
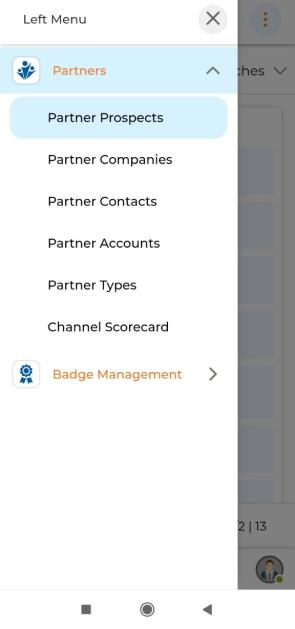
Partner Prospects
Partner Prospects lists all potential partner reps you are recruiting or onboarding.
- Navigate to Partners → Partner Prospects to access the View Partner Prospects list.
- Three-dots actions: Add, Delete, Bulk Import, Assign To.
- On the detail page: Edit, Delete, Clone, Assign To.
Partner Types
Partner Types allows you to create naming conventions for different partner categories, then associate those types to Partner Account and Partner Contact records for segmentation in reporting, filtering, and workflow rules.
- Navigate to Partners → Partner Types to access the View Partner Types list.
- Three-dots actions: Add, Delete.
- On the detail page: Edit, Delete.
Library
The UPM Library helps your organization maintain an online library system to manage and share digital assets — e-books, videos, banners, images, customer stories — ensuring real-time access to essential content across your organization and partner network.
Content Library
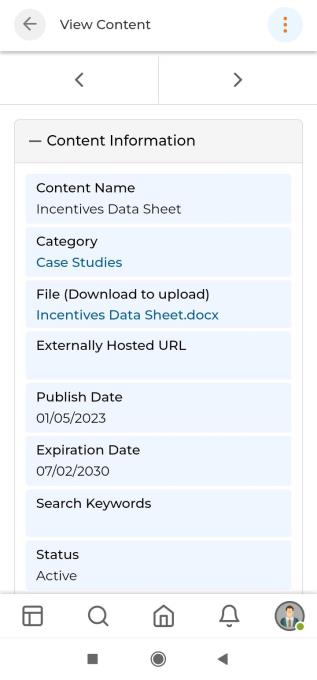
The Content Library provides a secure repository for business documents, audio files, video files, spreadsheets, images, and web pages.
- Navigate to Library → Content Library → View Contents to access the listing.
- Three-dots (list level): Add, Bulk Upload.
- Four-dots (item level): View, Visibility Configuration, Info, Share.
- On the detail page: Edit, Delete.
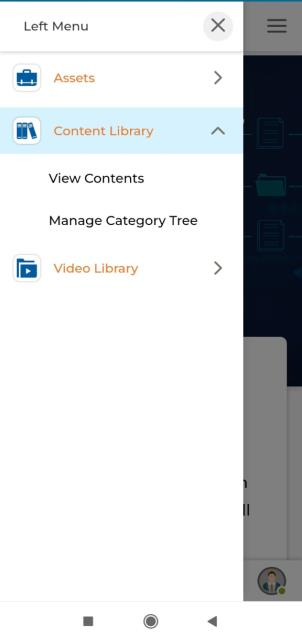
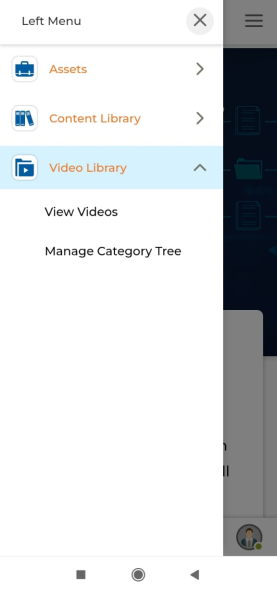
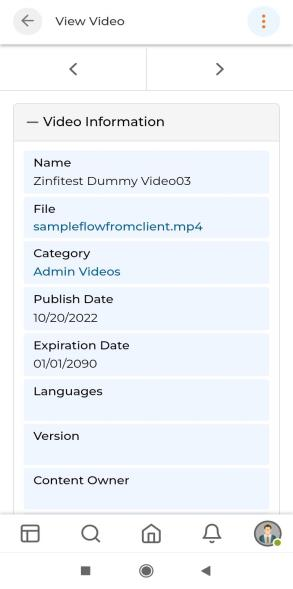
Video Library
The Video Library provides a secure repository for audio-visual files including audio and video content.
- Navigate to Library → Video Library → View Videos to access the listing.
- Three-dots (list level): Add, Bulk Upload.
- Four-dots (item level): Play, Visibility Configuration, Download.
- On the detail page: Edit, Delete, Play, Download.
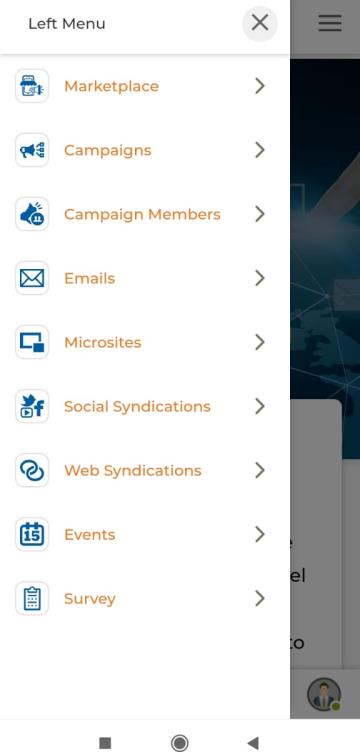
Marketing
The Marketing module, integrated with Campaign Management activities, enables your organization to configure campaign accessibility via user group association and manage your entire multi-level campaign member ecosystem — including Prospects, Contacts, Partner Prospects, and Partner Contacts.
Contacts (Campaign Members)
Manage contacts enrolled in campaigns via Marketing → Campaign Members → Contacts. Actions available: Add, Delete, Send Email, and on the detail page: Edit, Delete, Clone, Send Email.
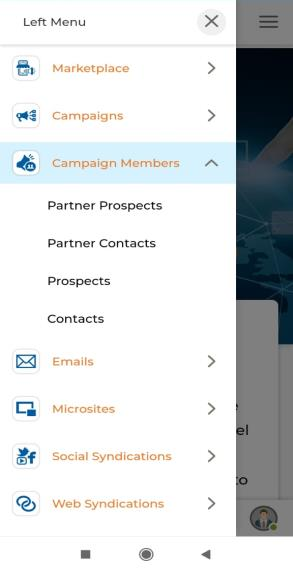
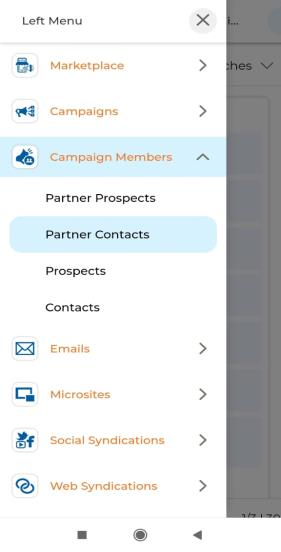
Partner Contacts (Campaign Members)
Manage partner contacts in campaigns via Marketing → Campaign Members → Partner Contacts. Actions: Add, Delete; detail page: Edit, Delete, Clone, Send Email.
Partner Prospects (Campaign Members)
View and manage partner prospects in campaigns via Marketing → Campaign Members → Partner Prospects. Actions: Add, Send Email; detail page: Edit, Delete, Clone, Send Email.
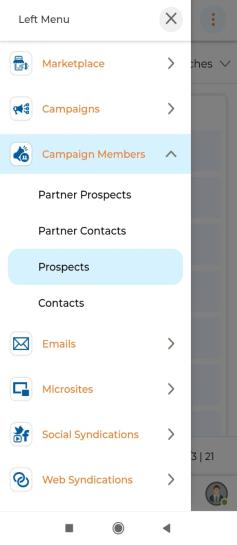
Prospects (Campaign Members)
Access prospects enrolled in campaigns via Marketing → Campaign Members → Prospects. Actions: Add, Send Email, Delete; detail page: Edit, Delete, Clone, Assign To, Send Email.
Sales
The Sales module lets you organize products and solutions, leads and deals, and channel data. Key capabilities include end-user account management (full lead lifecycle from generation to close) and opportunity and deal management with automated review and CRM push via configured system connectors.
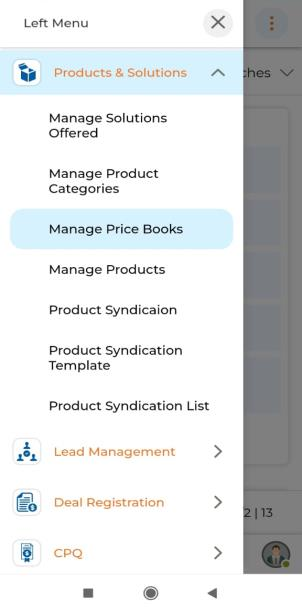
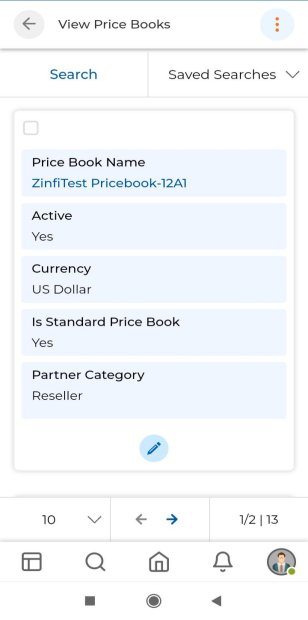
Products and Solutions — Manage Price Books
Navigate to Sales → Products & Solutions → Manage Price Books to view and manage price books. Actions: Add, Delete; detail page: Edit, Delete.
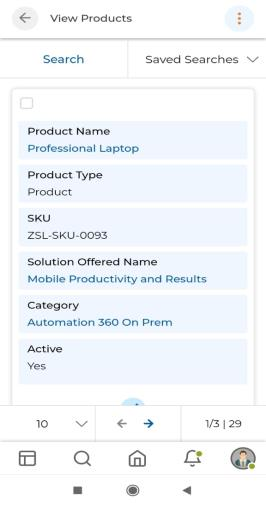
Products and Solutions — Manage Products
Navigate to Sales → Products & Solutions → Manage Products to manage the product catalog. Actions: Add, Delete, Bulk Import; detail page: Edit, Assign To, Delete.
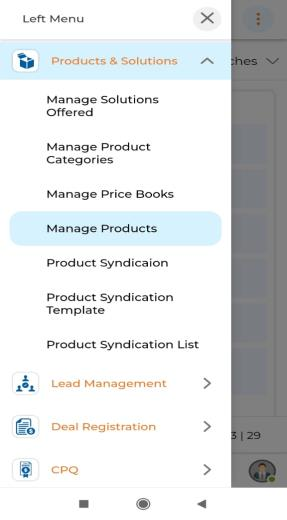
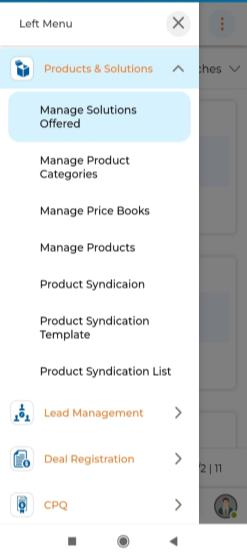
Products and Solutions — Manage Solutions Offered
Navigate to Sales → Products & Solutions → Manage Solutions Offered to manage solution categories. Actions: Add, Delete; detail page: Edit, Delete.
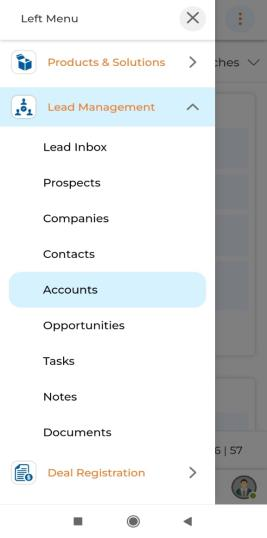
Lead Management — Accounts
An Account is an organization or person involved with your business — customer, competitor, or partner. These are records of companies engaged in potential Opportunities and Deals.
- Navigate to Sales → Lead Management → Accounts to access the View Accounts list.
- Actions: Add, Delete; detail page: Edit, Delete, Clone, Assign To.
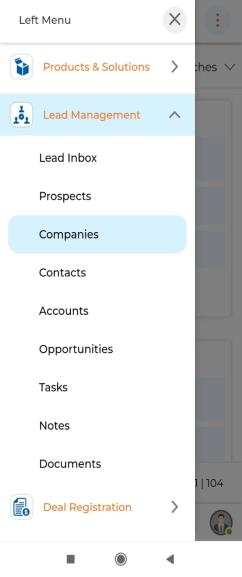
Lead Management — Companies
Companies lists all Prospect Company records — the organizations your Prospect records are associated with. Navigate to Sales → Lead Management → Companies. The three-dots action provides Export; tap a company name to view its detail page.
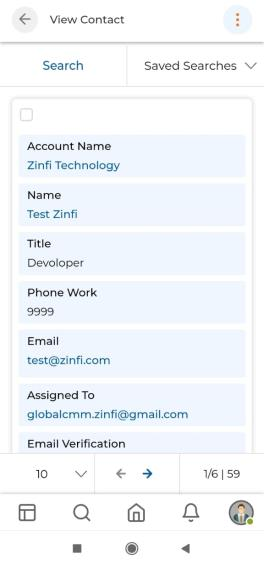
Lead Management — Contacts
Contacts are the representatives/employees of your Partner Accounts — the people engaged in potential Opportunities and Deals. Upon qualification, a lead is converted into a Contact.
- Navigate to Sales → Lead Management → Contacts.
- Actions: Add, Delete, Send Email, Export; detail page: Edit, Delete, Clone, Send Email.
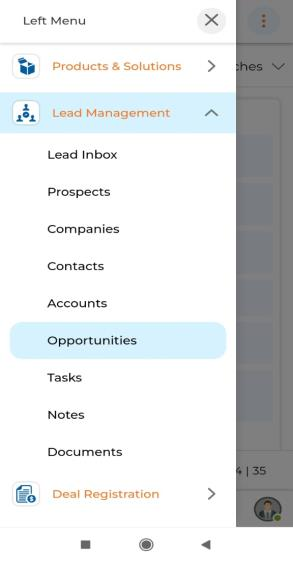
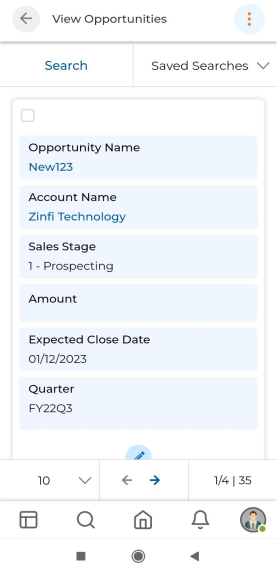
Lead Management — Opportunities
Opportunities capture potential deals with any Account or Contact. Some organizations use Opportunities as the actual deal record; others use them as a preliminary approval record before creating a Registered Deal.
- Navigate to Sales → Lead Management → Opportunities.
- Actions: Add, Delete, Export; detail page: Edit, Delete, Clone, Assign To.
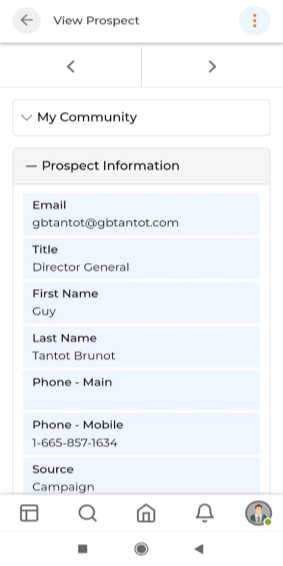
Lead Management — Prospects
A Prospect (lead) is a prospective client — emerging from conferences, website form fills, or other interactions. The Prospects section under Lead Management is where all Prospect records are stored and managed.
- Navigate to Sales → Lead Management → Prospects.
- Actions: Add, Delete, Assign, Bulk Import; detail page: Edit, Delete, Clone, Assign To.
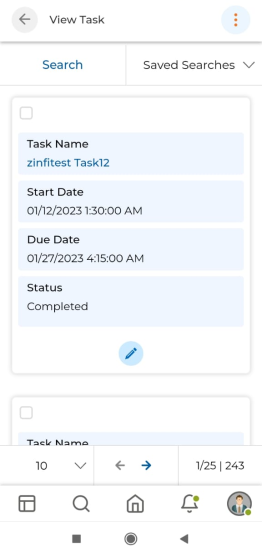
Lead Management — Tasks
Tasks are actionable items linked to any Prospect, Contact, Account, or Opportunity in Lead Management. They help arrange complex projects into manageable, trackable units.
- Navigate to Sales → Lead Management → Tasks.
- Actions: Add, Delete, Export; detail page: Edit, Delete.
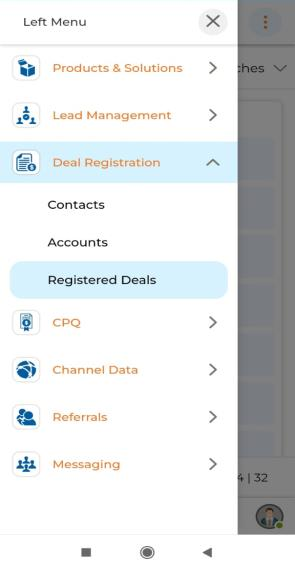
Deal Registration
UPM's Simplified Deal Registration methodology lets partners create a deal in one step through a single-page Deal Registration Form. From the Admin view, the Deal Registration module is the repository of all submitted deals from your partners.
- Navigate to Sales → Deal Registration → Registered Deals.
- Actions: Add, Delete, Export; tap a deal name to view its detail page.
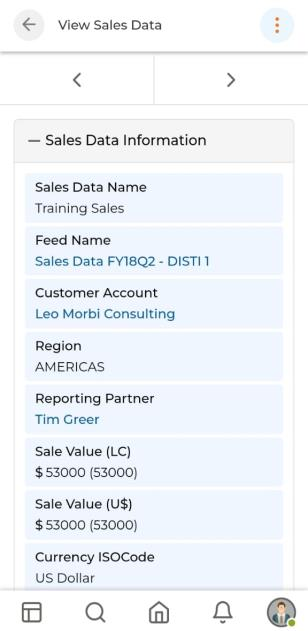
Channel Data
ZINFI's Channel Data Management module enables your organization to set up a dynamic data collection process from distributors and resellers — tracking what is selling, who is selling, where it is selling, and why.
- Navigate to Sales → Channel Data → Sales Data.
- Actions: Add, Delete; detail page: Edit, Delete.

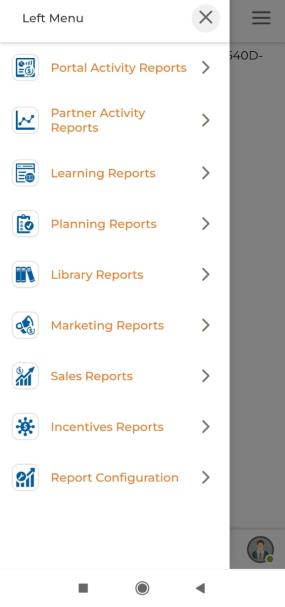
Reports
ZINFI's Business Intelligence Reports module allows your organization to track progress on all marketing activities and lead generation by participating channel partners. Generate default reports, build custom reports, and add personalized reporting components to your dashboard for real-time performance monitoring.
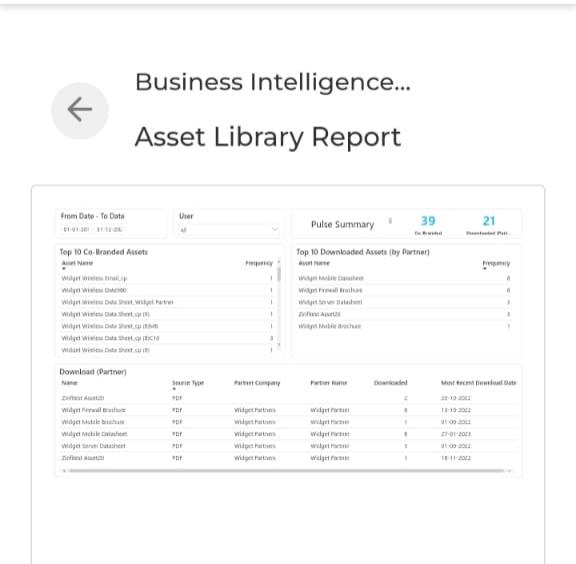
Library Reports — Assets
The Assets report (under Library Reports) shows a comprehensive count and details of co-branded assets, assets downloaded by partners and leads, and more.
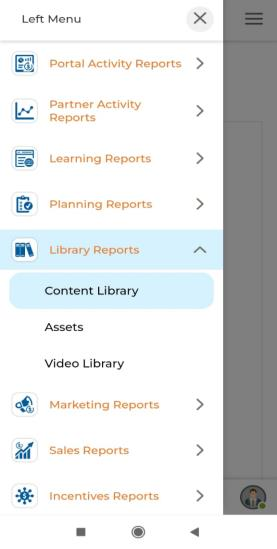
Library Reports — Content Library
The Content Library report shows sales content library tracking details, content downloads by region, and count of content downloads by type.
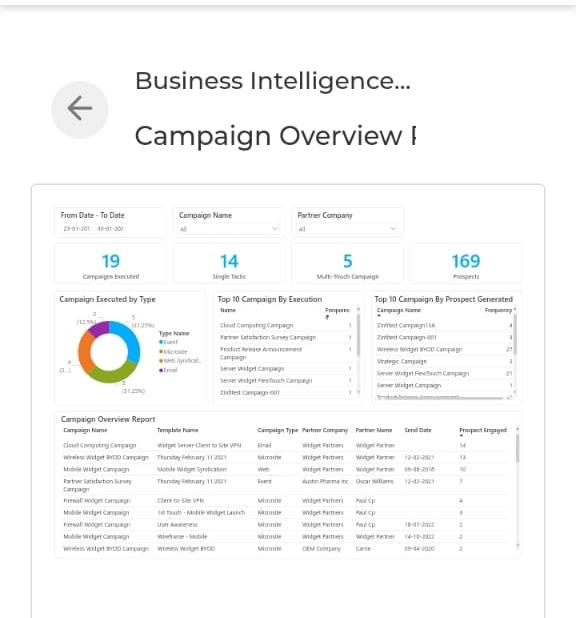
Marketing Reports — Campaign Overview
The Campaign Overview report shows statistics on the count of campaigns executed by type and prospects generated from those campaigns.
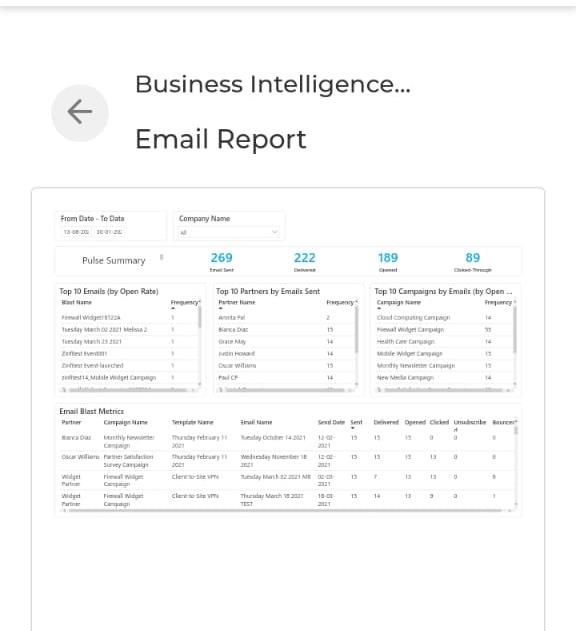
Marketing Reports — Email
The Email report shows the count of emails sent, delivered, opened, and clicked, along with top 10 email campaigns by open rate, partners, and campaigns.
Marketing Reports — Events
The Events report shows a detailed count of digital and physical events launched with registrations, plus top 10 events by launch and registration metrics.

Marketing Reports — Marketing Overview
Marketing Overview shows a report of all marketing activities done by partners — prospect counts, leads distributed and generated, and graphical representations of prospect engagement per campaign tool by month.
Marketing Reports — Social Syndication
The Social Syndication report shows counts of posts syndicated, likes earned, shares, and comments, plus top 10 posts by syndication and engagement metrics.
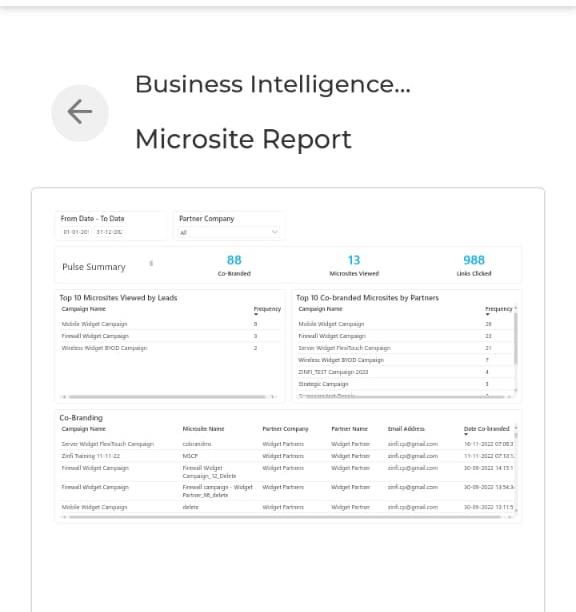
Marketing Reports — Web Syndication
The Web Syndication report shows counts and details of co-branded showcases, showcases participated, and click-throughs, plus top 10 showcases by participation and engagement metrics.
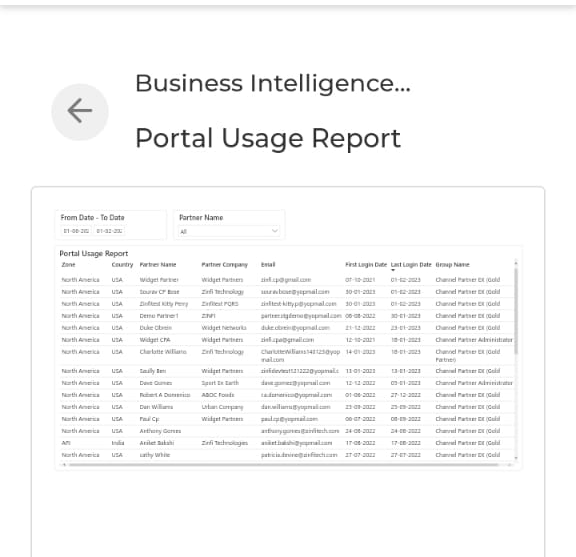
Portal Activity Reports — Portal Usage
The Portal Usage report shows portal usage by partners — including partner name, contact person, first and last visit timestamps, and whether the partner has downloaded assets, executed campaigns, or accessed reports.
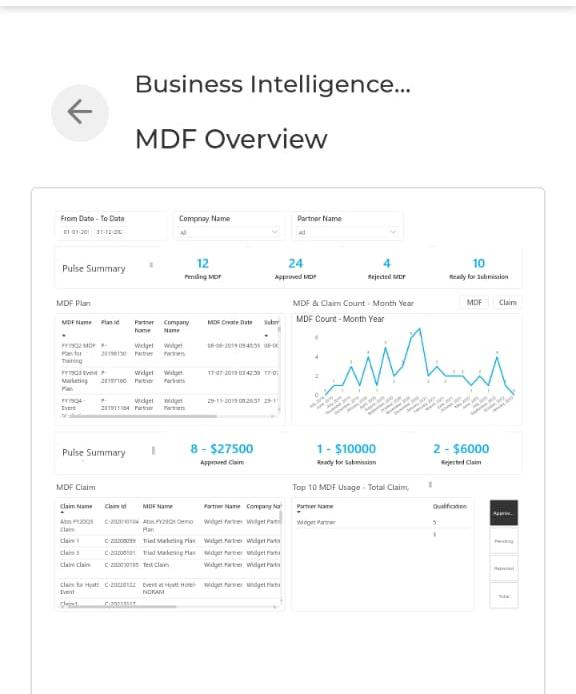
Incentive Reports — MDF Overview
The MDF Overview report shows details of MDF Claims and Submissions — including claim counts, MDF amounts by tier, and monthly trend charts.
Sales Reports
Sales Reports provides two sub-reports: Pipeline Overview (details of deals in the sales pipeline) and Prospecting (details of sales prospecting activity).
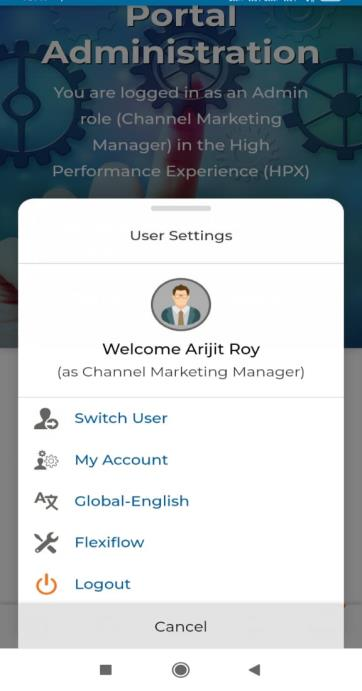
Logging Out
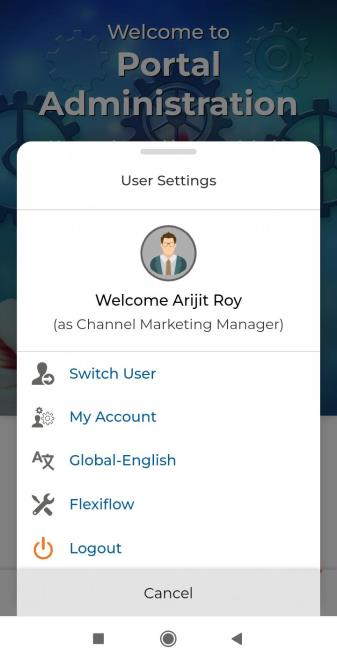
To log out from the UPM Mobile App:
- Tap the Avatar icon at the bottom-right corner of the screen. A User Settings panel will appear showing the current user name and role.
- Tap Logout from the options presented (Switch User, My Account, Global-English, Flexiflow, Logout).