
Introduction
The Partner module of ZINFI's UPM enables a unified approach to global partner management by providing key elements outlined through a structured channel program, and clear channel policies so partners know exactly what they need to do to perform successfully and how their performance will be measured and rewarded.
Partner Profile Management
The Partner Management module allows your organization to manage channel partner profiles more quickly and effectively. Your organization can easily create partner records in the system, including business information such as partner type and company, prospect information, contacts, and accounts. Channel management team members can easily track detailed partner profile information as well as sales history, lead generation, and other channel program-related activities.
Global Partner Management
By deploying ZINFI's UPM platform, you can recruit, onboard, train, and manage your partners globally to drive profitable growth. The platform makes it easy for you to determine which partners are on track to become high performers and which need extra help. ZINFI's UPM platform is supported in multiple languages with localized resources in various countries, driving partner usage and satisfaction.
Partner Prospects
Partner Prospects are listings of all potential partner reps you are going after to recruit or onboard. You can track these records by sending Market To campaigns and reporting on engagement. Once a Partner Prospect is successfully recruited, you can convert them into a full Partner Contact — and their associated Partner Company gets converted to a Partner Account.
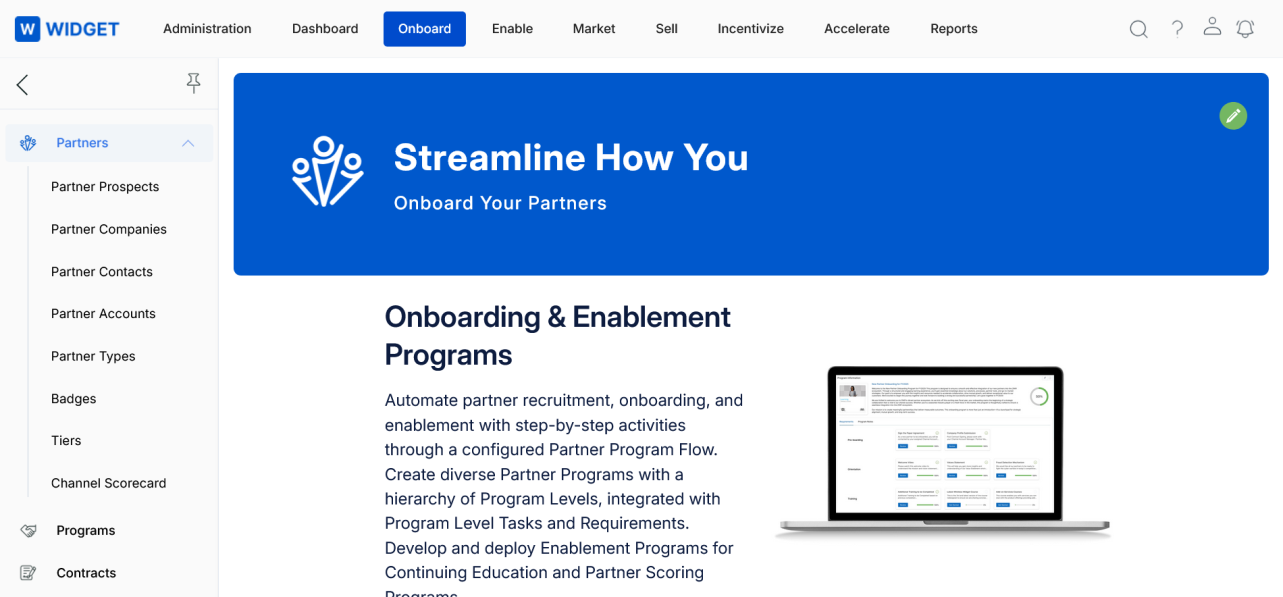
To navigate to Partner Prospects: click Onboard in the top menu, then click Partners > Partner Prospects in the left menu bar.
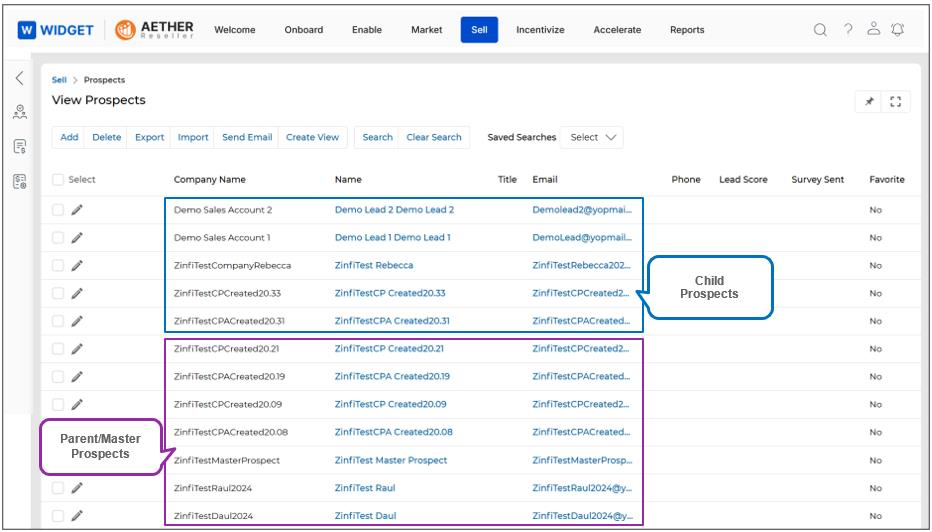
View Partner Prospects
The View Partner Prospects list page provides the following actions at the top of the page:
- Add — Opens a new page to add a new prospect.
- Delete — Deletes selected prospect(s) from the list.
- Create Mailing List — After selecting prospects, creates the required distribution list.
- Export — Exports the Entire List, Current Page, or Uncheck All selections.
- Import — Click to import records in legacy format (CSV/Excel).
- Create View — Creates a new customised page view.
- Search / Filter — Opens a search window filterable by email ID, Name, Company Name, Country, List Name, Blast Name, and more.
- Clear Search — Clears the active search.
- Saved Searches — Shows a dropdown list of saved filter configurations (each supports Edit and Delete).
Clicking on a Prospect Name in the grid navigates to that record's detail page.

View Partner Prospect Details
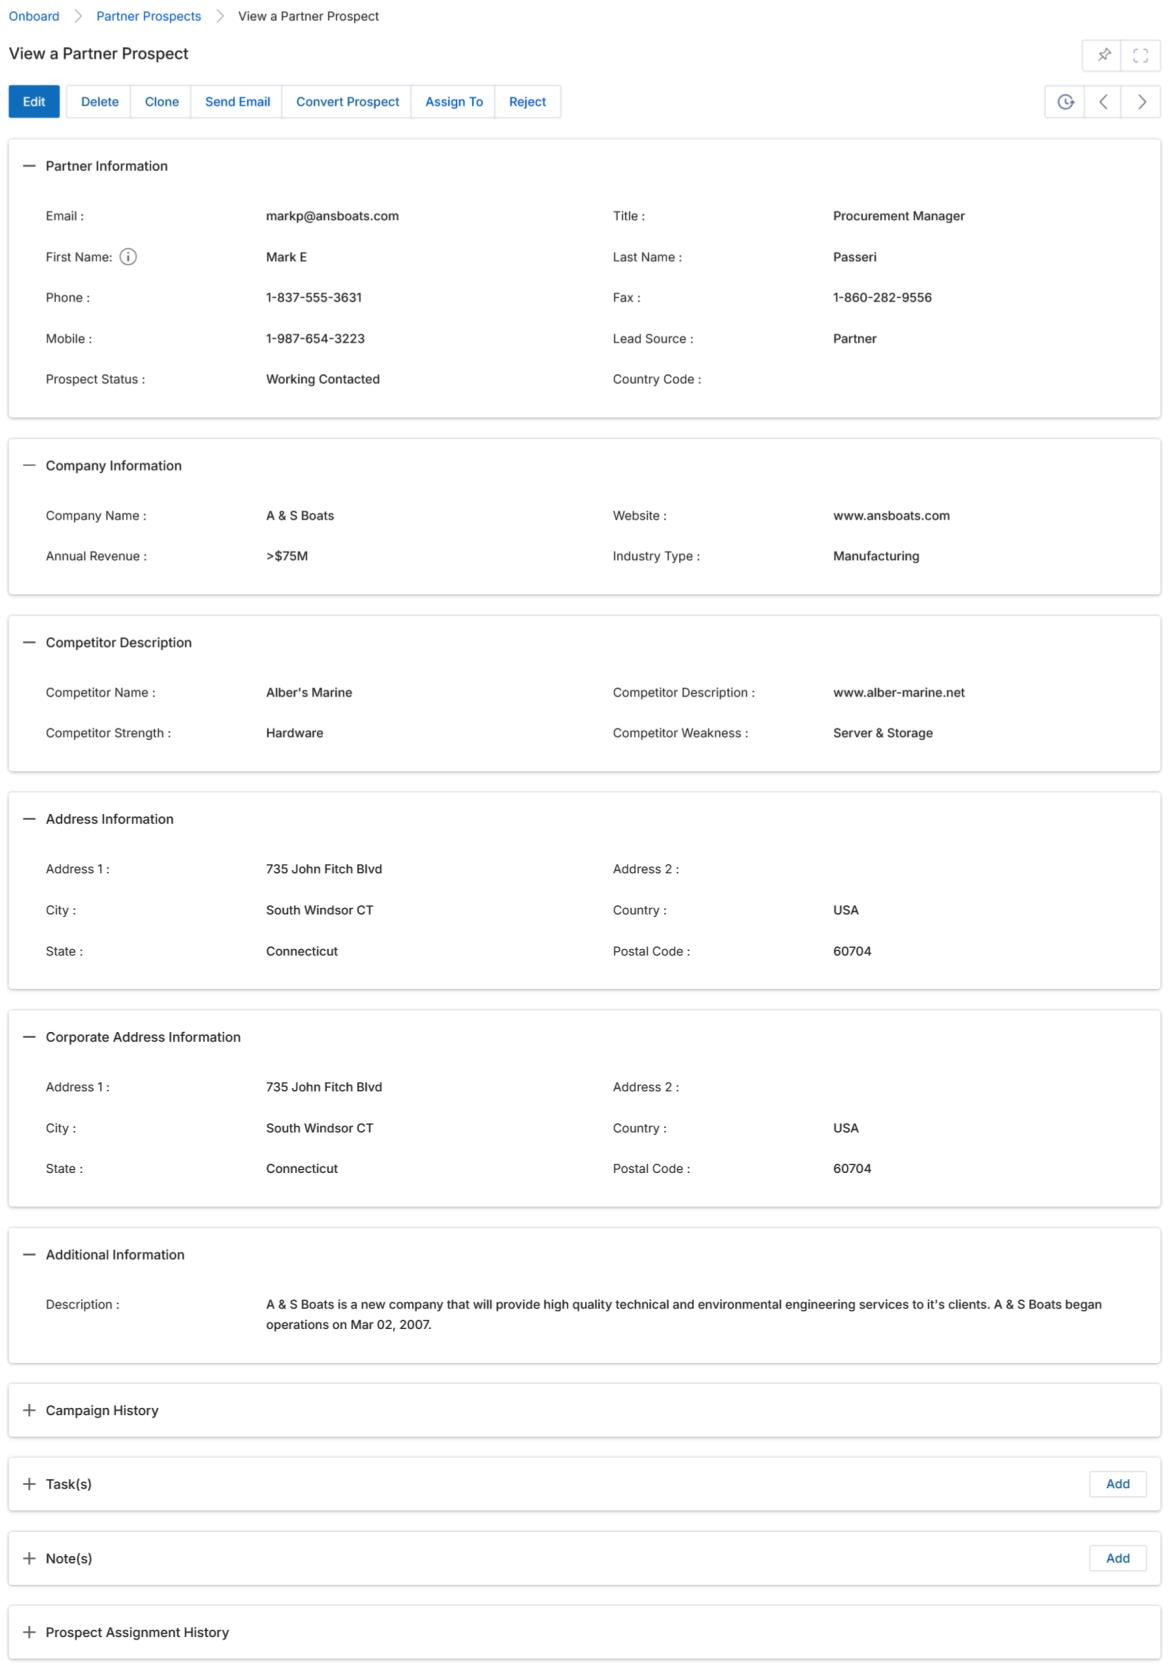
The Partner Prospect detail page contains the following sections and action buttons:
- Edit — Opens the record in edit mode.
- Delete — Deletes the record and its related list associations.
- Clone — Clones the record.
- Send Email — Sends email to the prospect via a distribution mailing list.
- Convert Prospect — Converts the Partner Prospect to a Partner Contact.
- Assign To — Assigns the record to specific user(s) or group(s) with Read Only or Read/Write access.
- Reject — Rejects the prospect; a popup prompts for a rejection reason.
The record contains these information sections:
| Section | Key Fields |
|---|---|
| Partner Information | Email, Title, First Name, Last Name, Phone, Fax, Mobile, Lead Source, Partner Category, Country Code, Prospect Status |
| Company Information | Company Name, Website, Annual Revenue, Industry Type |
| Competitor Description | Competitor Name, Description, Strength, Weakness |
| Address Information | Address 1, Address 2, City, Country, State, Postal Code |
| Corporate Address | Alternate address fields |
| Additional Information | Description |
| Commission Payout Milestones | Referral Submission, Acceptance, Rejected, and Contacted commission amounts |
| Campaign History | Campaign Type, Campaign Name, Status, Created On |
| Tasks | Task Name, Status, Start Date, Due Date, Priority, Assigned User, Description |
| Notes | Note Name, Associated Record, File attachment, Contents |
| Prospect Assignment History | Assigned By, Assigned To |
Partner Self Registration
Partners can self-register on the Sign Up page of the ZINFI Portal. Once registration is successful, the Referral Partner record will appear in the View Partner Prospects list. Affiliate Partners can also register themselves through the UPM Sign Up Form and land as Affiliate Partner Prospects at UPM.
Convert a Partner Prospect into a Partner Contact
From a Prospect detail page, click Convert Prospect. The Contact Information fields are auto-filled and cannot be edited before saving. Under Account Information:
- For a new account, check the New Account checkbox.
- For an existing account, click Select to open the account picker and choose or create the account.
- Click Save to complete the conversion.
Add / Edit a Partner Prospect
To edit an existing prospect, click the pencil icon. To add a new prospect, click the Add button at the top of the list. The Add/Edit form contains: Partner Information (Email, Title, Name, Phone, Fax, Mobile, Lead Source), Company Information (Company Name, Website, Annual Revenue, Industry Type), Competitor Description fields, Corporate Address Information, and an Additional Information description field. Click Save when complete — you will be returned to the list where you can click back into the record to add Campaign History, Tasks, and Notes.
Import a List of Prospects
Click the Import button on the list view to open the View Imports page. Click Add to configure a new import:
- Name — Name this upload instance.
- Entity List — Select "Partner Prospects" from the dropdown.
- Attachment — Browse and upload your filled Excel template (.xlsx only — the system shows an alert for unsupported formats).
- Auto Update — Check to overwrite existing records matched by email address; leave unchecked for new records.
- External ID Name / UPM Field — Required only when Auto Update is enabled, to map your Excel column to the matching UPM system field.
- Has External ID — Check when you have an External ID Name to map.
- Click Next to proceed to field mapping, then click Next again to complete the import.
To review or edit an existing import configuration, click the Edit (pencil) icon. Click the link in the Attachment column to download the original import file, or click the Name link to open the Import Details window (showing Import Information, Import Configuration Details, and a Download Report link).
Partner Companies
Partner Companies are the listings of all companies that your Partner Prospect records are associated with. There is no Add button in this tool — Partner Company records are created automatically when you enter a new partner company name in a Partner Prospect record. After a company is auto-generated, you can edit the record here.
Navigate to Partner Companies: Onboard > Partners > Partner Companies.
View Partner Companies
The list page provides Create View, Search, Clear Search, and Saved Searches actions. Clicking on a Company Name navigates to its detail page.
Partner Company listings are created by entering a new Partner Company name in a Partner Prospect record — this is the only way they appear in this sub-module.
Edit a Partner Company
To edit the name or website of a Partner Company, you must navigate back into the Partner Prospect record of the individual associated with that company and edit the information there.
Partner Contacts
Partner Contacts are the records of your Partner reps (and also your internal Admin reps) that you are currently doing business with. It is from these records that you track your Partner ecosystem and generate User records to invite people into the platform or portal for access.
For in-portal guided help, go to Administration zone and click on the Blue Icon for the UPM Wizard. Navigate to User Management > Create Partner Contact Record for a step-by-step guided experience.
Navigate to Partner Contacts: Onboard > Partners > Partner Contacts.
View Partner Contacts
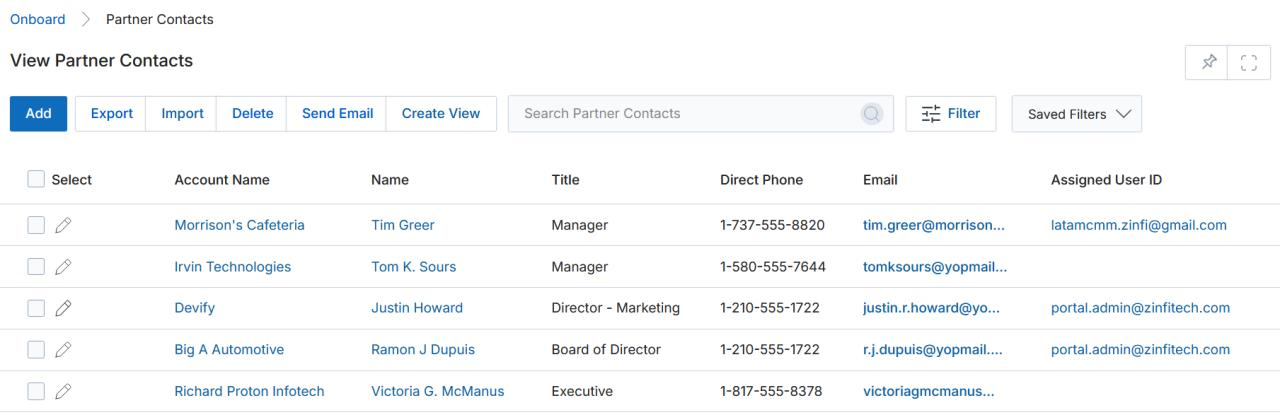
The list page provides:
- Add — Opens a new page to add a partner contact.
- Delete — Deletes selected contacts from the list.
- Send Email — Sends email to selected contacts via a distribution list.
- Export — Exports Entire List, Current Page, or Selected Records to CSV/Excel.
- Import — Imports records in CSV/Excel format.
- Create View — Creates a new customised page view.
- Filter — Filters by Email, Account Name, Company Name, Alternate Country, and more.
Clicking a Contact Name navigates to that contact's detail page; clicking the contact's company navigates to the company's detail page.
View Partner Contact Details
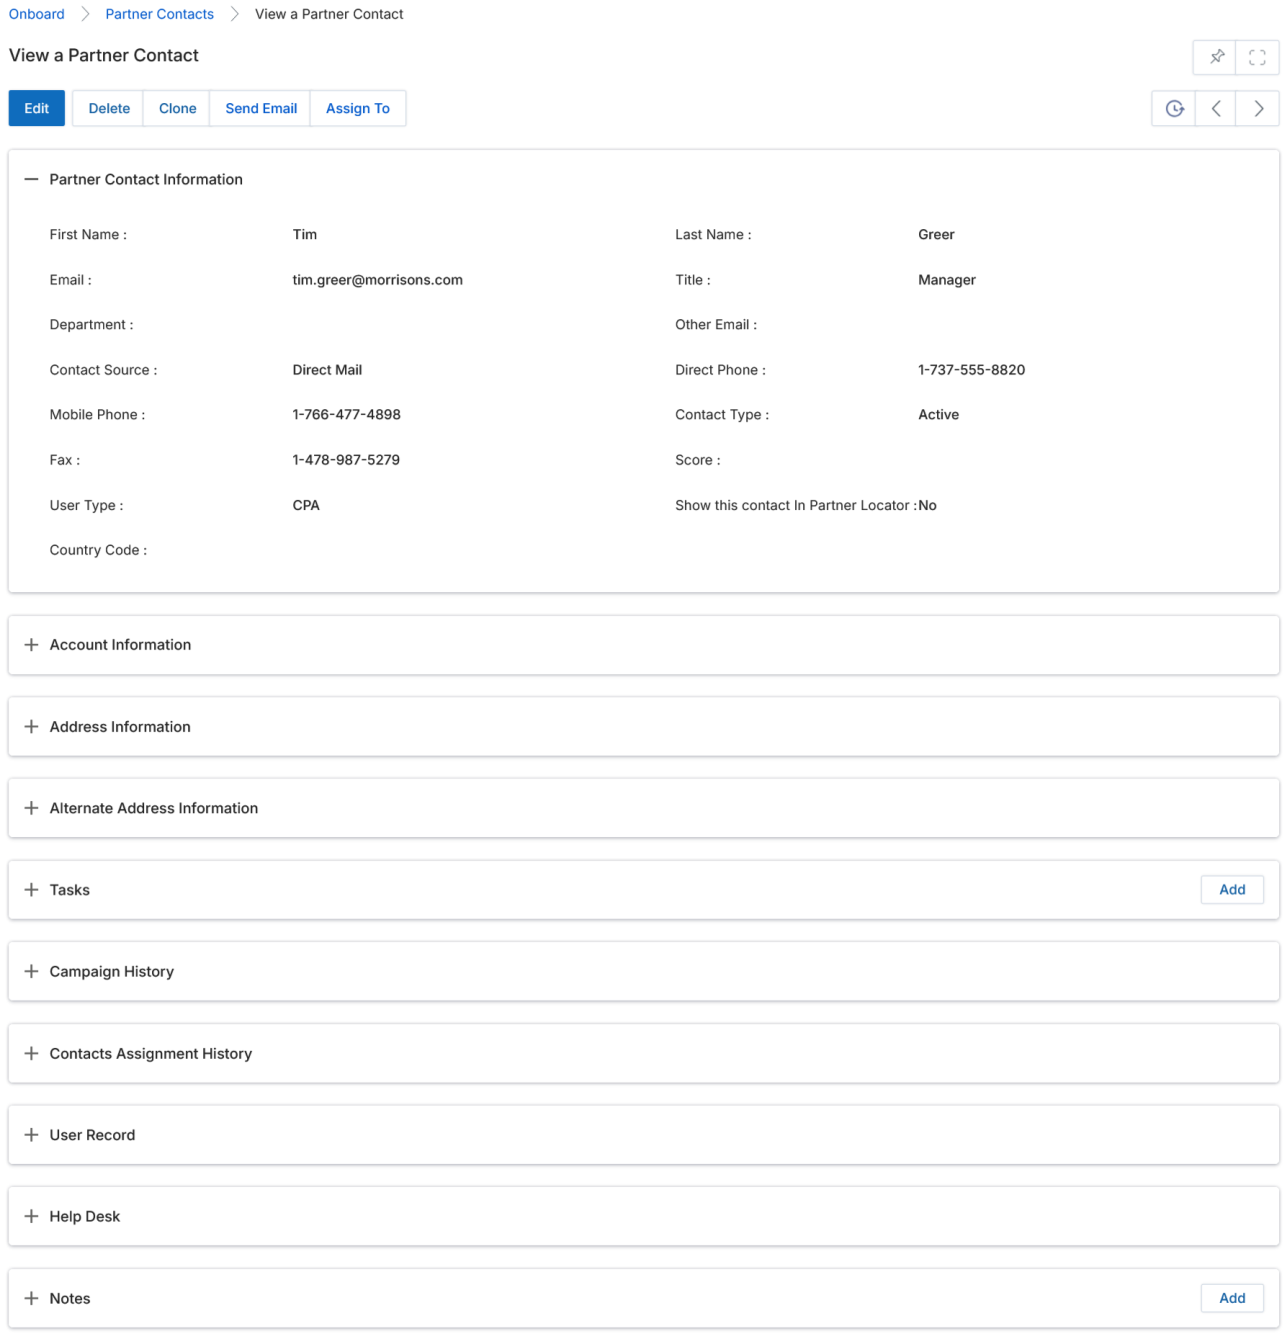
The Partner Contact detail page includes:
| Section | Key Fields |
|---|---|
| Partner Contact Information | First Name, Last Name, Email, Title, Department, Other Email, Contact Source, Direct Phone, Mobile Phone, Contact Type (Active/Dormant), User Type (CP or CPA), Score, Country Code, Show in Partner Locator |
| Account Information | Account Name, Account Country, Region, Description |
| Address Information | Primary Address 1 & 2, City, Country, State, Zip/Postal Code |
| Alternate Address Information | Alternate Address 1 & 2, Alternate City, State, Country, Postal Code |
| Tasks | Task Name, Start/Due Date, Priority, Assigned User, Description |
| Campaign History | Campaign Type, Campaign Name, Status, Created On |
| Contacts Assignment History | Assigned By, Assigned To, Date Entered |
| User Record | Name, User Name, Status (link to User & Territories Management) |
| Help Desk | Ticket Name, Ticket ID, Status, Category |
| Notes | Note Name, Contents |
Action buttons at the top of the detail page: Edit, Delete, Clone, Send Email, and Assign To (supports Assign to User or Assign to Group with Read Only or Read/Write access).
Add / Edit a Partner Contact
To edit an existing contact, click the pencil icon. To add a new contact, click the Add button. The Add/Edit form covers Partner Contact Information (First/Last Name, Email, Title, Contact Type, User Type, Address fields, Direct/Mobile Phone, Contact Source, Score) and Account Information (Account Name, Address, Country, State, Zip, Description). After saving, you can return to the record to add Notes, Tasks, Campaign History, and create a User Record.
Import a List of Contacts
Click Import on the Partner Contacts list page. On the View Imports page, click Download Sample Data to get the sample Excel template (the "Contacts" sheet), fill it in, then click Add and configure the import (Name, Entity List = "Partner Contacts", Attachment, Auto Update settings, field mapping). The import supports a Parent Child Field configuration so that Contacts can be uploaded with Account associations already mapped — the Contact is treated as the Child Object and the Account as the Parent Object. Pre-create any net-new Account Names in the Portal before importing contacts.
Partner Accounts
Partner Accounts are the records of the Companies of your Partners that you are currently doing business with. All your Partner Contacts are associated with and listed under these Partner Accounts.
For in-portal guided help, go to Administration zone and click on the Blue Icon for the UPM Wizard. Navigate to User Management > Creating Partner Account Record for a step-by-step guided experience.
Navigate to Partner Accounts: Onboard > Partners > Partner Accounts.
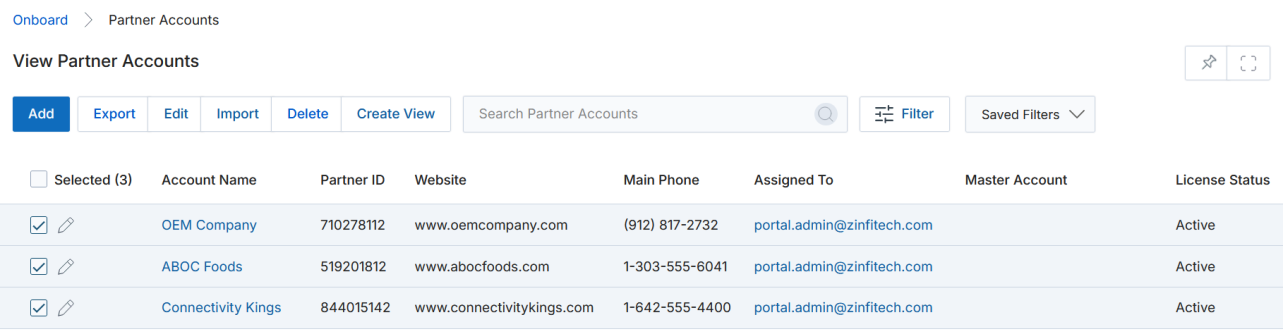
View Partner Accounts
The list page provides: Add, Delete, Export, Edit, Import, Create View, Search/Filter, and Saved Searches. Clicking an Account Name navigates to its detail page.
Records can be exported in CSV or XLSX format. Select specific columns via the Export Columns List popup, or choose "All" from the Export Fields dropdown to include all available fields. Up to 1,000 records can be exported per operation. Images attached to partner accounts (such as Partner Logo files) are exported separately in ZIP files alongside the XLSX data file.
View Partner Account Details
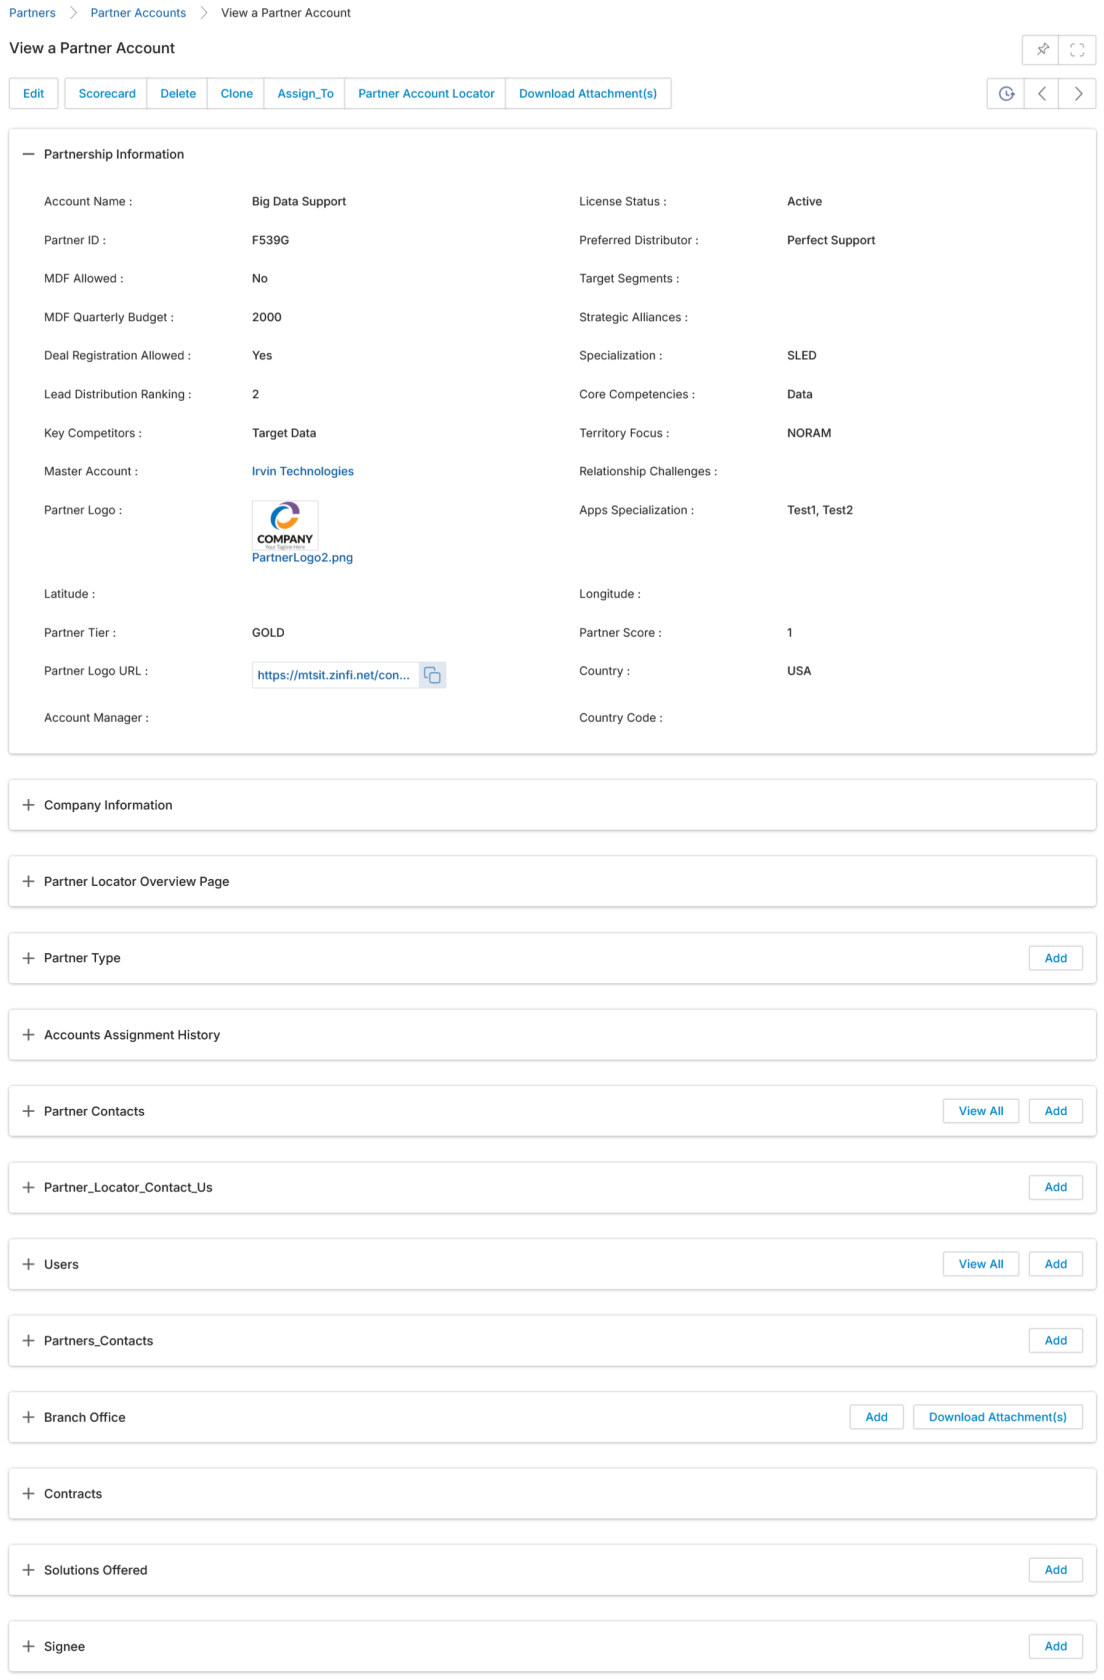
The Partner Account detail page includes:
| Section | Key Fields |
|---|---|
| Partnership Information | Account Name, License Status, Partner ID, Preferred Distributor, MDF Allowed, MDF Quarterly Budget, Deal Registration Allowed, Lead Distribution Ranking, Key Competitors, Territory Focus, Master Account, Partner Logo, Partner Score, Partner Tier, Partner Logo URL (auto-generated shareable URL), Country, Account Manager |
| Company Information | Year Founded, Industry, Annual Revenue (M$), Specialization, Average Transaction Value, MDF Quarterly Budget, Commission Rate (%), MDF Allocation (%), Total Employees, Deal Registration Allowed, Discount Margin (%) |
| Partner Locator Overview Page | Rich-text company overview for the Partner Locator |
| Accounts Assignment History | Assigned To, Assignment Type, Assigned By, Date Entered |
| Partner Contacts | List of associated Partner Contacts with Name and Email |
| Partner Type | Assigned partner types |
| Solutions Offered | Business lines / solutions associated with the account |
| Business Plans | Plan Name, Status, Created By, Created On |
| Support Desk Tickets | Ticket Name, Status, Created By, Created On |
| Projects | Project Name, Start Date, End Date |
| Rewards Points Earned | Reward Name, Partner, Quarter, Transaction Date |
| MDF Plans | Plan Name, Status |
| License Management History | Licensing history for the Partner Account |
| Signee | Contract signatories with Signatory Type and Sort Order (drag-and-drop reorder) |
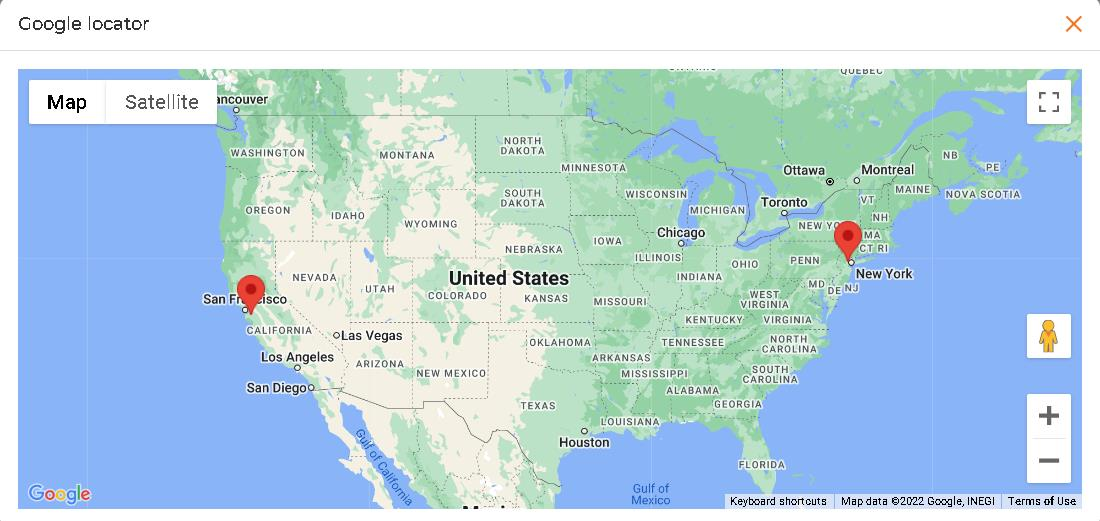
Action buttons: Edit, Scorecard, Delete, Clone, Assign To, Partner Account Locator (shows account on Google Maps — shows all child accounts when clicked from a Master Account), and Download Attachment(s).
When the Partner Score field is updated, the system automatically checks tier rules and updates the Partner Tier if the new score falls into a different tier range — ensuring the partner always holds the correct tier based on their latest score.
Once a Partner Logo is uploaded, a shareable URL is automatically generated. Clicking this URL downloads the logo directly without requiring UPM Portal login. The URL can be integrated with platforms such as Salesforce or shared with users who do not have UPM Portal access.
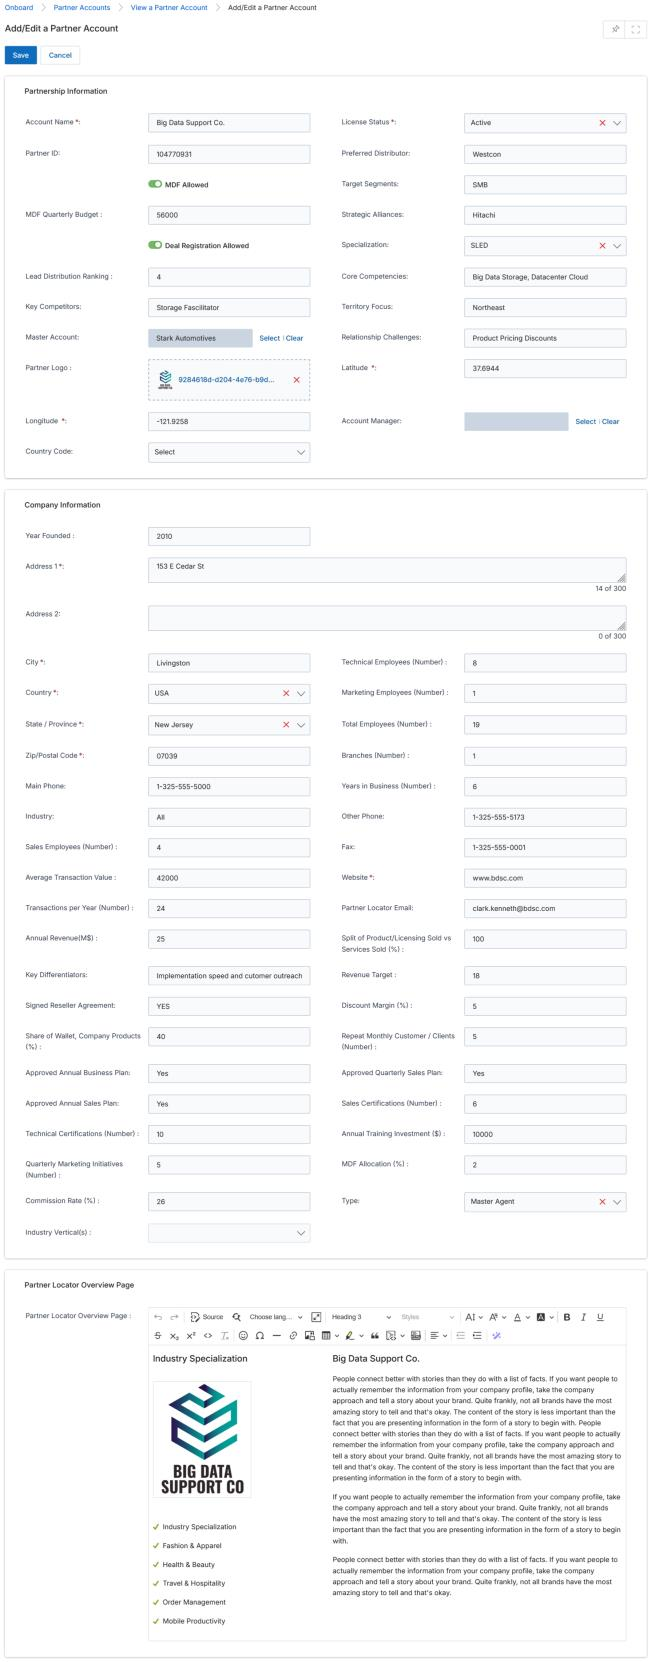
Add / Edit a Partner Account
To edit an existing account, click the pencil icon. To add a new account, click the Add button. The Add/Edit form covers Partnership Information (Account Name, Status, Partner ID, address fields, Website, Main Phone, Territory Focus, Master Account, Partner Logo, Partner Score/Tier, Partner Logo URL, Account Manager, Country Code) and Company Information (Year Founded, Industry, Annual Revenue, Specialization, Average Transaction Value, MDF Quarterly Budget, Commission Rate, MDF Allocation, Total Employees, Deal Registration Allowed, Discount Margin). After saving, return to the record to add Partner Contacts, Partner Types, Solutions Offered, Help Desk Tickets, and Projects.
Auto-Assignment of Partner Contacts and Users
When a Partner Account gets assigned to a specific user, all the associated Contacts along with their related User Records are automatically transferred to the respective user's Partner Accounts list. This cascading assignment keeps your channel ownership data in sync without manual reassignment of each contact.
Master / Parent-Child Partner Accounts
ZINFI supports a robust Partner Account Hierarchy that allows partner organisations to establish parent-child relationships between their accounts. Once configured, the Parent Account users can view and manage records from associated child accounts.
To assign a Master Account, open the Child Account record in Edit mode and select the parent using the Master Account selector. Account Hierarchy Visibility can be enabled per application (Sales Prospects, Contracts, Opportunities, etc.) under Administration > Access Management > Record Visibility. Enable the Enable Account Hierarchy Visibility setting and select the Profiles of the Parent Partner Account that can view child account records.
Deactivating a Partner Account
To make an account inactive, change the Account Status field from Active to Inactive in the Edit Account page. This does not delete the Account, Contacts, or Users — it only blocks portal login access for all users associated with that account. When reactivated, user statuses remain Pending and must be manually changed back to Approved one by one.
Manage Partner Logo
In the Add/Edit a Partner Account section, click Browse in the Partner Logo field to open a file picker. Select the image and click Open. The logo will be stored on the account and displayed in the title bar of the application for that partner's users when they log in. The Partner CPA (Channel Partner Administrator) can also manage their own logo from their account.
Partner Types
Partner Types allows you to create a naming convention to set up various types of Partners, then associate these types to your Partner Account and Partner Contact records. This enables segmentation in reporting, filtering by type, and creating workflow rules triggered by specific partner types. Example: if you create a "Manufacturing" partner type and assign it to partner records, you can create a workflow rule that triggers for any partner with that type.
Navigate to Partner Types: Onboard > Partners > Partner Types.
View Partner Types
The list page provides Add, Delete, Create View, Search, Clear Search, and Saved Searches. Clicking on a Partner Type Name navigates to its detail page.
Add / Edit a Partner Type
Click the pencil icon to edit, or the Add button to create a new type. The form has a single Partner Type Name field. Click Save when done.
Channel Scorecard
Navigate to Channel Scorecard: Onboard > Partners > Channel Scorecard.
ZINFI's Channel Scorecard allows your organisation to keep close tabs on the progress of all marketing activities and lead generation by participating channel partners. Scores based on configured parameters reflect the true performance of Channel Partners and help admins identify what is working and what needs improvement in their global and local channel programs. The Scorecard is fully configurable with the ZINFI team.
The out-of-the-box scorecard includes the following widgets:
- Performance by Partner Type — A bar graph segmenting channel performance by Partner Type, filterable by Prospects Engaged, Contacts Engaged, Campaigns Executed, Opportunity Pipeline, Deal Reg (Pending/Approved), and MDF Approved.
- Performance by Region — A pie chart showing performance by region (APJ, EMEA, LATAM, NORAM), filtered by the same activity metrics as above.
- Performance by Onboarding & Training — A pie chart correlating onboarding/training program completion with channel activity outcomes, helping identify which programs drive results.
- Performance Ranking by Partner — A master dashboard table of all active Partner Accounts ranked by: Channel Percentage, Prospects Engaged, Contacts Engaged, Campaigns Executed, Opportunity Pipeline, Deal Reg (Pending), Deal Reg (Approved), and MDF Approved.
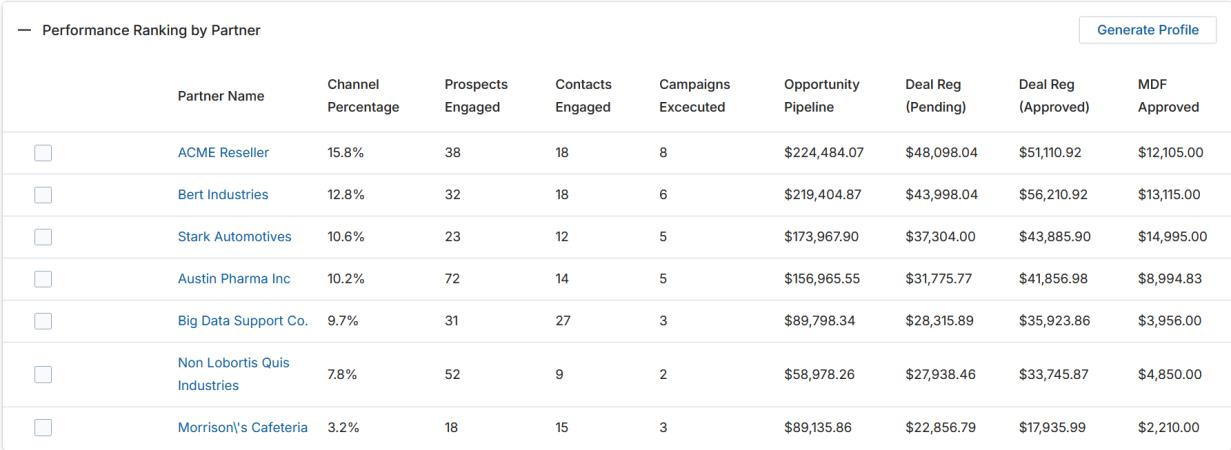
Generate Profile — Find High-Potential Partners
The Generate Profile button on the scorecard helps identify partners that are not currently performing well but share characteristics with your top performers, indicating untapped potential:
- Check off your most successful partners in the performance ranking (e.g., your Top 5).
- Click Generate Profile to open a dialog showing the shared attributes across those partners — by Region, Partner Type, Employee Size, Specialization, and Certification Type.
- Check off the attributes you want to match and specify a performance threshold (e.g., "not in my Top 50").
- Click Submit — the system returns partners outside your selected threshold that match the chosen profile attributes.
- Name this group and click Save to revisit and nurture them later.
Manage Badges
Badges allows you to upload and create various badge graphics that can be associated with and awarded to Partners based on certification levels, achievements, and training completions. Badges can be represented in reporting or displayed on the Partner Locator.
Navigate to Badges: Onboard > Partners > Badges.
View Badges
The Badges list page provides Add, Delete, Create View, Search, Clear Search, and Saved Searches. Clicking on a Badge Name navigates to its detail page.
View Badge Details
The Badge detail page shows:
- Badge Name — Name of the badge.
- Partner Tier — The tier eligibility for this badge.
- Region — Region applicability.
- Expiry Date — When the badge expires.
- Status — Published or Draft.
- Badge Description — Brief description of the badge and criteria.
- Badge Template — The uploaded badge image file.
Add / Edit a Badge
Click the pencil icon to edit, or the Add button to create a new badge. The form includes: Badge Name, Partner Tier, Region, Expiry Date, Status, Badge Description, and Badge Template (file upload). Click Save when done.
A scheduler runs every five minutes to update partner-tier-region mapping and make the relevant badge templates visible to eligible partners.