
Introduction
The Partner Leads Management application of ZINFI's PRM platform enables your organization to manage or distribute leads to your partner base and manage the complete "contacts to opportunities" process. It supports lead engagement via Round Robin, Shark Tank, and other lead distribution mechanisms.
Shark Tank Management
Distribute leads to different partners or partner groups based on criteria established in a "shark tank" lead distribution scheme. Lead data can be synchronized with an existing CRM system for smooth integration. You can define a time frame for lead follow-up with pre-scheduled notifications when no activity has occurred. Pullback functionality automatically reclaims inactive leads and reassigns them to another partner.
End-user Account Management
Manage the entire journey of a prospective lead from generation to close through an automated system. Includes lead-age tracking to help users quickly prioritize follow-up activities, and configurable system alerts that generate automated notifications on scheduled dates and times.
Opportunity & Deal Management
Set up an automated review and approval mechanism for all submitted opportunities and deals by the channel sales team. Push submitted deals to your internal CRM through configured connectors. The dynamic reporting engine provides clear insight into every level of the sales funnel.
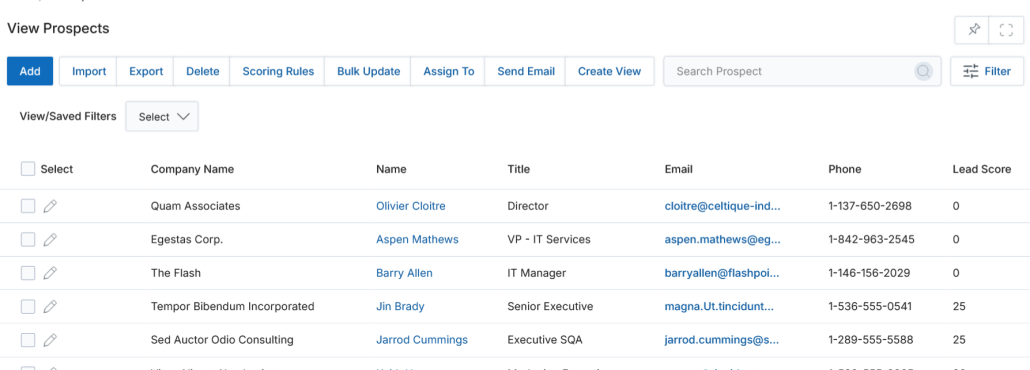
Prospects
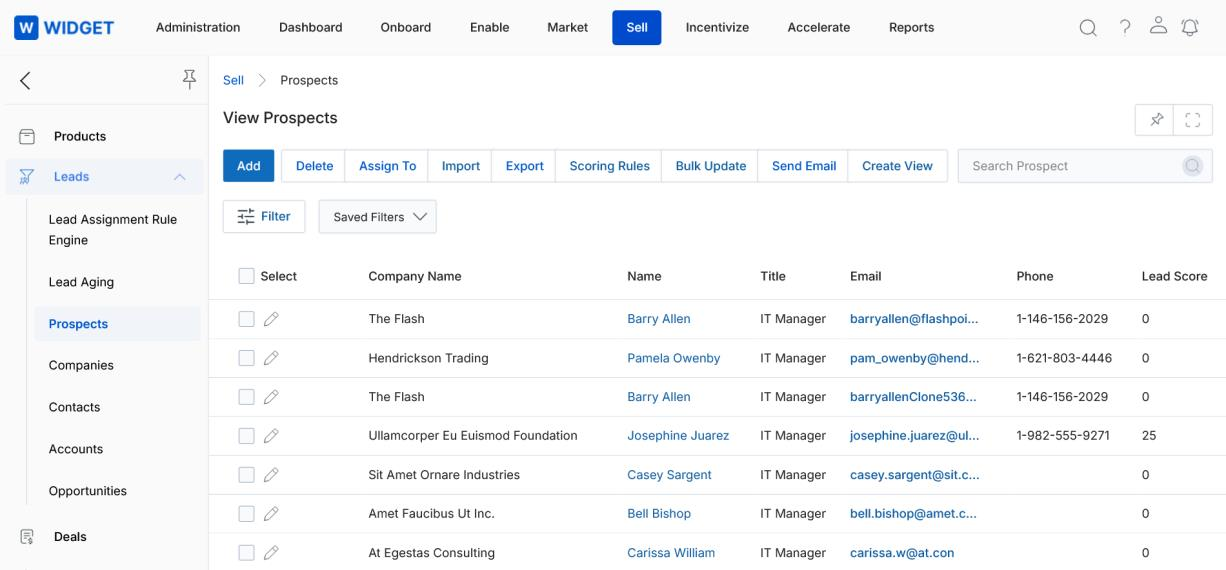
Navigate to Sell → Leads → Prospects in the left-hand menu.
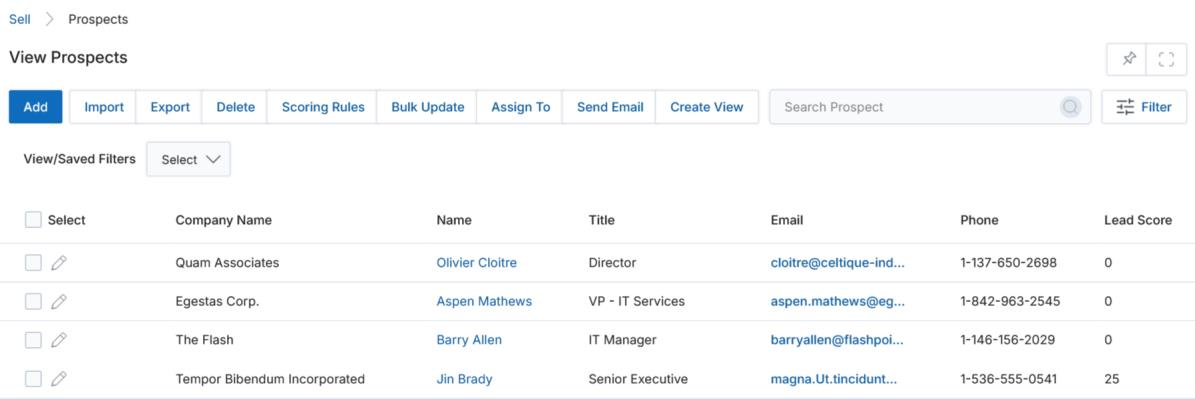
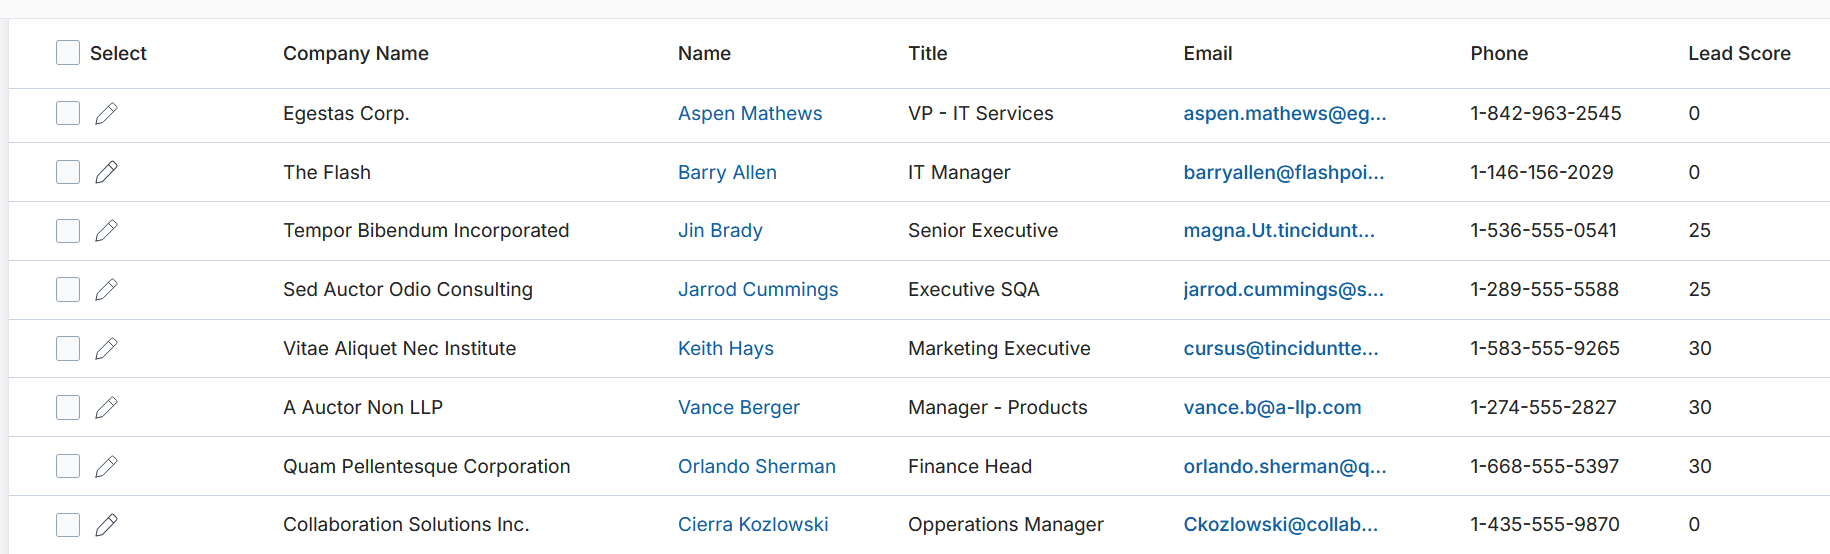
View & Manage Existing Prospects
The View Prospects page toolbar provides the following actions:
Add, Delete, and Assign To
- Add — Creates a new Prospect record manually.
- Delete — Deletes selected Prospect(s) from the listing.
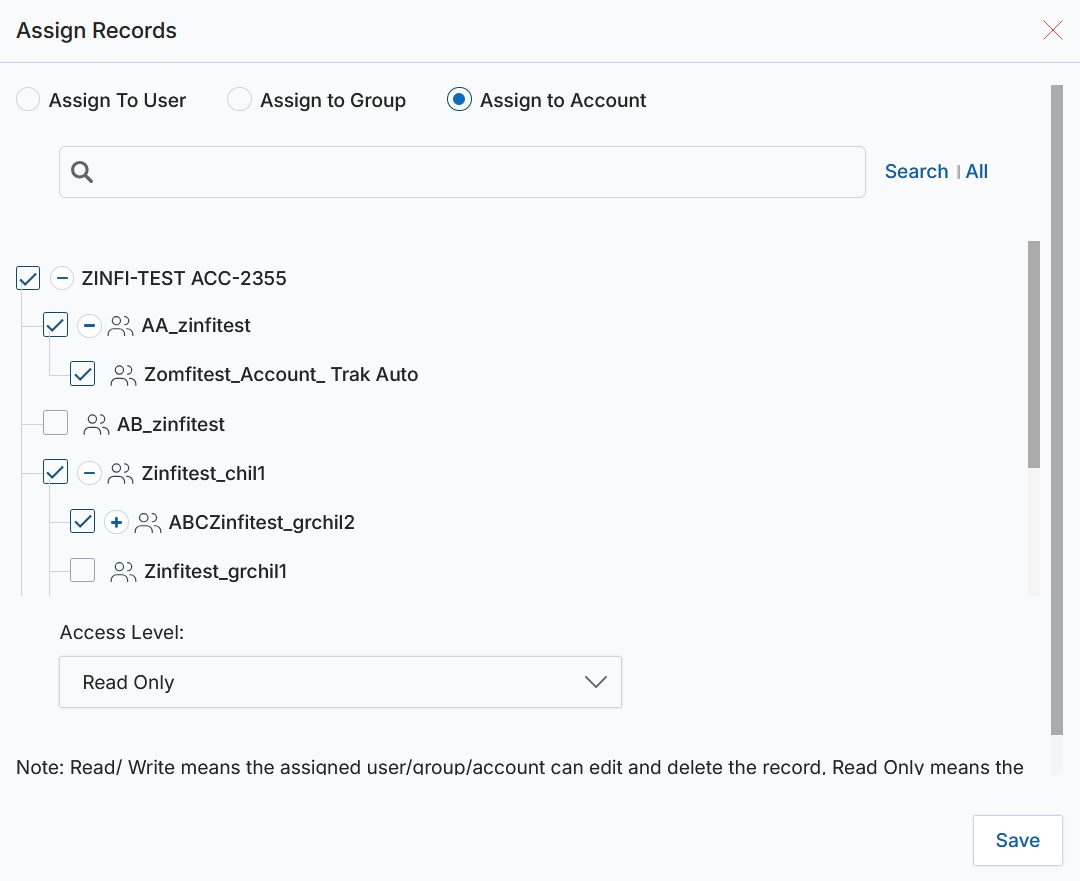
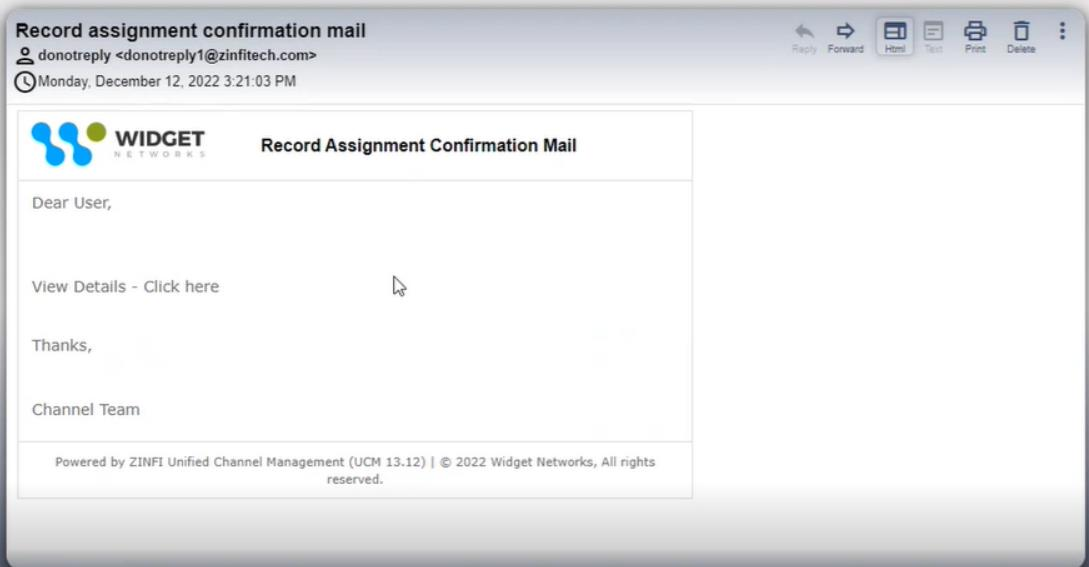
- Assign To — Assigns read/write permissions of selected prospect(s) to a partner user, a group, or an Account. Selecting Assign to Account opens a hierarchical view based on master parent-child relationships. Each account entry includes a plus icon to expand its children. A checkbox and access-level dropdown appear for selection, and upon saving, the record is assigned with the specified permissions. System email notifications are triggered automatically whenever a record is assigned to a user or group.
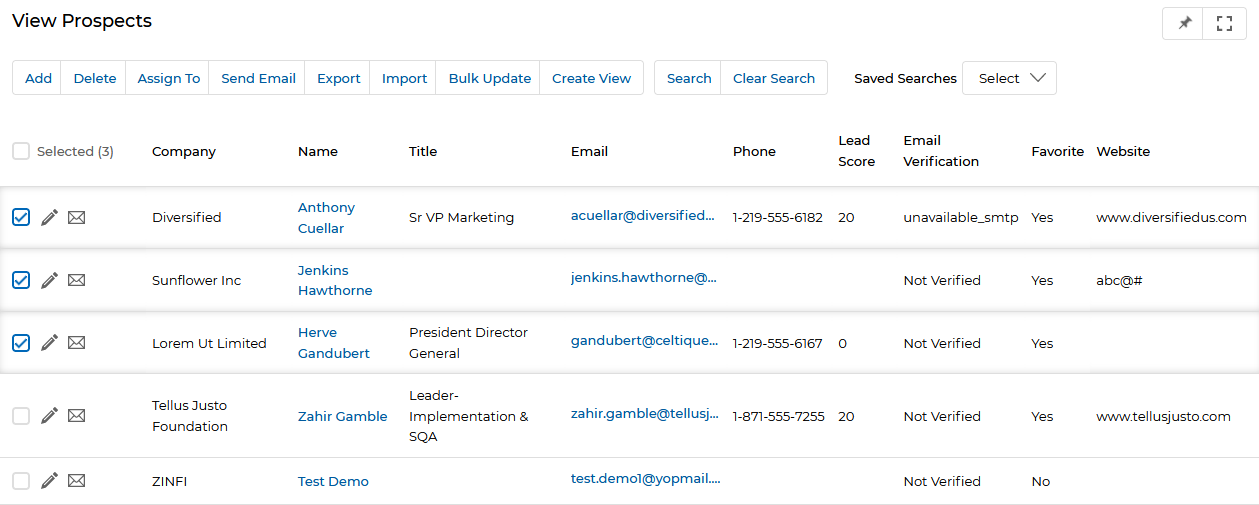
Send Email
Select prospects and add them to a mailing list or create a new mailing list from the selection. Check off the desired Mailing List and click Add to An Existing List, or use Add a List to create a new one.
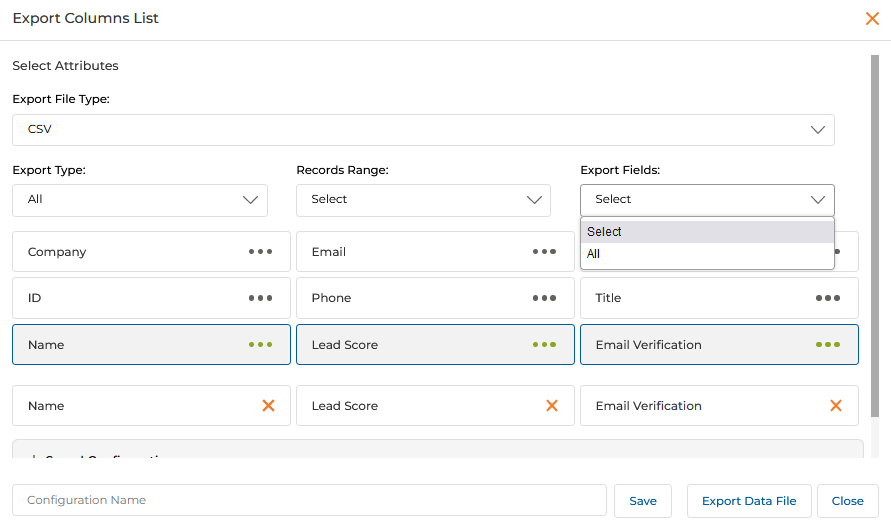
Export
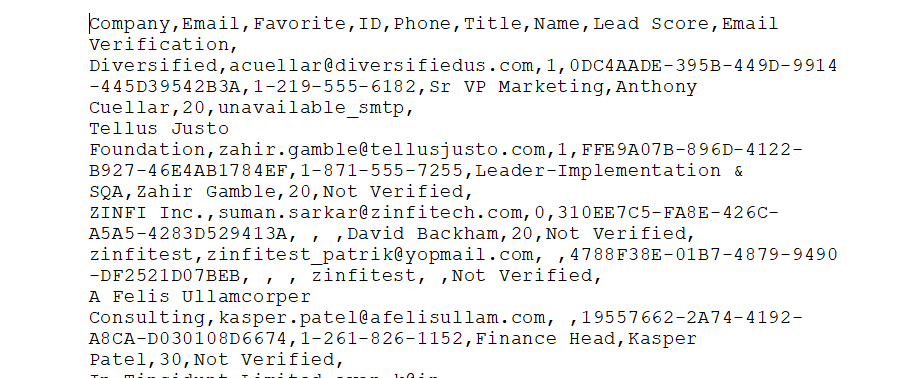
Exports records from the listing page into CSV or XLSX format. The Export Columns List pop-up lets you select specific fields or choose All to include every available field. You can save field selections as a named Export Template for reuse. Up to 1,000 records can be exported per batch.
Bulk Update
Updates specific fields with the same values across multiple selected records without opening each record individually.
Bulk Update is not provided OOTB. A feature request must be submitted to the ZINFI Engineering Team, detailing the Application and Fields to be configured.
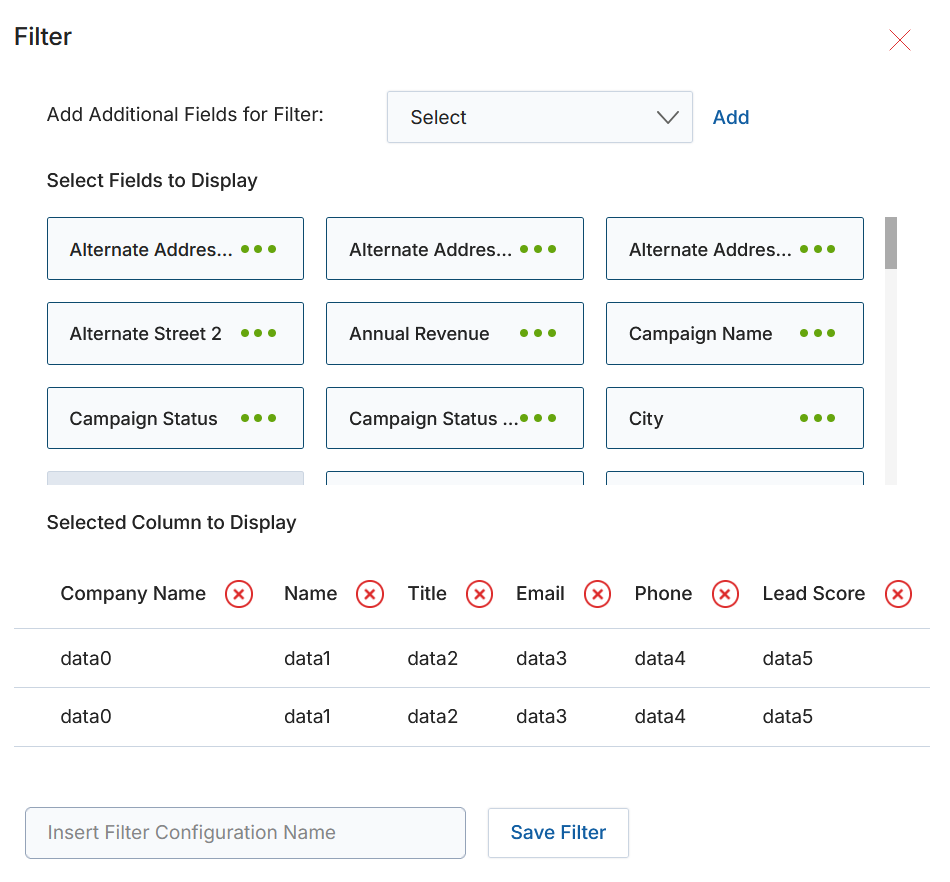
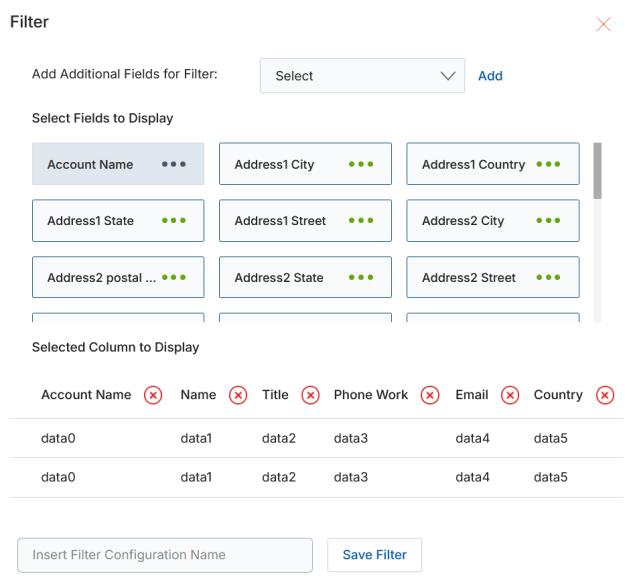
Create View
Manage the columns displayed on the listing page. Use the dropdown at the top to add fields, click the green dots to select them, then provide a View Name and click Save.
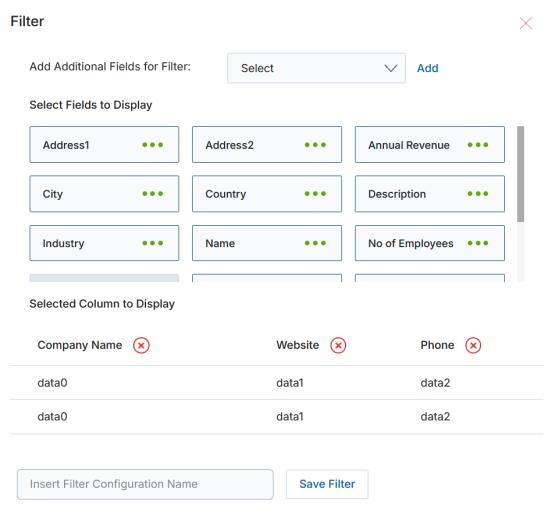
Filter / Search
Opens a pop-up where you can apply criteria across fields like Company Name, Email, Favorite, First Name, Last Name, and Lead Score. Saved searches appear in a dropdown for quick reuse.
Import Prospects
Click Import on the View Prospects page to bulk-create Prospect records.

- Click Download Sample Data to get the Prospects sample Excel template. You may add extra columns for optional fields.
- Fill in the template and click Add to start the upload.
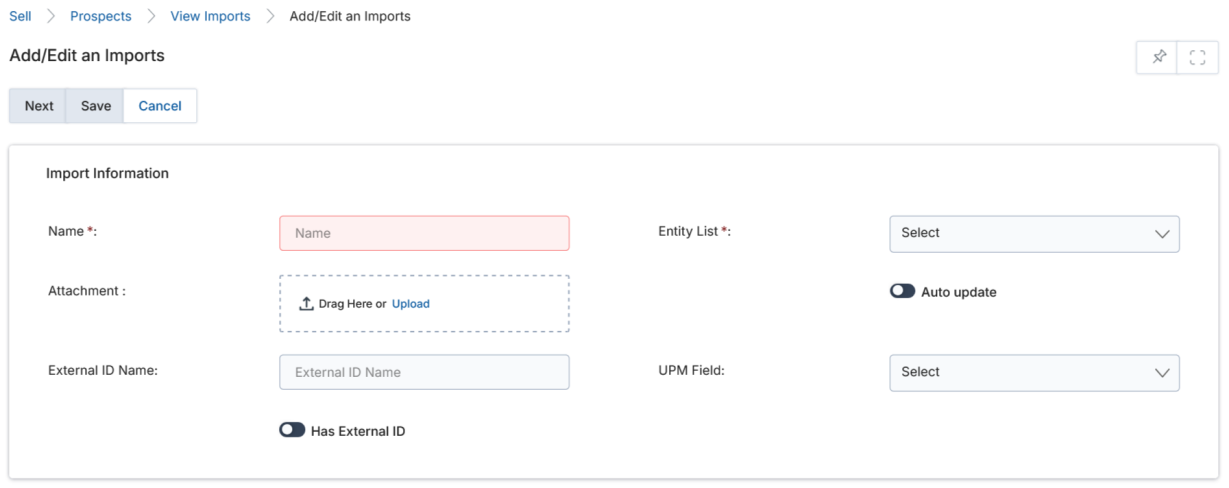
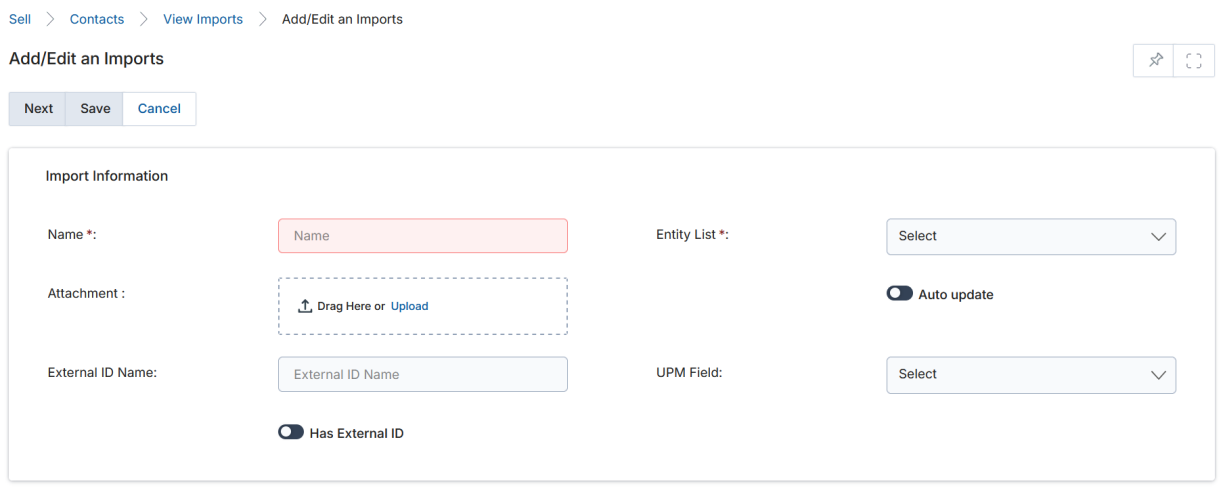
- Fill in the import fields:
- Name — Name for this upload instance.
- Entity List — Select Prospects from the dropdown.
- Attachments — Browse and attach your filled-out Excel file.
- Auto Update — Check to overwrite fields for existing records that match on email address. Leave unchecked when creating new records.
- External ID Name — (Auto Update only) Column name in the Excel that the system should match.
- UPM Field — (Auto Update only) The system field to map the Excel column against.
- Has External ID — (Auto Update only) Check to tell the system which Excel column name to map against the selected UPM Field.
- Click Next, map the Excel columns to the record fields, then click Next again to complete the upload.


Import Engine Error Report
If records fail validation (e.g., "United States" instead of "USA" for the Country field), an error report is downloadable in XLSX format from the Import Details page via the Download Error Report button. The Error Log column identifies the specific field and invalid value.
Record Assignment During Import
To assign records to groups or users during import, add two additional columns to the upload Excel file: RecordAssignTo (group name or user email) and AccessType (Group or User). On successful import, prospects are automatically assigned to the specified assignees.

Freeze Headers
Column headers on the View Prospects page are frozen by default, remaining visible at the top even as users scroll through long lists. This prevents the need to scroll back up to see column labels.
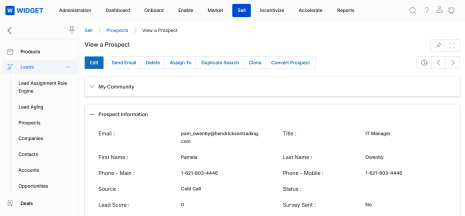
View Prospect Details
Click the Name of any Prospect record in the listing to open its detail view.

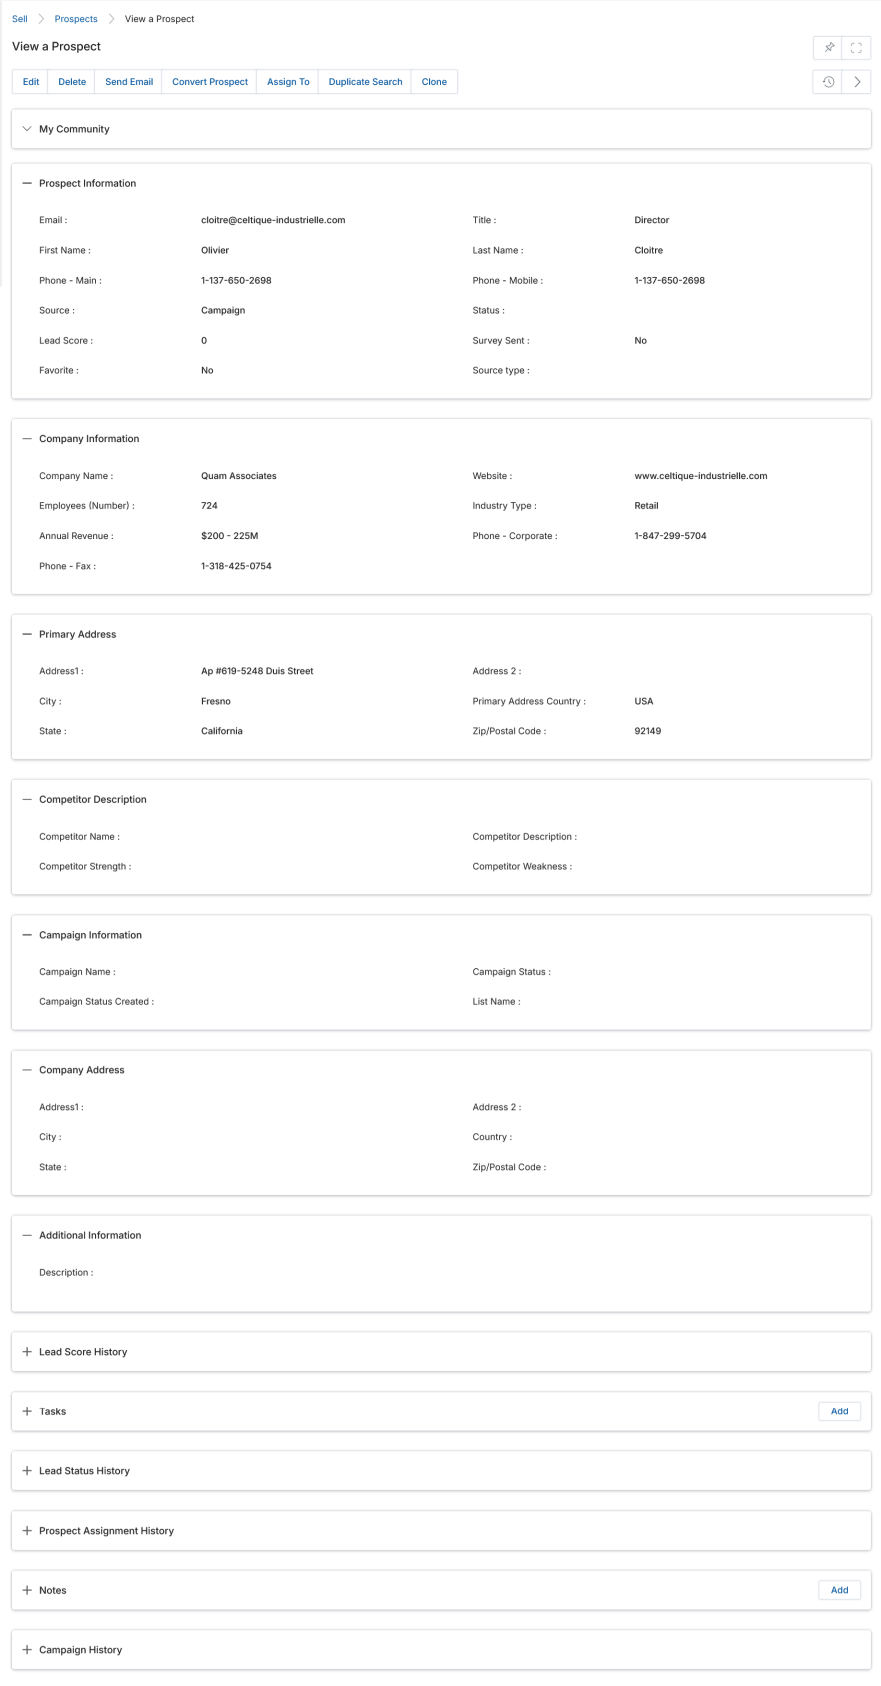
The View Prospect page provides the following buttons and sections:
Buttons
- Edit — Opens the Prospect in edit mode.
- Delete — Deletes the Prospect record after confirmation.
- Clone — Duplicates prospect details and opens a copy in edit mode.
- Send Mail — Sends an email to the prospect.
- Convert Prospect — Converts this Prospect to a Contact record.
- Assign To — Assigns visibility of this record to another user or group, triggering an email notification.
- Duplicate Search — Searches for like Prospect and Contact records by Company Name, First Name, or Email Address.
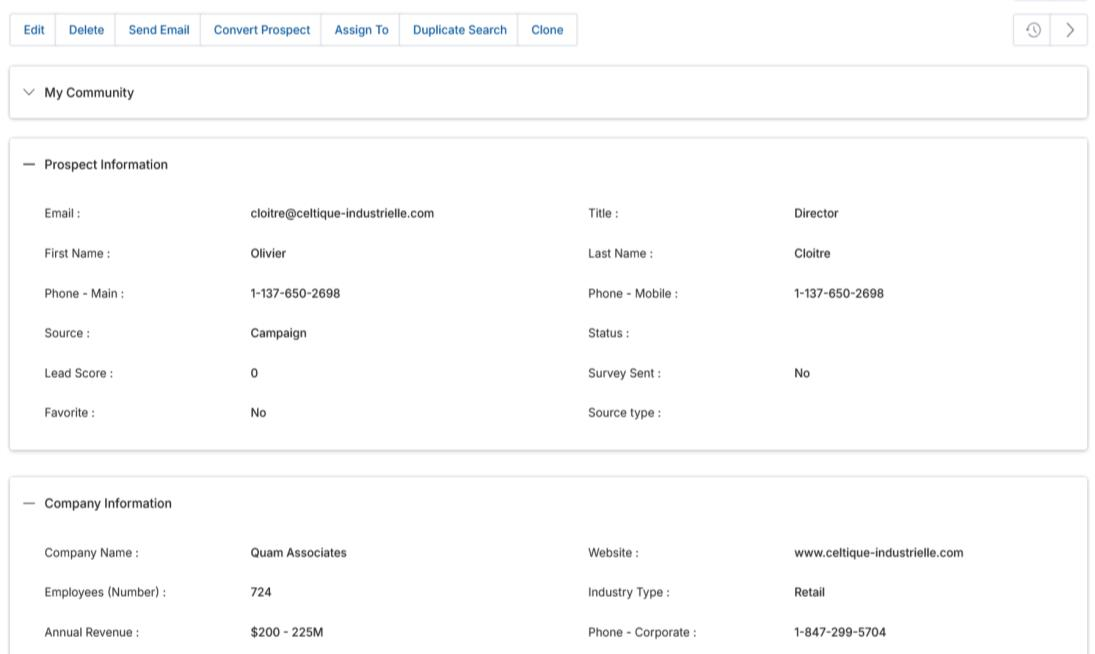
Prospect Information Fields
| Field | Description |
|---|---|
| Email address of the Prospect. | |
| Title | Job title of the Prospect. |
| First Name / Last Name | Prospect's full name. |
| Phone - Main / Mobile | Contact phone numbers. |
| Source | Origin of the prospect (Campaign, Cold Call, Conference, etc.). |
| Status | Recent engagement status: Accepted, Rejected, Assigned, Interested, etc. |
| Lead Score | Auto-generated sum of scores earned through campaign interactions per the Lead Scoring Rule. |
| Survey Sent | Whether a survey has been sent to this Prospect. |
| Favorite | Toggle to mark the Prospect as Favorite, pushing the record to the top of the listing page. |
Related Lists
- Lead Score History — Shows all scoring points earned, the campaign, the scoring rule, the score, and when it was created. Individual campaigns and scoring rules link to their detail pages.
- Campaign History — Shows campaigns that have marketed to this Prospect and their engagement status.
- Lead Status History — History of engagement status changes (Accepted, Rejected, Assigned, Interested), who made the change, and the timestamp.
- Tasks — Action items against this Prospect. Use the Add button to create tasks.
- Notes — Notes capturing engagement history. Use the Add button to add notes.
- Prospect Assignment History — History of who has been assigned visibility into this record.
Convert Prospect to Contact
When ready to upgrade a Prospect to a full Contact (indicating engagement and potential sale), click Convert Prospect on the View Prospect page.
- Contact Information — Auto-populated with the Prospect's name, email, and title.
- New Account — Enable if the Prospect's company does not yet exist as an Account in the system. This converts the Company record into an Account.
- Existing Account — If the company already exists as an Account, leave New Account unchecked and select the existing Account.
After clicking Convert Prospect, the Prospect becomes a Contact record visible in Contacts, and (if New Account was selected) the associated Company becomes an Account.
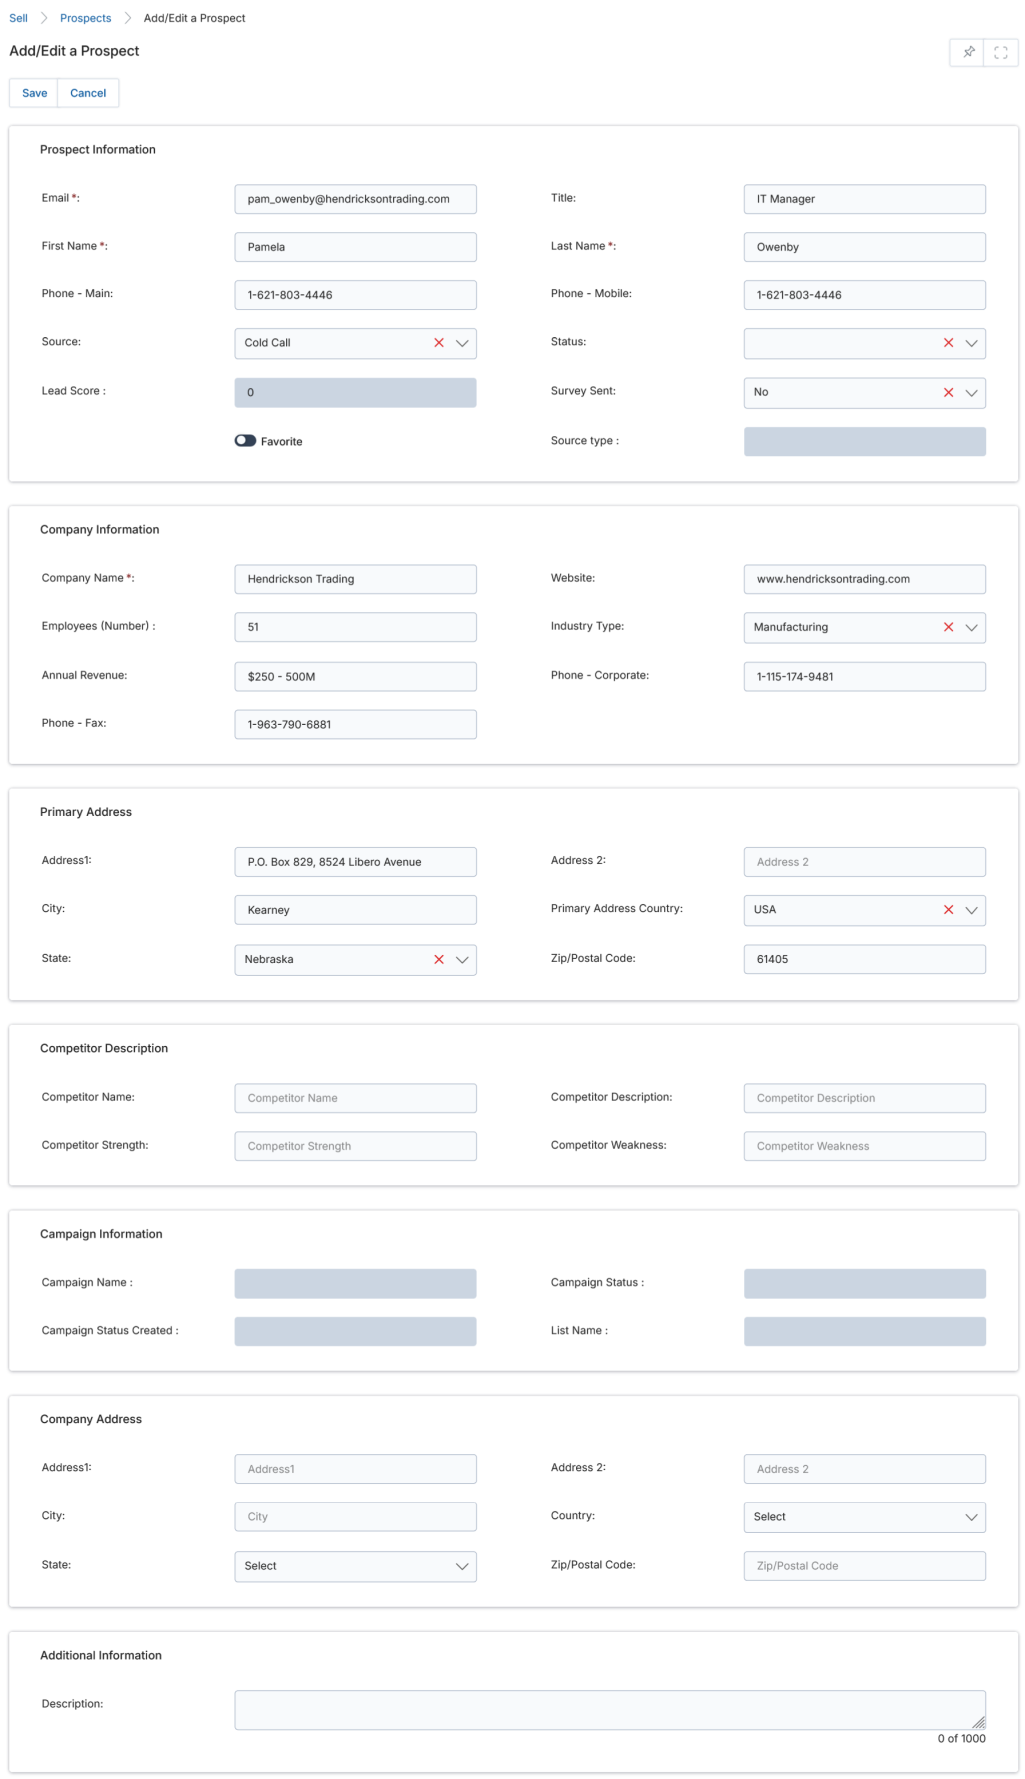
Add / Edit a Prospect
Click Add on the View Prospects listing to create a new record, or click the pencil icon next to an existing record to edit it.
Key sections on the form include Prospect Information (email, name, phones, source, status, lead score, favorite), Company Information (company name, website, employees, industry, annual revenue, phone), Primary Address, Competitor Description, Company Address, Campaign Information, and Additional Information. Click Save when done.
Companies
Navigate to Sell → Leads → Companies in the left-hand menu.
View Companies
The View Companies page supports Export, Create View, Search / Clear Search, and Saved Searches — functioning the same way as in the Prospects module.
View Company Details
Click the Name of any Company listing to view its details. Company information is pulled directly from the associated Prospect records and should be edited through those Prospect records.
The detail page includes: Company Information (name, corporate phone, fax, employees, annual revenue, website, industry), Company Address, Additional Information (description), and a Prospects related list showing all Prospect records associated with this company.
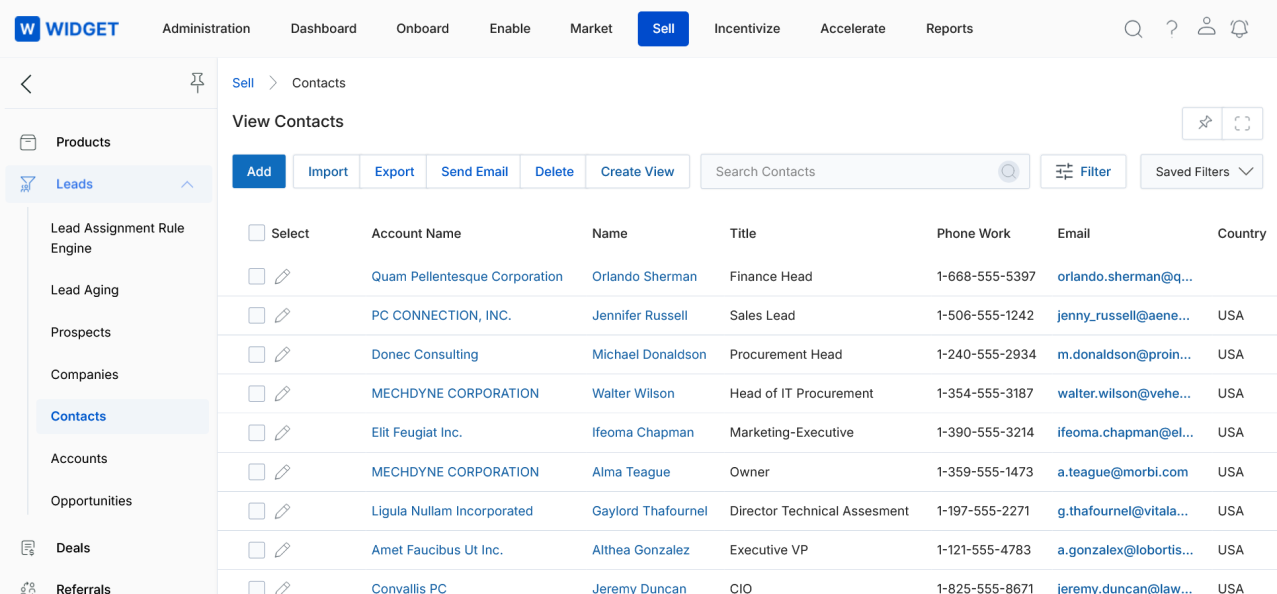
Contacts
Navigate to Sell → Leads → Contacts in the left-hand menu.
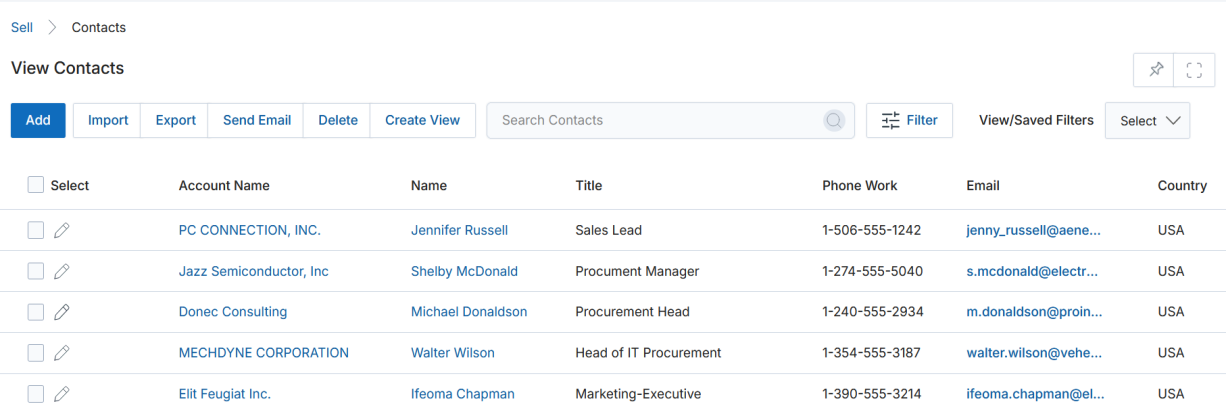
View Contacts
The View Contacts listing provides Add, Delete, Send Email, Export, Import, Create View, Search, and Saved Searches actions — functioning the same way as in Prospects. Additionally:
- Predictive Search — Uses AI/algorithms to display real-time suggestions as you type. After entering three or more characters, the system automatically filters matching contact records.
- Import Contacts — Supports bulk creation using the Contacts sample Excel template. During import you may include an Account Name column to map contacts to their parent accounts automatically (Parent-Child Field/Attribute relation).
View Contact Details
Click the Name of any Contact in the listing to open the detail view.
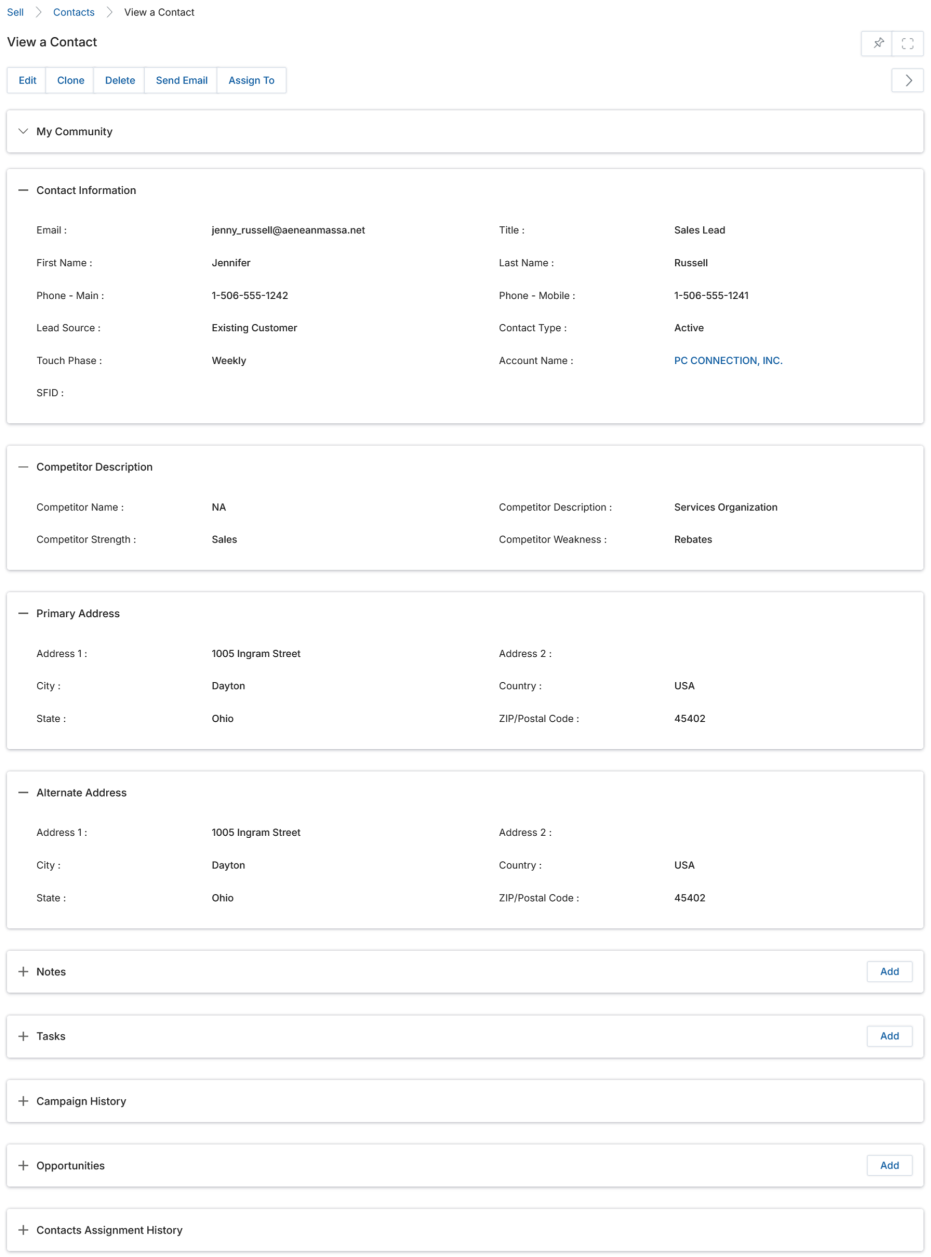
Buttons
- Edit — Opens the Contact in edit mode.
- Clone — Duplicates contact details and opens the copy in edit mode.
- Delete — Deletes the Contact record after confirmation.
- Send Mail — Sends an email to the contact.
- Assign To — Assigns the contact to selected group(s) or user(s).
Contact Information Fields
| Field | Description |
|---|---|
| Email address of the Contact. | |
| Title | Job title of the Contact. |
| First / Last Name | Contact's full name. |
| Phone - Main / Mobile | Contact phone numbers. |
| Lead Source | Origin of the contact (Campaign, Cold Call, Conference, etc.). |
| Contact Type | Type of contact as per the business process. |
| Touch Phase | Configurable sales journey phase. Drives which Sales Resources (documents/files) appear in the related list below. |
| Account Name | The Account associated with this Contact. Use Select to search existing accounts or Add to create a new one. |
Related Lists
- Notes — Related notes for this Contact. Click Add to create new notes.
- Tasks — Tasks associated with the contact's journey through channel management. Click Add to create tasks.
- Opportunities — Sales opportunities associated with this Contact. Click Add to create an opportunity.
- Campaign History — Historical data showing this Contact's involvement with campaigns and their engagement status.
- Contacts Assignment History — History of who this Contact record has been assigned to for visibility.
- Sales Resources — Documents/files surfaced based on the Contact's current Touch Phase. Documents are configured in the Documents sub-tool and tagged to specific phases.
Add / Edit a Contact
Click Add on the View Contacts listing to create a new record, or click the pencil icon next to an existing record to edit it.
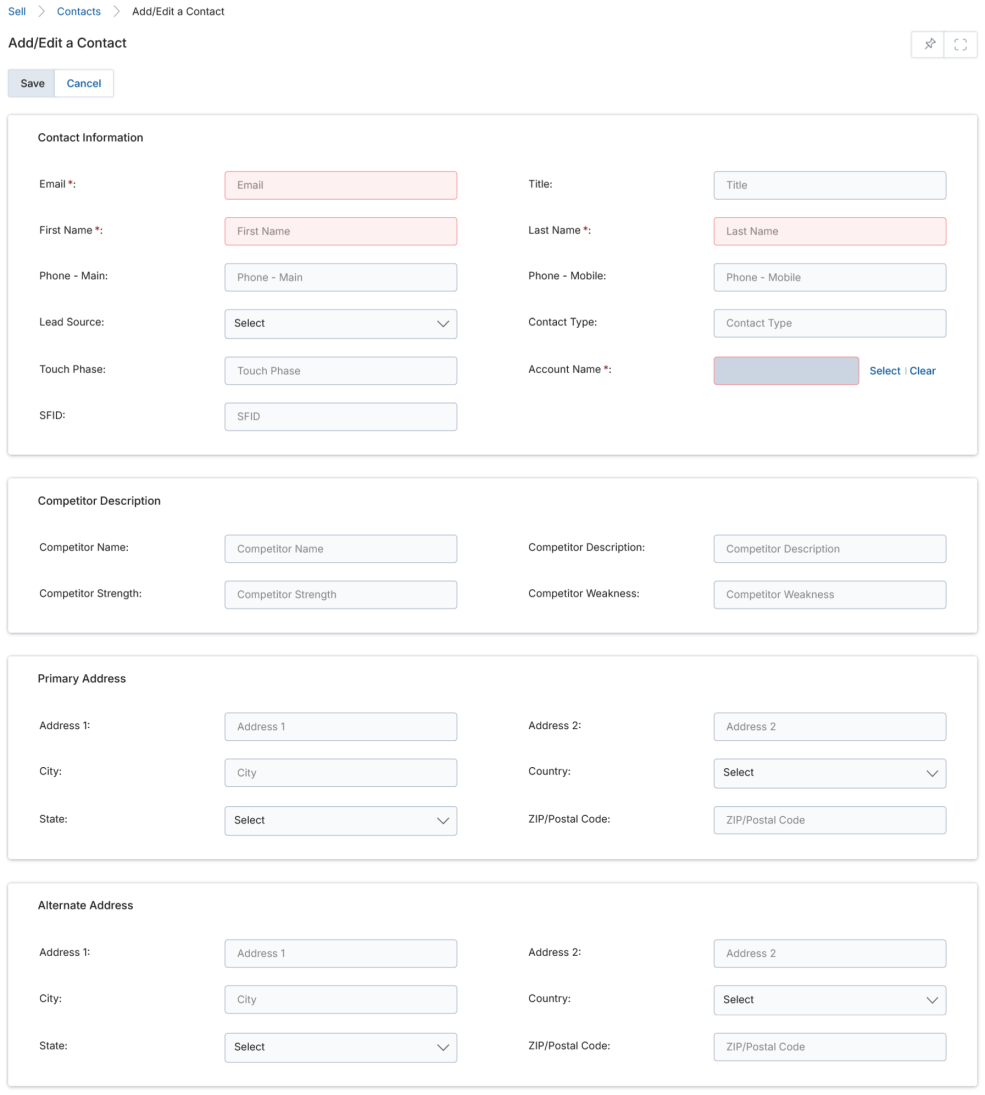
The form includes Contact Information, Competitor Description, Primary Address, and Alternate Address sections. Click Save when done.
Accounts
Navigate to Sell → Leads → Accounts in the left-hand menu.
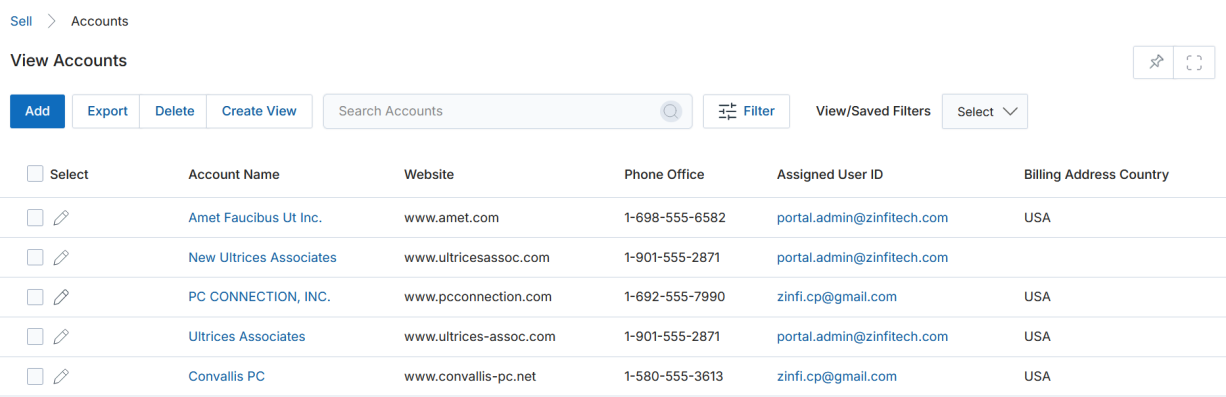
View Accounts
The View Accounts page supports Add, Delete, Export, Create View, Search, Saved Searches — all functioning the same as in other sub-tools.
View Account Details
Click the Name of any Account in the listing to open the detail view.
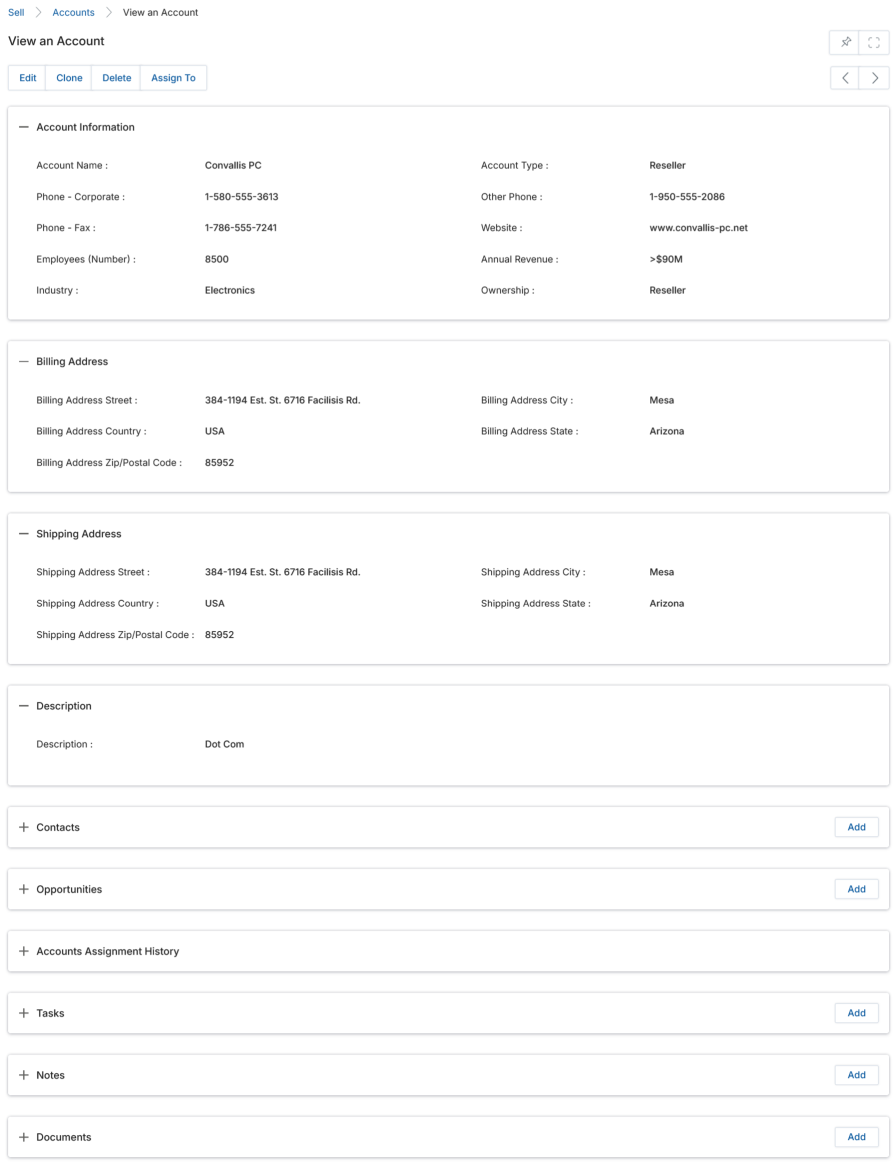
Account Information Fields
| Field | Description |
|---|---|
| Account Name | Company name of the Account. |
| Account Type | OEM, Distributor, Reseller, Alliance, etc. |
| Phone - Corporate / Other / Fax | Company phone numbers. |
| Website | Official website address. |
| Employees | Estimated employee count. |
| Annual Revenue | Annual business income in currency. |
| Industry Type | Industry vertical based on activities and business line. |
| Ownership | Name of the account's ownership. |
Related Lists
- Contacts — Related contacts associated with this Account.
- Opportunities — Related sales opportunities. Click Add to create an opportunity.
- Accounts Assignment History — History of assignments for visibility.
- Tasks — Related tasks. Click Add to create tasks.
- Notes — Related notes. Click Add to create notes.
- Documents — Related documents. Click Add to attach files. Documents here become available to Contacts based on the assigned Touch Phase.
Add / Edit an Account
Use the Add button on the View Accounts listing or the pencil icon to edit an existing account. The form includes Account Information, Billing Address, Shipping Address, and Description. Click Save when done.
Opportunities
Navigate to Sell → Leads → Opportunities in the left-hand menu.
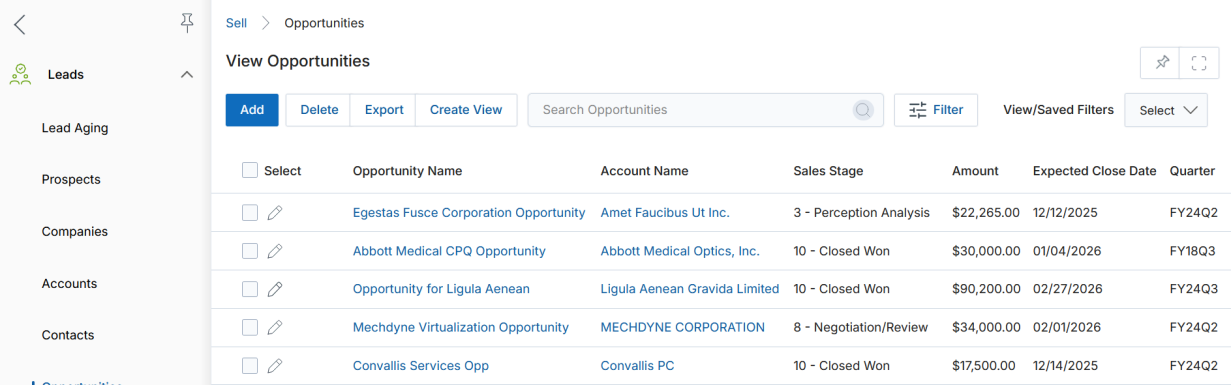
View Opportunities
The View Opportunities page supports Add, Delete, Export, Create View, Search, Saved Searches. The listing shows Opportunity Name, Account Name, Sales Stage, Amount, Expected Close Date, and Quarter.
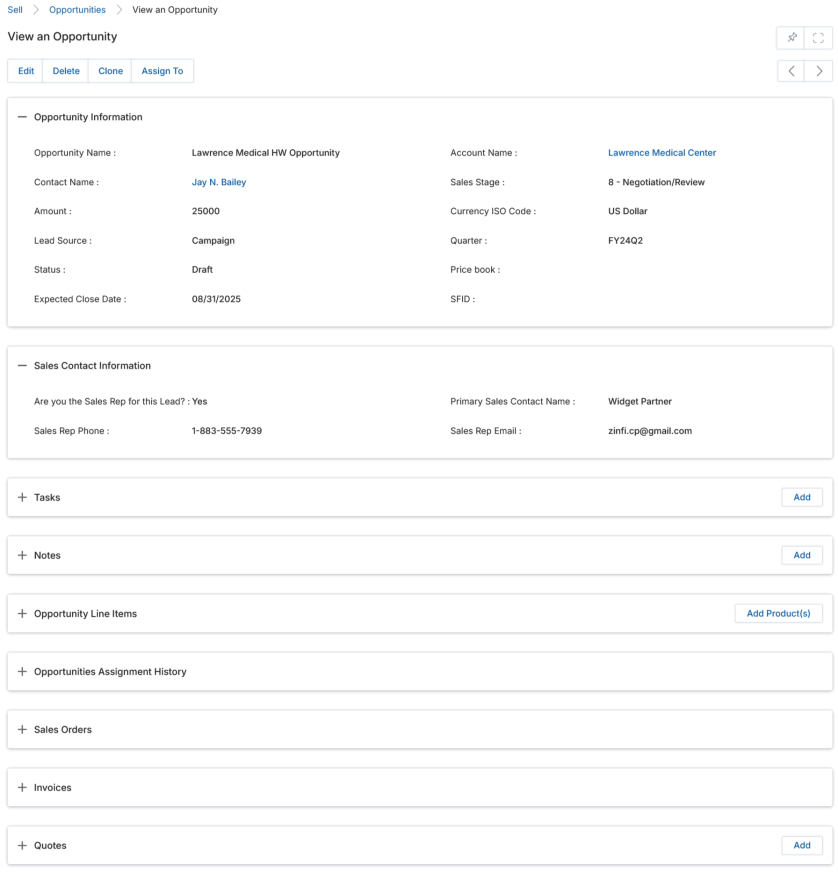
View Opportunity Details
Click the Name of any Opportunity to open the detail view.
Buttons
- Edit / Delete / Clone — Standard record management actions.
- Assign To — Assigns visibility to selected group(s) or user(s).
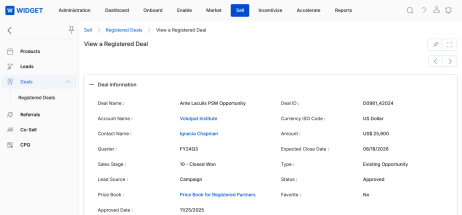
- Register your Deal — Available once the opportunity reaches a "Closed/Won" stage. Converts the Opportunity into a Deal record for approval and transaction closure.
Opportunity Information Fields
| Field | Description |
|---|---|
| Opportunity Name | Name of the opportunity. |
| Account Name | Account associated with this opportunity. |
| Contact Name | Contact at the Account for this Opportunity. |
| Sales Stage | Current stage: 1-Prospecting through 12-Other. |
| Amount | Auto-populated from the total of all Opportunity Line Items. |
| Currency ISO Code | US Dollar, Pound Sterling, Australian Dollar, or Indian Rupee. |
| Lead Source | Source of the opportunity. |
| Quarter | Fiscal quarter (e.g., FY24Q2). |
| Status | System-generated current status. |
| Price Book | Selected pricebook used for line item pricing. |
| Expected Close Date | Expected closure date for the opportunity. |
Opportunity Line Items
Related list showing Products or Services included in this Opportunity. Click Add Product(s) to add items. Details include Product Name, SKU, Sales Price, Quantity, Total Line Item, and Net Line Item. Editing a line item lets you adjust Quantity and Discount, with Total and Net values auto-calculated.

Additional Related Lists
- Tasks / Notes — Track action items and notes against this opportunity.
- Opportunities Assignment History — History of visibility assignments.
- Quotes / Sales Orders / Invoices — Generated after the opportunity moves to a Registered Deal and processes through the CPQ application.
Add / Create a New Opportunity
Click Add on the View Opportunities page, or use the Opportunities related list Add button inside a Contact or Account record.
Fill in the required fields: Opportunity Name, Account Name (Select), Contact Name (Select), Sales Stage (dropdown 1–12), Currency ISO Code, Lead Source, Quarter, Expected Close Date, and Sales Contact Information. Click Save to create the record.
Lead Assignment Rule Engine
The Lead Assignment Rule Engine lets Admins create tailored distribution rules based on attributes like country, state, and lead source. It automates assigning leads to the right users, accounts, or groups, reducing manual effort and speeding up response times.
Navigate to Sell → Leads → Lead Assignment Rule Engine, then click Add.
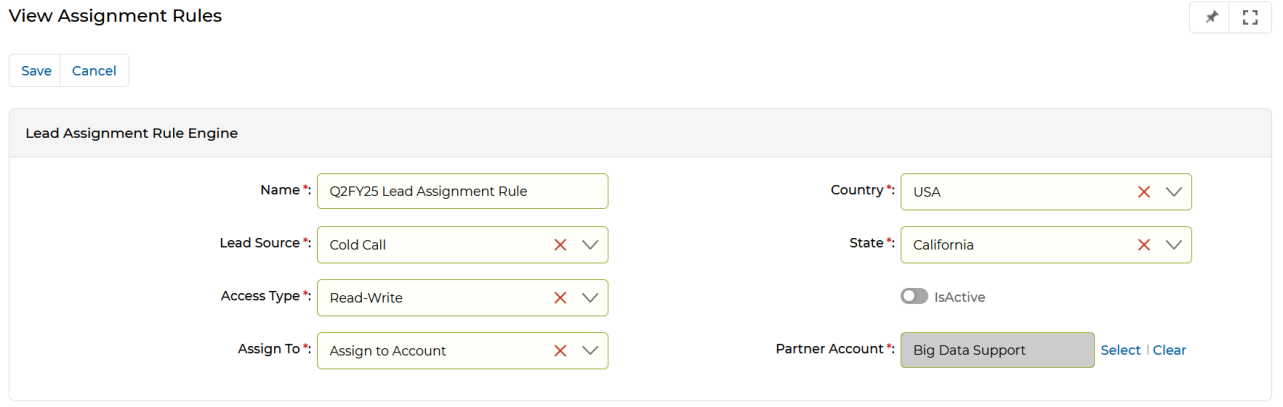
Rule Configuration Fields
| Field | Description |
|---|---|
| Name | An identifiable name for the Lead Assignment Rule. |
| Country | Country to match for lead distribution. |
| Lead Source | Source of the lead: Cold Call, Contact Us, Direct Mail, etc. |
| State | State to match for lead distribution. |
| Access Type | Read-Only or Read-Write access level. |
| Assign To | Where the lead is assigned: User, Account, or Group. |
| Is Active | Toggle to activate or deactivate the rule. |
Click Save to store the rule. Once a lead is created and meets the rule's criteria, the system automatically triggers the rule and assigns the lead according to the configured parameters.
Lead Aging
Lead Aging lets Admins configure rules for lead follow-up time frames and automatic lead pullback (revocation) when no activity occurs within a defined period. Navigate to Sell → Lead Aging in the left menu bar.
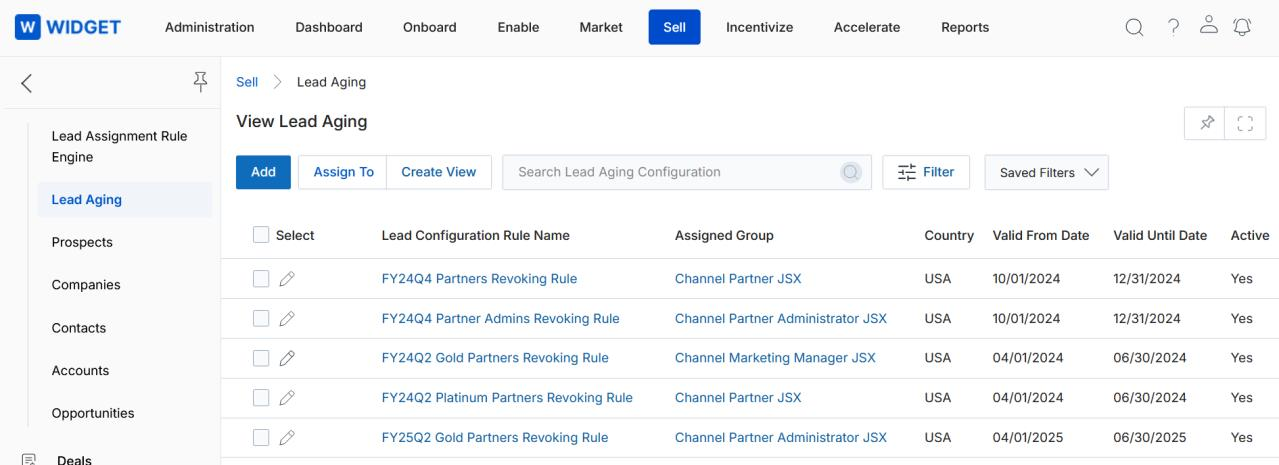
View Lead Aging
The View Lead Aging page lists all Lead Configuration Rules. Actions available include Add (create a new rule), Delete, Assign To, Create View, Search / Clear Search, and Saved Searches. Click the pencil icon to edit an existing rule.
View Lead Configuration Details
Click the Name of any Lead Configuration Rule to view its details.

Lead Configuration Detail Fields
| Field | Description |
|---|---|
| Lead Configuration Rule Name | Name of the rule. |
| Assigned Group | Name of the partner group this rule applies to. |
| Valid From Date | Start date of the rule's validity period. |
| Valid Until Date | End date of the rule's validity period. |
| Country | Country scope for the rule. |
| Active | Whether the rule is currently active. |
| Yellow / Green | Color codes used as lead aging indicators. |
Lead Revoke Rules
The Lead Revoke Rule(s) related list shows the rules that govern when a lead should be automatically revoked (pulled back). Click Add to create a new revoke rule specifying the rule Name, Operator (e.g., Greater Than), and Days threshold.