Introduction
ZINFI UPM offers a discussion group feature through the Community and Comments application — where individuals with similar interests can formally or informally share ideas, solve problems, and post comments. The application operates like a discussion forum with a tree-like structure, containing discussions, replies, and sub-replies.
Discussions can be shared via social syndication, and business intelligence reports can be generated based on activity within the application. Within a community, each new discussion can be replied to by as many users and partners as wish to participate.
The Community forum is an online discussion tool where people can hold conversations in the form of posted messages for specific records. Users can attach files and tag users, groups, and previous conversations. The primary aim of the Community application is to facilitate communication and file sharing between users and groups for records associated with sales.
Communities
To access Communities, navigate as follows:
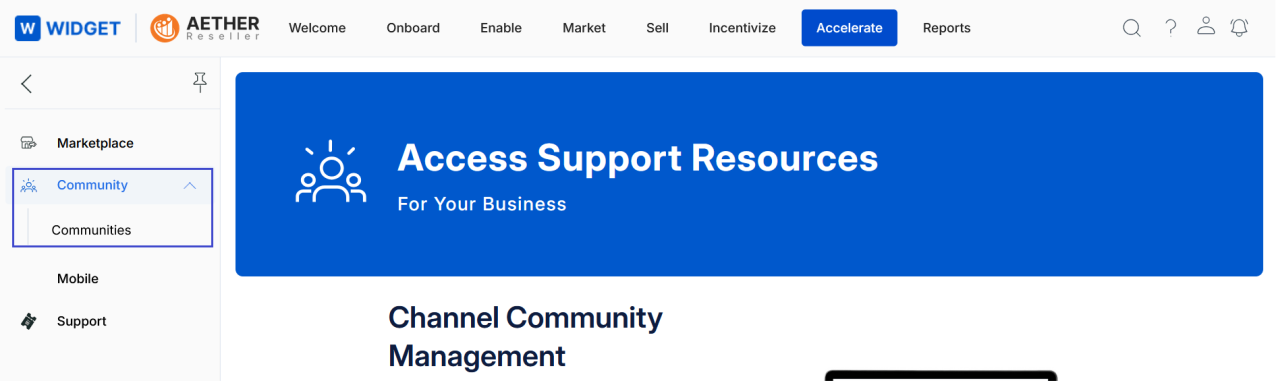
- Click Accelerate on the top menu.
- Click Communities in the left menu bar.
View Existing Community Info
Clicking on Communities opens the Community Info page where all existing communities are listed. The following actions are available at the top of the page:
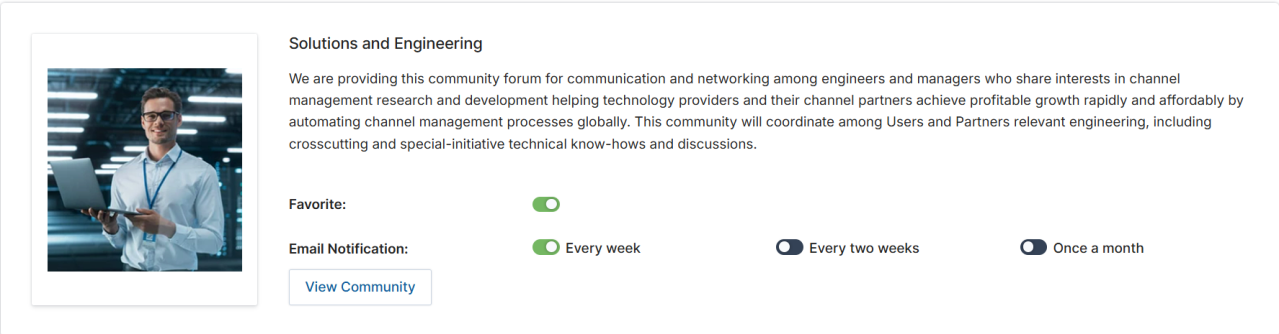
- Sort by — Lets you sort the listed Community Info using available parameters in the dropdown.
- Favorite — Users can enable the Favorite toggle to access their preferred communities quickly from their dashboard.
- Email Notifications — Users can select Every week, Every two weeks, or Once a month email updates to stay informed about new posts, discussions, and announcements within the community.
For each community record on the page, clicking View Community takes you directly to the Community page for that community.
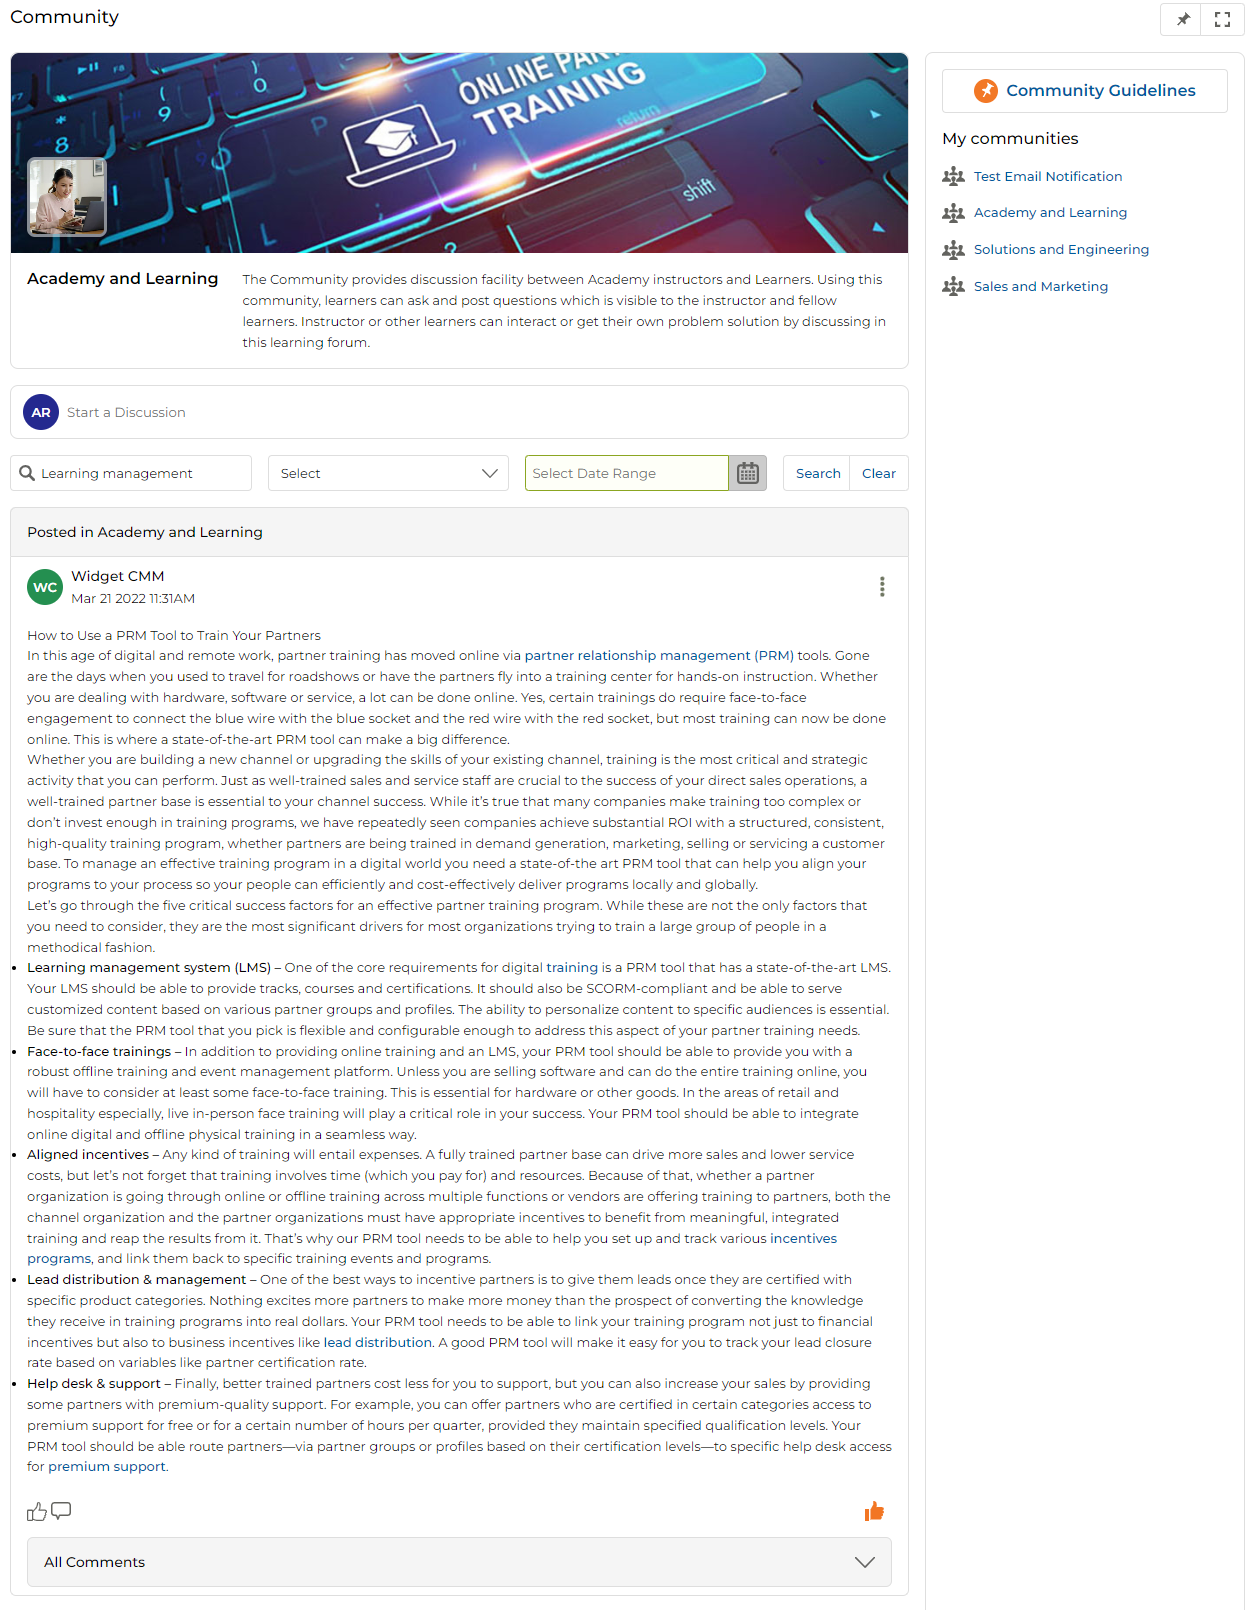
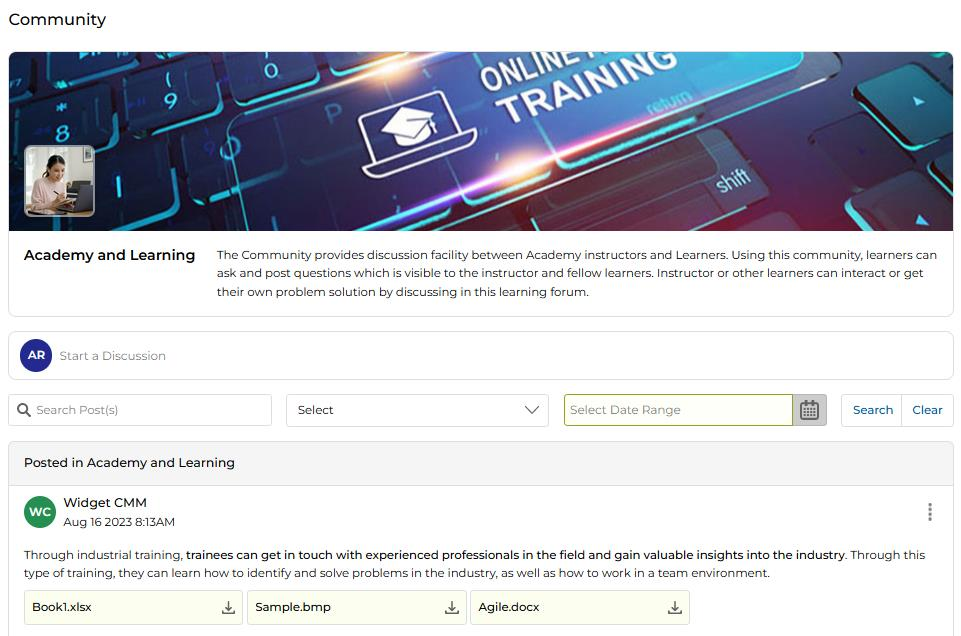
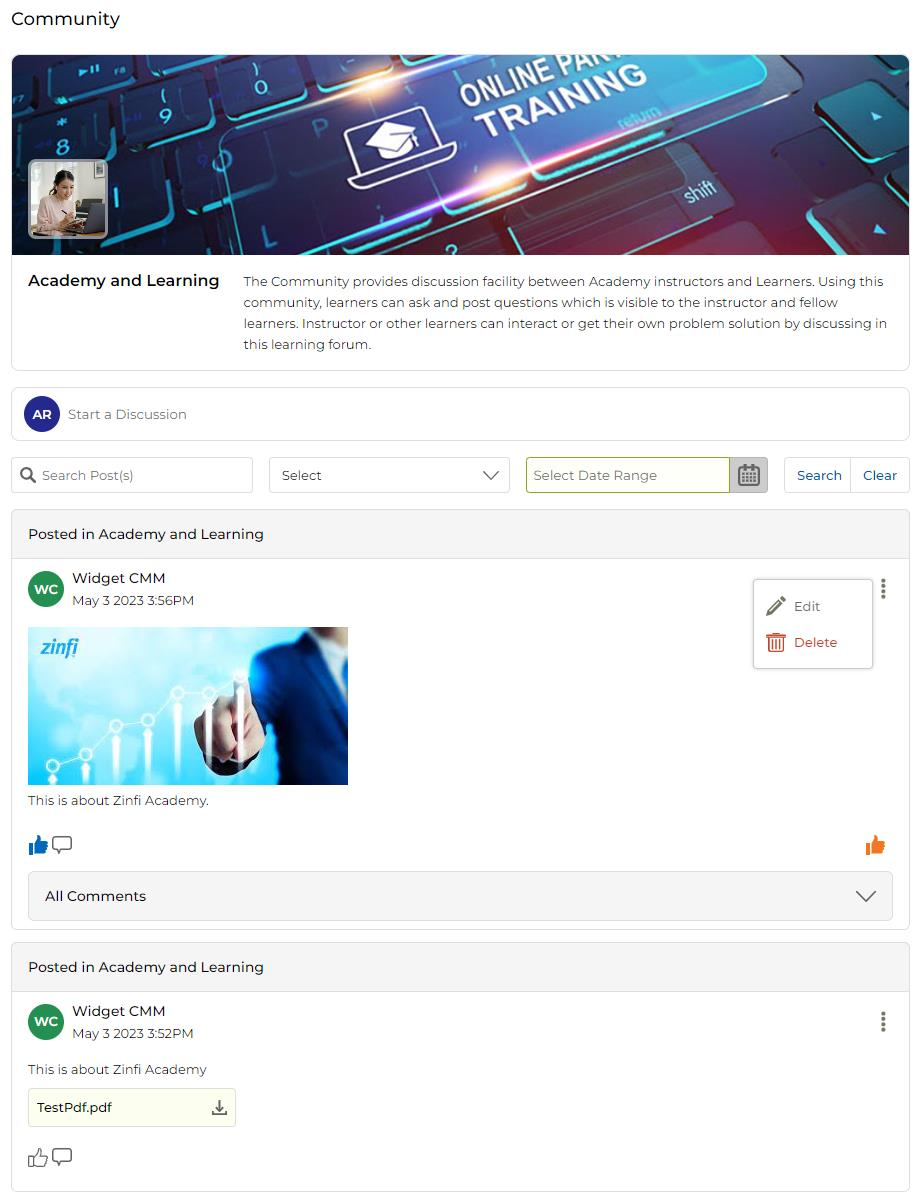
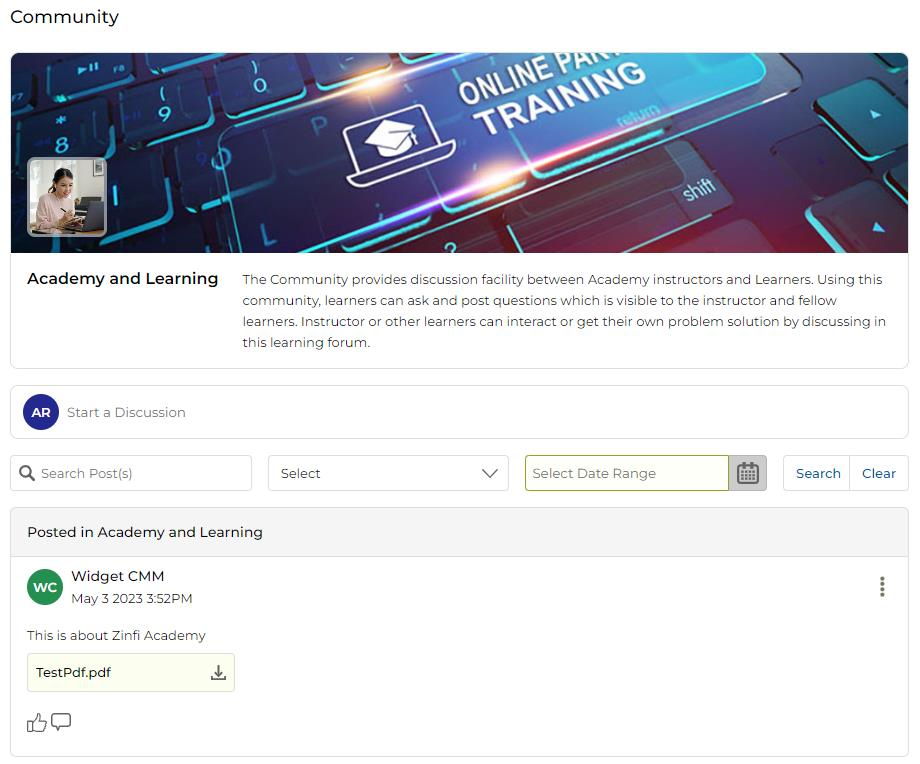
View Community and Creating Posts
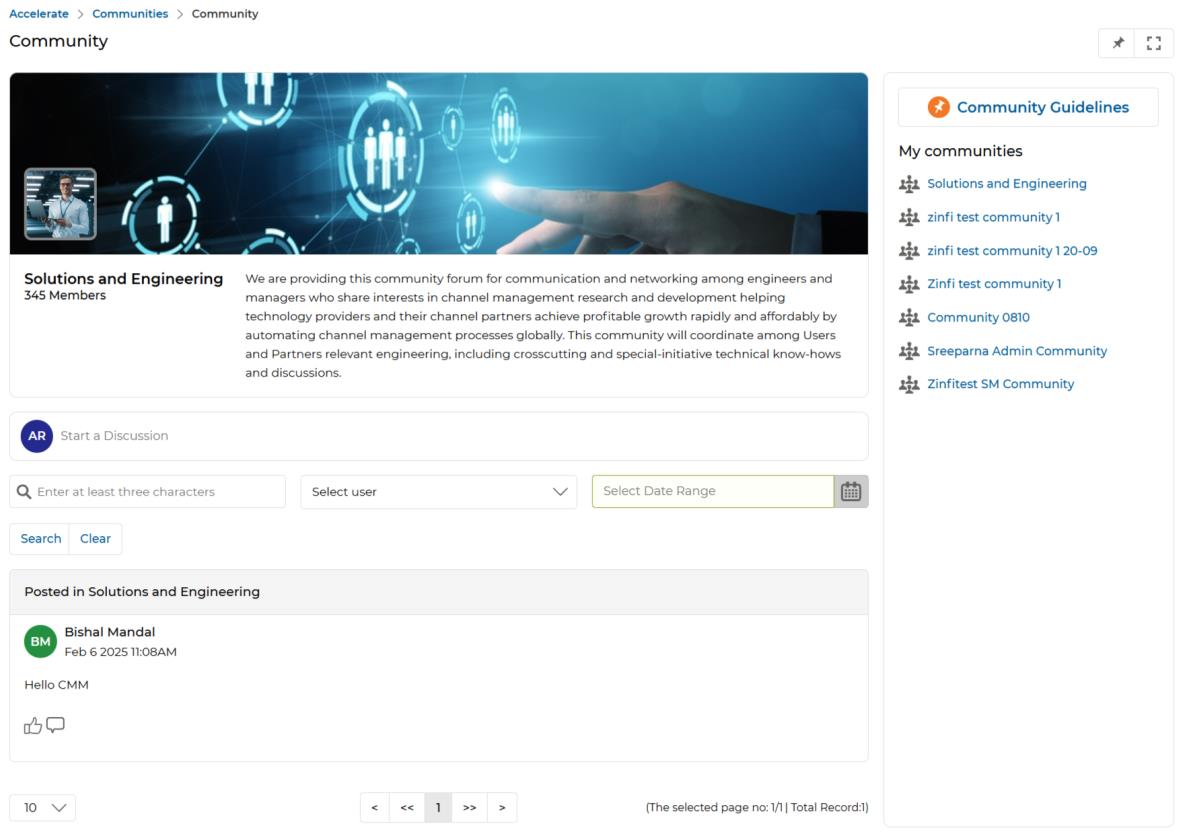
After clicking View Community from the Community Info page, you arrive at the Community page. The right-hand panel lists all Communities created by the Portal Admin.
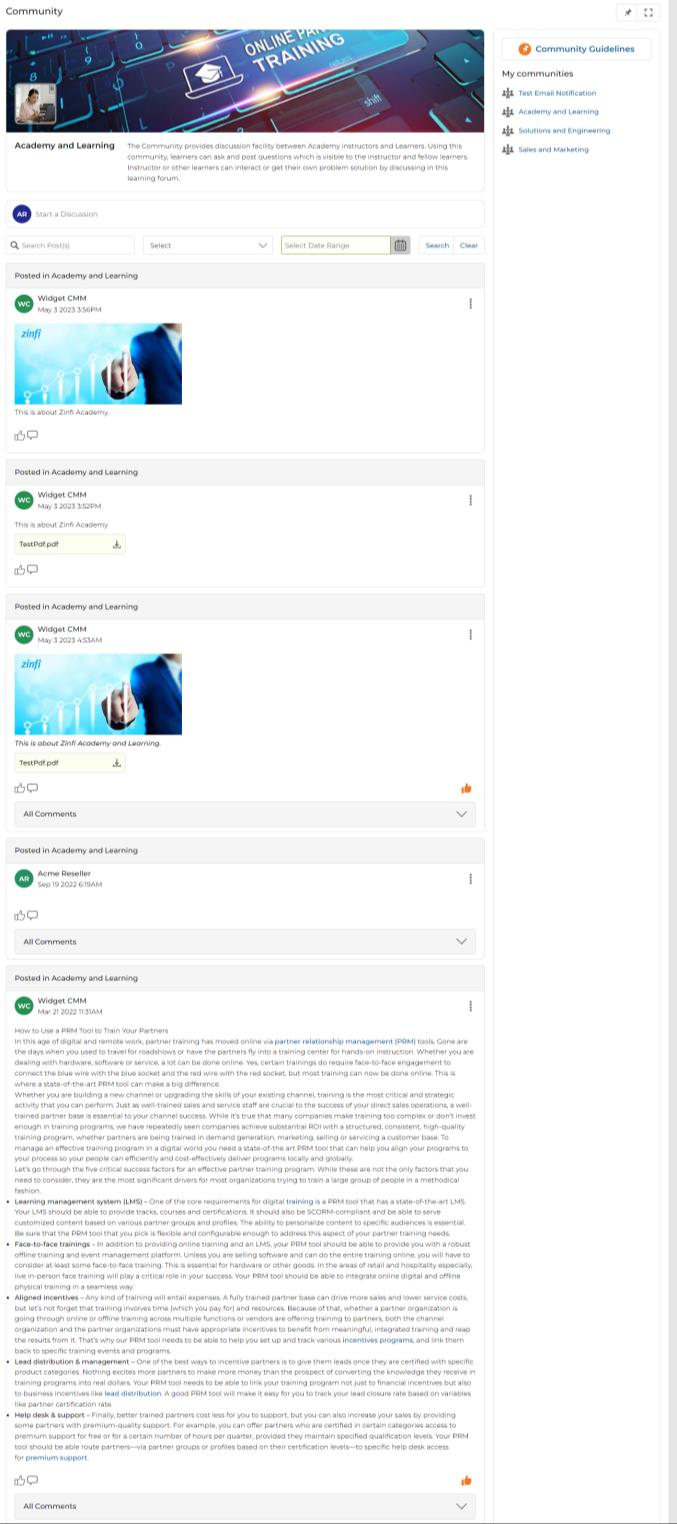
Starting a Discussion
- In the Community page, click the Start a Discussion panel. This opens a Discussion Details box with an embedded HTML editor for drafting your post.
- Click the Choose button to select the Users or Groups that should receive the post and be able to comment. Use the toggle keys to select individual recipients. Selected recipients are added to the TO panel.
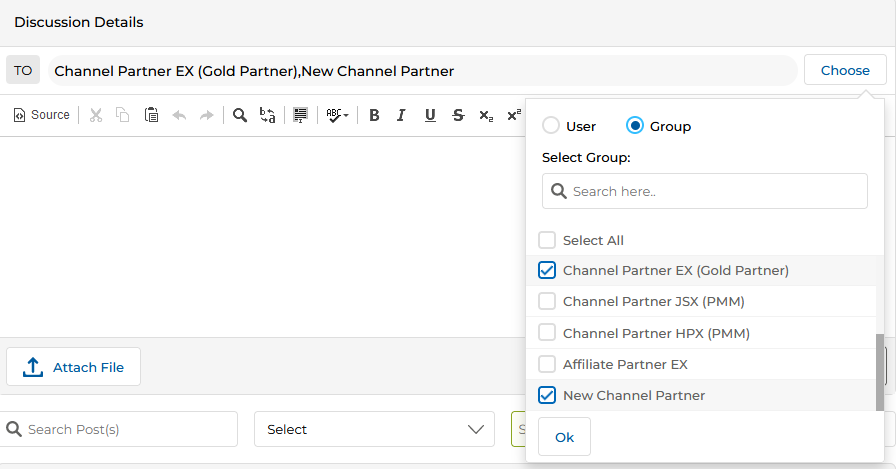
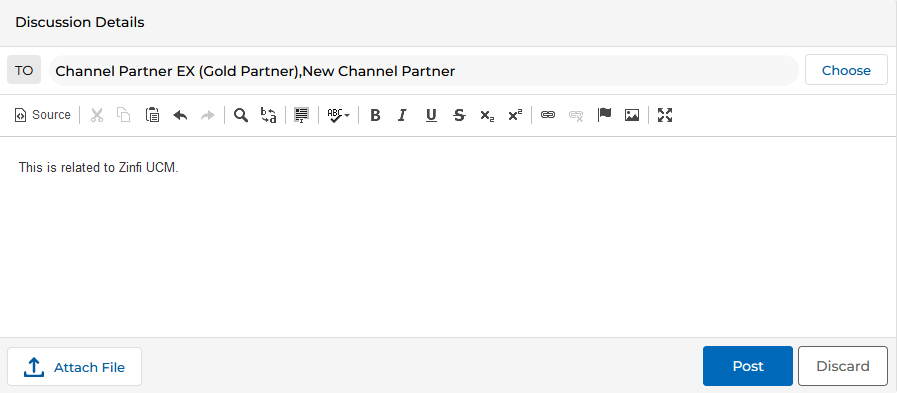
- Draft the post content in the embedded editor. Click Post to publish, or Discard to cancel.
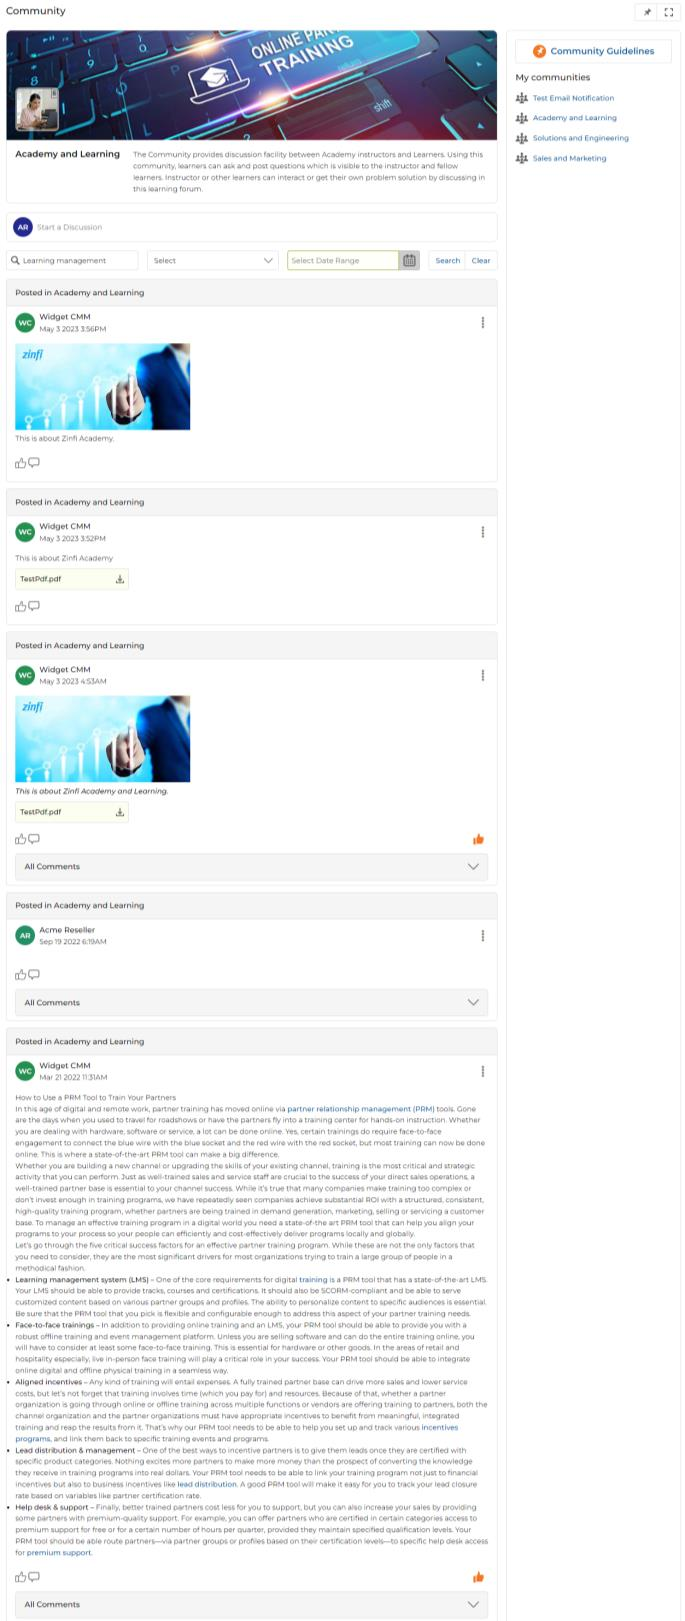
Searching Posts
Search filter tools are available directly on the Community page. A post can be searched by post text, creator's name, or creation date.
- Enter search text in the Search Post(s) field. Optionally, select a user from the Select dropdown and choose a date range.
- Click Search. Only posts matching the search criteria are displayed. Click Clear to reset the filter.
Email Notifications for Posts
- Once a post is launched, each participant of the Community receives an email notification.
- Recipients can reply directly from email — the reply is captured and reflected in the Portal automatically.
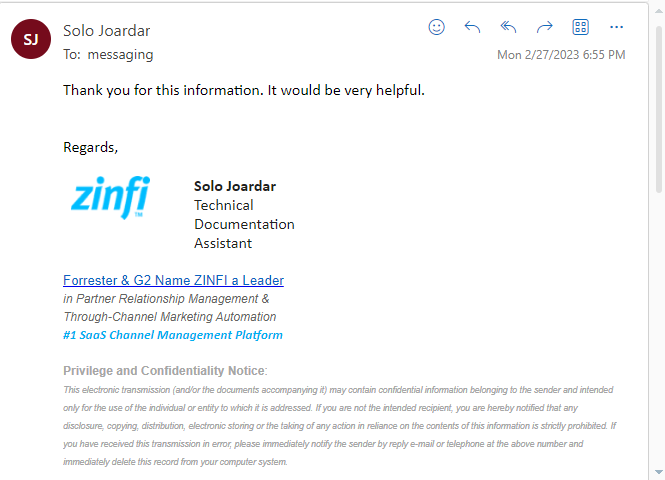
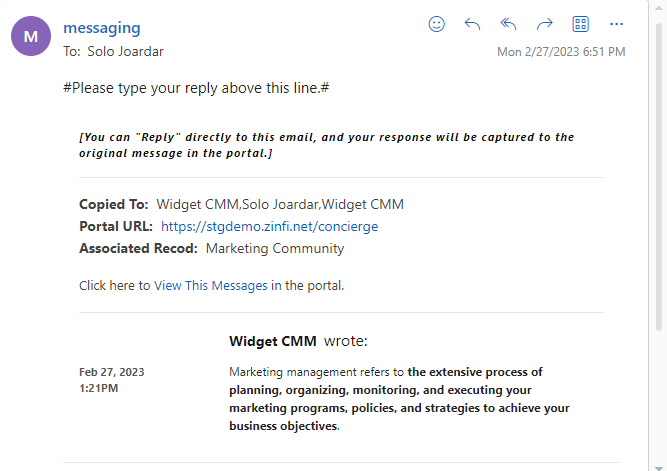
Note: When someone comments on a post, the actual post owner — along with users above them in the UPM user hierarchy — receives the email notification along with the comment.
Attaching Files to Posts
Posts can include one or more file attachments in a variety of formats including .png, .xlsx, .doc, .pdf, and others.
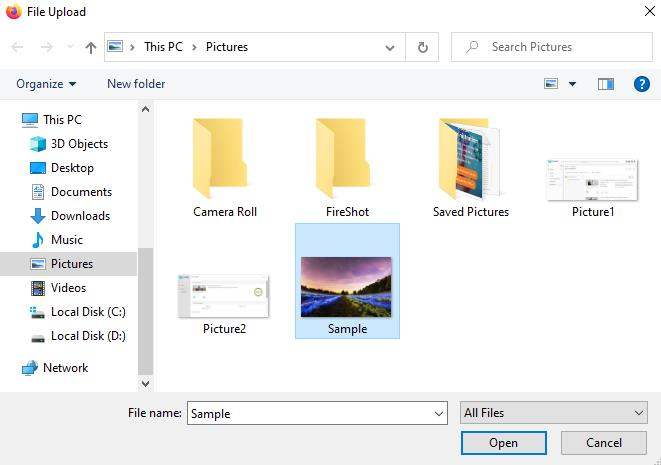
- Click the Attach File button in the Discussion Details box. A file browser dialog opens.
- Select the file you want to attach and click Open.
- The attached file becomes visible above the editor in the under-construction post. Repeat the steps to attach additional files.
- To remove an attached file, click the Bin icon (highlighted in orange). To download a file from the post, click the Download icon (highlighted in blue).
- Click Post to publish the post with all attached files.
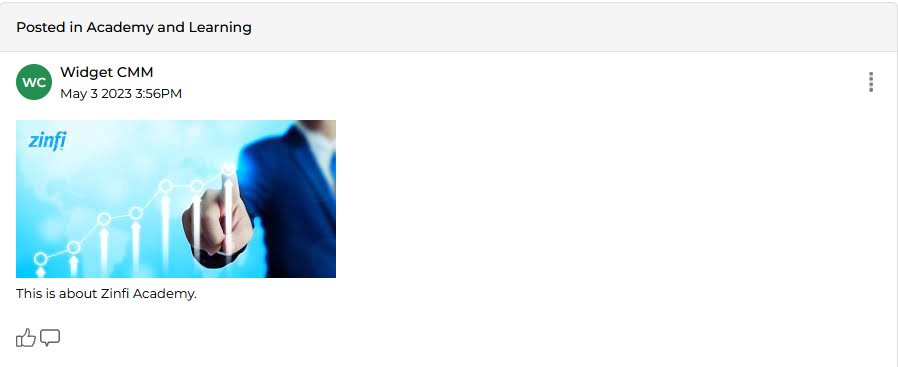
Creating Posts with Images
You can include images in a post using the embedded HTML editor:
- In the Discussion Details box, click Source to switch to HTML source view.
- Write the HTML
<img>tag for your image. Alternatively, paste an image directly into the editor without switching to source view. - Click Post. The image renders inline in the published post along with any associated written description.

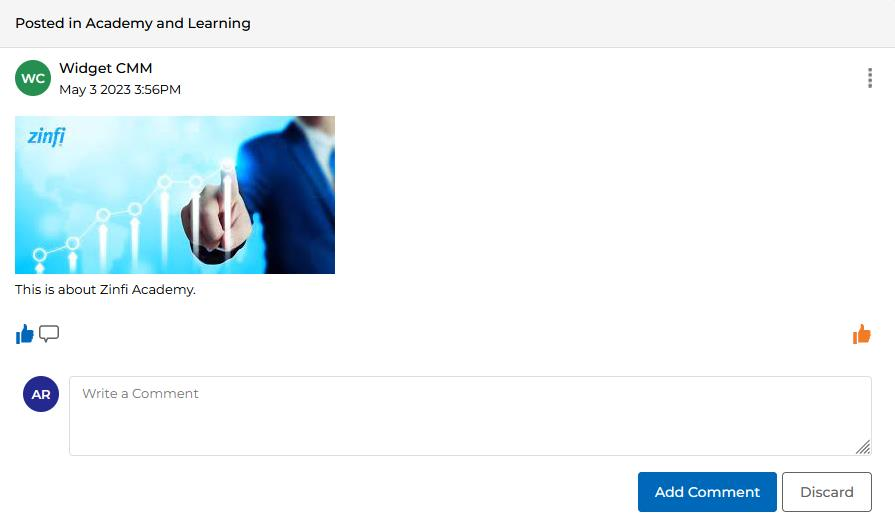
Liking and Commenting on Posts
- After a post is published, any participant can Like it by clicking the Thumbs Up icon.
- To add a comment, click the Comment icon beside the Thumbs Up. A collapsible editor opens where you can write your comment.
- Click Add Comment to submit. The comment appears under the post in the All Comments section.
- Clicking the All Comments bar opens the collapsible window where all comments for a post can be viewed.
Editing and Deleting Posts
Access the Edit and Delete options from the three-dot menu (⋯) in the top-right corner of any post or comment.
- Admin — Can edit or delete their own posts and comments as well as those of other participants.
- Other users — Can only edit or delete their own posts and comments.
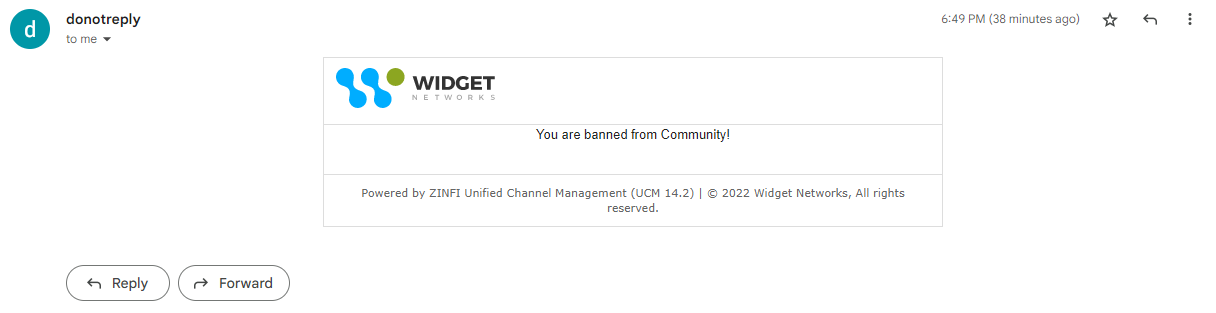
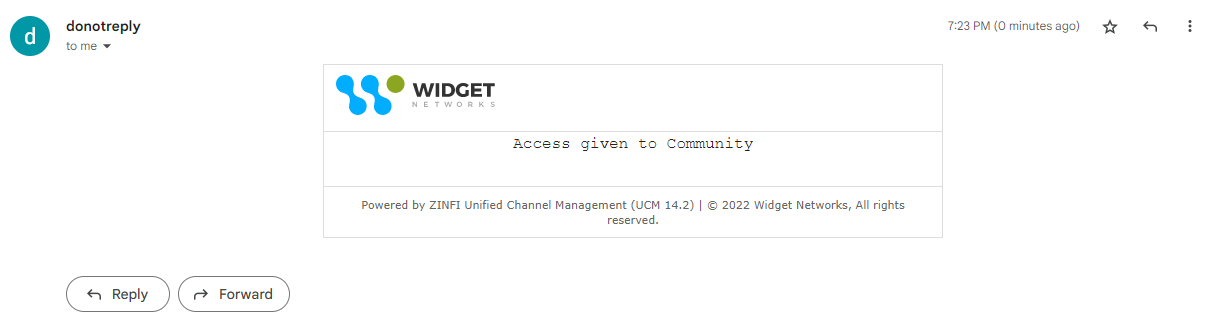
User Ban Management
From the User Management application, an Admin can invoke or revoke a ban on a user from accessing Communities. Both actions trigger a notification email to the affected user.
- When banned, the user loses access to all Communities immediately.
- When the ban is lifted, the user regains access to Communities.
Calendar
The Calendar feature within the Community section allows partners to view all assigned events in a visual calendar interface.
To access the Calendar:
- Click Accelerate on the top menu.
- Click Community > Calendar in the left menu bar.
- All assigned events are displayed within the calendar interface. You can toggle between Day, Week, Month, and List views.
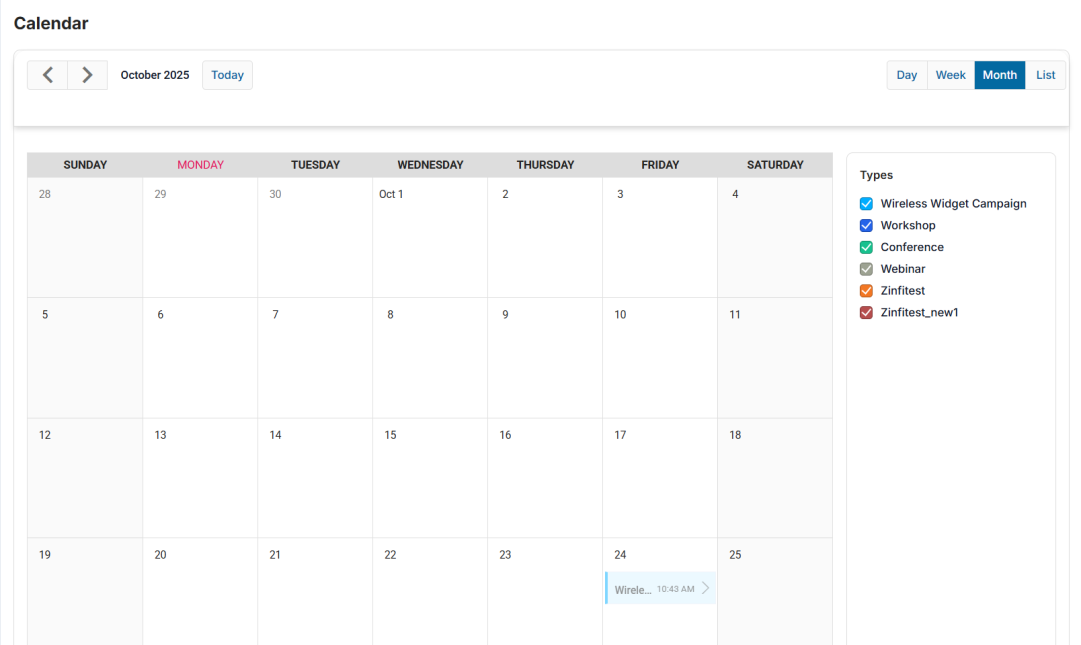
- Use the Types checkboxes on the right panel to select or deselect event types, instantly filtering which events are visible on the calendar.
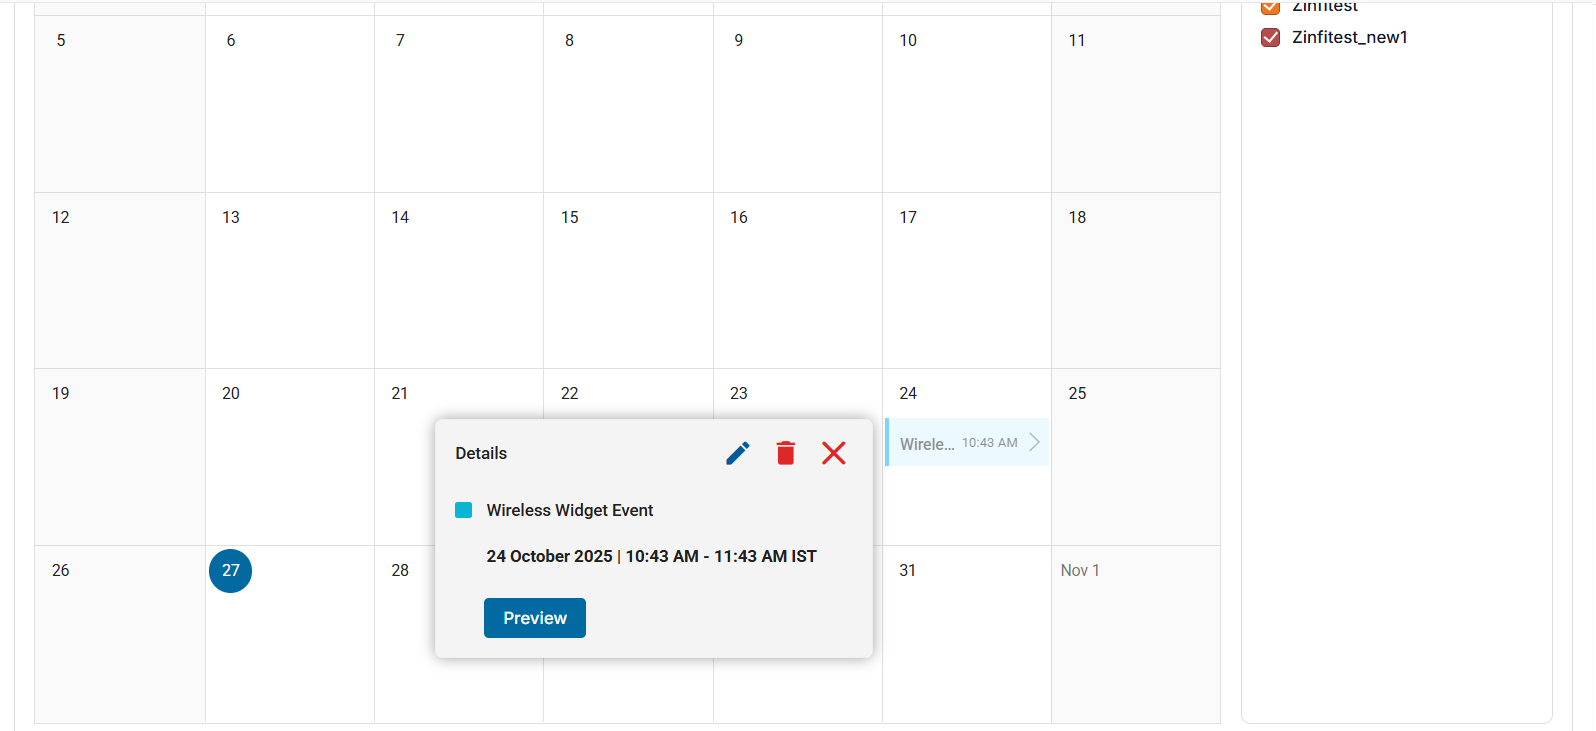
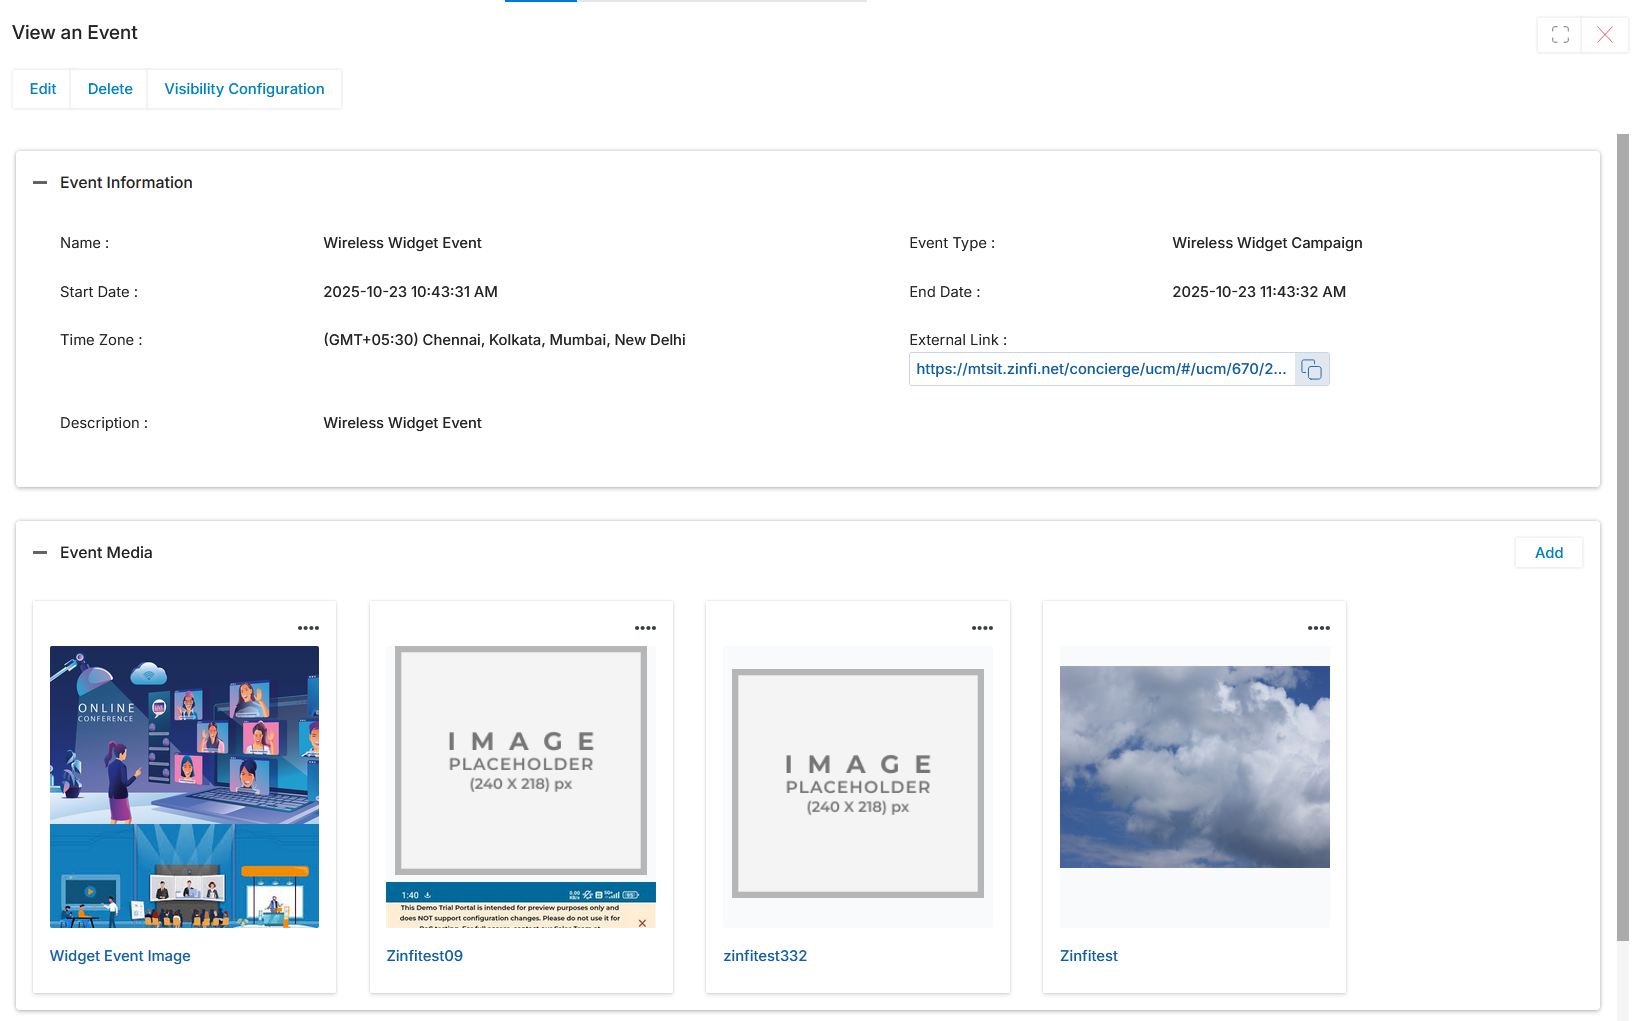
- Click on any event entry in the calendar to see a Details popup showing the event name, date, and time. Click Preview to open the Event details page.
- On the Event details page, you can view all event information (name, type, start/end dates, time zone, external link) and download any attached media or documents associated with the event.