
Introduction
With UPM's Email Marketing Management application, you can customize emails and newsletter templates provided by vendors, with your images, logos, and color schemes to fit your brand. You can utilize data from your UPM instance and personalize emails to create effective marketing campaigns and add hyperlinks to redirect recipients to your web pages, social media, and microsites.
ZINFI's UPM connects with your existing marketing tools through UPM's Centralized Interconnect (CENTRi™) application, allowing you to identify leads that convert and track the ROI from your marketing spend. UPM's Email Marketing Management application not only lets you send email campaigns and measure basic marketing analytics (open rates, close rates, click-through rates) but also helps you identify which campaigns have the highest conversion rates by comparing marketing spend to deals generated.
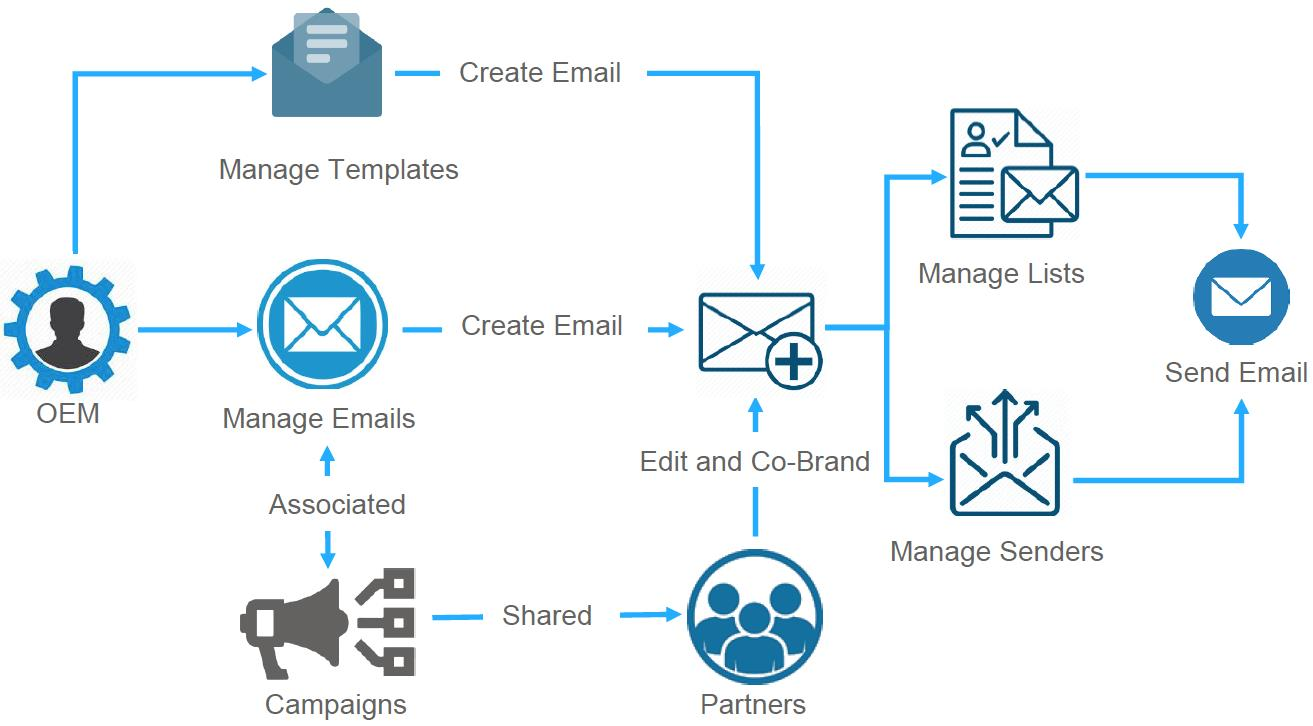
The application makes it easy to execute multi-touch, co-branded emails — the foundation for integrated campaigns that generate leads via microsites, events, syndication, or call campaigns.
UPM's Email Marketing Management application seamlessly integrates with popular email marketing tools through two-way synchronization via CENTRi, so all contacts and campaign data reside in a common location accessible by both sales and marketing teams. This allows you to cross-reference deals created from each campaign and identify which campaigns were successful.
Benefits
Manage Outgoing Emails
- Click Market on the top menu.
- Click Emails > Outgoing Emails from the left menu bar.
View Outgoing Emails
The top action bar provides the following options:
- Preview — Shows a preview of the selected email.
- Clone — Creates a clone copy of the email and opens it in editable mode.
- Launch — Opens the page to set up email launch instructions.
- Delete — Deletes selected email(s) from the listing page.
- Search — Opens a pop-up where you can put search criteria to find desired emails.
- Clear Search — Clears the current search.
-
Saved Searches — Shows a list of saved searches. When selected:
- Edit — Update the selected search name.
- Delete — Remove the selected search name from the dropdown.
For each email in the grid, click any linkable item to go to its details page.
View Details of an Outgoing Email
- In the View Outgoing Emails page, click the Name of any email to view its detailed information: scheduled blast date/time and recipients' details.
- The View an Outgoing Email page contains the following sections:

| Section / Field | Description |
|---|---|
| Outgoing Email Name | Name of the outgoing email blast. |
| Schedule Date/Time | The time zone and date/time the email was scheduled. |
| Actual Sent Date/Time | The actual timestamp when the email was launched. |
| Account Name | Name of the recipient's account. |
| Name | Name of the recipient. |
| Email Address | Recipient's email address. |
| Status | B = Clicked — email was clicked by recipient. Email Sent — email delivered but not yet clicked. |
Setup an Email
Setting up an email configures and co-brands the template before launch. Follow these steps:
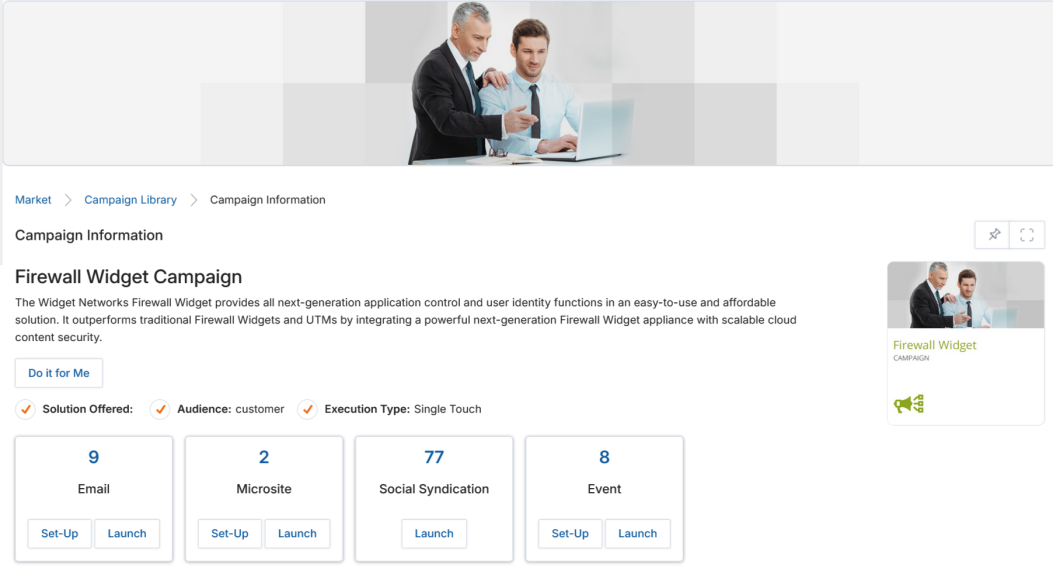
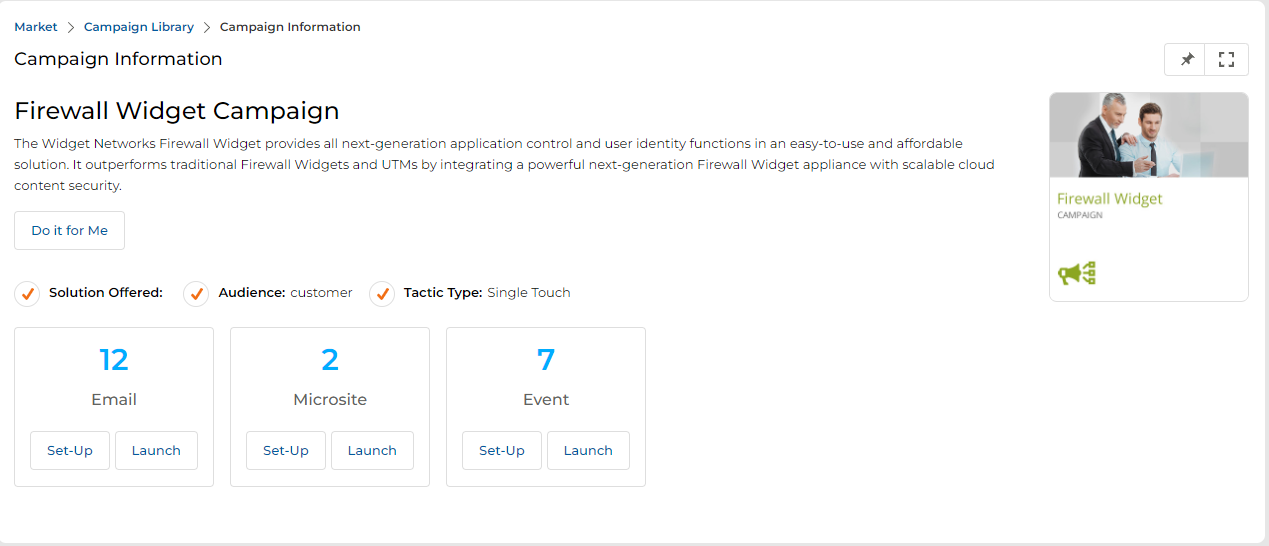
Step 1 — Campaign Interstitial Page
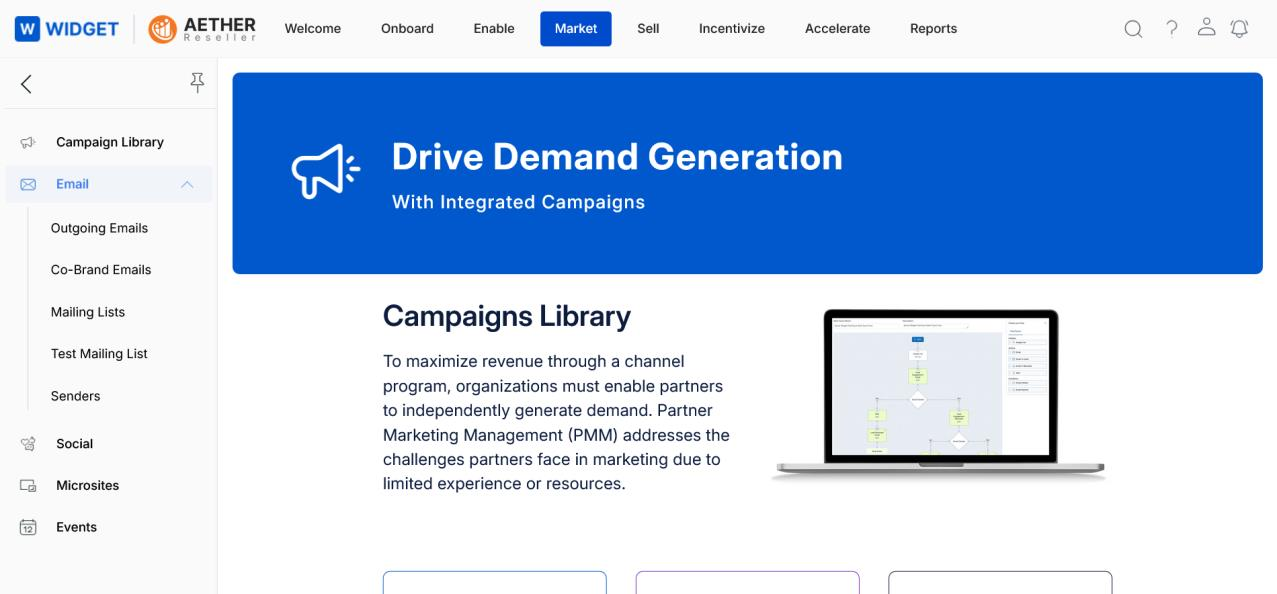
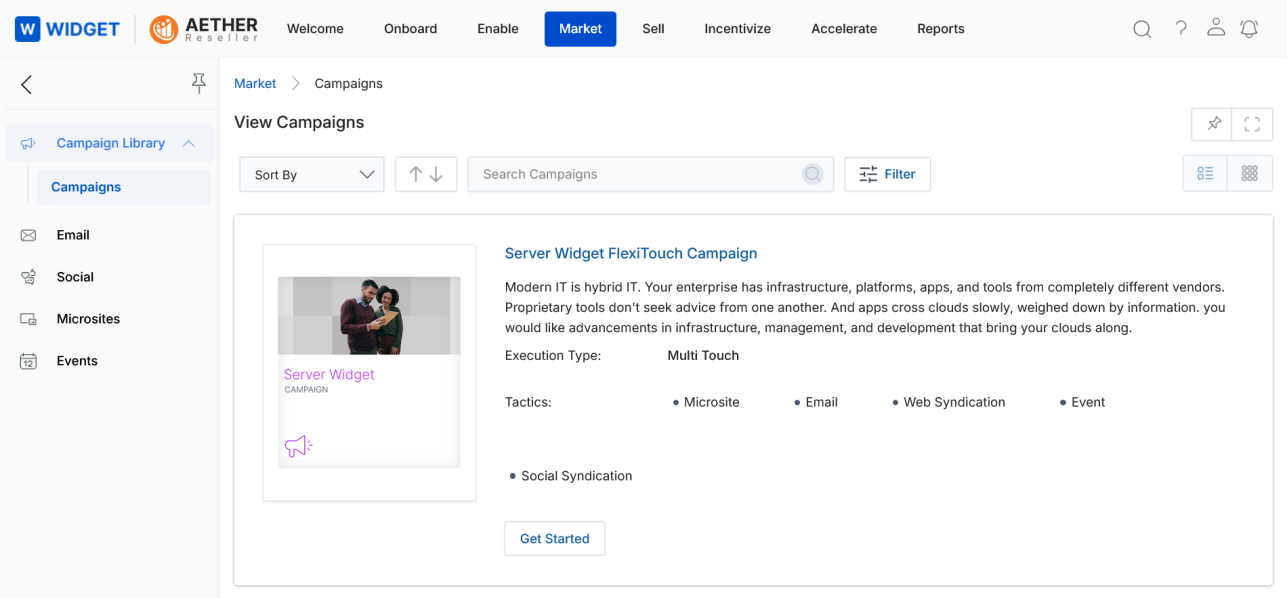
- Click Market > Multi-Touch > Campaign Library. Select the campaign you wish to launch and click Get Started.
- You land on the Interstitial page. Click Set-Up to configure the email tactic.

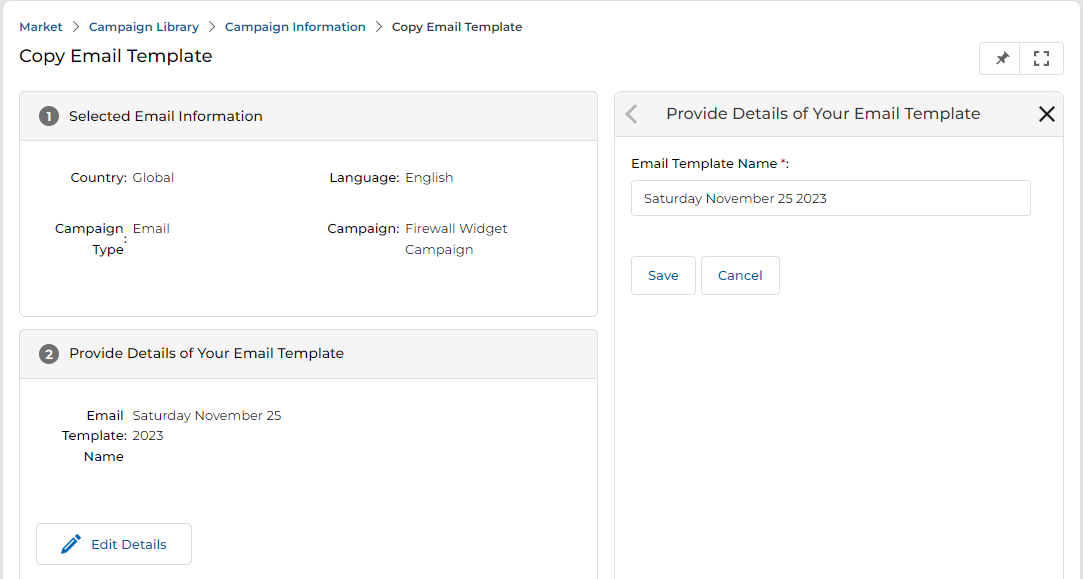
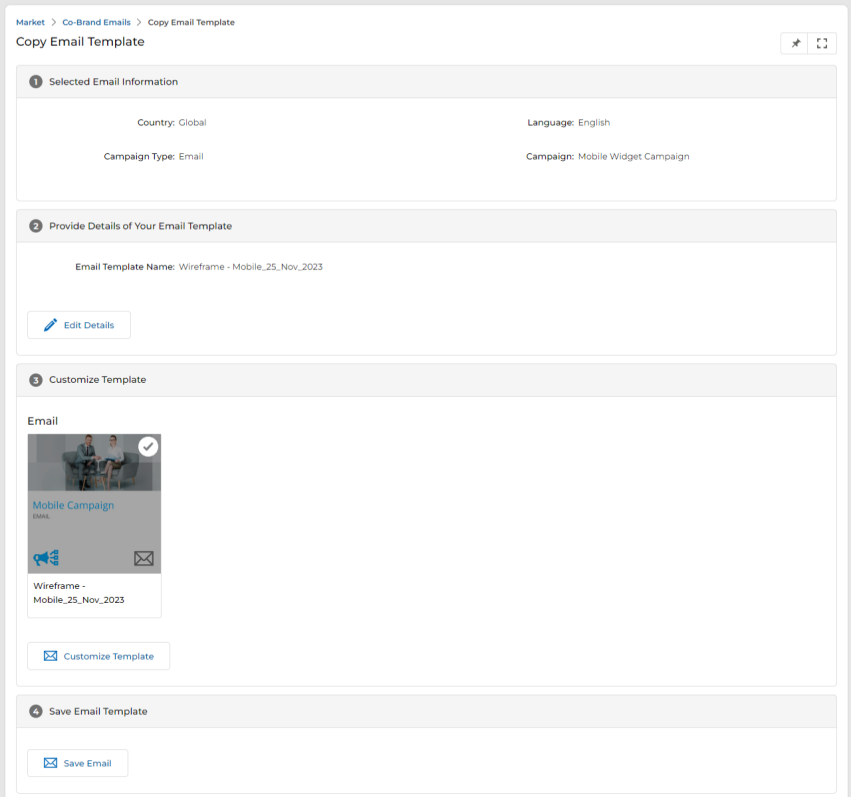
Step 2 — Details of Email Template
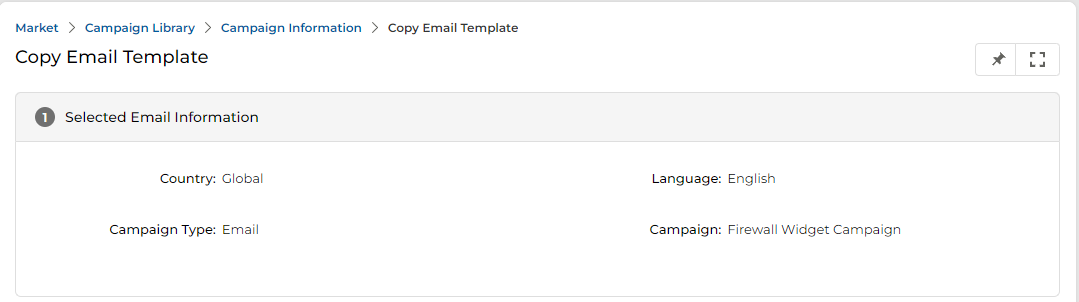
- The Copy Email Template page opens, showing the Selected Email Information (Country, Language, Campaign Type, Campaign name).
Step 3 — Provide Details of Your Email
- Review the Provide Details of Your Email Template section. Click Edit Details to update fields if required.
- The slide-out panel on the right allows you to update the Email Template Name. Click Save when done.
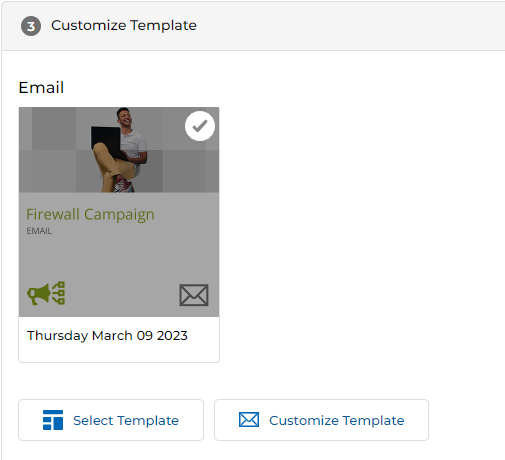
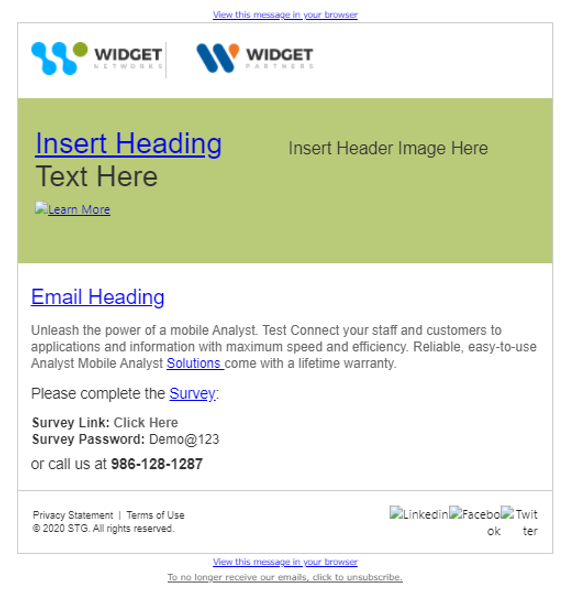
Step 4 — Customize Email Template
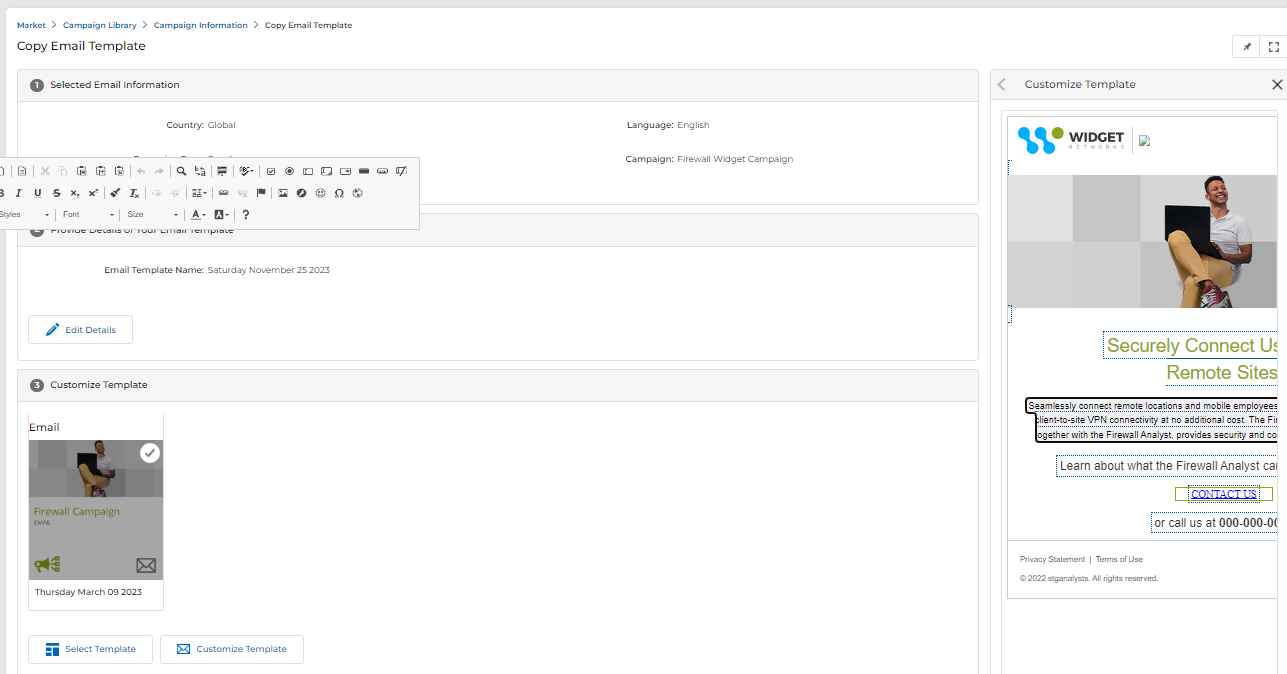
- In the Customize Template section, click Customize Template to open the template editor.
- A panel opens on the right displaying the selected template. Click any image or text area (shown with dotted borders) to edit it inline using the editor toolbar.
- Use the menu options to further customize as required. Click Save when done.
Launch an Email
Launching an email sends (or schedules) the blast to a selected mailing list. Follow the steps below.
Step 1 — Add a List
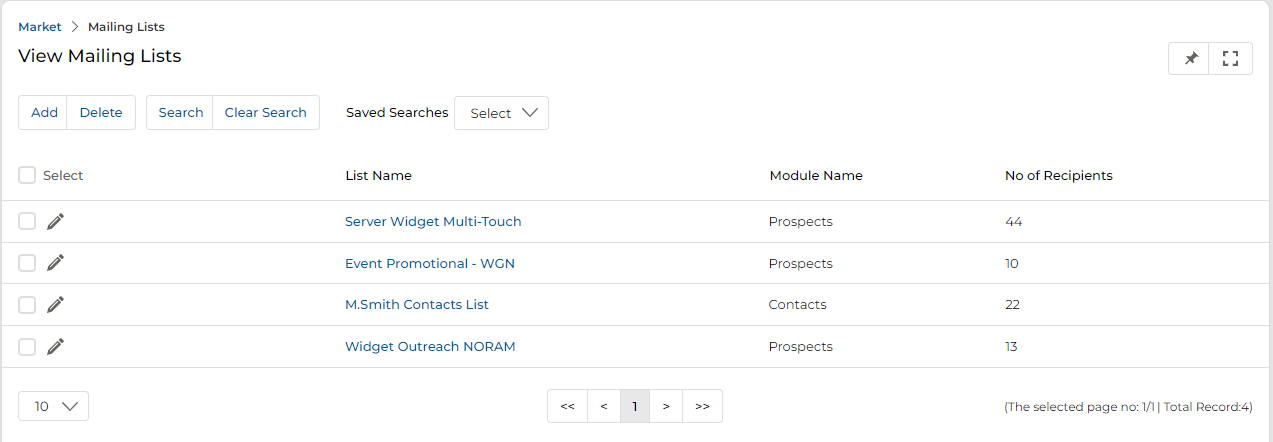
- Click Market > Emails > Mailing Lists to reach the View Mailing Lists page.
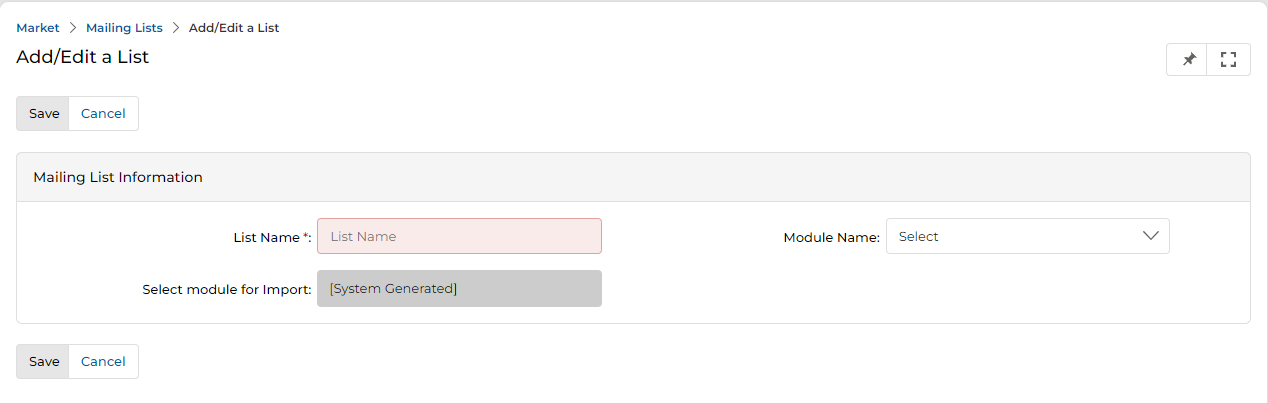
- Click Add to open the Add/Edit a List page and create a new list for emailing.
- Click Save after creating the list.
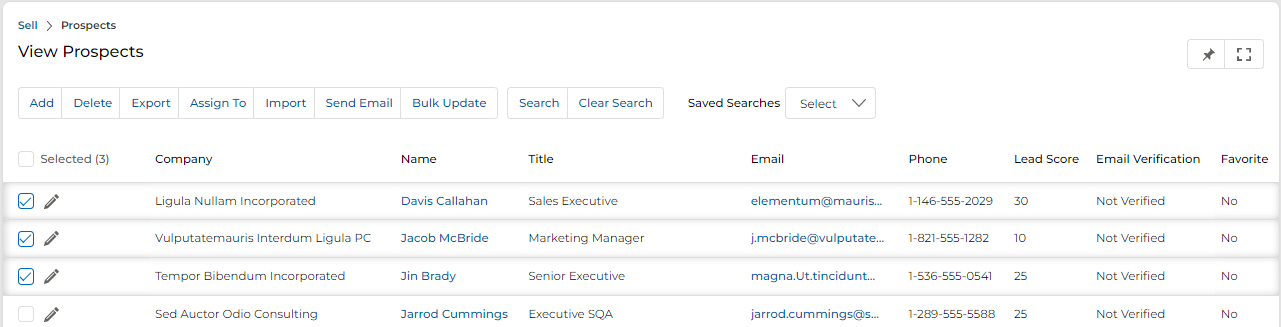
- Click Sell > Leads > Prospects to reach the View Prospects page.

- Select the desired prospects from the listing, then click Send Email.
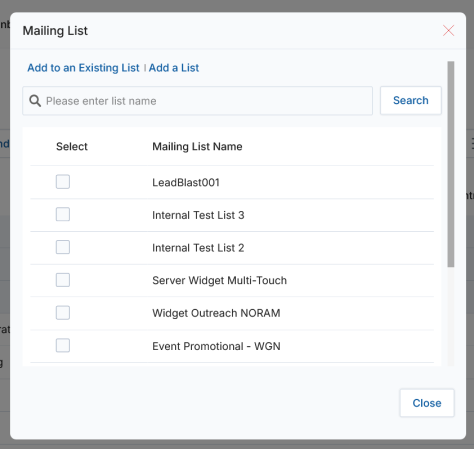
- The Mailing List popup appears. Select the intended mailing list name from the list.
- Click Add To An Existing List to add the selected prospects to the chosen mailing list.
Step 2 — Campaign Interstitial Page
- Re-visit the campaign Interstitial page and click Launch (not Set-Up) under the Email tactic.
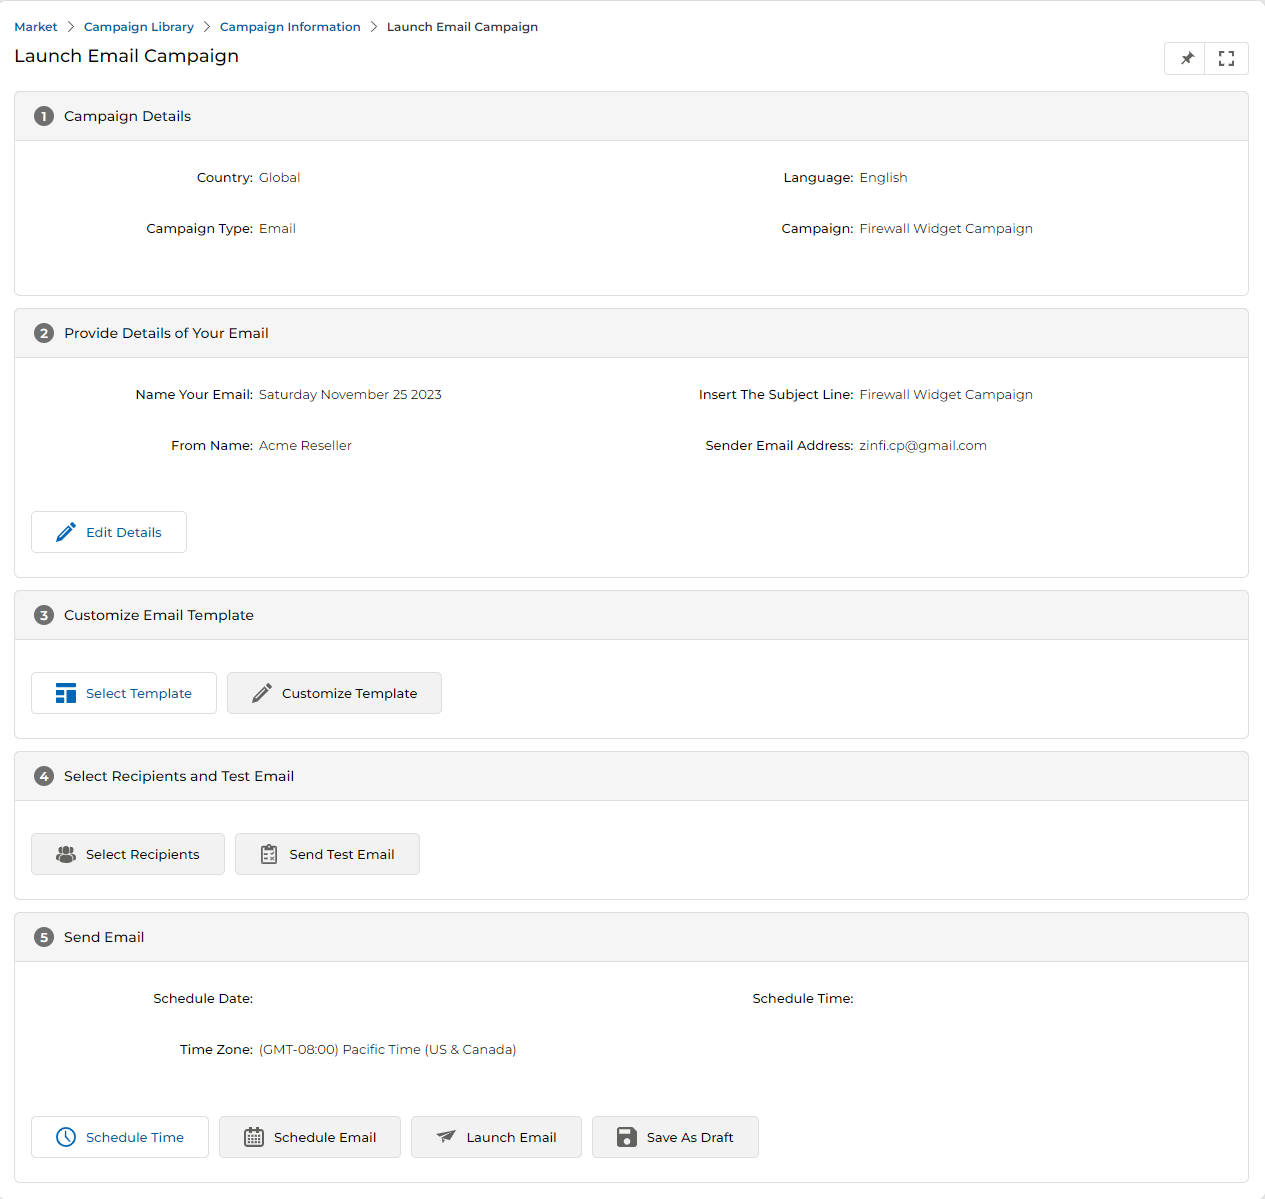
- You are redirected to the Launch Email Campaign page.

Step 3 — Campaign Details
- Review the non-editable Campaign Details section (Country, Language, Campaign Type, Campaign name).
Step 4 — Provide Details of Your Email
- Review or update the email blast details. Click Edit Details to update any field.
Step 5 — Customize Email Template
- Click Select Template to switch the template if required.
- Click Customize Template to open the inline editor. Edit any dotted area and click Save when done.
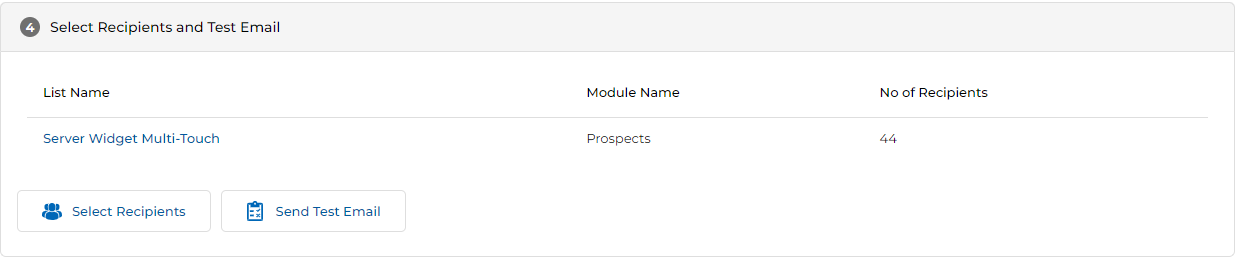
Step 6 — Select Recipients and Test Email
- The Select Recipients and Test Email section shows the currently assigned mailing list with recipient count and Module Name.
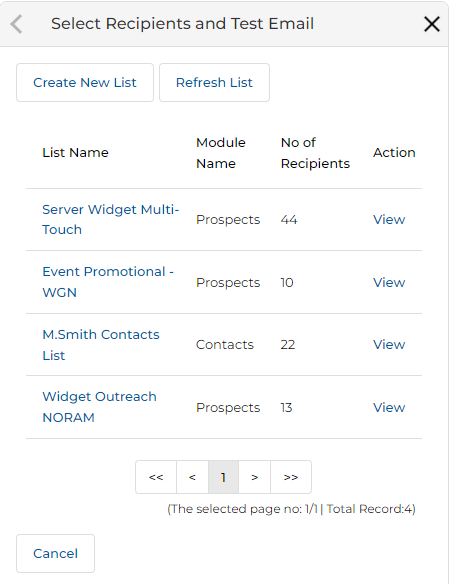
- Click Select Recipients to open the recipients panel. The panel shows available mailing lists with fields:
| Column | Description |
|---|---|
| List Name | Name of the mailing list. |
| Module Name | The UPM module the list is associated with (Prospects, Contacts, etc.). |
| No. of Recipients | Count of recipients in the list. |
| Action | Click View to inspect the list details. |
- Click Send Test Email to send a test email to the chosen recipients before the live launch. See the Manage Test Mailing List section for more details.
Step 7 — Send Email
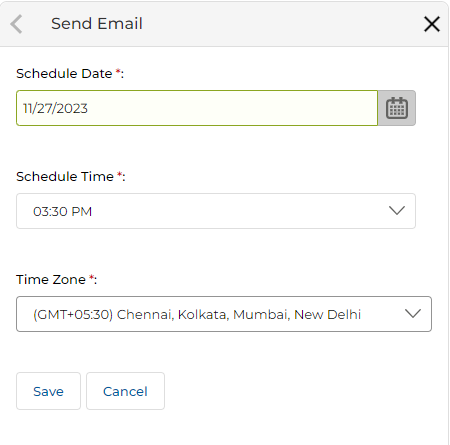
- The Send Email section allows scheduling or immediate launch of the blast.
- The Time Zone field defaults to the time zone set in your User profile. Update it by clicking Schedule Time.
-
Click one of the following:
- Schedule Email — Queues the email to send at the scheduled time.
- Launch Email — Blasts the email immediately.
- Save as Draft — Saves the email configuration as a draft for future use.
- Clicking Schedule Time opens the Schedule panel where you set the Schedule Date, Schedule Time, and Time Zone. Click Save when done.
Unsubscribe Emails
- Any recipient who does not wish to receive emails must click the Unsubscribe link shown at the bottom of any campaign email.
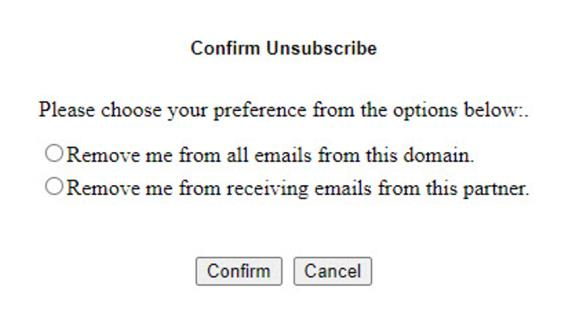
- Clicking the Unsubscribe link opens a Confirm Unsubscribe popup with two options:
- Remove me from all emails from this domain — The user will not receive any emails from this platform from any partner.
- Remove me from receiving emails from this partner — The user will not receive any emails from this specific partner, on any platform.
For both options, the system is updated as per the chosen policy to restrict further emails.
Manage Co-Brand Emails
- Click Market on the top menu.
- Click Emails > Co-Brand Emails from the left menu bar.
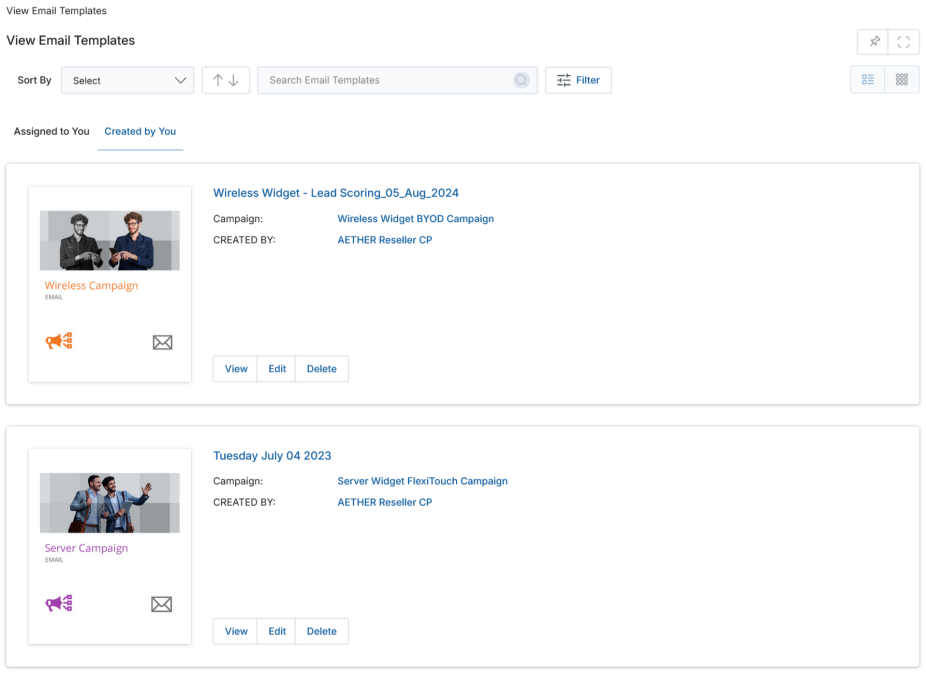
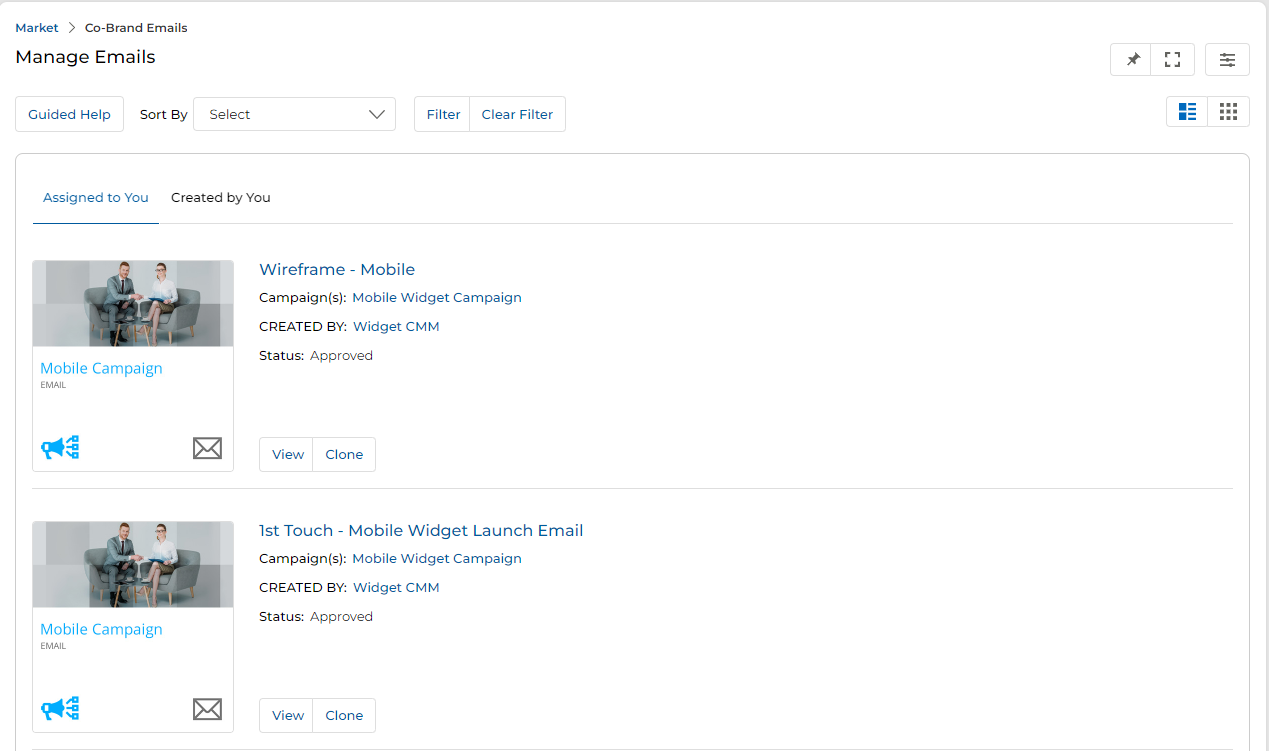
View Email Templates
- Click Sort By to sort templates by creation date, modification date, or email template name.
-
Click:
- Assigned to You — Displays templates assigned to you by the admin for co-branding.
- Created by You — Displays templates you have created or cloned.
-
Click:
- List View — Displays templates in list format.
- Thumb View — Displays templates as thumbnail cards.
-
For each template, click:
- View — View the template details.
- Edit — Creates a duplicate copy and lets you change the template structure before saving.
- Delete — Deletes the email template.
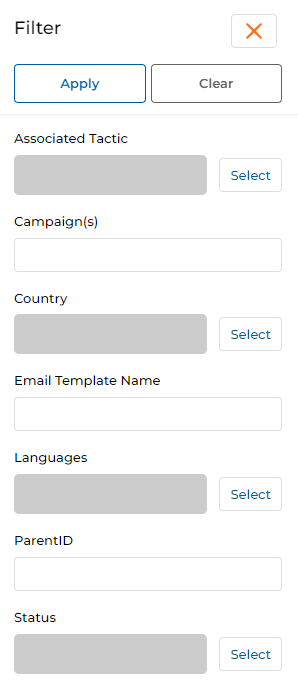
- Filter templates by any or all of the following attributes:
| Filter Field | Description |
|---|---|
| Associated Tactic | Filter by one or more campaign tactic types. |
| Campaign | Filter by campaign name. |
| Country | Filter by one or more countries. |
| Email Template Name | Filter by template name. |
| Languages | Filter by one or more languages. |
| Parent ID | Filter by the parent record ID. |
| Status | Filter by the current status of the template. |
- Click Apply after setting filter attributes.
- Under the Assigned to You tab, these are vendor-assigned templates available for co-branding. Click the Clone button on any template to create your own co-branded version.
- Clicking Clone opens the Copy Email Template page. Follow the same steps as in the Setup an Email section above (Steps 2–4) to customize and save the template.
Manage Mailing Lists
- Click Market on the top menu.
- Click Emails > Mailing Lists from the left menu bar.
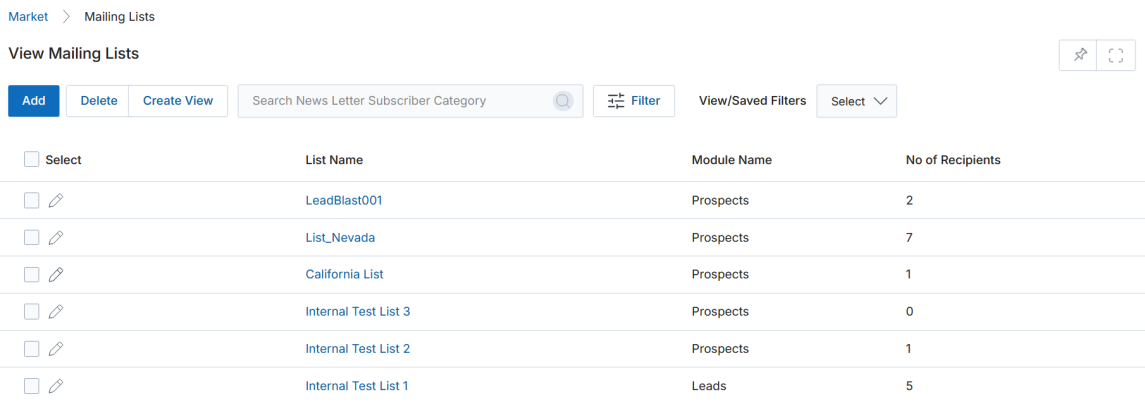
View Lists
The top action bar provides:
- Add — Create a new email list based on Module Name and Audience.
- Delete — Delete selected mailing lists.
- Search — Open a search criteria pop-up.
- Clear Search — Clear the current search.
- Saved Searches — Access saved search configurations (with Edit and Delete sub-options).
For each list in the grid: click Name to open the list detail page, or Module Name to see the associated module.
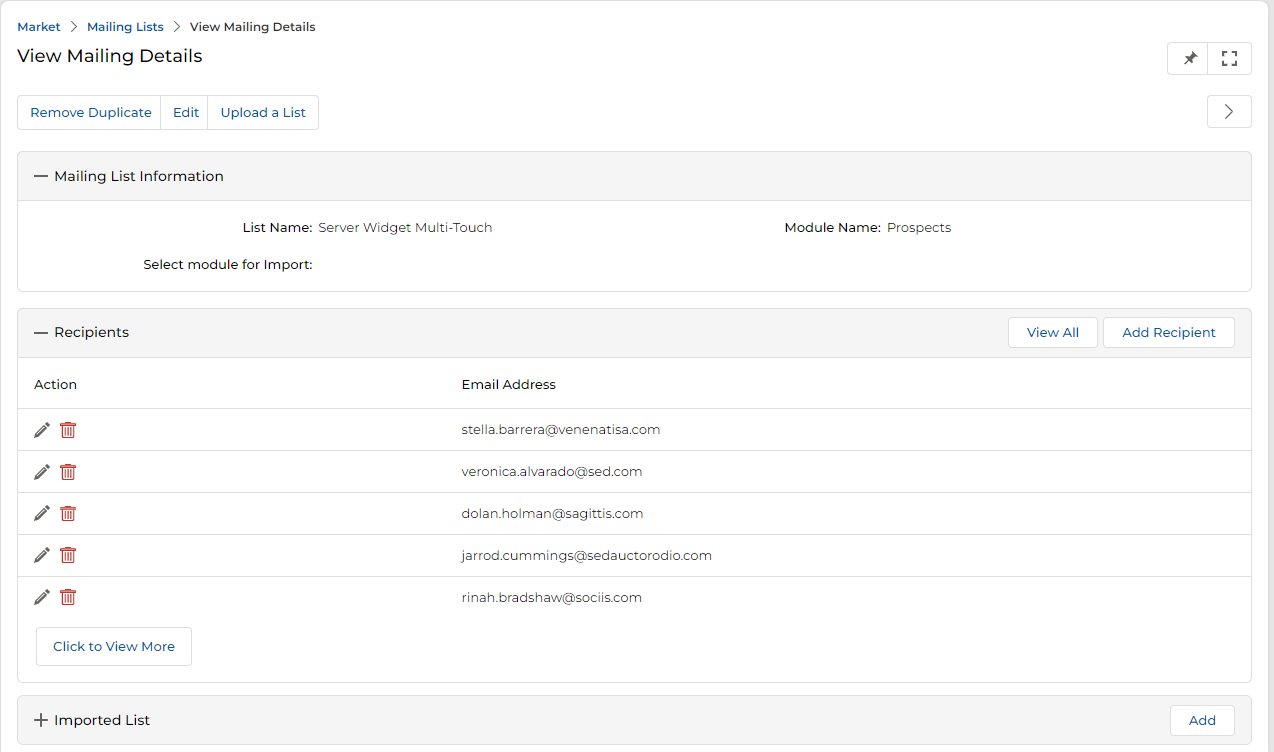
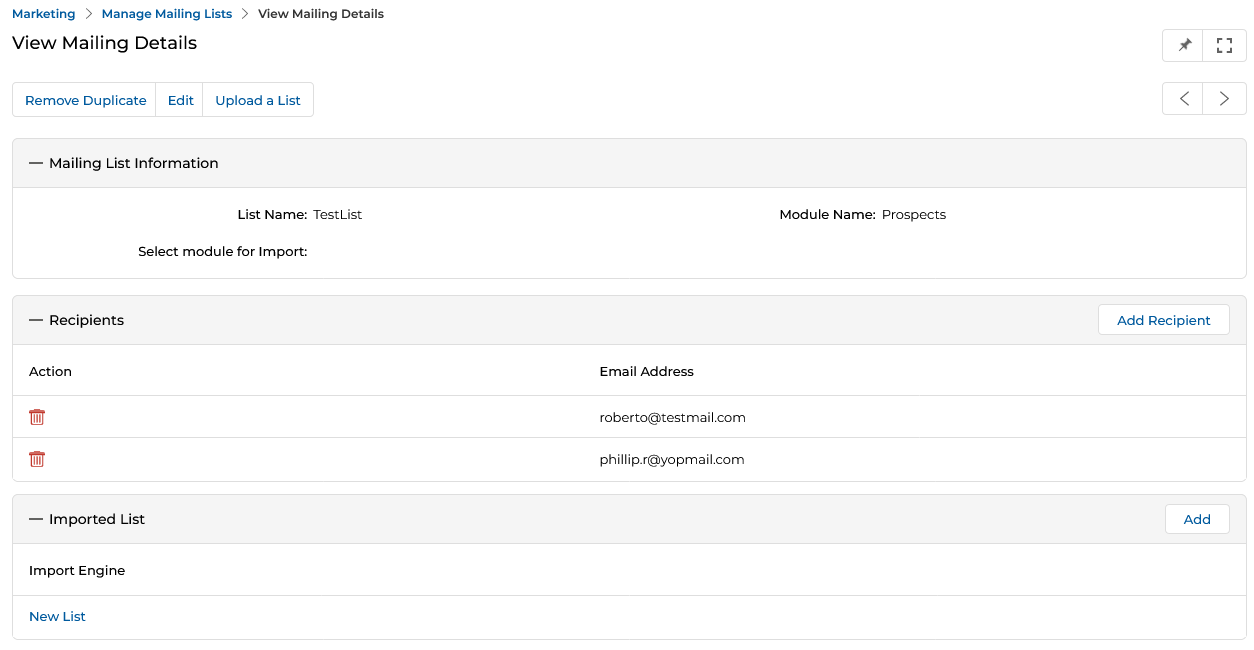
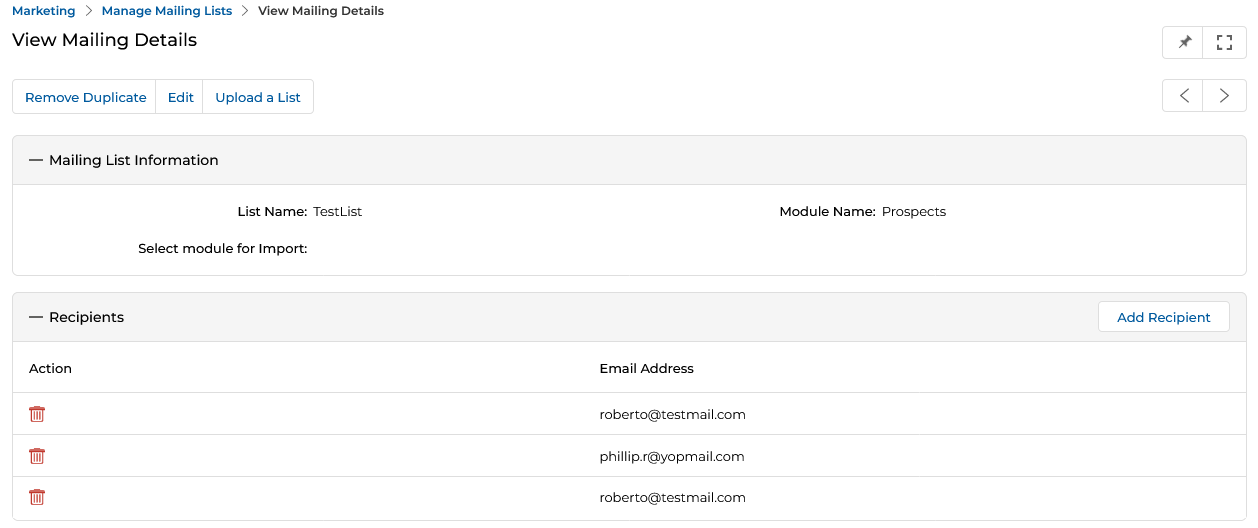
View Mailing List Details
- Shows detailed information on the mailing list.
- Click Edit to update the List Name.
- Click Add Recipients to add new email recipients to the list.
- Shows the full list of email recipients (email addresses).
- Click Remove Duplicate to deduplicate records identified by email address.
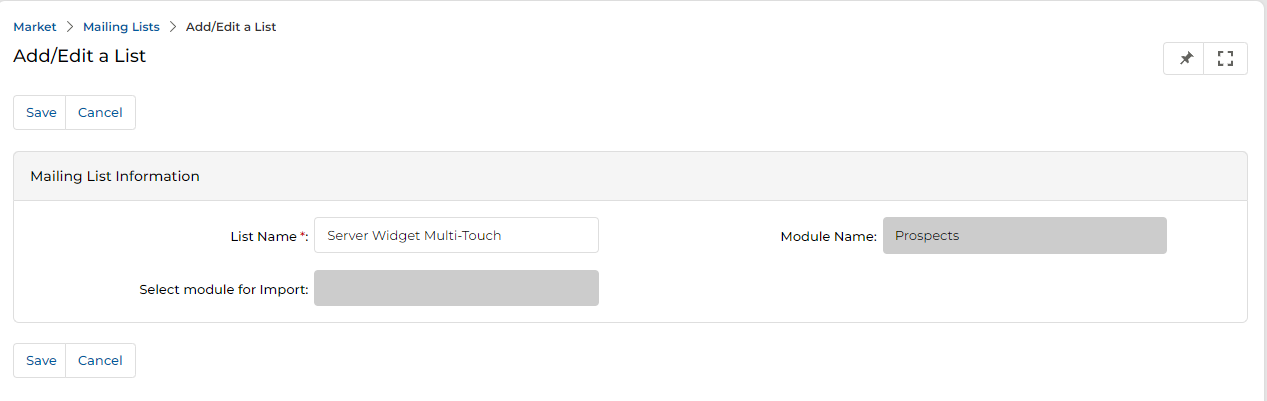
Add / Edit an Email List
- Provide the following fields to create a list:
| Field | Description | Required |
|---|---|---|
| List Name | Provide a desired name for the list. | Yes |
| Module Name | The module for this list — Prospect, Partner Prospects, Contacts, or Partner Contacts (auto-populates based on context). | Yes |
| Select module for Import | Choose the module to use when importing records into this list. | No |
- Click Save when done.
- After creating the list, return to the View Mailing List details page and click Add Recipients to populate the list with contacts.
Adding Records from an Imported List
Records from an imported list (Excel/XLSX file via the Import Engine) can be added to an existing mailing list. There are two pathways:
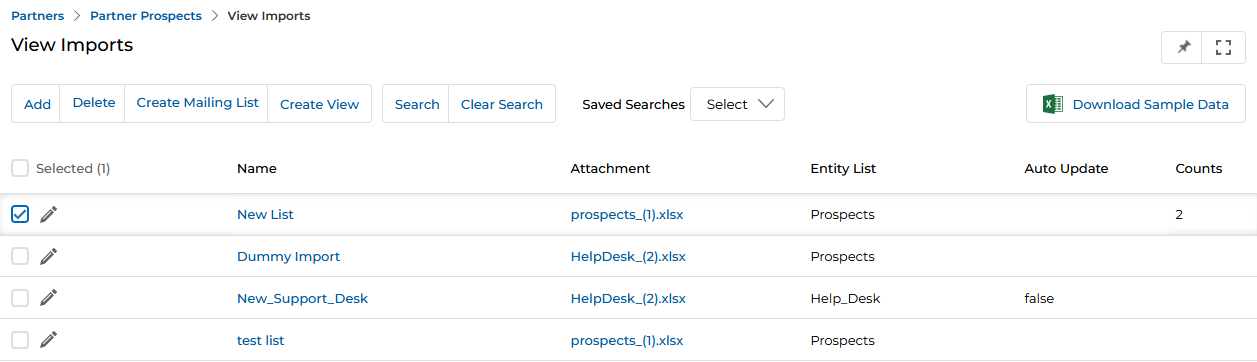
Pathway A — From the View Imports page
- Go to Partners > Partner Prospects > View Imports.

- In this example, the New List import contains two prospect records from an Excel file.
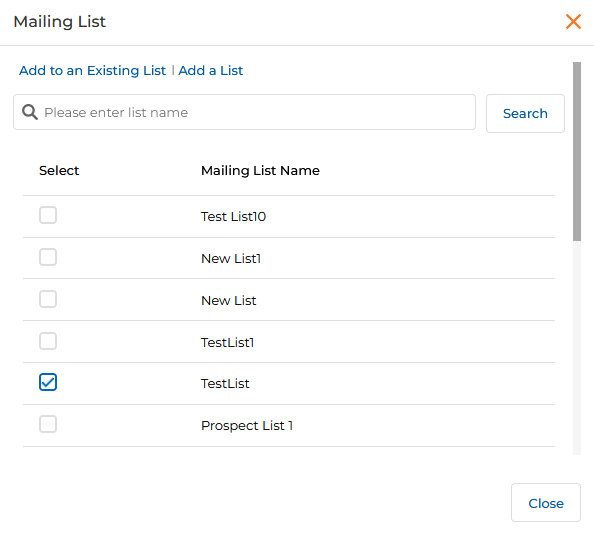
- Click the Create Mailing List button (shown after selecting the import row) to open the Mailing List popup.
- Select the target mailing list and click Add to an Existing List.
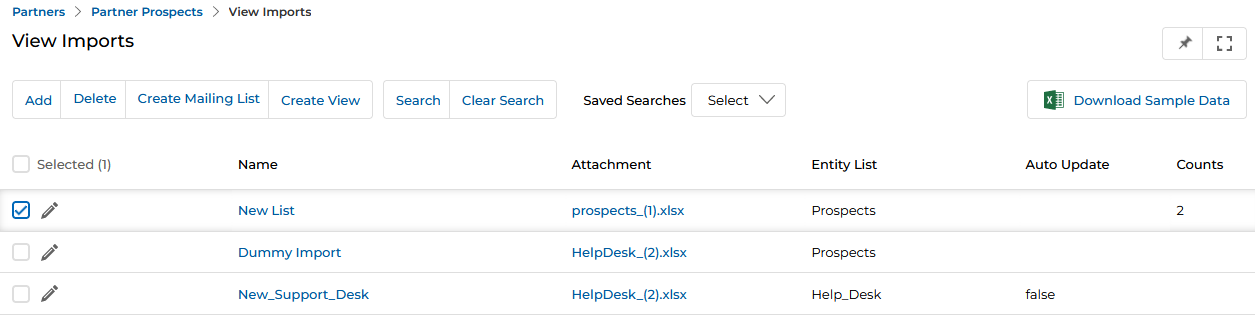
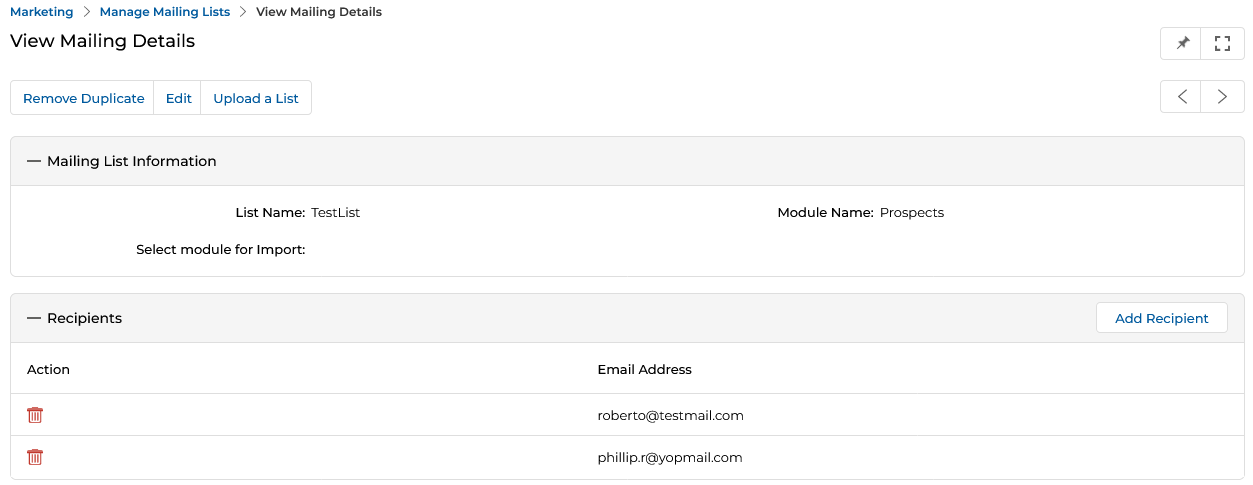
- Once confirmed, the View Mailing Details page shows the two new records added to the Recipients section.
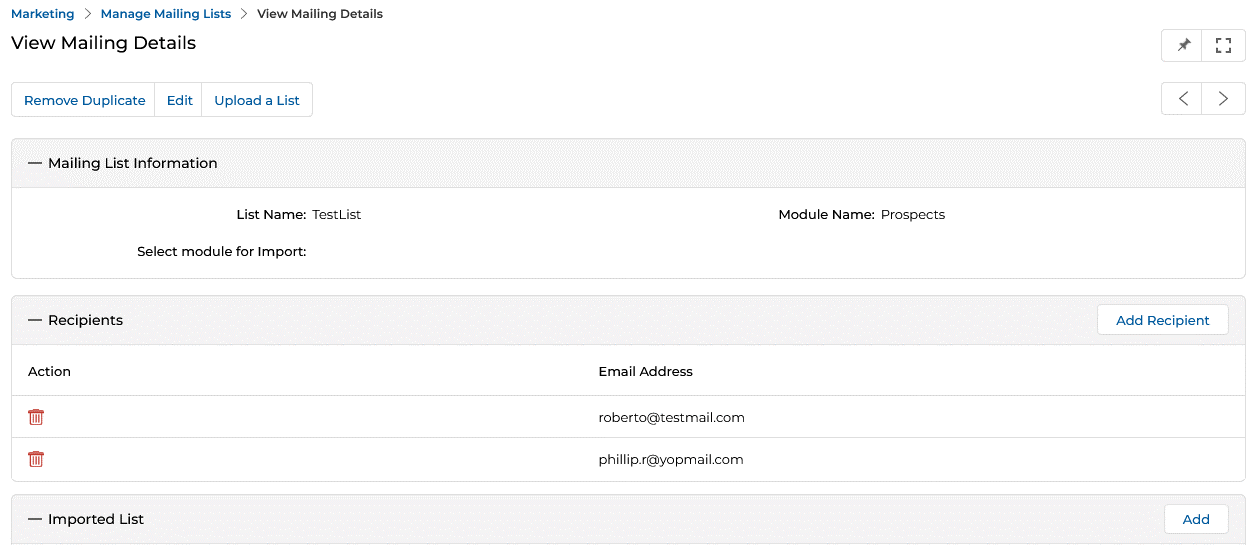
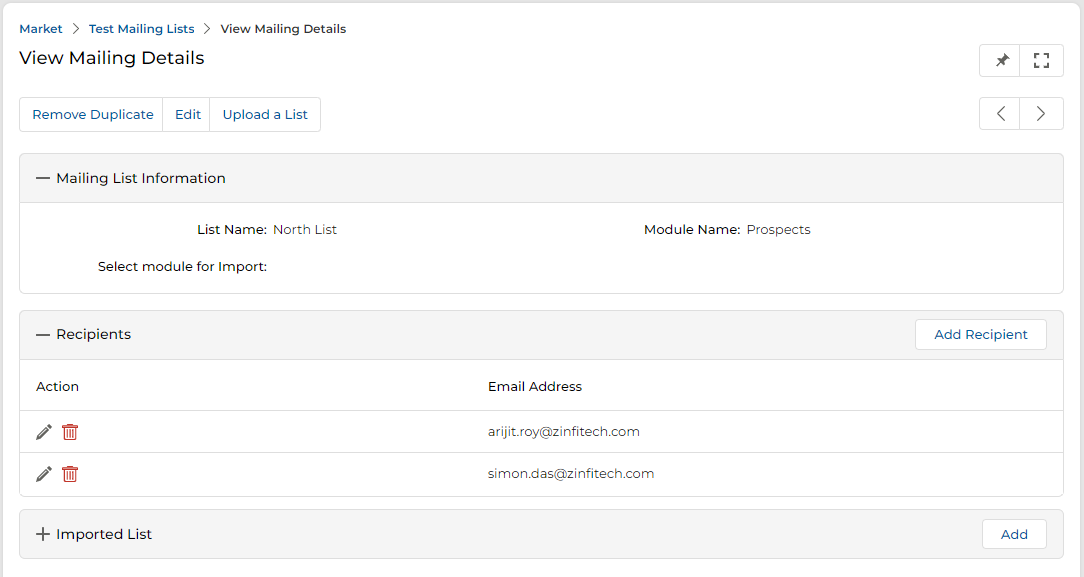
Pathway B — From the View Mailing Details page
- Open the details page of a mailing list that has no records in the Recipients section.
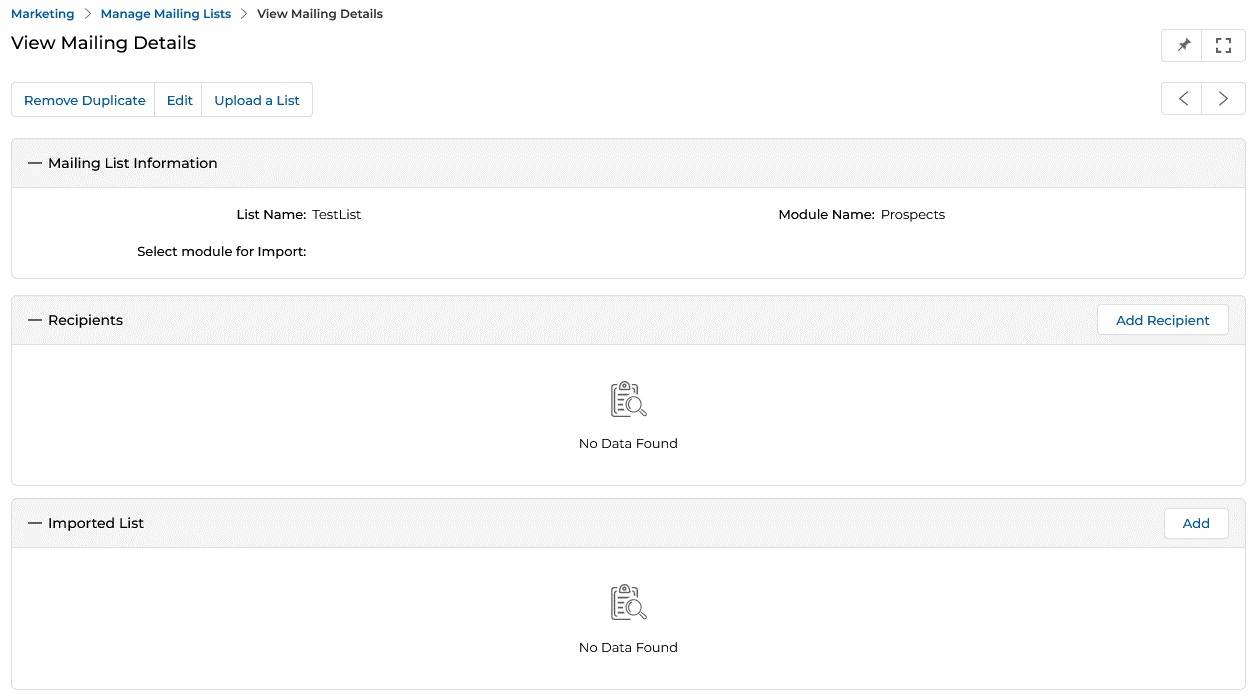
- Click the Add button in the Imported List section. The View Imports popup opens.
- Select the desired import and click Save.
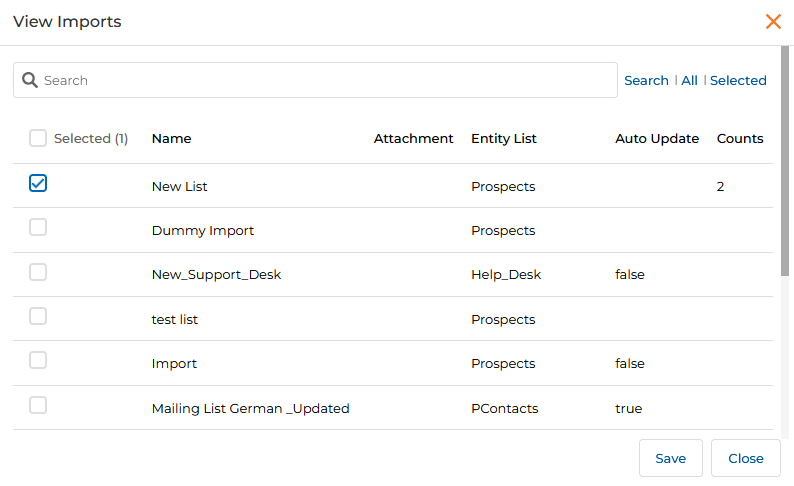
- The Imported List section now shows the selected import, and its records appear in the Recipients section.
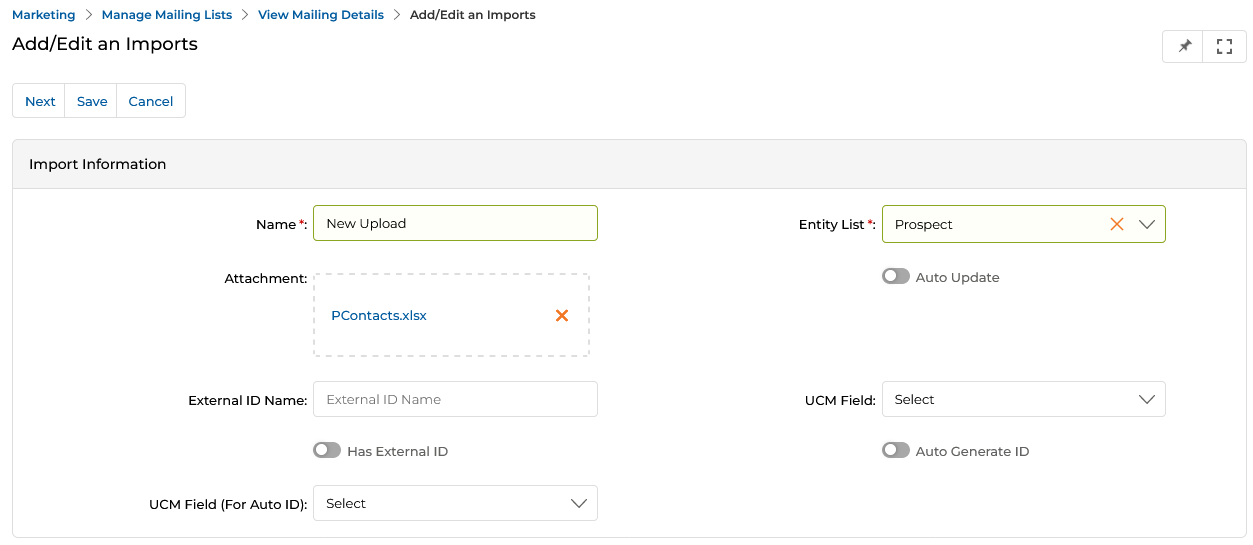
Uploading a New List
- Click Upload a List on the View Mailing Details page to import new records via XLSX. This takes you to the Add/Edit an Imports page.

Adding Individual Recipients
- Click Add Recipient in the Recipients section to add a single contact.
- The Recipient List popup opens. Select the desired contact and click Add.
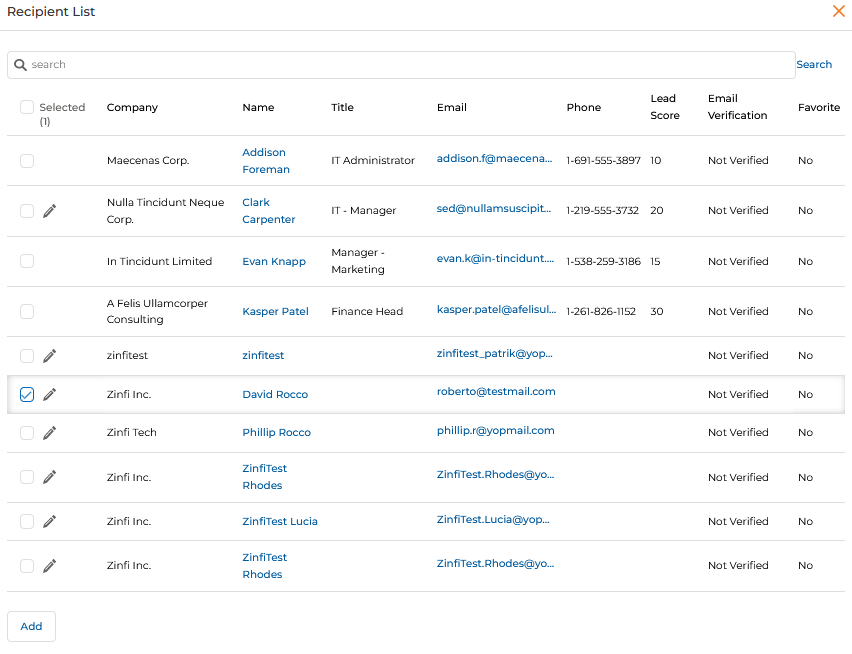
- The new recipient appears in the Recipients section. If a duplicate exists, click Remove Duplicate to clean the list.
Manage Test Mailing List
Before launching an email campaign, a test email is sent only to internal recipients to ensure the email layout, design, and embedded links are working as expected in webmail, email clients, and mobile email apps. Partners save their internal test email recipient lists in this sub-module.
Accessing Test Mailing Lists
- Click Market on the top menu.
- Click Emails > Test Mailing List from the left menu bar.
View Test Emails
Clicking Test Mailing Lists takes you to the View Test Mailing Lists page, showing all lists associated with generated test emails.
The top action bar provides:
- Search — Find a specific list by name.
- Clear Search — Clear the current search.
- Saved Searches — Access saved searches (with Edit and Delete sub-options).
Click any Linkable Item in the grid to open its details page.
View Test Email Details
- The View Test Mailing Lists page shows List Name, Module Name, and No. of Recipients for each test list.
- Click any List Name to open the mailing list detail page.

-
The top action bar provides:
- Edit — Edit the List Name.
- Remove Duplicate — Remove duplicate list names from the list.
- Upload a List — Upload a new list from an XLSX file.
- The detail page contains the following sections:
| Section / Field | Description |
|---|---|
| Mailing List Information — List Name | Name of the test mailing list. |
| Mailing List Information — Module Name | The UPM module the test list is associated with. |
| Recipients | Displays all recipients in the test list. Click Add Recipient to add new recipients; click the Trash icon to remove a recipient. |

Manage Senders
- Click Market on the top menu.
- Click Email > Senders from the left menu bar.
View Senders
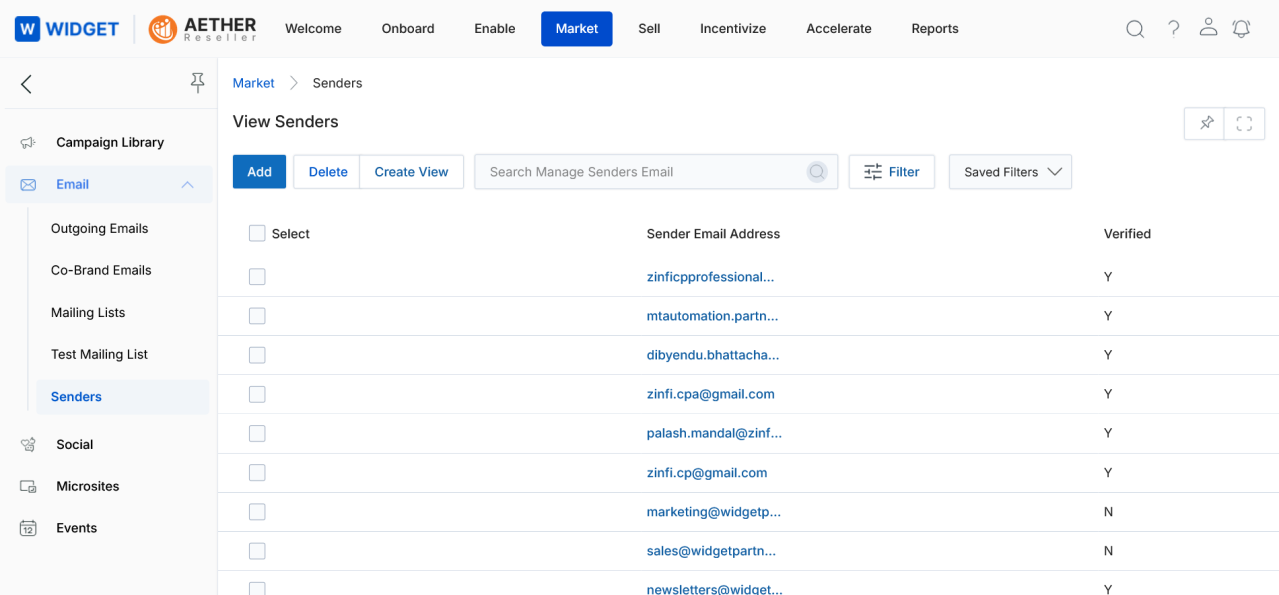
The top action bar provides:
- Add — Create a new sender email address.
- Delete — Remove selected sender(s) from the list.
- Search — Find sender addresses by search criteria.
- Clear Search — Clear the current search.
- Saved Searches — Access saved searches (with Edit and Delete sub-options).
The Verified column indicates whether the sender address has been authenticated. Y = verified (can be used for campaign blasts). N = not yet verified. Only verified sender addresses can be selected in the Sender Email Address field when launching a campaign.
Add a Sender Email Address
- Click Add on the View Senders page. The Add/Edit a Sender page opens.
- Enter the desired email address in the Sender Email Address field.
- Click Save when done. Click Cancel to return to the listing page without saving.
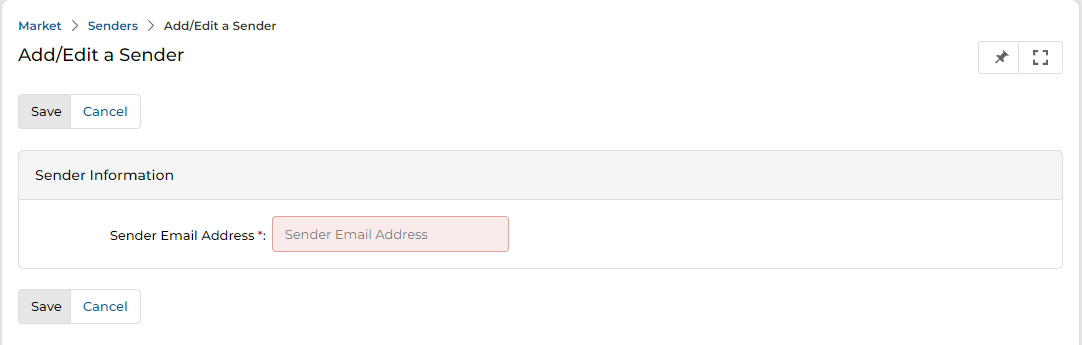
After adding a sender address, the system will send a verification email to that address. The sender must complete the verification process before the address can be used in campaign blasts. The Verified column in the View Senders grid will update to Y once verified.