Introduction
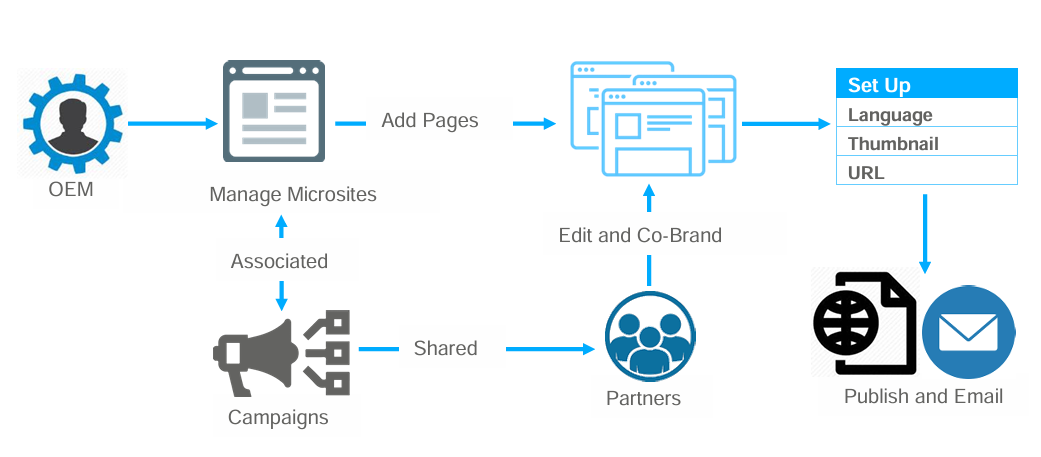
A microsite is an individual web page or a small cluster of web pages that act as a separate entity for a brand. A microsite typically lives on its own domain, but some microsites operate as a subdomain.
Microsites can be used to help brands achieve a number of things. For example, you can use them to highlight a specific campaign, target specific buyer personas, tell a story or inspire a specific call-to-action. Designed to be specific in nature with a narrow focus on a topic or issue, microsites allow your organization to highlight products and promotions across the channel through your partners. Content included in microsites is often shareable and interactive, incorporating graphics, videos and integration across the web for a more holistic experience.
The Microsite & Landing Page Management module of ZINFI's UPM enables your organization to easily set up co-branded microsites or landing pages which partners can use to engage their prospects and customers via single-touch or multi-touch digital drip campaigns.
Co-Brand Microsites
The Co-Brand Microsites section allows partners to access, view, set up, and launch microsites that have been shared with them by the OEM — as well as any microsites the partner has created themselves.
2.1 Access Microsites
To navigate to the Co-Brand Microsites section:
- Click Market from the top navigation menu.
- Click Multi-Touch > Co-Brand Microsites from the left menu bar.
2.2 View Existing Microsites
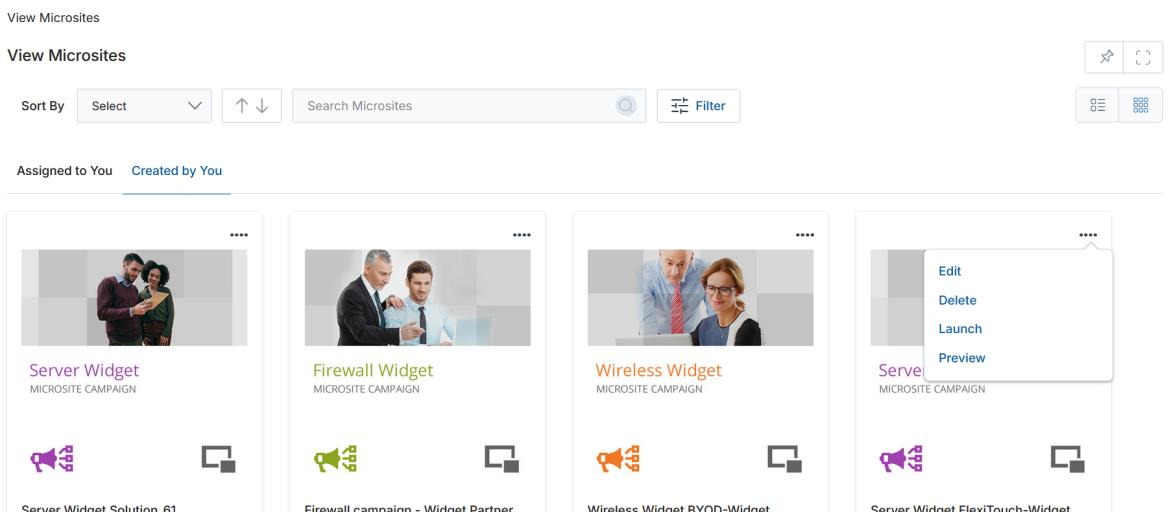
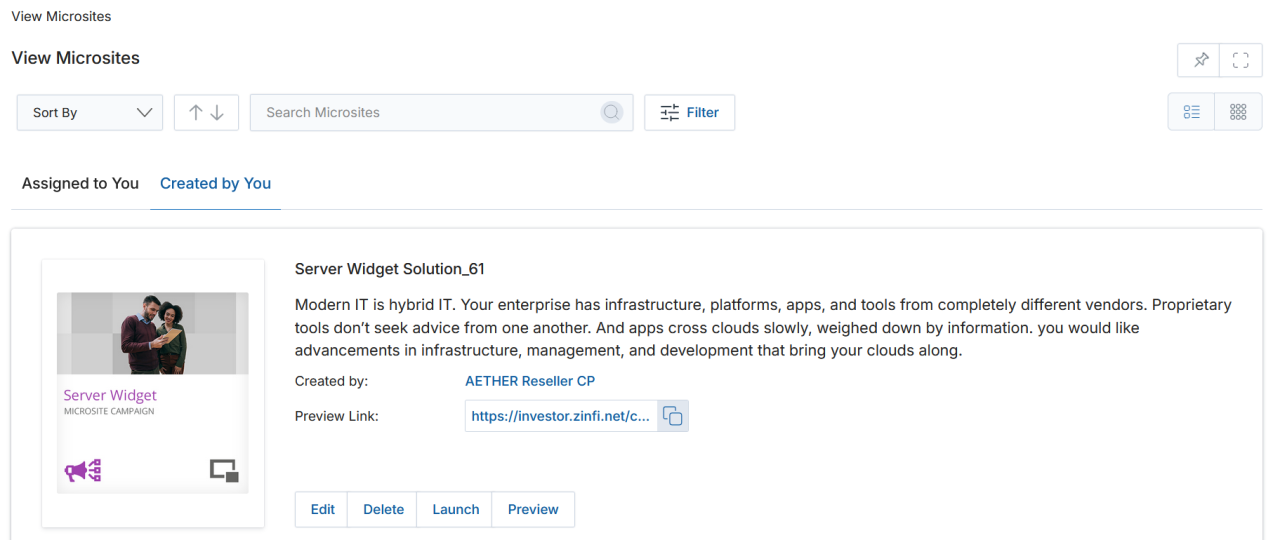
Clicking Co-Brand Microsites from the left menu opens the View Microsites page, where all microsites developed and shared are displayed.
-
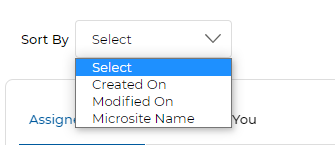
Sort: Click the dropdown arrow in the Sort By: Select box to sort microsites by:
- Created On — Order by creation date.
- Modified On — Order by last modification date.
- Microsite Name — Alphabetical order.
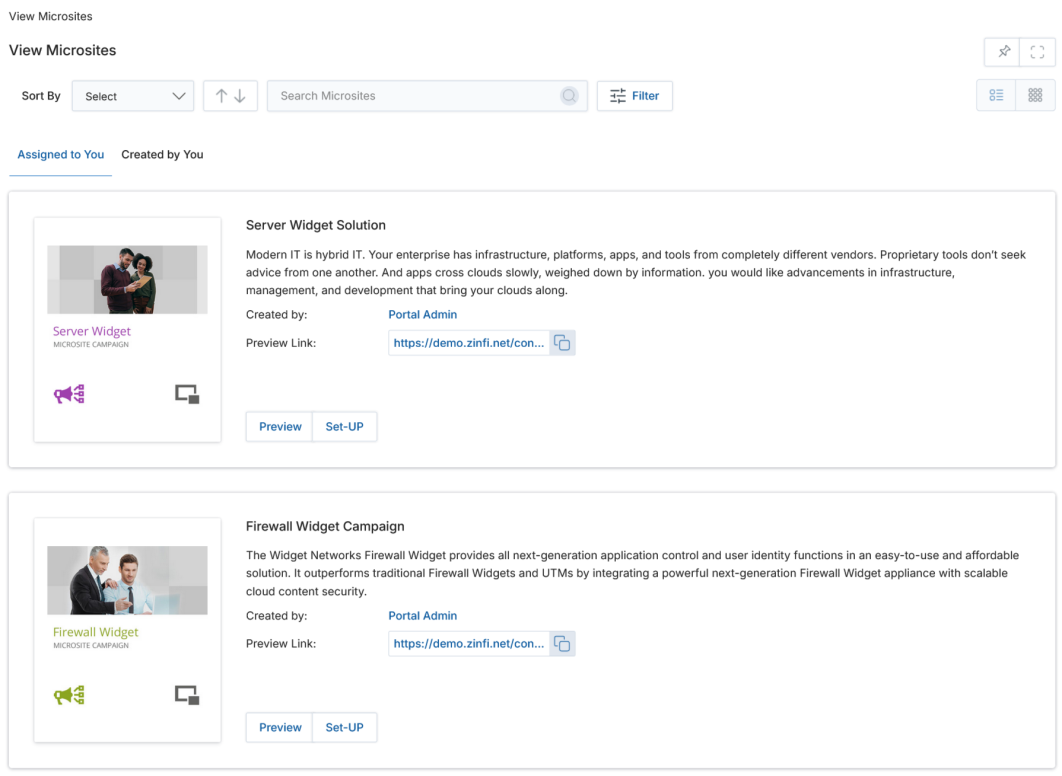
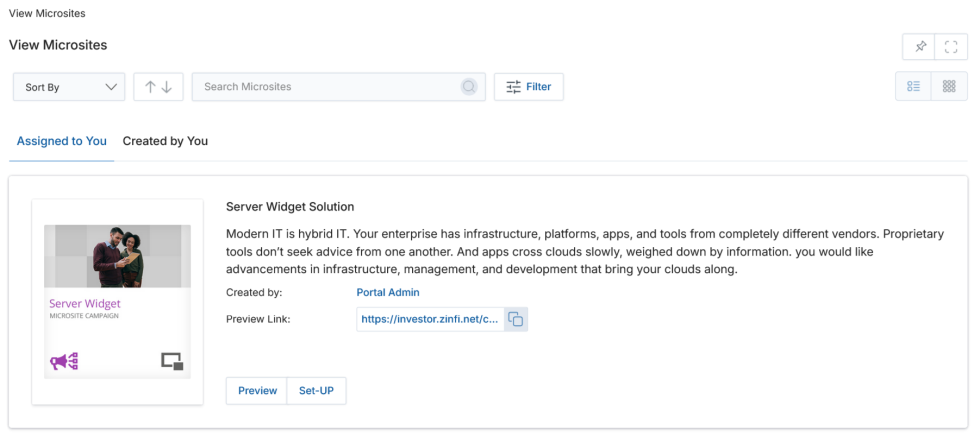
- Click the Assigned to You tab to view microsites assigned to you by OEM users, or click the Created by You tab to view microsites you have added to the microsite library.
- Click either List View or Thumb View to change the visual arrangement of each microsite.
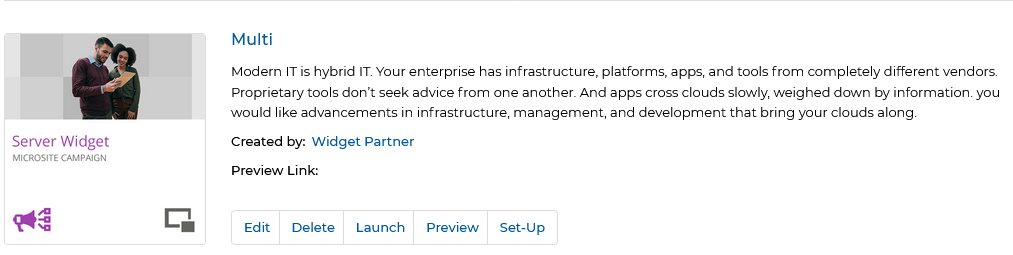
In Thumb View, click the four dots (⋯) on the top right of any microsite card to access further options: Edit, Delete, Launch, Preview, and Set Up. In list view, these options are already visible as inline buttons.
The Edit, Delete, Launch, Preview, and Set Up buttons appear only for microsites listed under Created by You. Microsites shown under Assigned to You carry only two buttons: Preview and Set Up.
Clicking the Preview button allows you to preview the microsite after it has been created.

-
Filter: To search for a specific microsite, click the Filter button or Filter icon on the top right to open the filter pane. Click the (X) icon to close the pane. Microsites can be filtered using the following parameters:
- Campaign — Search for microsites associated with specific campaigns.
- Country — Search for microsites associated (visible) with specific countries.
- Languages — Search for microsites associated (visible) with specific languages.
- Microsite Name — Type a keyword to search for microsites by name or title, then click Apply to filter results.

- Copy to Clipboard: The Copy to Clipboard option is associated with the Preview Link and provides the convenience of copying the URL for further reference. The link can be copied to the clipboard or opened in a new tab by clicking the link directly.

2.3 Manage Pages for Existing Microsite(s)
From the View Microsites page, two primary actions are available for any microsite:
- Setup — Click to modify the content and layout of an existing microsite page.
- Preview — Click to view an existing page of the microsite without making changes.
2.4 Set-up Microsite Page(s)
Clicking the Set-Up button opens the Set-Up Microsite page, which contains several sections and associated fields.
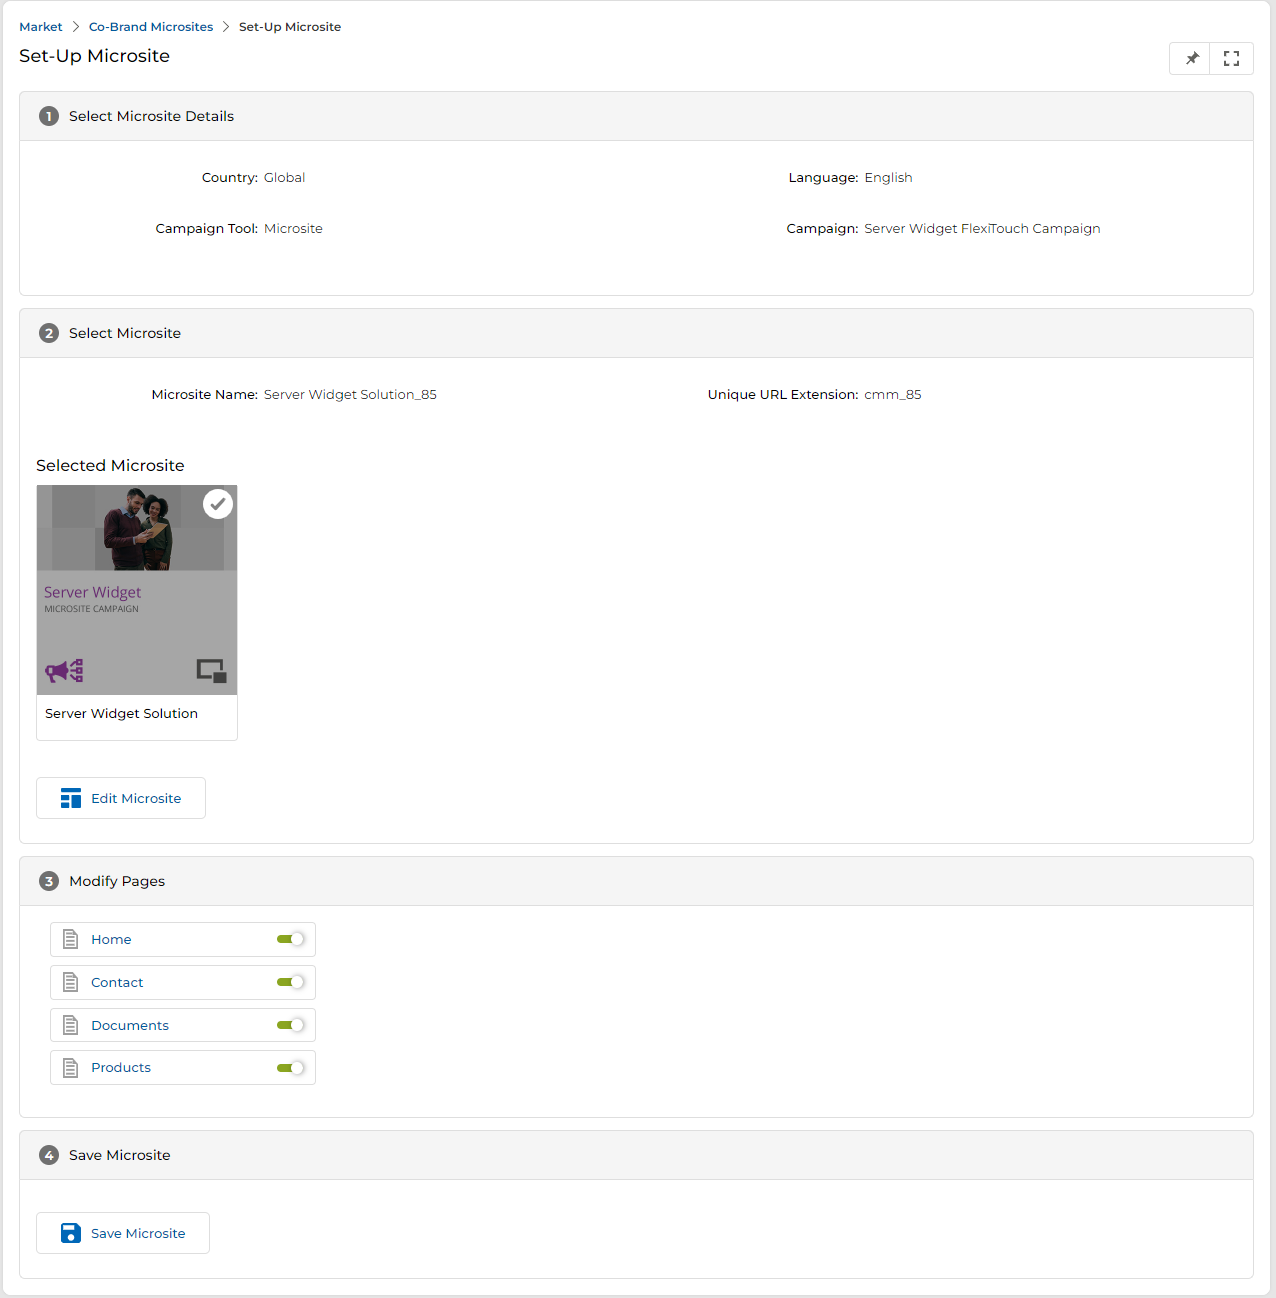
Section 1 — Select Microsite Details
This section displays read-only information about the campaign context for this microsite.
| Field | Description |
|---|---|
| Country | The country where the microsite is accessible. |
| Language | The language of the microsite. |
| Campaign Tool | The campaign tool used — in this case, Microsite. |
| Campaign Name | The name of the campaign with which the selected microsite is associated. |
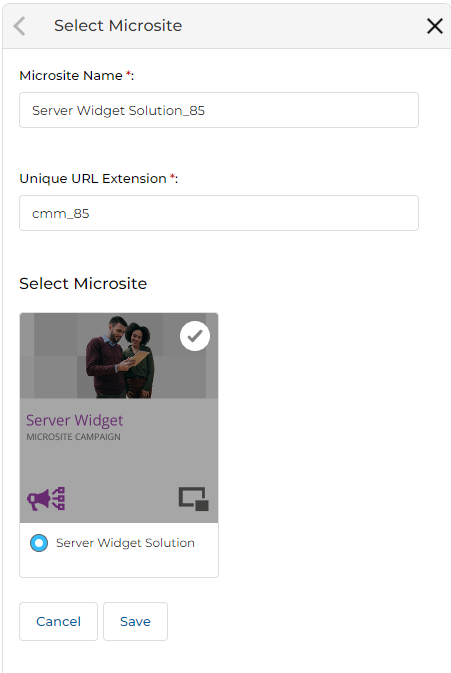
Section 2 — Select Microsite
This section allows you to review and change the microsite template being used.
| Field / Action | Description |
|---|---|
| Microsite Name | The display name of the currently selected microsite. |
| Unique URL Extension | The URL path extension used to identify this microsite instance (e.g., cmm_85). |
| Edit Microsite | Clicking this button opens a right-hand panel where you can update the Microsite Name, Unique URL Extension, and the selected microsite template. Click Save when done. |
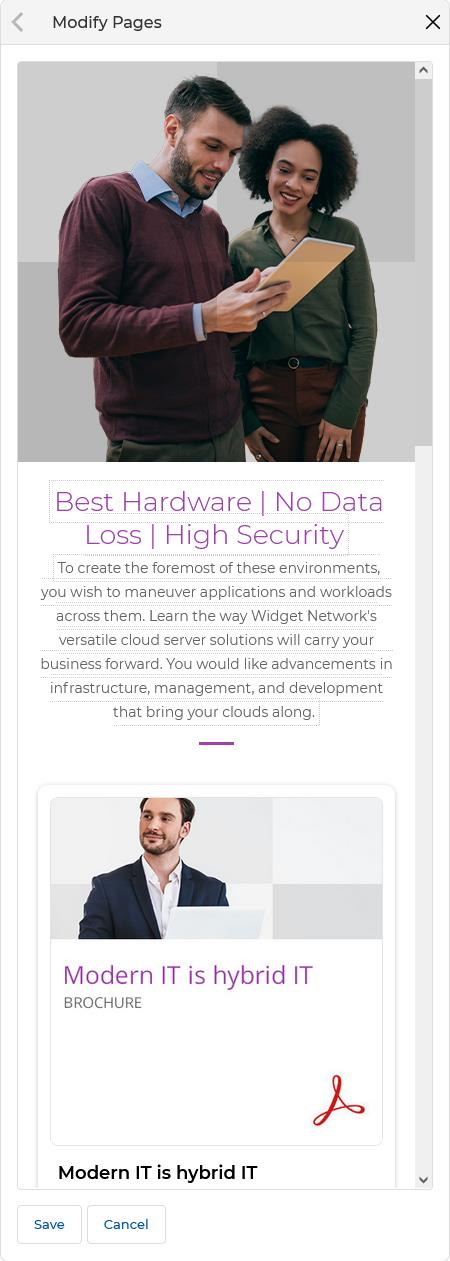
Section 3 — Modify Pages
This section displays all pages included in the microsite template. You can enable or disable individual pages by toggling the switch beside each page name.
- To edit a page, click the page name to open it in the on-screen editor.
- Make edits by placing the cursor in the editable area, then click Save when done.
Section 4 — Save Microsite
When all changes are complete, click the Save Microsite button to save the configuration.
2.5 Launch a Microsite
Partners can launch a microsite campaign — sending a co-branded email blast linked to their microsite — directly from the View Microsites page.
- Click the Launch button for the desired microsite under the Created by You tab.
- Clicking Launch opens the Launch Microsite Campaign page, which contains five sections to complete:
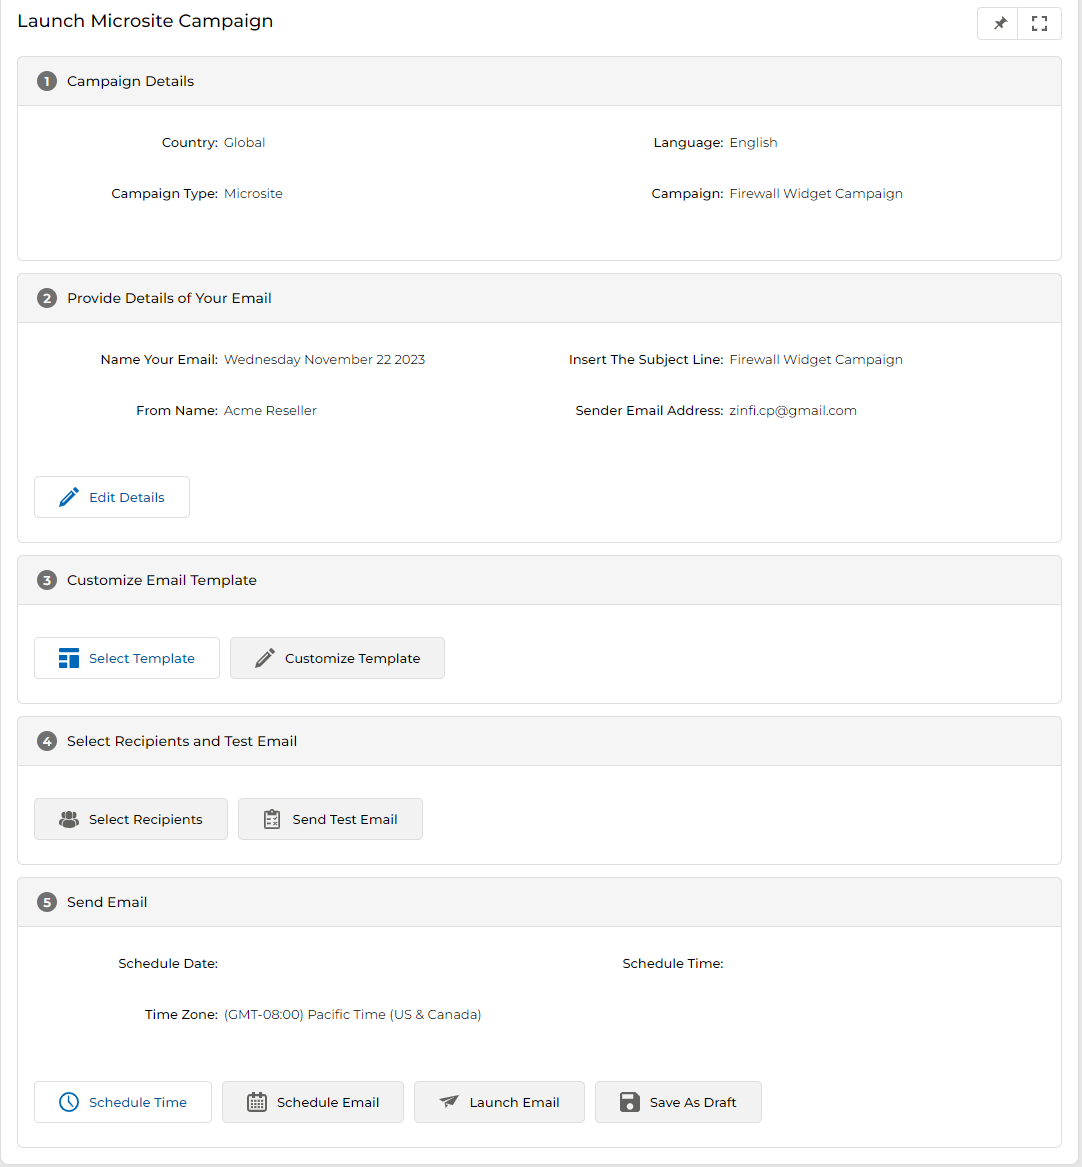
a. Campaign Details
This section is non-editable. It reflects the campaign context: country, language, campaign type, and campaign name.
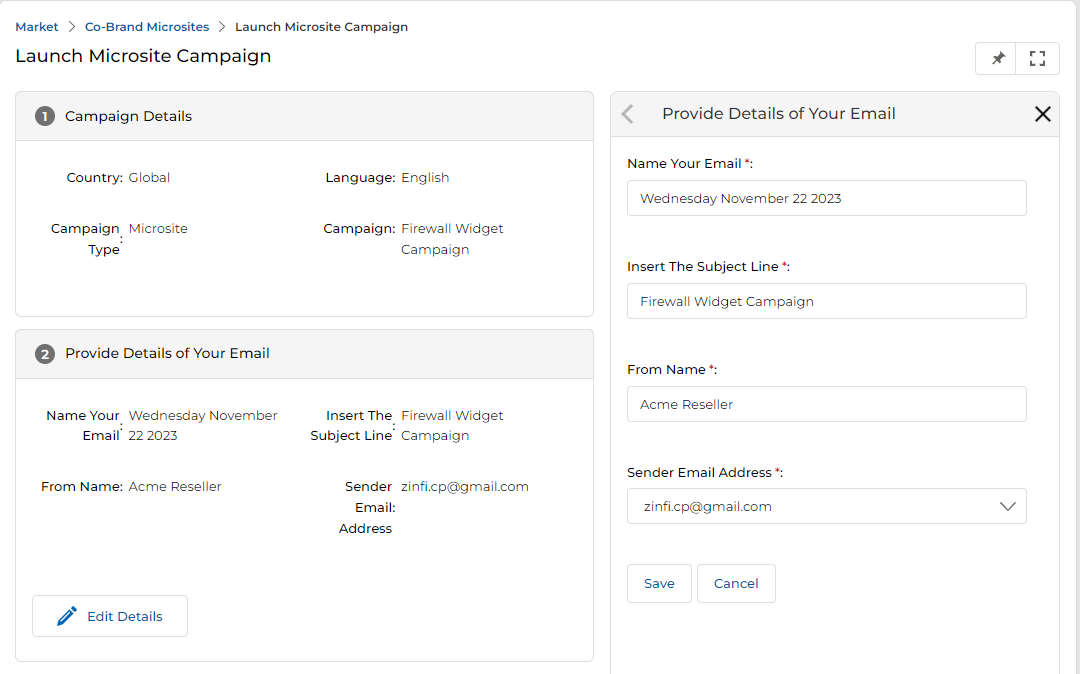
b. Provide Details of Your Email
This section lets you configure the outgoing email blast details. Click Edit Details to open the edit panel on the right-hand side and populate the following fields:
| Field | Description |
|---|---|
| Name Your Email | The internal name for this email blast. Blank by default — must be filled in. |
| Insert the Subject Line | The subject line the recipient will see. Blank by default — must be filled in. |
| From Name | The sender name displayed in the recipient's inbox. |
| Sender Email Address | The reply-to or from email address shown to recipients. |
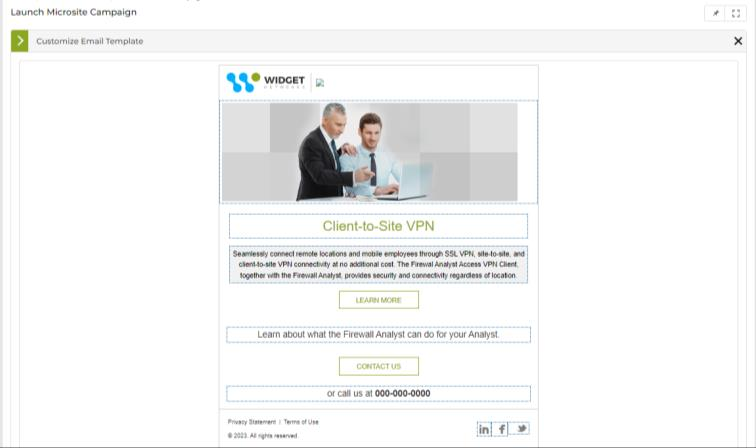
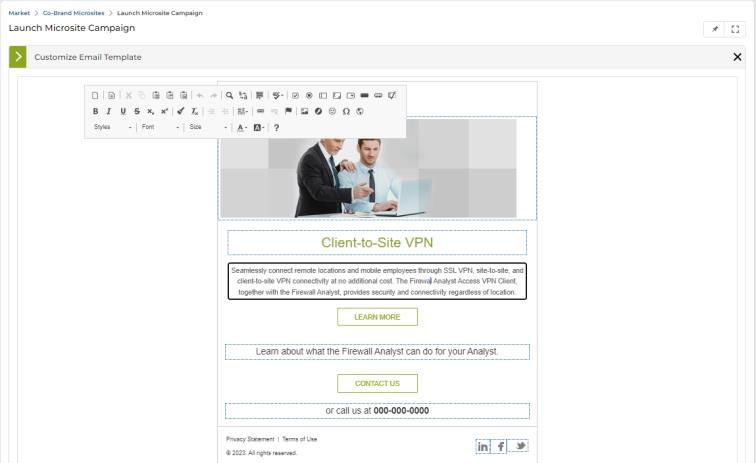
c. Customize Email Template
Click Select Template to choose the desired email template and link it to the microsite campaign. Once selected, click Customize Template to open it in the right-hand workspace.
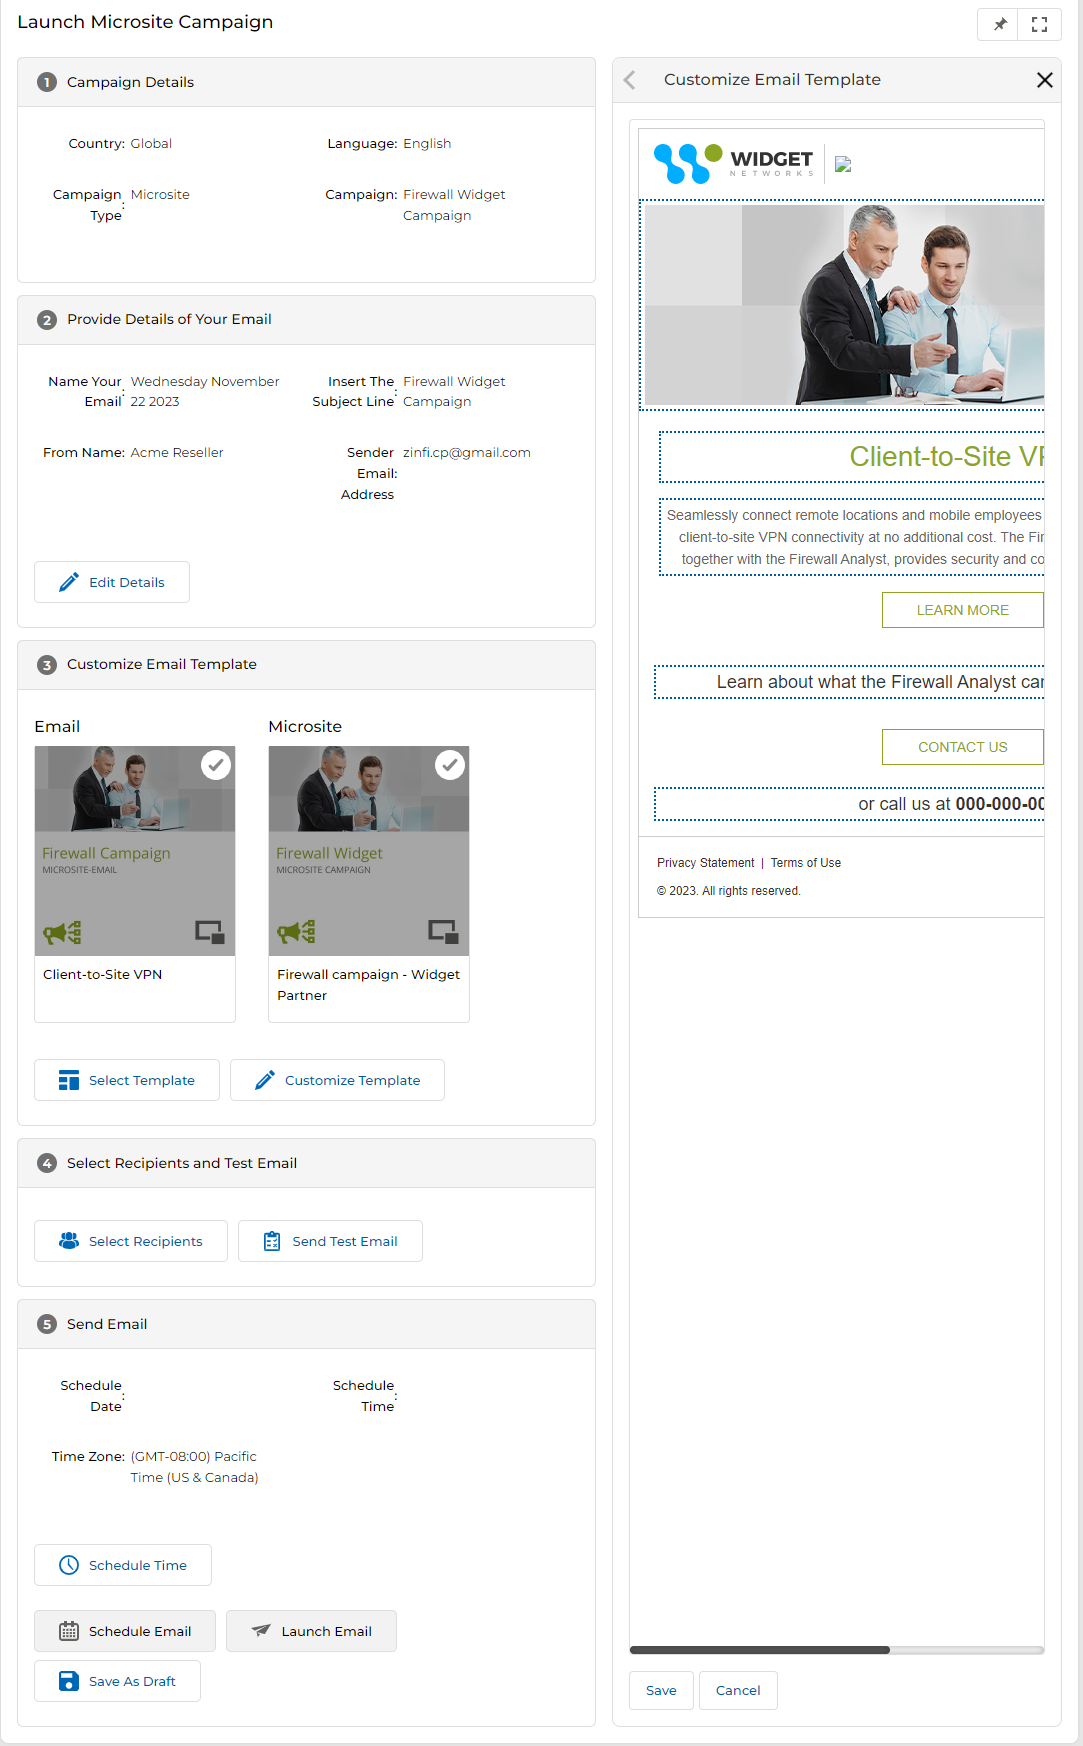
Within the template editor:
- Editable areas are enclosed in dotted lines. Hovering over any editable content changes its background to grey, indicating it can be clicked to edit.
- Clicking an editable area activates the CK Editor for rich text editing.
- Social Connector icons in the email footer are also editable — hovering triggers the grey background, and clicking opens the CK Editor to link them to your social pages.
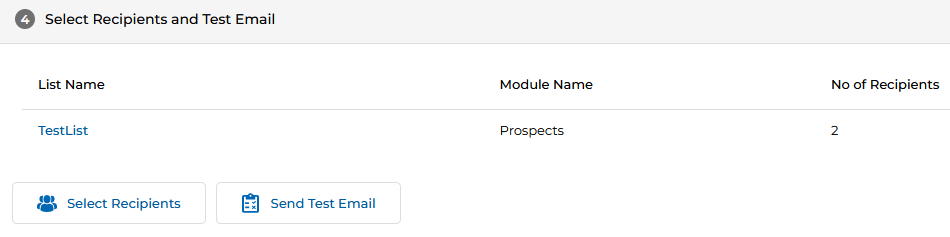
d. Select Recipients and Test Email
Once the email template is saved, configure your recipient list:
- Click Select Recipients to choose from your prepared mailing lists.
- Or click Create New List to build a new mailing list on the spot.
- After selecting a list, click Send Test Email to send a test version of the campaign to verify receipt.
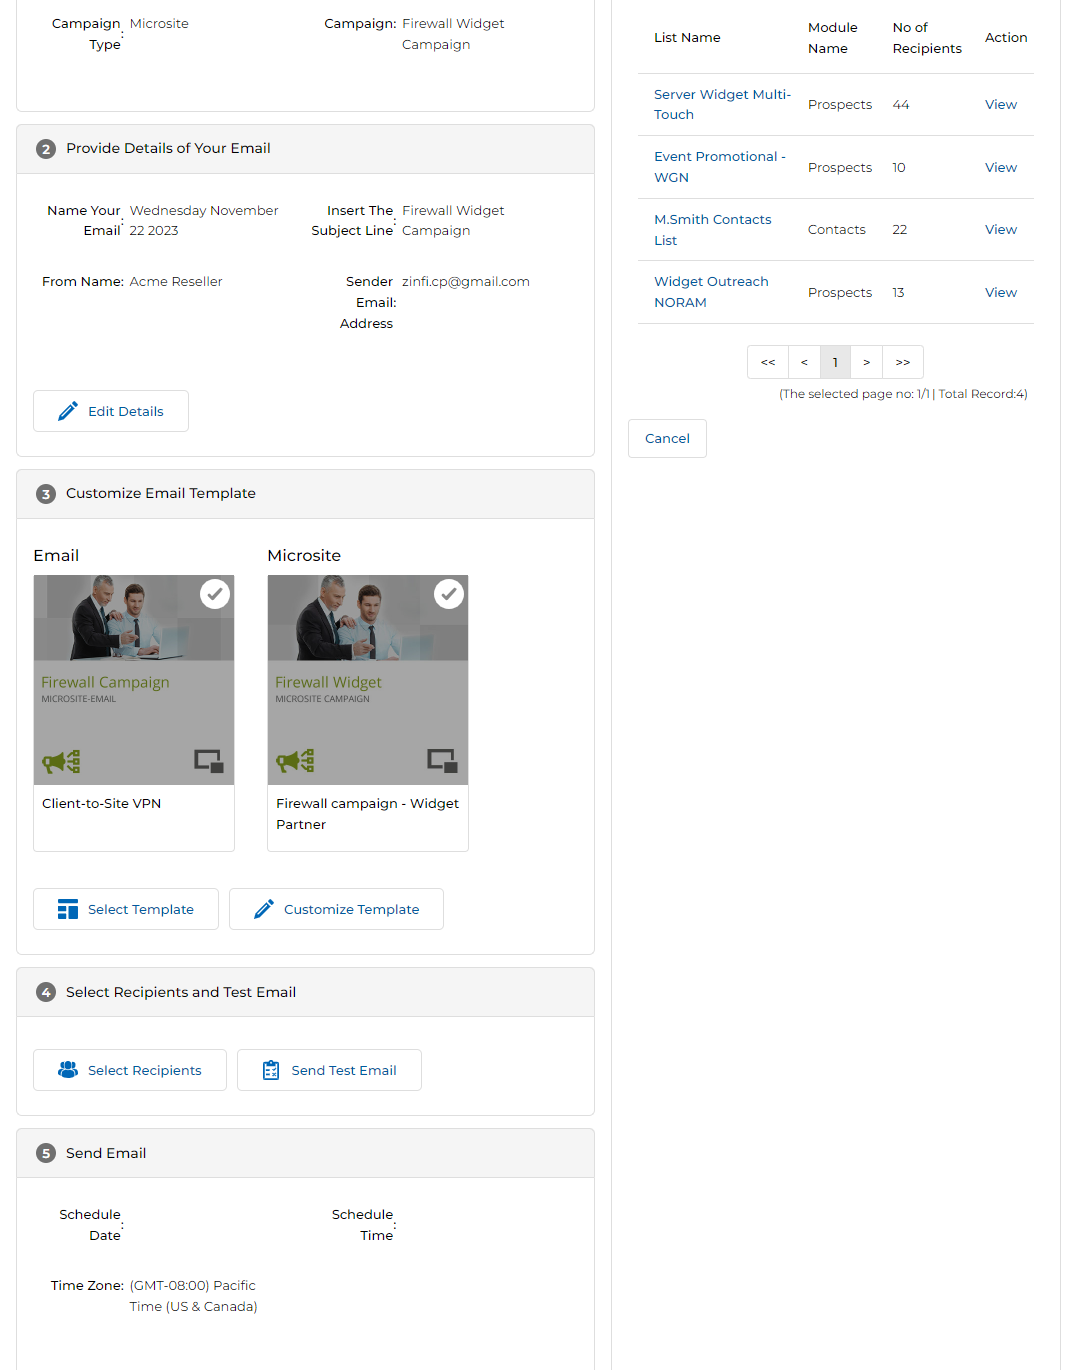

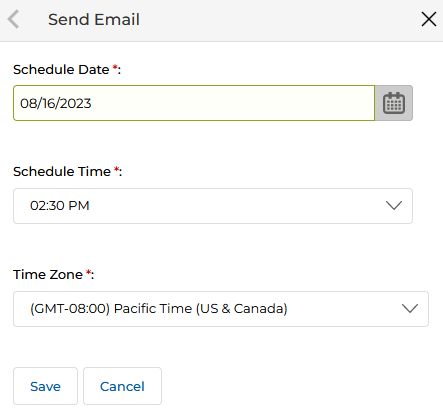
e. Send Email
The final section provides options to schedule, launch immediately, or save the campaign as a draft.
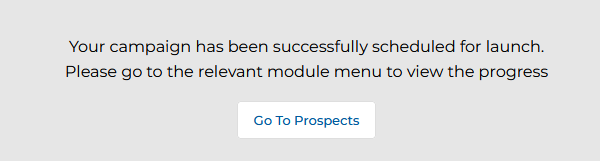
- Schedule Time — Opens the Send Email dialog where you can select a specific date, time, and time zone for the blast. Click Save to confirm the schedule.
- Schedule Email — Queues the email for launch at the scheduled time. A confirmation message is displayed on screen.
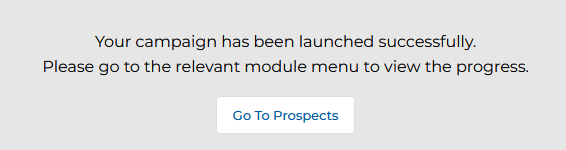
- Launch Email — Blasts the email immediately. A confirmation message confirms the email has launched successfully.
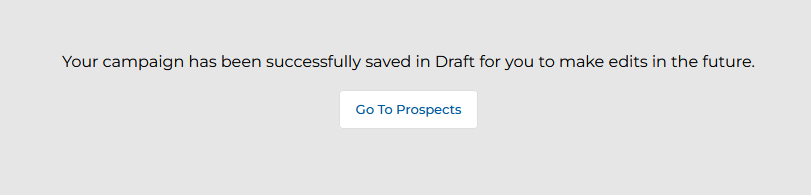
- Save as Draft — Saves the current campaign configuration as a draft for future completion. A confirmation message confirms the draft was saved.

Multiple partners can utilize the same microsite dynamic form assigned by the admin, co-brand it, and launch campaigns to capture prospect information. When the same prospect is captured by microsites launched by two or more partners, the Prospect Record is made visible to all relevant partners for effective conversion. The system updates the prospect record based on the latest information captured. Duplicate records are not created; both partners can access the same record.
Manage Showcases
Web Syndication Showcases allow partners to embed co-branded product or campaign content directly into their own website using iFrame or JavaScript code snippets. This section covers how to access, configure, and generate embed code for Web Syndication Showcases.
To navigate to Manage Showcases:
- Click Market on the top navigation menu.
- Click Microsites > Manage Showcases from the left menu bar.

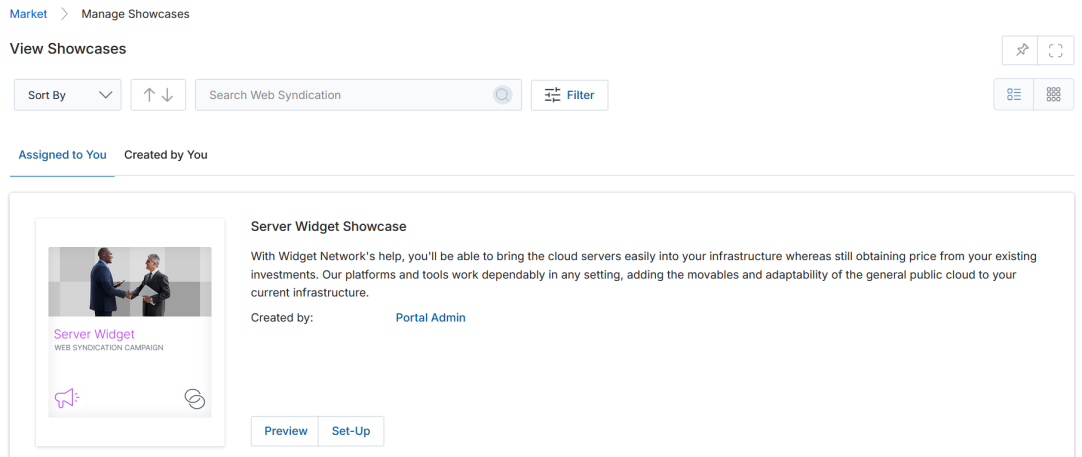
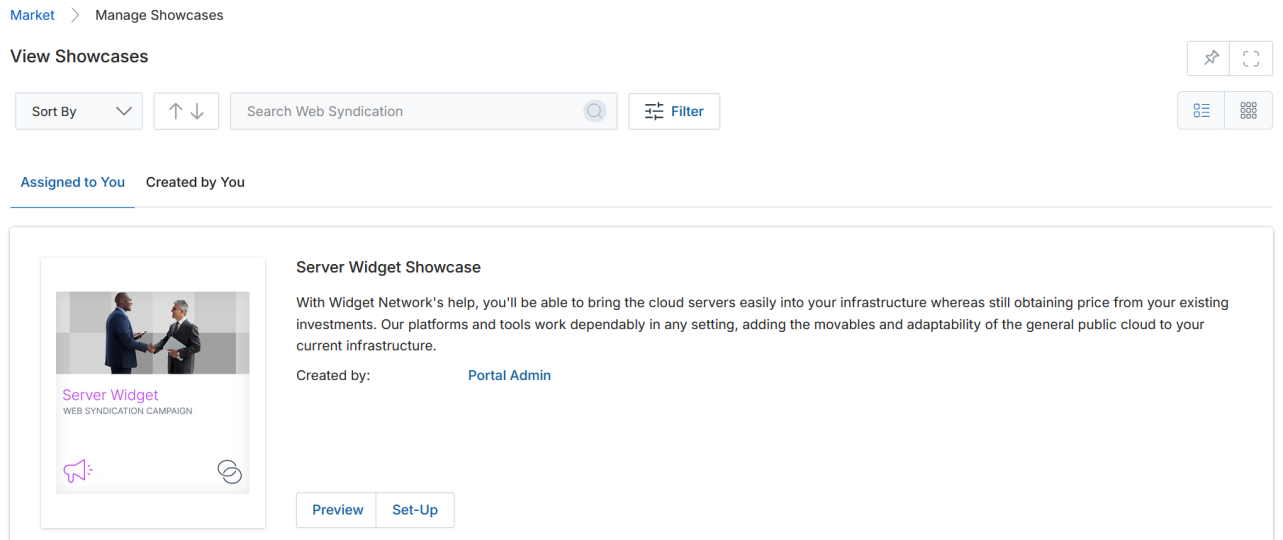
3.1 View Web Syndication Showcases
The View Showcases page lists all showcases either assigned to you or created by you.
-
Sort: Use the Sort By dropdown to order showcases by:
- Showcase Name — Alphabetical order.
- Created On — Order by creation date.
- Modified On — Order by last modification date.
-
Tab View:
- Assigned to You — Displays syndications assigned to you by the OEM.
- Created by You — Displays syndications you have created.
-
Layout:
- List View — Displays showcases in a list format with inline buttons.
- Thumb View — Displays showcases as cards. Click the three dots (⋯) on a showcase card to access Preview, Edit, Delete, and Launch.
The Edit, Delete, and Launch buttons appear only for showcases under Created by You. Showcases under Assigned to You show only Preview and Set Up.

-
Available actions per showcase:
- Preview — View the showcase before implementation.
- Edit — Modify the showcase content or layout.
- Delete — Remove the showcase from the listing.
- Launch — Launch a campaign using this showcase.
3.2 Set Up and Edit Web Syndication Showcase
Each showcase in the Assigned to You section has two buttons — Preview and Set Up.
- From the View Showcases page, click Set Up on any showcase to open the Set-Up Web Syndication page.
- The Set-Up Web Syndication page displays five numbered sections.
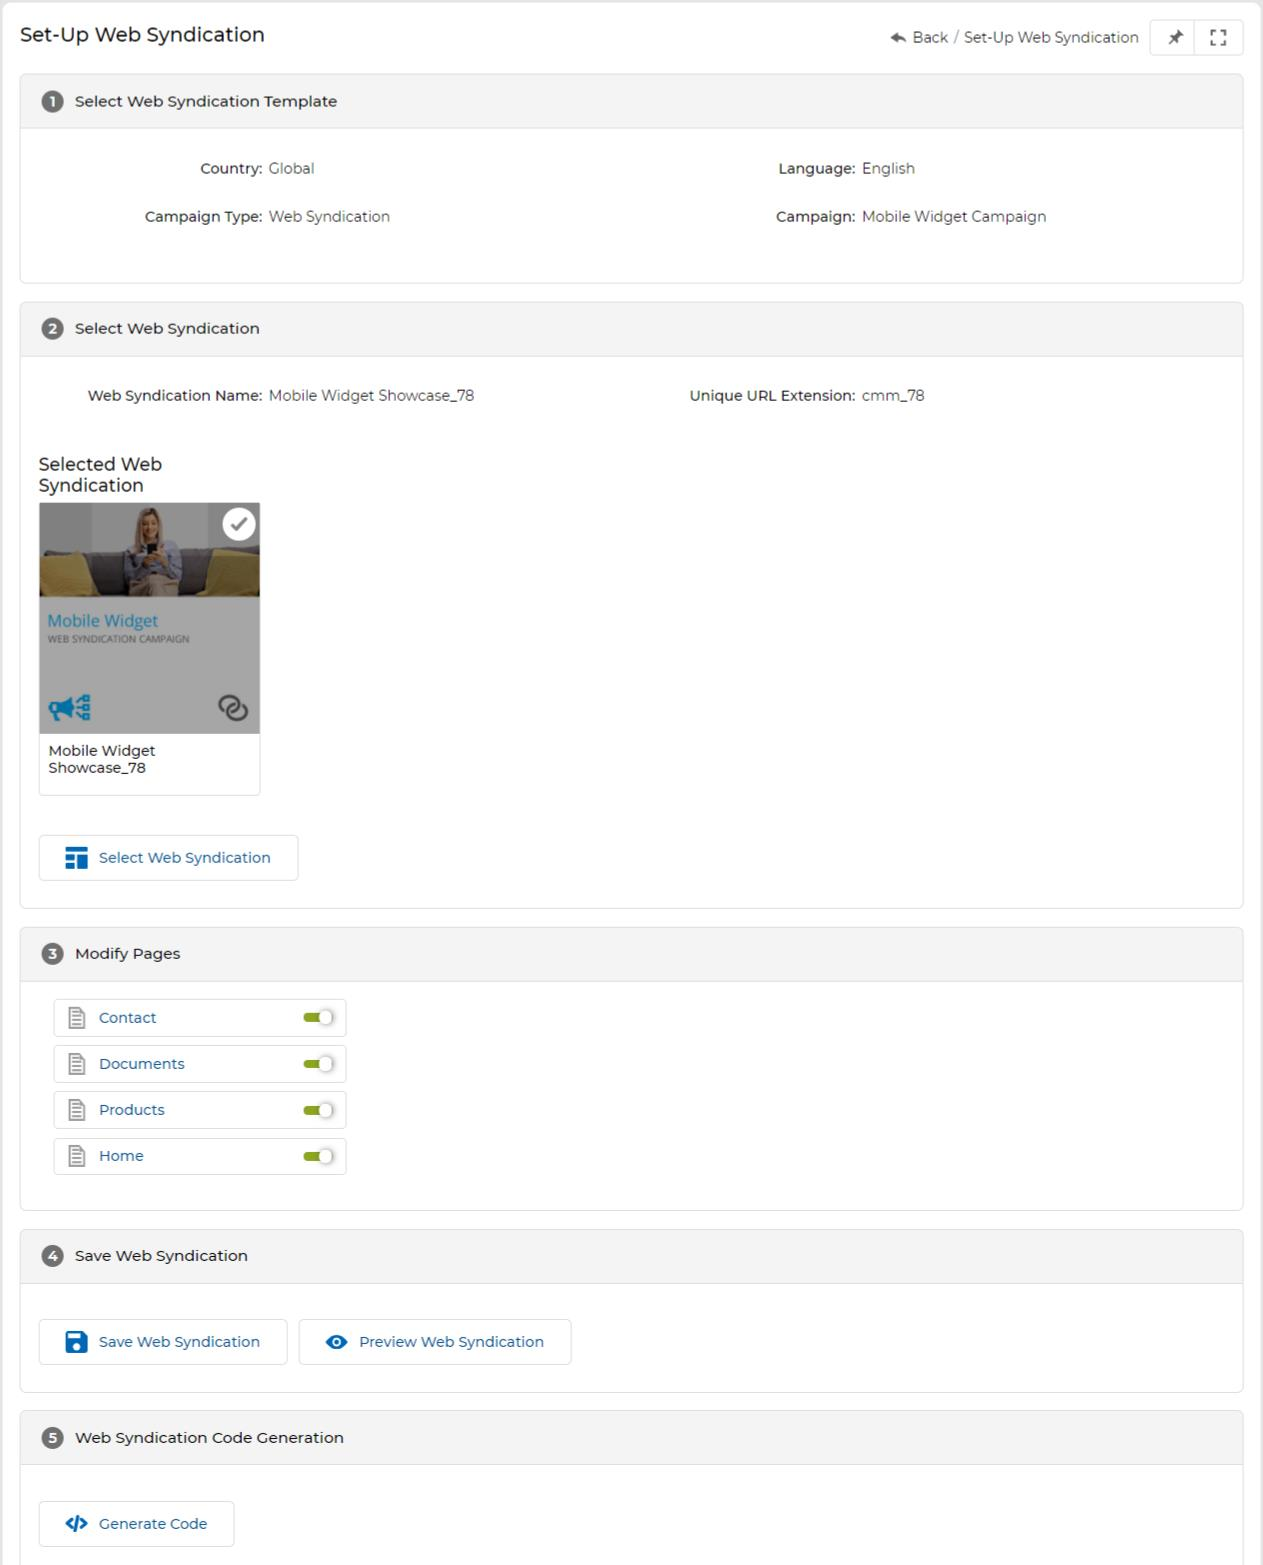
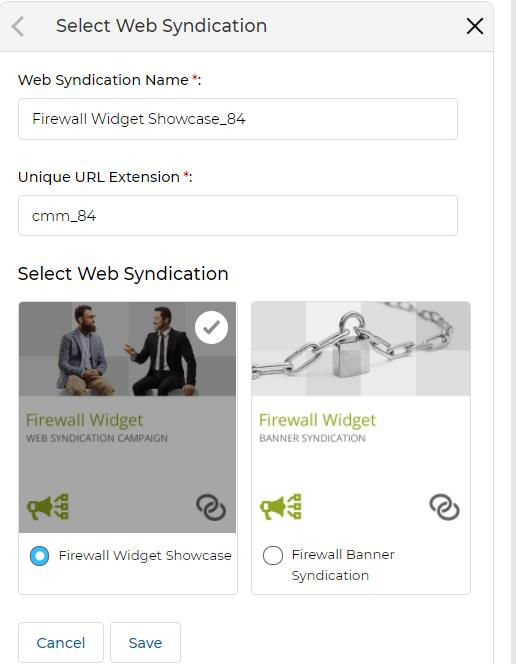
- Click Select Web Syndication to choose your desired syndication template. A panel appears on the top right where you can:

- Update the following fields as required, then click Save:
| Field | Description |
|---|---|
| Web Syndication Name | The display name of the web syndication. |
| Unique URL Extension | The URL path extension used to identify this syndication instance (e.g., cmm_84). |
| Select Web Syndication | Choose the syndication template from the available list that best fits your campaign. |
-
The Modify Pages section displays all pages included in the syndication. Toggle each page on or off as required:
- To edit a page, click the page name to open it in the right-hand work area.
- Click into editable areas of the page (the WYSIWYG editor will appear) to make changes. You can also expand the work area to full screen.
- Click Save when done editing the page.

- Click Save Web Syndication to save all changes, or click Preview Web Syndication to review the showcase before saving.
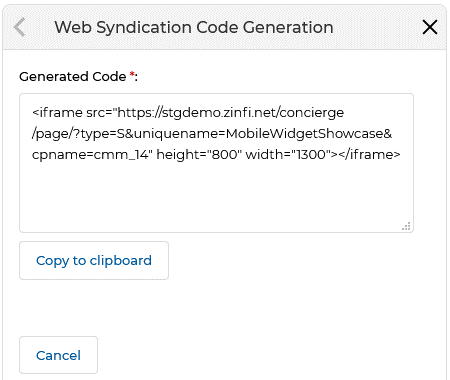
- After saving, click Generate Code to generate the embed snippet for your website. A panel opens where you configure:
| Field | Description |
|---|---|
| Name | A user-friendly name for the generated code snippet. |
| Partner Website Embed URL | The URL of the partner website page where the syndication will be installed. |
| Code Type | Select either iFrame or Javascript as the embed method. |
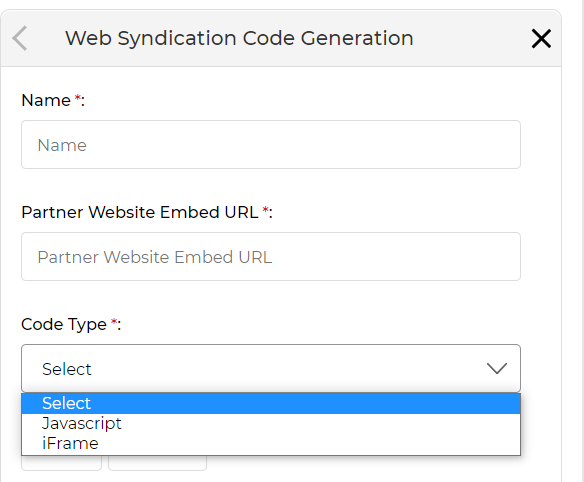
- Click Save in the code generation panel. The generated code appears at the end of the page. Click View Code to open the right-hand panel showing the full embed snippet, then click Copy to Clipboard to copy it for installation.
3.3 Installing Web Syndication Web Snippets in Your Site
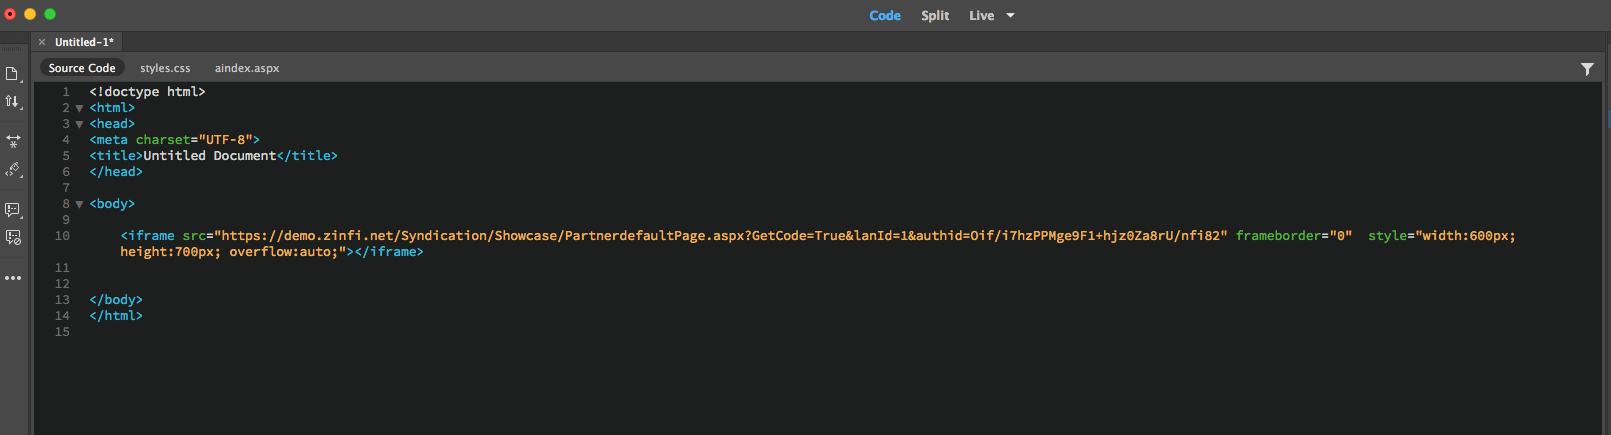
Once you have generated the embed code for your Web Syndication Showcase, follow these steps to install it on your website:
- Copy the generated code as described above (using the Copy to Clipboard button).
- Create a new webpage on your website and paste the code into that page's HTML. The embed code includes
widthandheightattributes that can be edited to fit the display frame within your page layout. - Once installed, the page is ready to display any Showcase you promote through it.
After installing the embed code, make a note of the full URL of the page you set up (example: https://www.yourdomain.com/syndication-page). You will need this URL when inserting the showcase link into your email templates during campaign sending.