
Introduction
The Partner Application of ZINFI's UPM enables a Partner Admin to manage the partner base by providing key elements outlined through a structured channel program — clear channel policies so partners know exactly what they need to do to perform successfully, how their performance will be measured and rewarded, and clear programs that address both technical and non-technical aspects of the channel program.
As a Channel Partner Admin you can efficiently create and manage partner records in the system, including partner prospect information, contacts, and accounts. Using the partner profile management features, channel management team members can easily track detailed partner profile information as well as sales history, lead generation, and other channel program-related activities.
By deploying ZINFI's UPM platform you can recruit, onboard, train, and manage your partners globally to drive profitable growth, increase channel ROI, and gain accurate visibility into which partners are on track to become high performers and which partners need extra support.
Partner Accounts
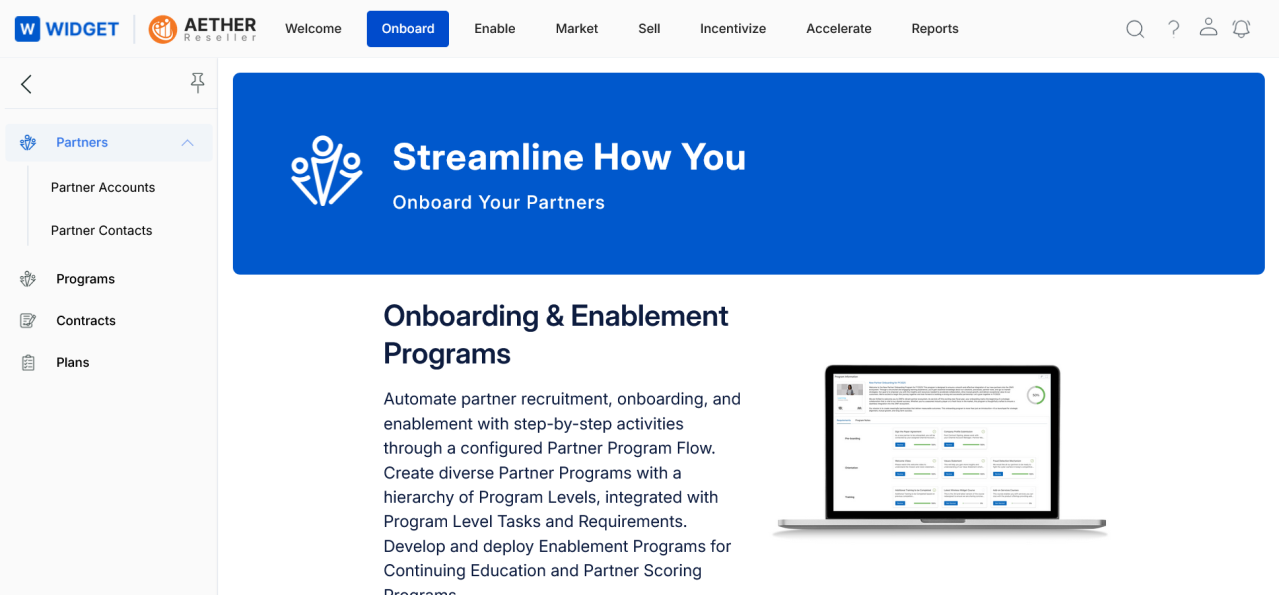
Partner Accounts are accessed through the Onboard zone in UPM's top navigation bar.
- Click Onboard in the top menu.
- Click Partner Accounts in the left menu bar.
2.1 View Partner Accounts
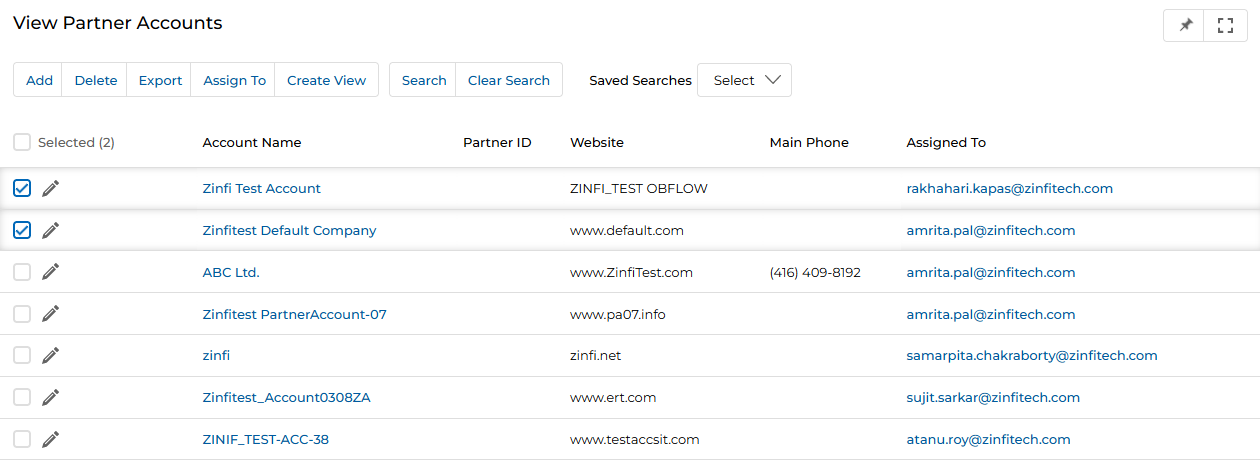
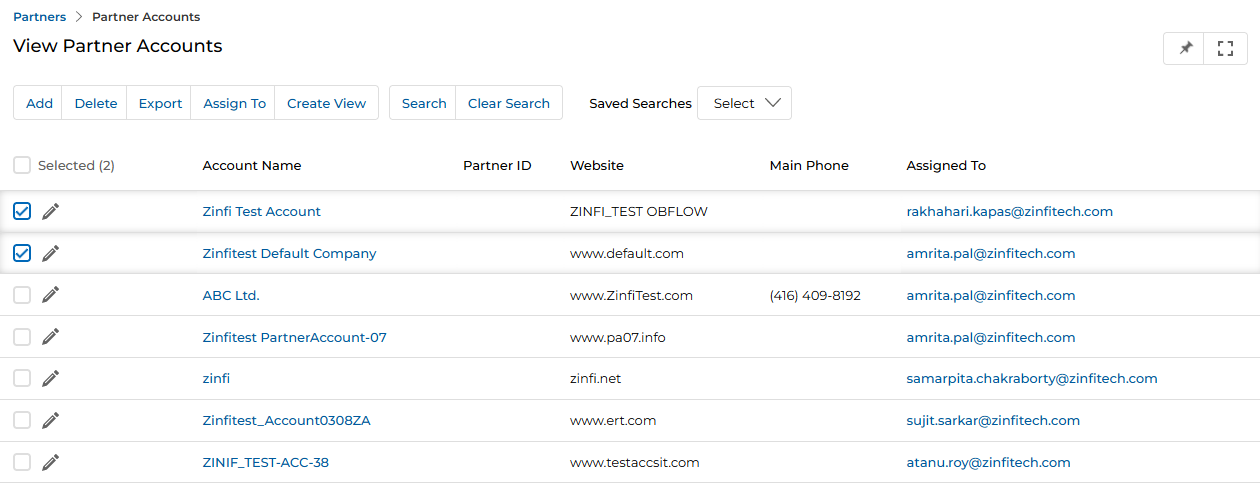
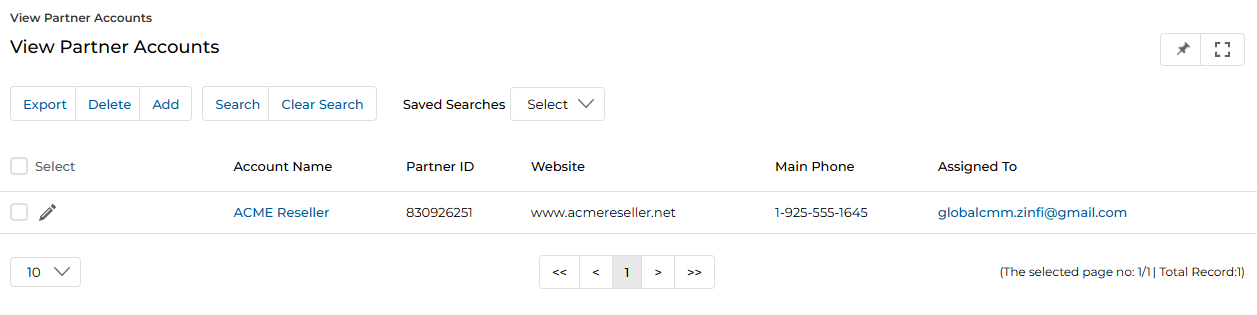
The View Partner Accounts page lists all partner account records. The toolbar at the top provides the following actions:
- Export — Exports selected records with a configurable set of columns in CSV or XLSX format.
- Delete — Deletes the selected account(s) from the list.
- Search / Filter — Opens a search popup to define criteria and find desired records.
- Clear Search — Clears the currently active search.
- Saved Filters / Saved Searches — Shows saved searches in a dropdown. When a saved search is selected, two additional options appear:
- Edit — Update the selected saved search name.
- Delete — Remove the saved search from the dropdown.
Clicking an Account Name in the grid takes you to its details page.

2.2 Delete a Partner Account
- Checkmark the partner account(s) you wish to delete from the list.
- Click the Delete link in the toolbar to delete the selected account(s).
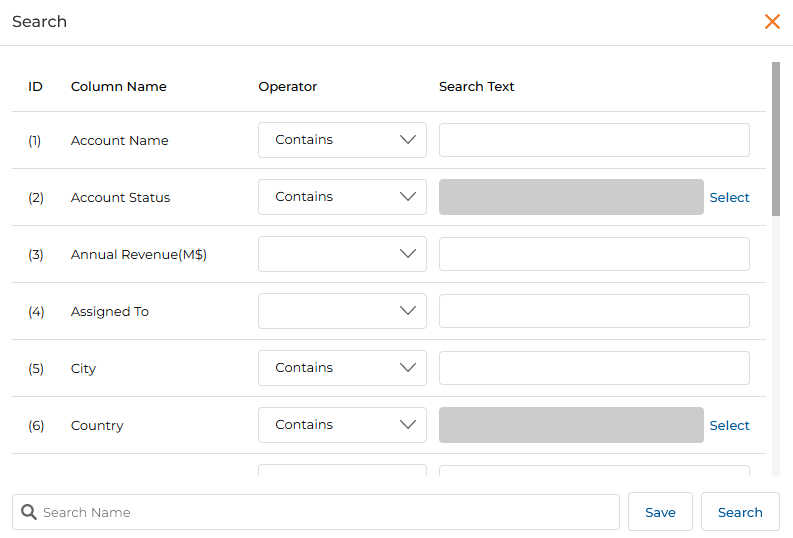
2.3 Search Partner Account
- Click the Search or Filter link on the menu section above the list.

- In the pop-up window, key in the value you would like to use as a search reference.
- Click Search.
2.4 Exporting Partner Accounts
Partner Account records can be exported to CSV or XLSX with a fully configurable set of columns.
- Click the Export button on the View Partner Accounts page. The Export Columns List popup opens, allowing you to select which columns/fields to include in the export and the file type.
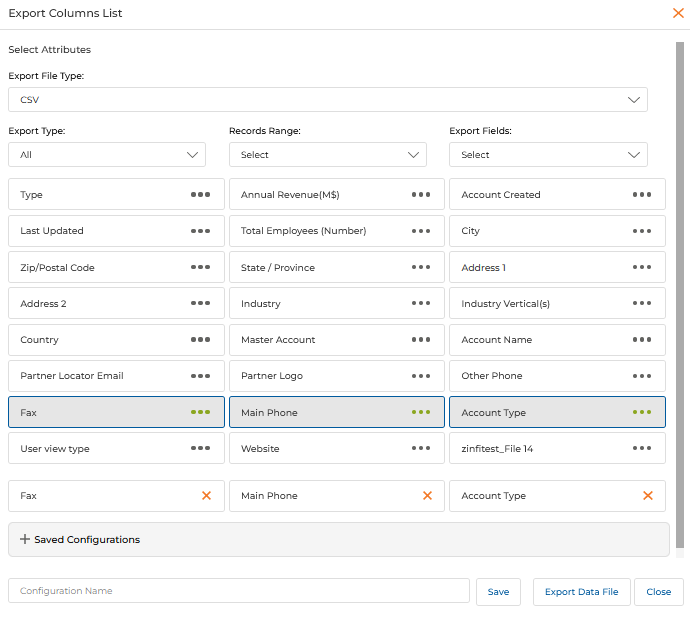
- Click the field name boxes with three dots (⋯) to select individual columns for export. Selected columns appear at the bottom of the dialog as the export headings.
- To select all fields at once, choose All from the Export Fields dropdown.
- To export specific records, pre-select (checkbox) those records on the View Partner Accounts page before clicking Export. To export all records, click Export and select All from the Export Type dropdown.
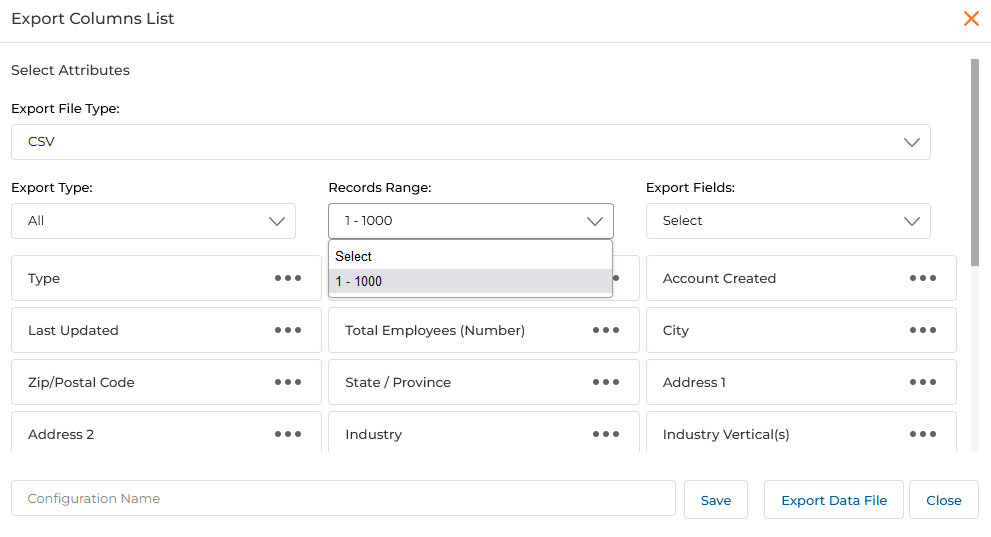
- When All is selected from the Export Type dropdown, the Record Range control appears. Up to 1,000 records can be exported per operation.
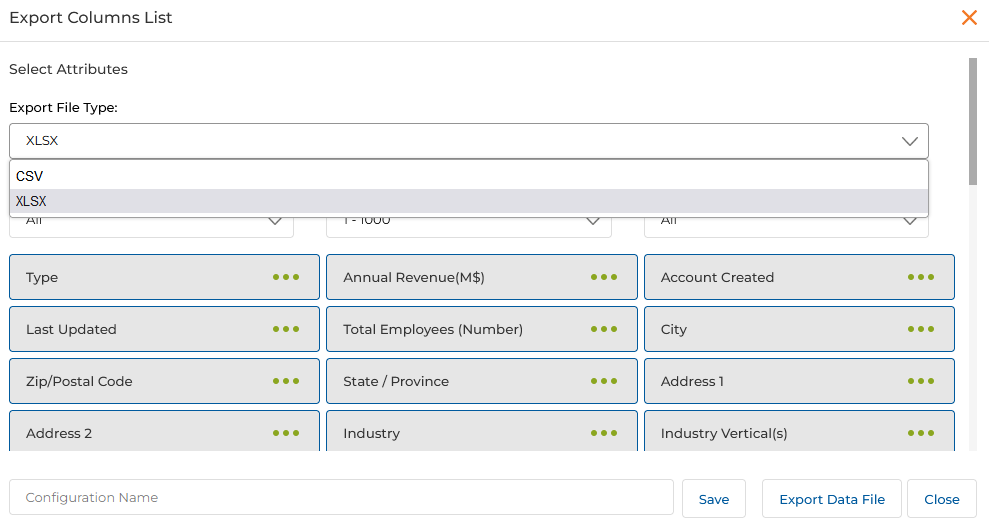
- Select the export file format from the Export File Type dropdown — either CSV or XLSX.
- Click Export Data File to download the selected/all partner account records.
Exporting Images
When image-type fields (such as Partner Logo or custom file fields) are included in the export, the system downloads both the XLSX data file and separate ZIP archives — one per image field — containing the image files for each exported record.
- Select the desired partner account records and click Export.
- In the Export Columns List dialog, select the fields to export — including any image fields (e.g., Account Name, Partner Logo, and custom file fields).
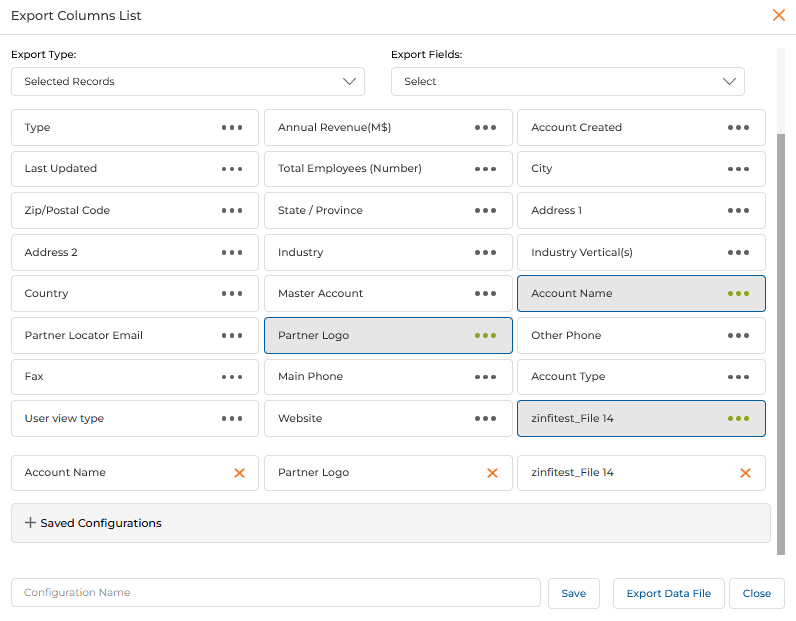
- Click Export Data File. The download package contains:
- An XLSX spreadsheet with text field values and image file names.
- One ZIP archive per image field (e.g., Partner_Logo.zip, zinfitest_File_14.zip) containing the actual image files.
Limiting Record Count in Grid
Control the number of records displayed per page by choosing the grid Page Size from the pagination control (options: 10, 25, 50, 100).
2.5 View Partner Account Details
- Click the Name / Title of a Partner Account in the list to open its details page.

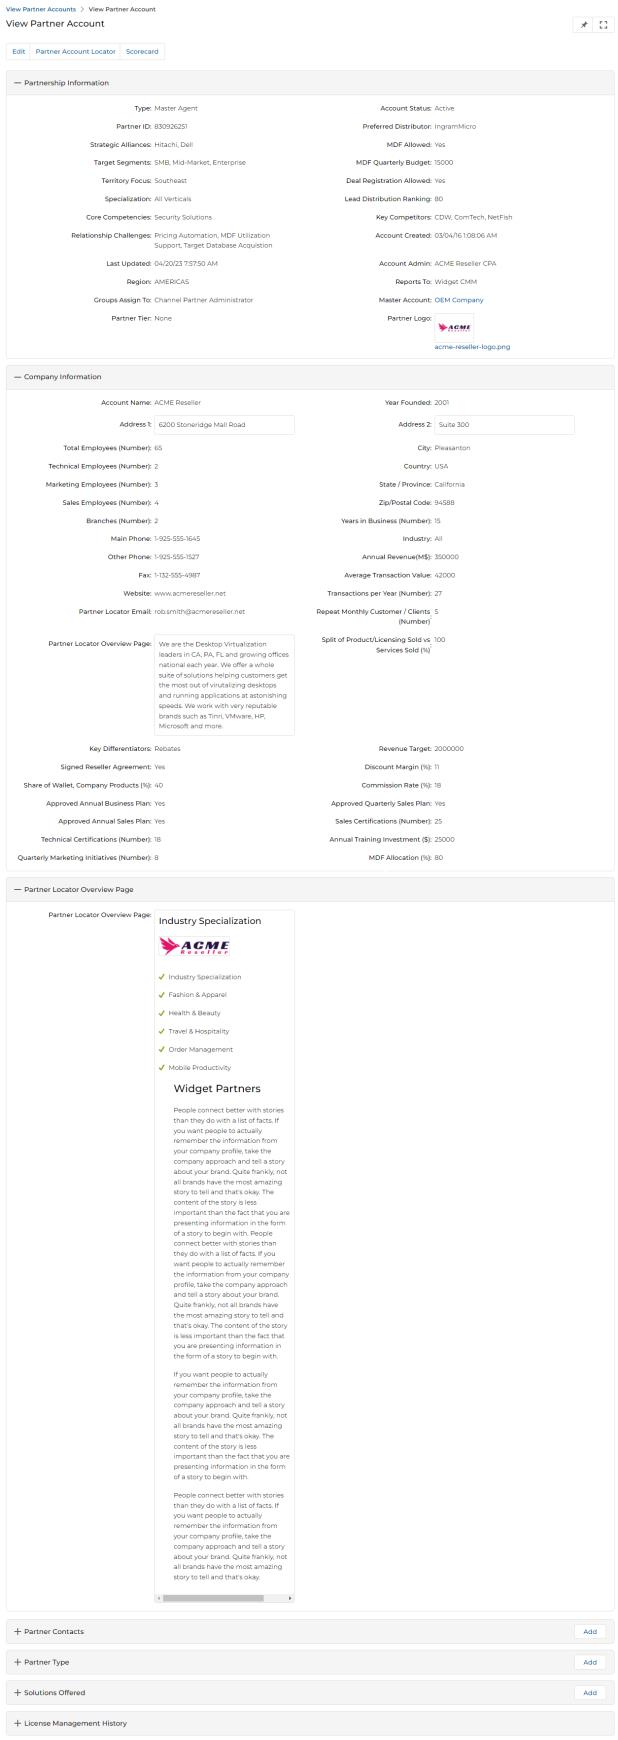
- The View Partner Account details page contains the following sections and action buttons:
| Section | Key Fields |
|---|---|
| Buttons | Edit — Opens the record in edit mode. |
| Partnership Information | Type, Account Status, Partner ID, Preferred Distributor, Strategic Alliances, MDF Allowed, Target Segments, MDF Quarterly Budget, Territory Focus, Deal Registration Allowed, Specialization, Lead Distribution Ranking, Core Competencies, Key Competitors, Relationship Challenges, Account Created, Last Updated, Account Admin, Region, Reports To, Groups Assign To, Master Account, Partner Tier, Partner Logo |
| MDF Allowed — Enables MDF for this partner account. | |
| Deal Registration Allowed — Enables deal registration for this partner account. | |
| Partner Tier — The tier in which the partner account falls. | |
| Master Account — The master account to which this partner account reports. | |
| Partner Logo — The partner company logo. | |
| Region — The geographic region of the partner account. | |
| Company Information | Account Name, Year Founded, # of Years in Business, City, Country, State/Province, Zip/Postal Code, Main Phone, Other Phone, Fax, Website, Industry, Total Employees, Technical/Marketing/Sales Employees, Branches, Annual Revenue (M$), Average Transaction Value, Transactions per Year, Partner Locator Email, Key Differentiators, Revenue Target, Signed Reseller Agreement, Discount Margin (%), Share of Wallet (%), Commission Rate (%), # of Customers/Repeat Monthly Clients, Approved Annual/Quarterly Business Plans, Sales/Technical Certifications, Annual Training Investment ($), # of Quarterly Marketing Initiatives, MDF Allocation (%), Street Address Lines 1 & 2, Company Overview |
| Annual Revenue (M$) — Revenue in millions of dollars. | |
| MDF Allocation (%) — MDF allocation percentage. | |
| Commission Rate (%) — Commission rate percentage. | |
| Company Overview — Free-text overview of the partner company. | |
| Partner Locator Overview Page | Rich-text company overview displayed on the Partner Locator. |
| Partner Contacts (sub-table) | Lists all contacts associated with this account. Actions: Add (create a new contact), pen icon (edit), trash icon (delete). Columns: Name, Title, Account Name, Email. |
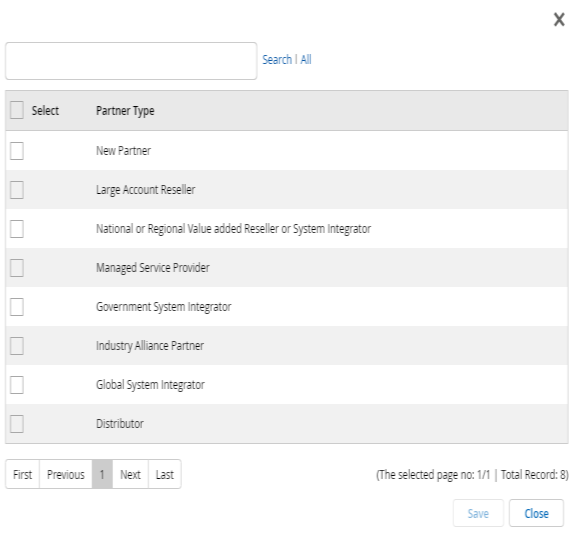
| Partner Type (sub-table) | Lists partner types associated with this account. Click Add to open a popup, check the required type(s), and click Save. |
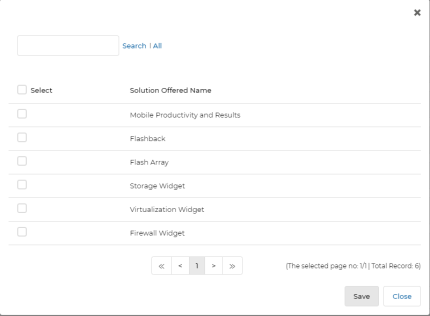
| Solutions Offered (sub-table) | Lists business lines associated with this account. Click Add to associate a solution. Click the pen icon to edit. Column: Solutions Name. |
| License Management History (sub-table) | Displays license status history. Columns: Modified By, Modified On, Previous Status, Changed/Current Status. |


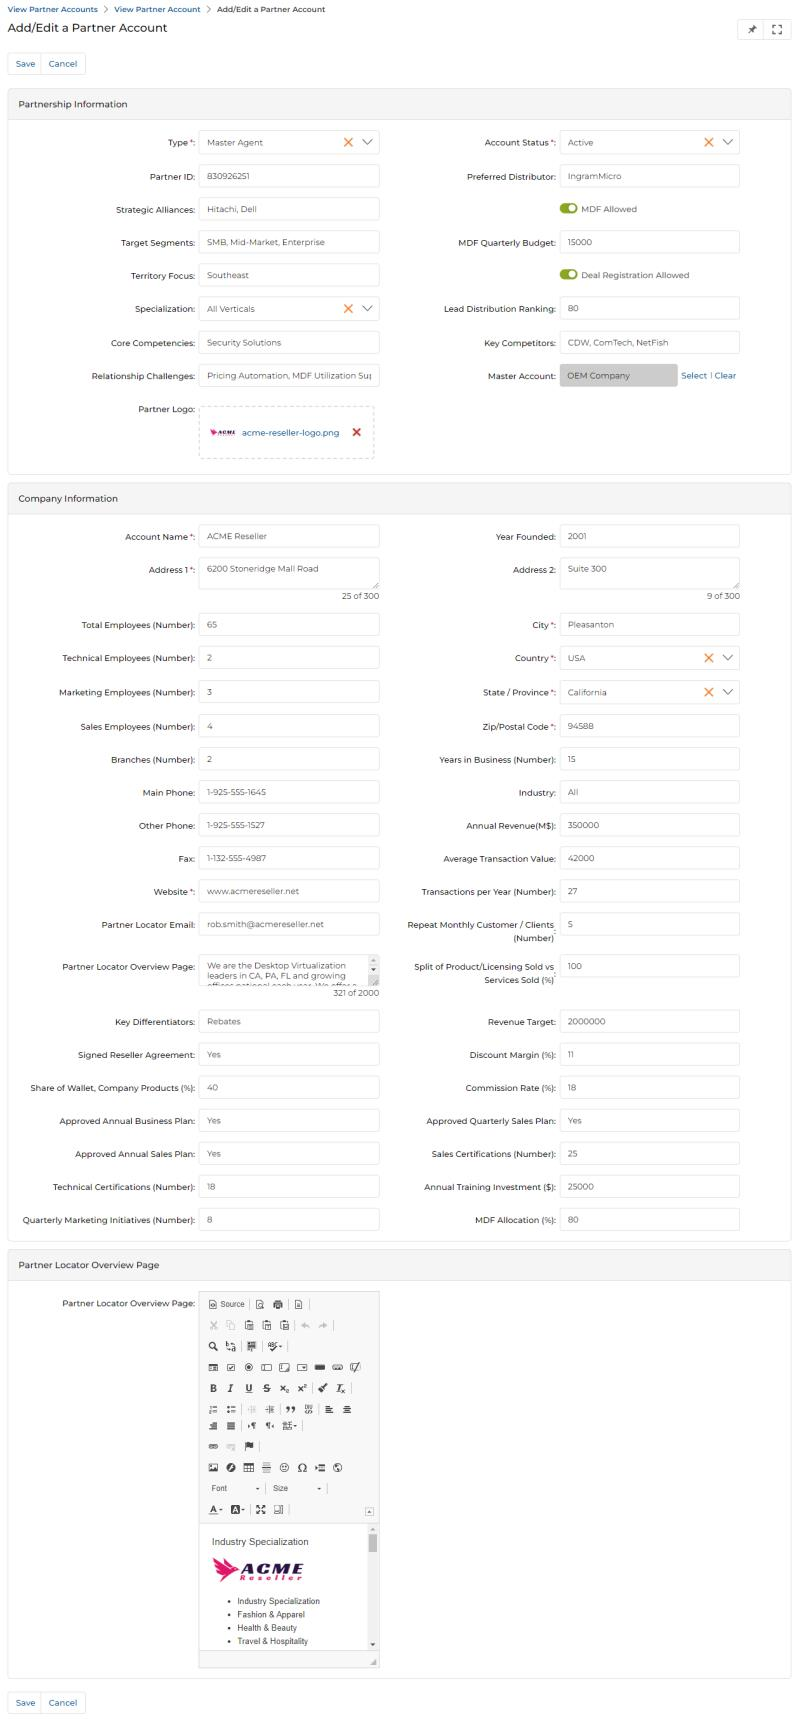
2.6 Add / Edit a Partner Account
- To edit an existing account — click the pencil icon on the View Partner Accounts list row, or click Edit from within the account's details page.
- To add a new account — click the Add button in the list toolbar.
The Add/Edit a Partner Account form contains the same Partnership Information and Company Information sections as the details view, all editable. Key controls:
- Save — Saves all changes and returns to the View Partner Accounts page.
- Cancel — Exits without saving.
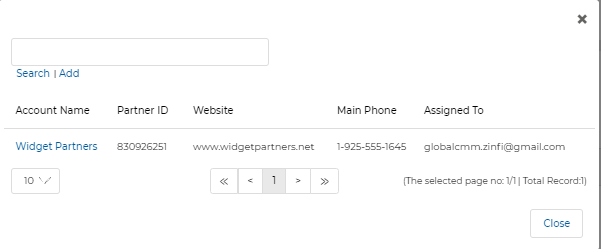
- Master Account — Click Select to open a popup and choose the master account.
- Partner Logo — Click Browse to upload a logo from your computer.
After saving, return to the account's details page to add Partner Contacts, Partner Types, and Solutions Offered.
2.7 Deactivating a Partner Account
To make an account inactive — which locks out all users at that account from the portal — change the Account Status field from Active to Inactive in the Add/Edit form. This does not delete the Account, Contacts, or Users; it only blocks portal login access.
2.8 Manage Logo
Both the OEM Admin and the Partner CPA (Channel Partner Administrator) can upload a partner brand logo. Once uploaded, the logo is visible to all Partner Users under that CPA role and is displayed in the portal title bar when the partner account is active.
Step 1: In the Add/Edit Partner Account form, click Browse next to the Partner Logo field. A file picker window opens.
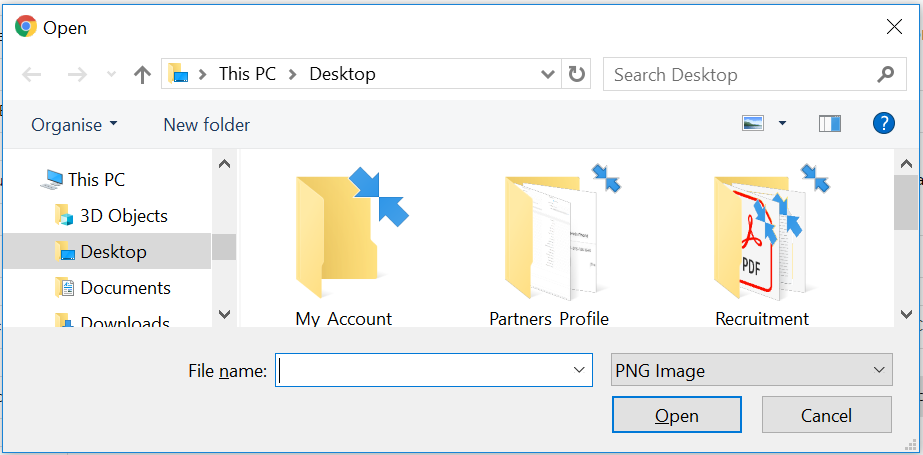
Step 2: Select the image file and click Open. The logo is added to the Partner Logo field. Once saved, the partner logo appears in the UPM title bar when that partner account is logged in.

Partner Contacts
- Click Onboard in the top menu.
- Click Partner Contacts in the left menu bar.
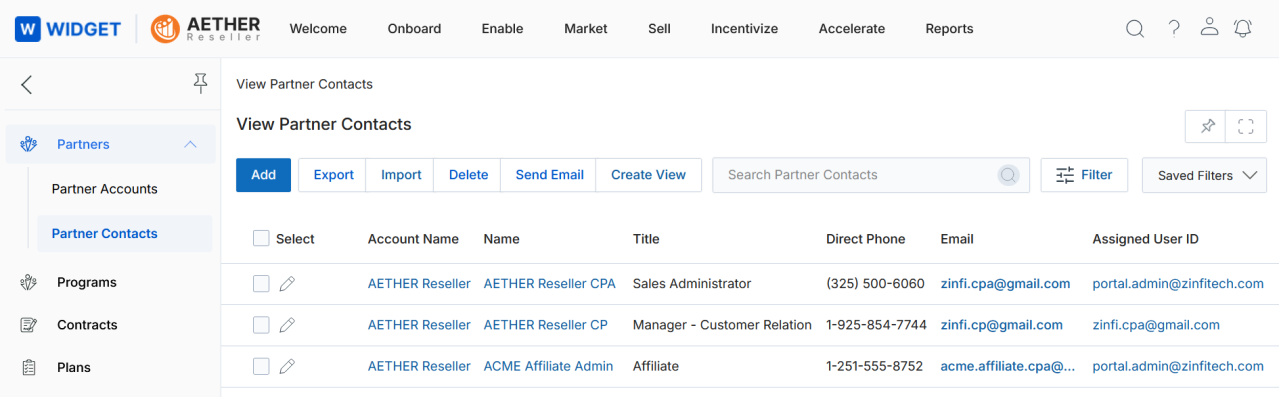
3.1 View Partner Contacts
The View Partner Contacts page lists all partner contact records. The toolbar provides:
- Add — Opens a new page to add a partner contact.
- Delete — Deletes selected contact(s).
- Send Email — After selecting contacts, sends them to a mailing list distribution.
- Export — Export contacts by Entire List, Current Page, or Selected Records.
- Import — Import a list of contacts via an Excel sheet.
- Search / Filter — Opens a search window to filter by Email, Name, Company Name, Country, List Name, Blast Name, and more.
- Clear Search — Clears the currently active search.
Clicking a Contact Name opens its details page; clicking the contact's company name opens the company's account details page.
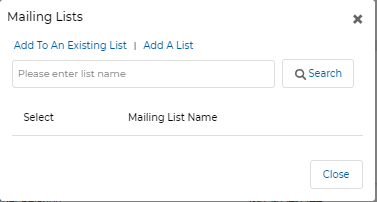
3.2 Send Email
After selecting contacts, click Send Email to assign them to a mailing list distribution.
- Add to an Existing List — Navigates to the Manage Emails page to associate contacts with an existing list.
- Add a List — Pops up a name entry row where you enter the desired list name and click Save.
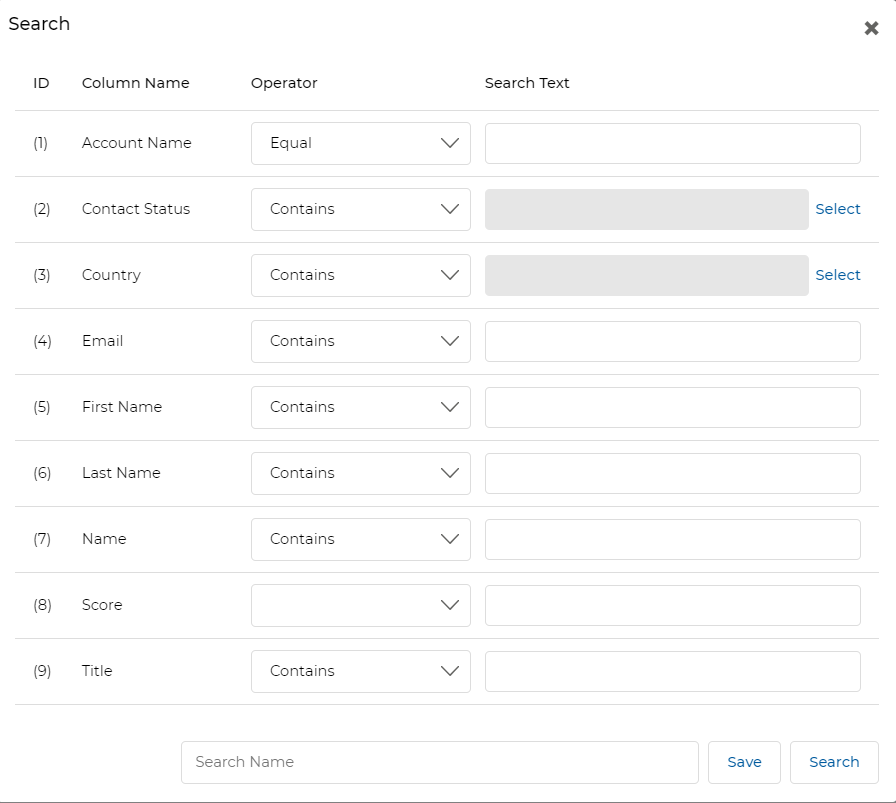
3.3 Search for an Existing Partner Contact
- Click Search in the toolbar above the contact list.
- In the search popup, enter the value to use as a search reference.
- Click Search.
- Saved Searches — Shows a dropdown of saved searches. When selected, two additional options appear:
- Edit — Update the saved search name.
- Delete — Remove the saved search from the dropdown.
Control the number of contacts displayed per page by choosing the grid Page Size (10, 25, 50, 100) from the pagination control.
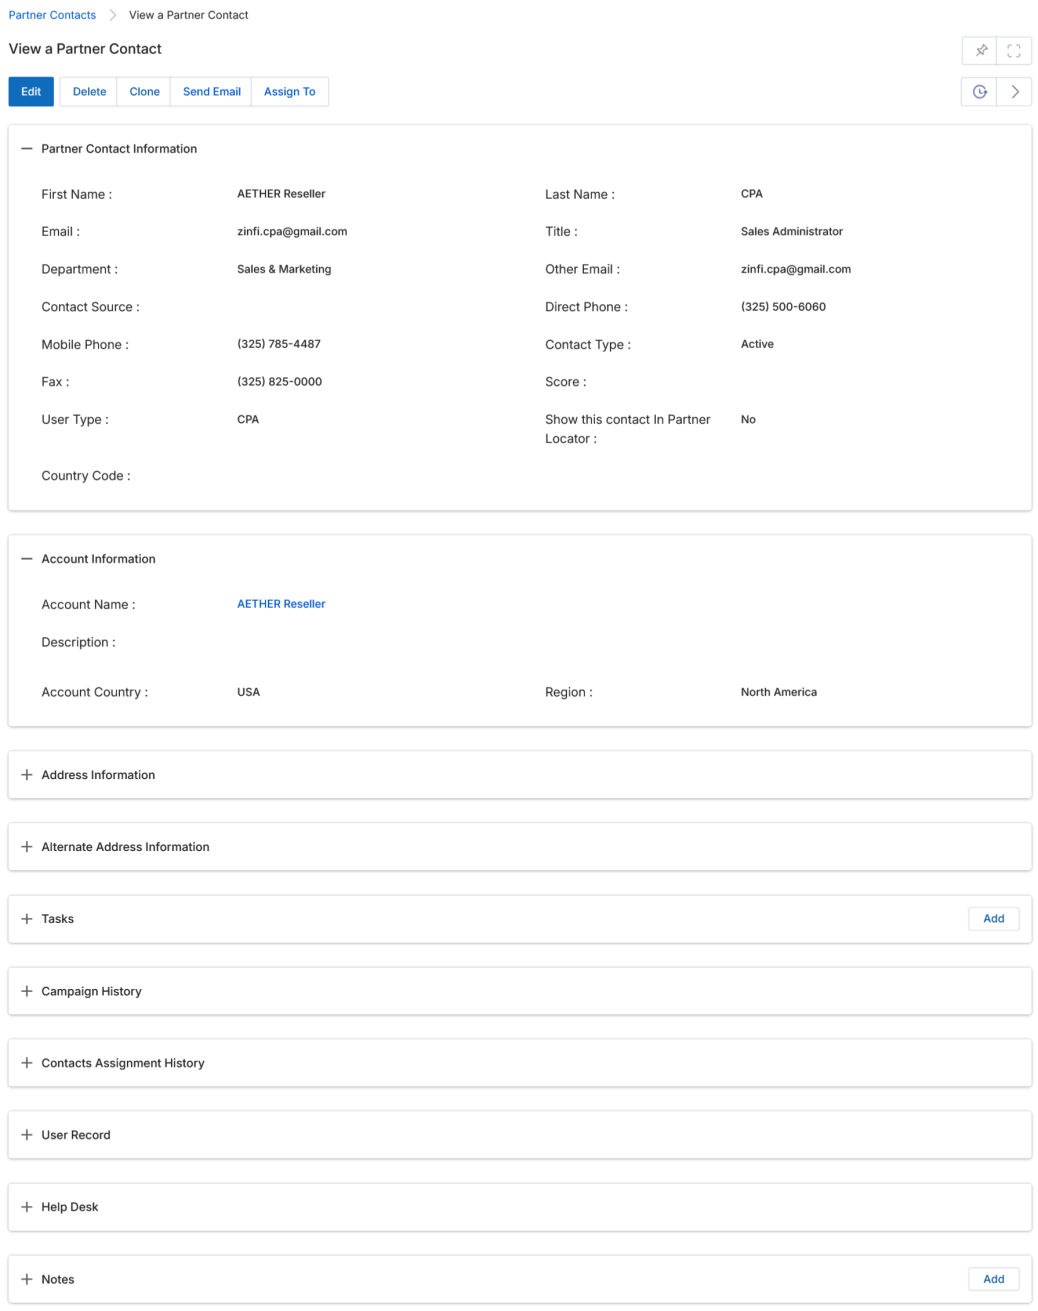
3.4 View Partner Contact Details
- Click the Name / Title of a Partner Contact in the list to open its details page.
The View a Partner Contact page includes the following sections and action buttons:
| Element | Description |
|---|---|
| Edit | Opens the record in edit mode. |
| Delete | Deletes the record and its related list associations. |
| Clone | Duplicates the contact record. |
| Send Email | Sends an email to the partner contact (see Send Email above). |
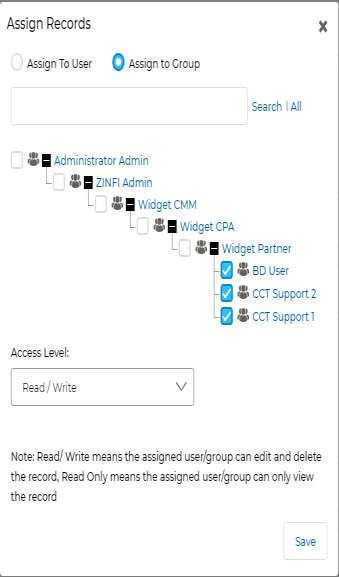
| Assign To | Assigns the record to specific user(s) or group(s) with Read Only or Read/Write access level. |
Partner Contact Information Fields
| Field | Description |
|---|---|
| First Name | First name of the partner contact. |
| Last Name | Last name of the partner contact. |
| Work email address. | |
| Title | Official designation. |
| Department | Partner contact department. |
| Other Email | Secondary email address. |
| Direct Phone | Direct phone number. |
| Mobile | Mobile phone number. |
| Contact Source | Source from which the contact came into contact with the OEM. |
| Contact Type | Active or Dormant. |
| Fax | Fax number. |
| Score | Lead score value (system-generated). |
| User Type | Channel Partner (CP) or Channel Partner Administrator (CPA). |
| Account Name | Associated partner account. |
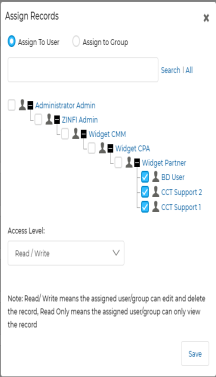
Assign To
The Assign To button opens a popup with two tabs:
- Assign To A User — Select specific users and set the access level (Read Only or Read/Write), then click Save.
- Assign To Group — Select specific partner user groups and set the access level, then click Save.
Notes Sub-Table
Lists all notes associated with the partner contact.

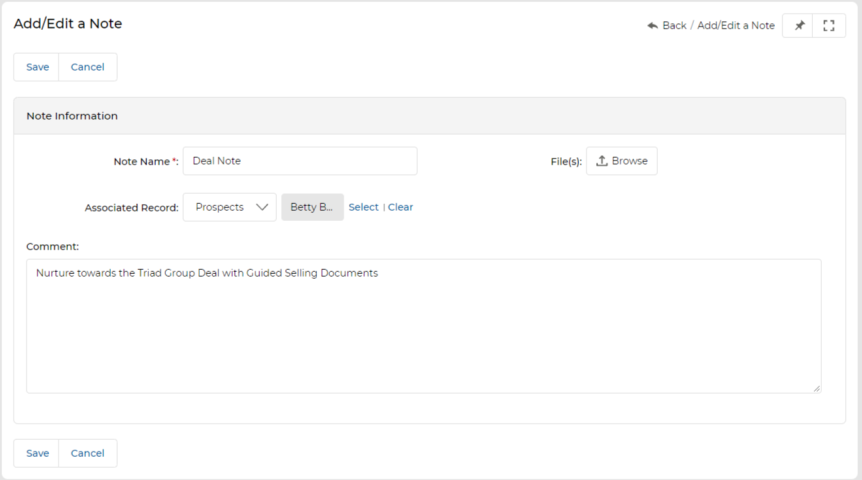
To add a note, click Add. The Add/Edit a Note form contains the following fields:
- Note Name (Title) — The note subject.
- Associated Record — Link the note to a UPM record (Accounts, Prospects, Contacts, Opportunities, PContacts, PProspects, or Deal). Click Select to choose.
- File(s) — Optional file attachment. Click Attach to upload.
- Contents (Comment) — Free-text note description.
Tasks Sub-Table
Lists all tasks associated with the partner contact.

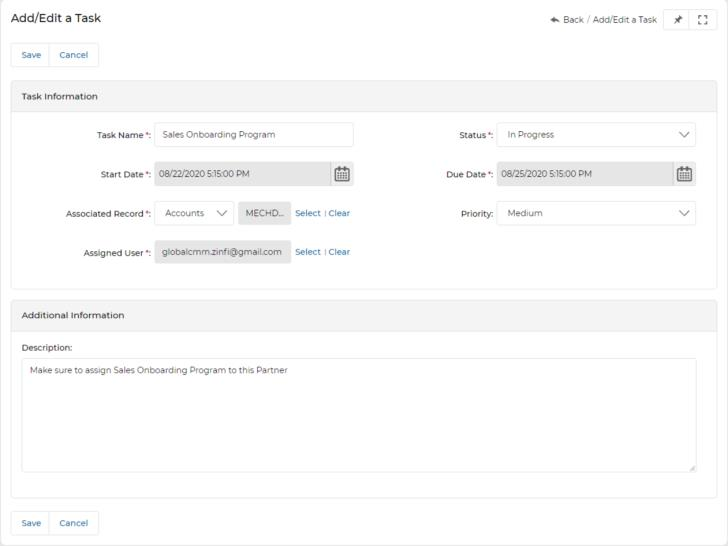
To add a task, click Add. The Add/Edit a Task form contains:
- Name — Task subject.
- Status — Completed, Deferred, In Progress, or Not Started.
- Start Date / Due Date — Task date range with time.
- Associated Record — Link to a UPM record (Accounts, Prospects, Contacts, Opportunities, PContacts, PProspects, or Deal).
- Priority — High, Low, or Medium.
- Assigned User — Click Select to choose an assignee.
- Description — Task details.
Campaign History Sub-Table
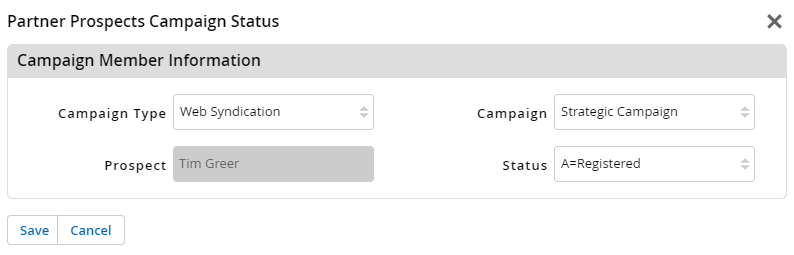
Shows campaigns the partner contact is associated with.

To add a campaign entry, click Add. In the popup, select the Campaign Type, Campaign, and Status, then click Save.
Contacts Assignment History
Shows the assignment history of this contact record to users/groups.

Click the globe icon to withdraw an assignment (only available to the user who made the original assignment via the Assign To button).
User Record Sub-Table
Lists application users associated with the partner contact.

Click the pen icon to edit a user record. Refer to the "User & Territories Management (Partner Admin)" guidebook for details on creating user accounts.
Help Desk Sub-Table
Lists all support tickets raised by the partner contact.

3.5 Add / Edit a Partner Contact
- To edit a contact — click the pencil icon on the list row.
- To add a new contact — click the Add button in the toolbar.

The Add/Edit a Partner Contact form contains the following sections:
| Section | Fields |
|---|---|
| Buttons | Save — Saves the current page. Cancel — Exits without saving. |
| Partner Contact Information | First Name, Last Name, Email*, Title, Department, Other Email, Direct Phone, Mobile, Contact Source, Contact Type, Fax, Score (system-generated), User Type (CP or CPA) |
| Account Information | Account Name* (click Select to link), Description, Account Country, Region, State, City, Address 1 & 2, Zip/Postal Code |
| Address Information | Address 1, Address 2, Country, State, City, Zip/Postal Code |
| Corporate Address Information | Alternate address fields: Address 1, Address 2, Country, State, City, Zip/Postal Code |
After saving, return to the contact's details page to add Notes, Tasks, Campaign History, and a User Record.