
Introduction
The Partner Leads Management Application of ZINFI's UPM enables your organization to distribute leads to your sales reps and manage the complete "contacts to contracts" process. This Application helps engage your sales reps via round robin, shark tank, and other lead management distribution mechanisms.
Shark Tank Management
The Partner Leads Management Application allows your organization to distribute leads to different users or partner groups based on various criteria established in a "shark tank" lead distribution scheme. Lead management data can also be synchronized with data in an existing CRM system for smooth integration between the two platforms.
Using the Partner Leads Management Application, your organization can easily define a time frame for lead follow-up, including pre-scheduled system notifications at regular intervals when no activity has occurred. Pullback functionality allows a lead to be automatically pulled from one user, in case of non-activity, and reassigned to another.
End-user Account Management
With the Partner Leads Management Application, your organization and your channel reps can manage the entire journey of a prospective lead from generation to close through an automated system. This automated sales approach encourages partner engagement and yields enhanced productivity.
The Application also includes functionality to track leads based on their age. This helps users quickly sort leads and logically prioritize follow-up activities. Organizations can easily configure system alerts to generate automated notifications to users on scheduled dates and times.
Opportunity & Deal Management
Organizations use the Partner Leads Management Application to set up an automated review and approval mechanism for all submitted opportunities and deals completed by the channel sales team. The Application also allows you to push submitted opportunities and deals to your internal CRM through configured system connectors.
Prospects
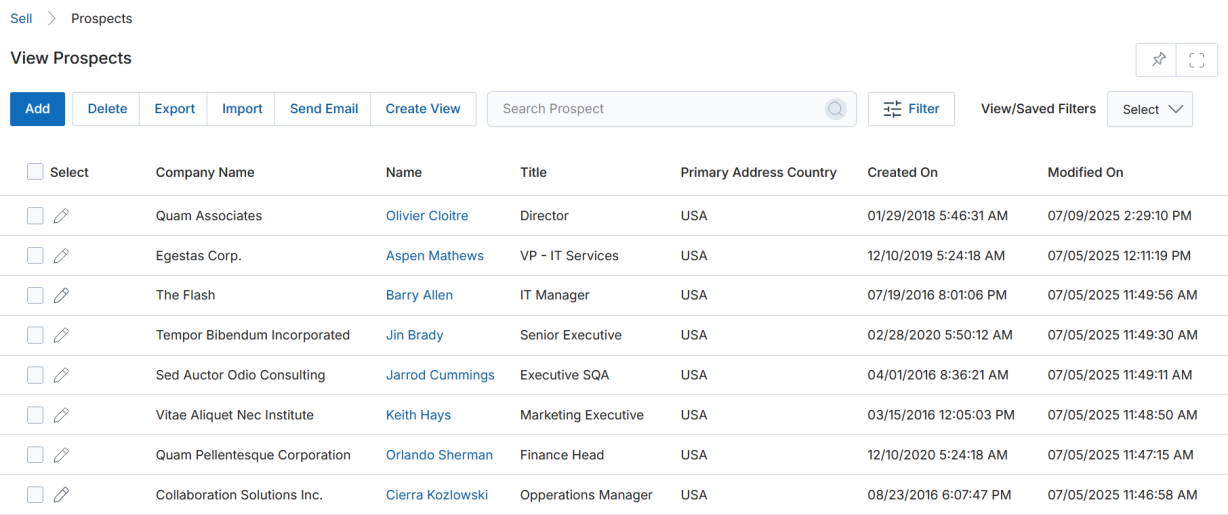
Navigate to Sell > Leads > Prospects to access the Prospects module. Click Sell on the top menu, then click Prospects in the left menu bar under Leads.
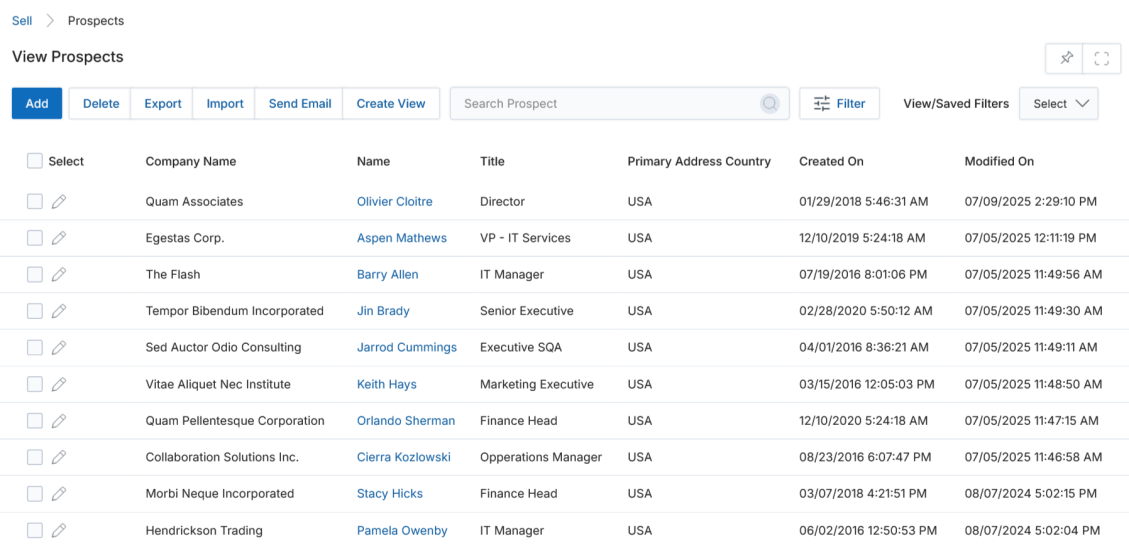
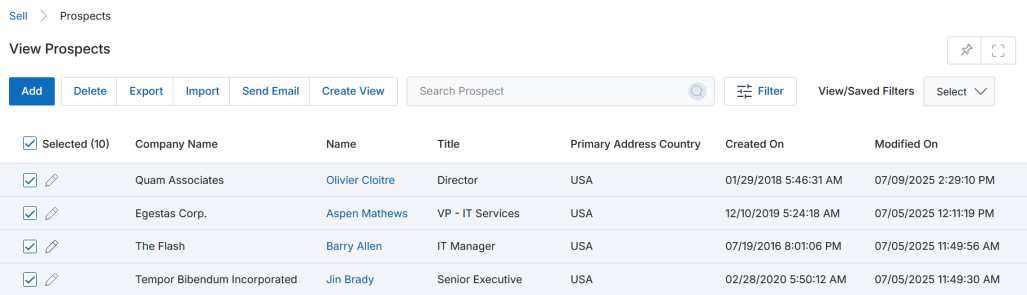
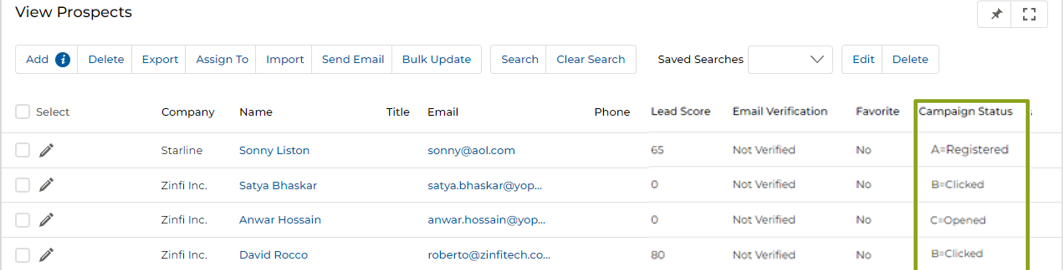
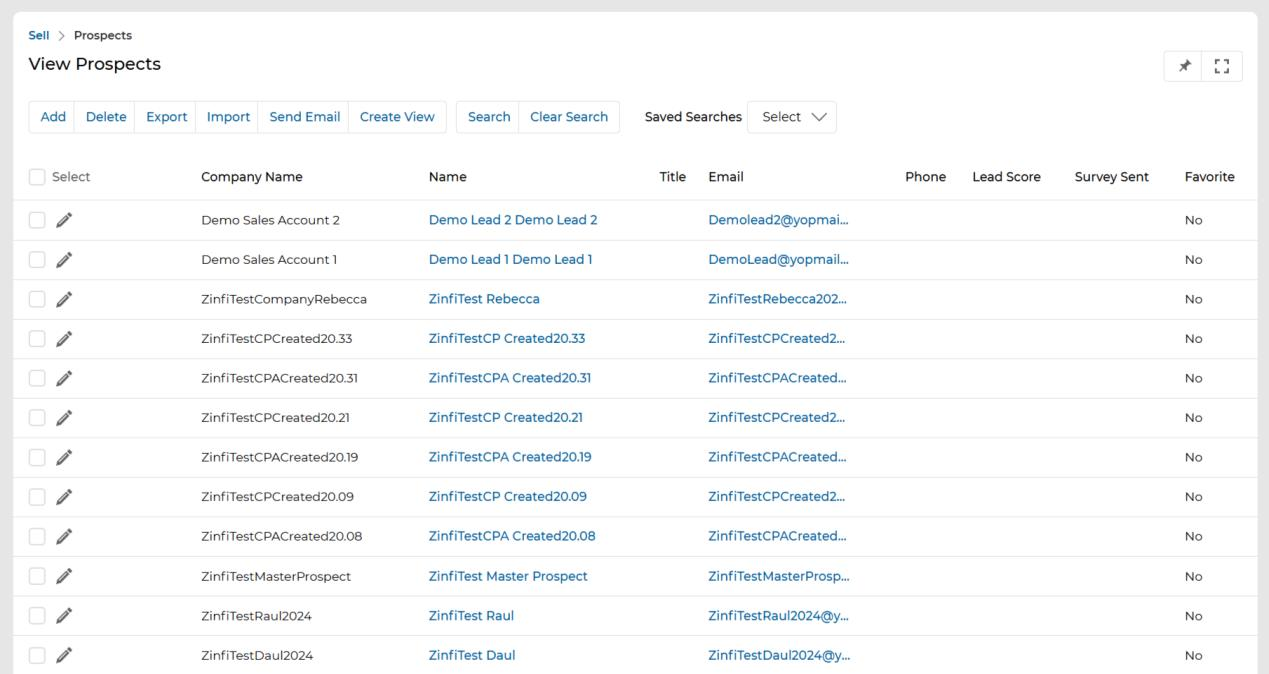
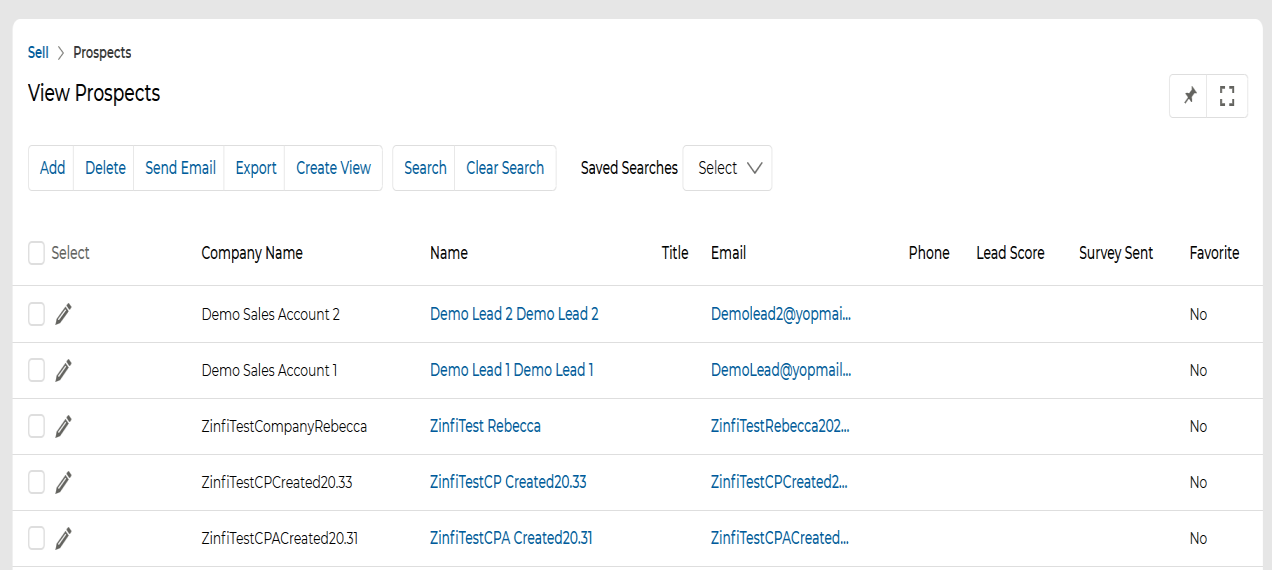
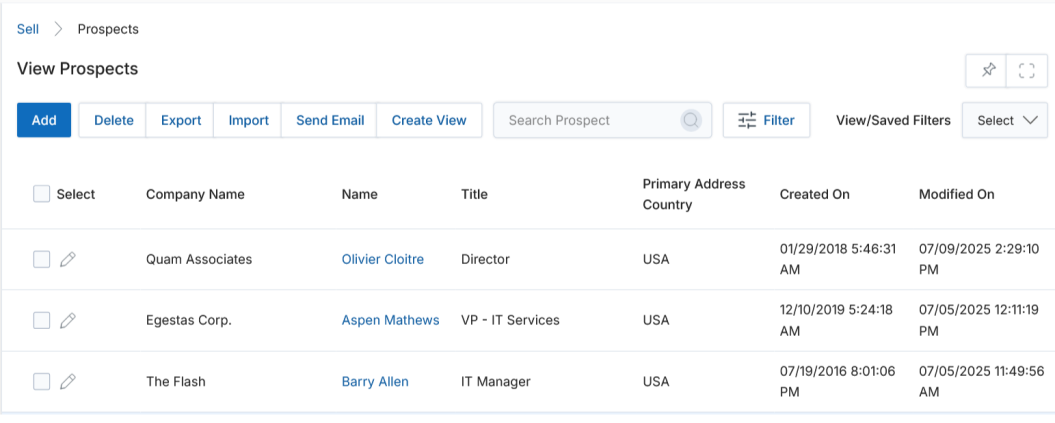
View Prospects
The top action bar on the View Prospects page provides the following actions:
- Add — Opens a new page to add a new prospect.
- Delete — Deletes the selected prospect(s) from the list.
- Export — Exports records from the listing page into CSV format. Choose Selected Records to export only checked rows, or All to export records within a specified range.
- Assign To — Assigns selected prospect(s) to a partner or a group.
- Import — Imports a list of prospects from a pre-formatted Excel sheet.
- Send Email — Sends email to a specific distribution list.
- Search — Opens a filter window. You can filter by Campaign Type, Campaign Name, and Campaign Status, then click OK. Additional search criteria include: equals to, contains, begins with, ends with, and not equal to.
- Clear Search — Clears the active search.
- Saved Searches — Shows a list of saved searches in the search dropdown.
For each record in the grid, click the Edit (pen) icon to edit a record, or click the prospect Name to navigate to its details page.
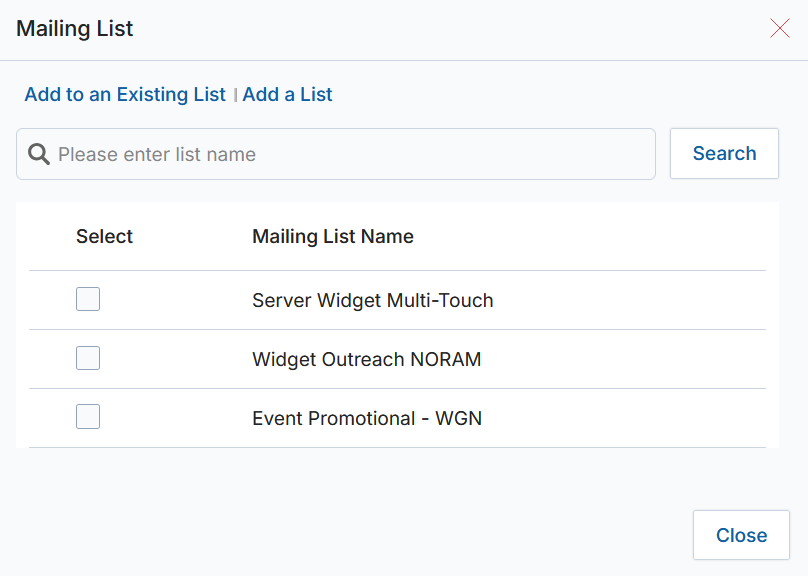
Sending Email to a List of Prospects
- Select the prospect(s) you want to send email to, then click Send Email.
- Select the prospect list(s) from the Category. If the desired list does not exist, click Search to query for it or click Add a List to create a new one, then assign prospects to it by clicking Add to an Existing List.
- After clicking Add to an Existing List, you will be moved to the prospect's email section to blast email to a list of prospects.
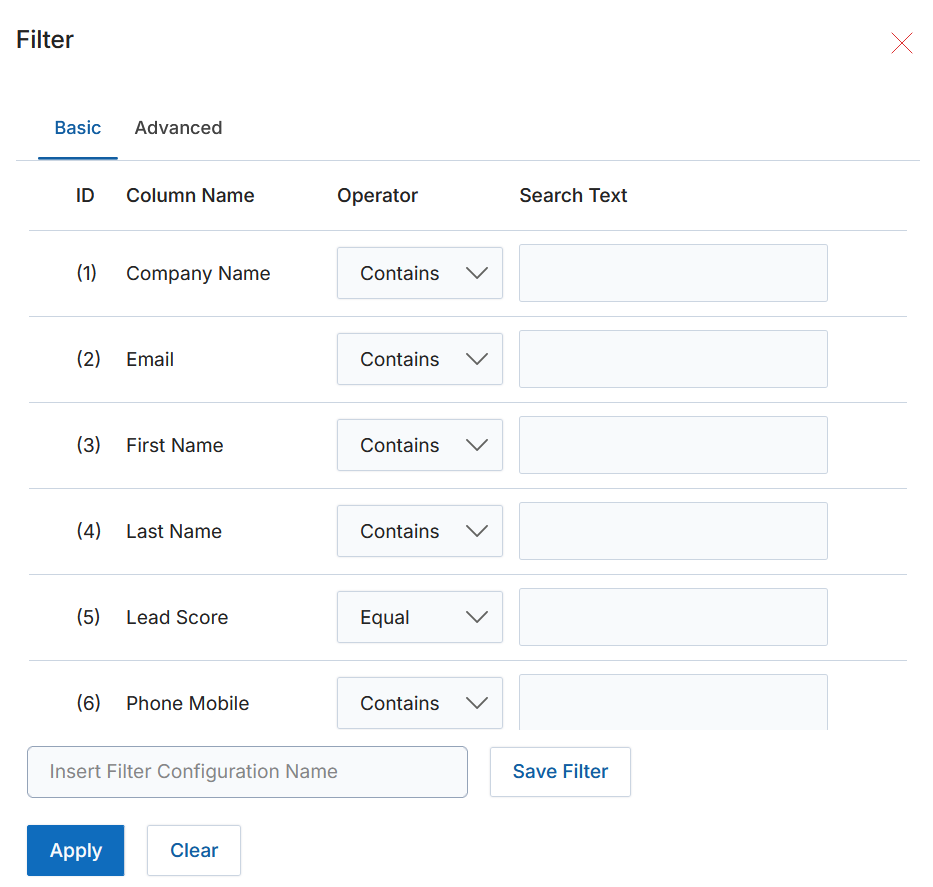
Searching Prospects
- Click Search to open the filter window.
- Enter your search parameters in the corresponding fields. The Basic tab provides filters for Company Name, Email, First Name, Last Name, Lead Score, and Phone Mobile.
- Click Apply at the bottom of the popup window to execute your search. Use Save Filter to preserve the configuration with a name for reuse.
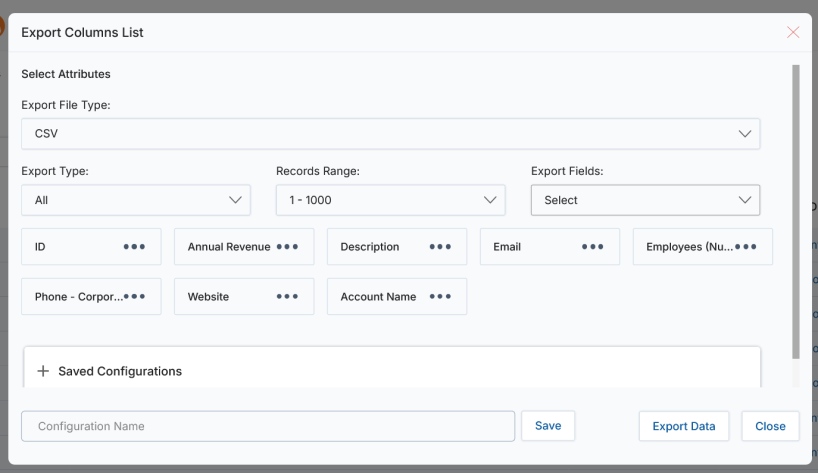
Export Prospects
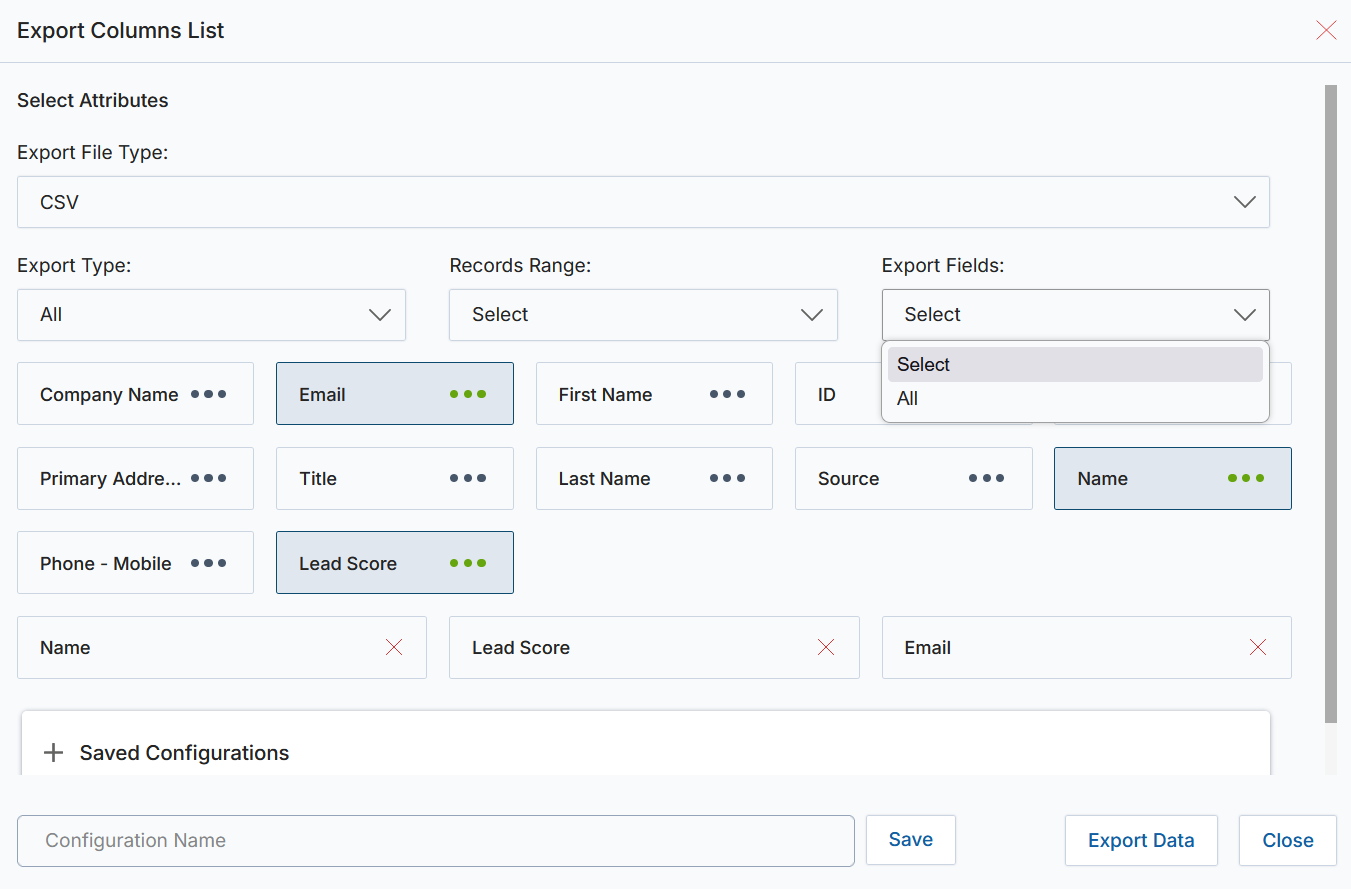
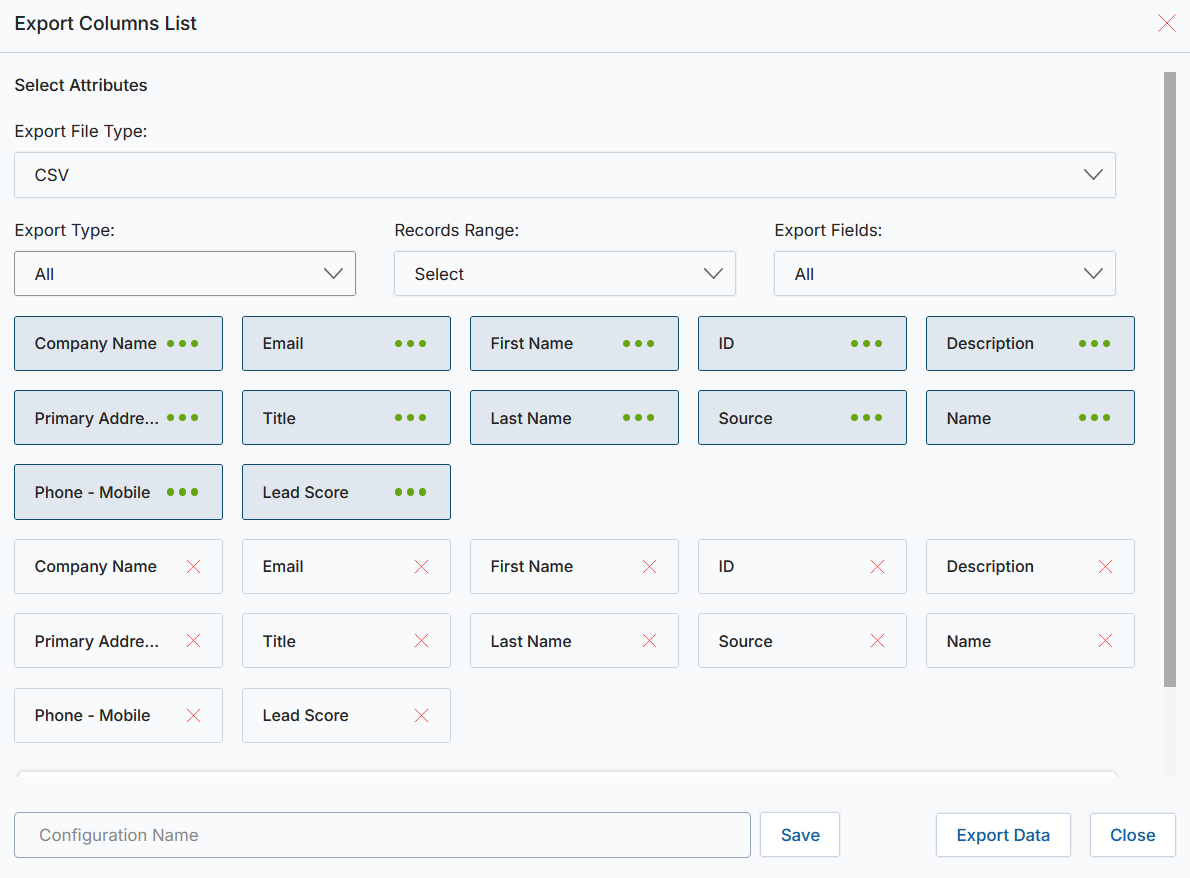
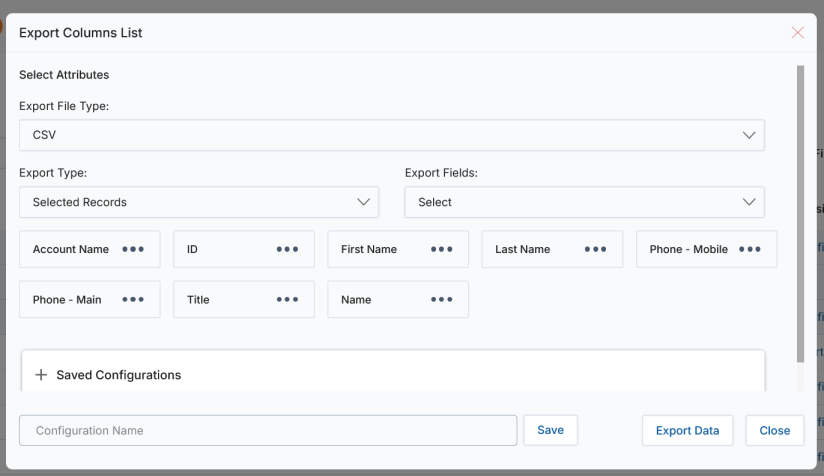
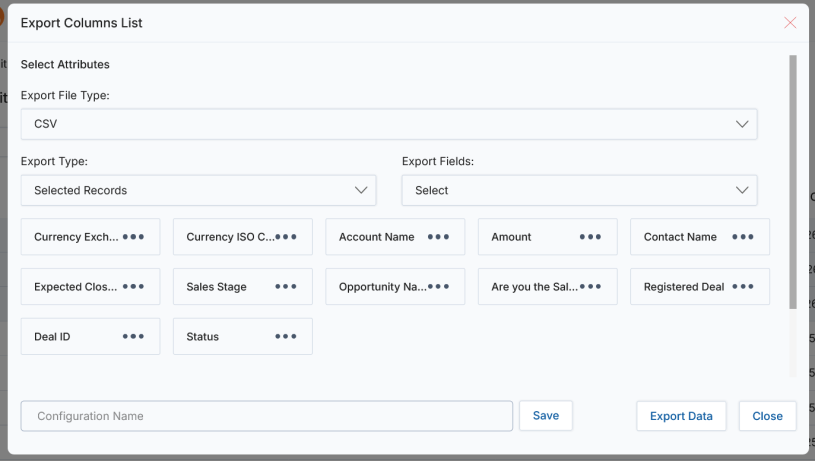
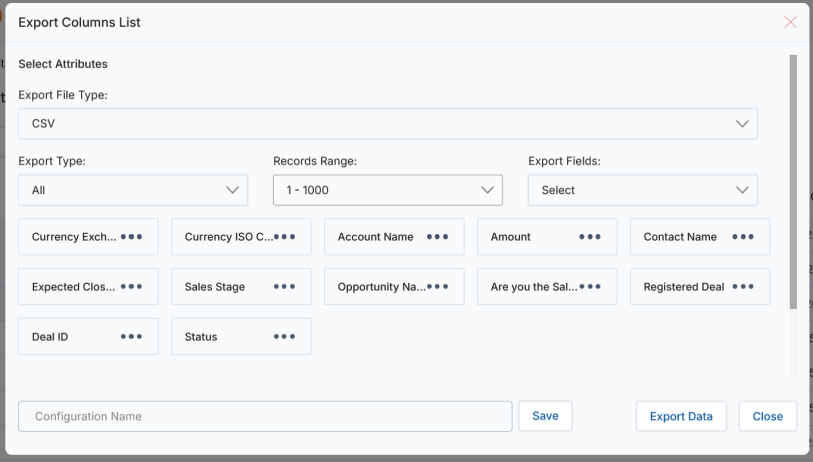
Clicking the Export button opens the Export Columns List pop-up, which allows you to select the columns and fields to include in your export file.
- Choose Selected Records from the Export Fields dropdown to export only checked rows, or All to include all records in the list (up to 1,000 per batch).
- Click individual field boxes (marked with three dots) to move them into the export structure.
- Select the export file type — CSV or XLSX — from the Export File Type dropdown.
- Save the field selection as an Export Template by entering a Configuration Name and clicking Save. Saved templates appear under Saved Configurations and can be edited or deleted.
- Click Export Data to download the file.
Limiting Record Count in Grid
Control how many records are displayed per page by selecting a Page Size from the dropdown at the bottom of the grid. Options are 10, 25, 50, and 100 records per page.
View Prospect Details
Click the prospect's Name in the grid to open the details page. The top action bar provides the following actions:
- Edit — Opens the prospect in edit mode.
- Delete — Permanently removes this prospect record after OK confirmation.
- Clone — Duplicates prospect details and opens in editable mode.
- Send Mail — Sends an email to the prospect.
- Convert Prospect — Converts the prospect to a contact (see Convert Prospect to Contact below).
- Assign To — Assigns this prospect to selected group(s) or user(s).
- Duplicate Search — Searches for duplicate prospects.
- ZoomInfo Update — Updates prospect details from the ZoomInfo database.
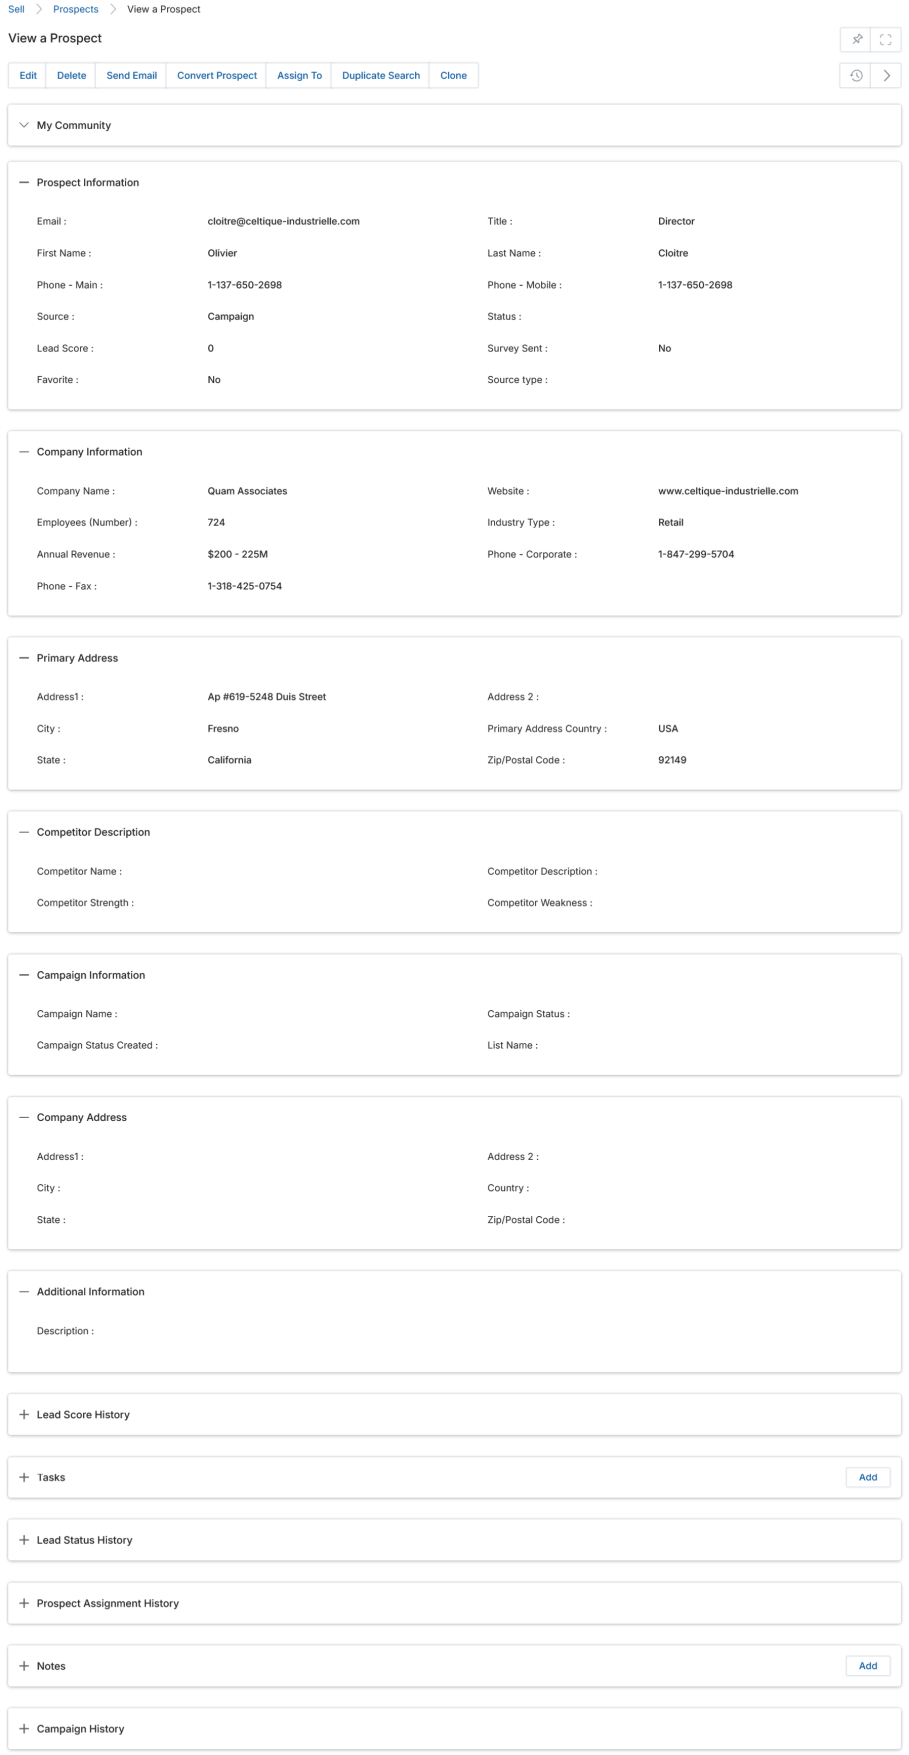
The details page is organized into the following collapsible sections (expand with the plus (+) sign):
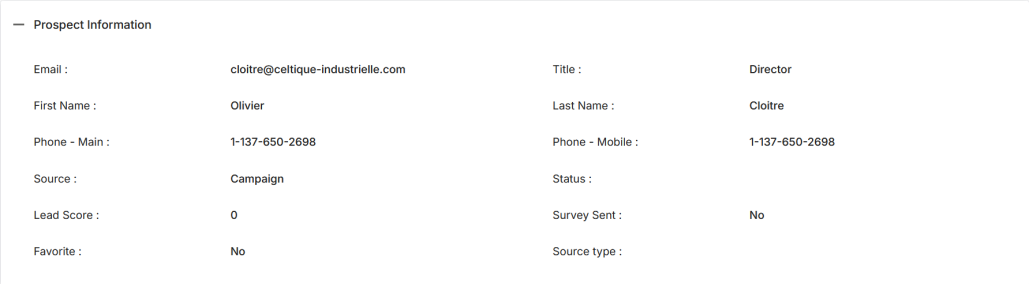
Prospect Information
| Field | Description |
|---|---|
| Email address of the prospect. | |
| Title | Job title of the prospect. |
| First Name | First name of the prospect. |
| Last Name | Last name of the prospect. |
| Phone – Main | Primary contact phone number. |
| Phone – Mobile | Mobile contact phone number. |
| Source | Origin of the prospect (e.g., Campaign, Cold Call, Conference). |
| Status | Engagement status (e.g., Accepted, Rejected, Assigned, Interested). |
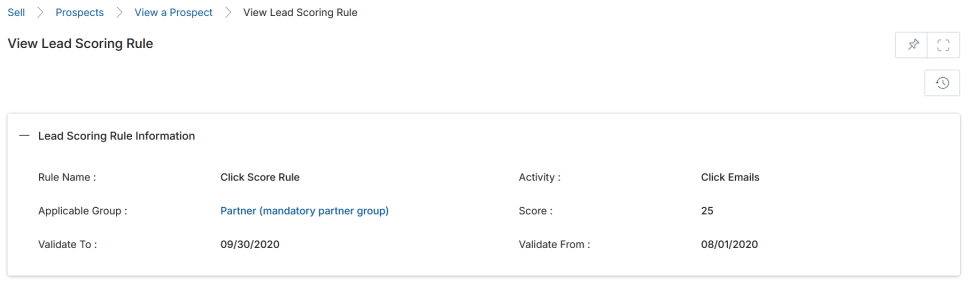
| Lead Score | Auto-generated total score earned by the prospect through campaign interactions, based on Lead Scoring Rules. |
| Survey Sent | Indicates whether the prospect has received a survey. |
| Favorite | Toggle to mark the prospect as a Favorite, which pins the record to the top of the listing page. |
Company Information
| Field | Description |
|---|---|
| Company Name | The prospect's company or organization name. Required — all prospects must be associated with a company. |
| Website | Official website address of the prospect's organization. |
| Employees (Number) | Total number of employees at the prospect's company. |
| Industry Type | The industry vertical the prospect's company falls under. |
| Annual Revenue | Annual business income of the prospect's company. |
| Phone – Corporate | Company phone number. |
| Phone – Fax | Company fax number. |
Competitor Description
| Field | Description |
|---|---|
| Competitor Name | Name of competitors in similar business lines and geographies. |
| Competitor Description | Organizational description of the competitor. |
| Competitor Strength | Characteristic traits that give the competitor an advantage. |
| Competitor Weakness | Weaknesses that can be exploited by the prospective organization. |
Additional Sections
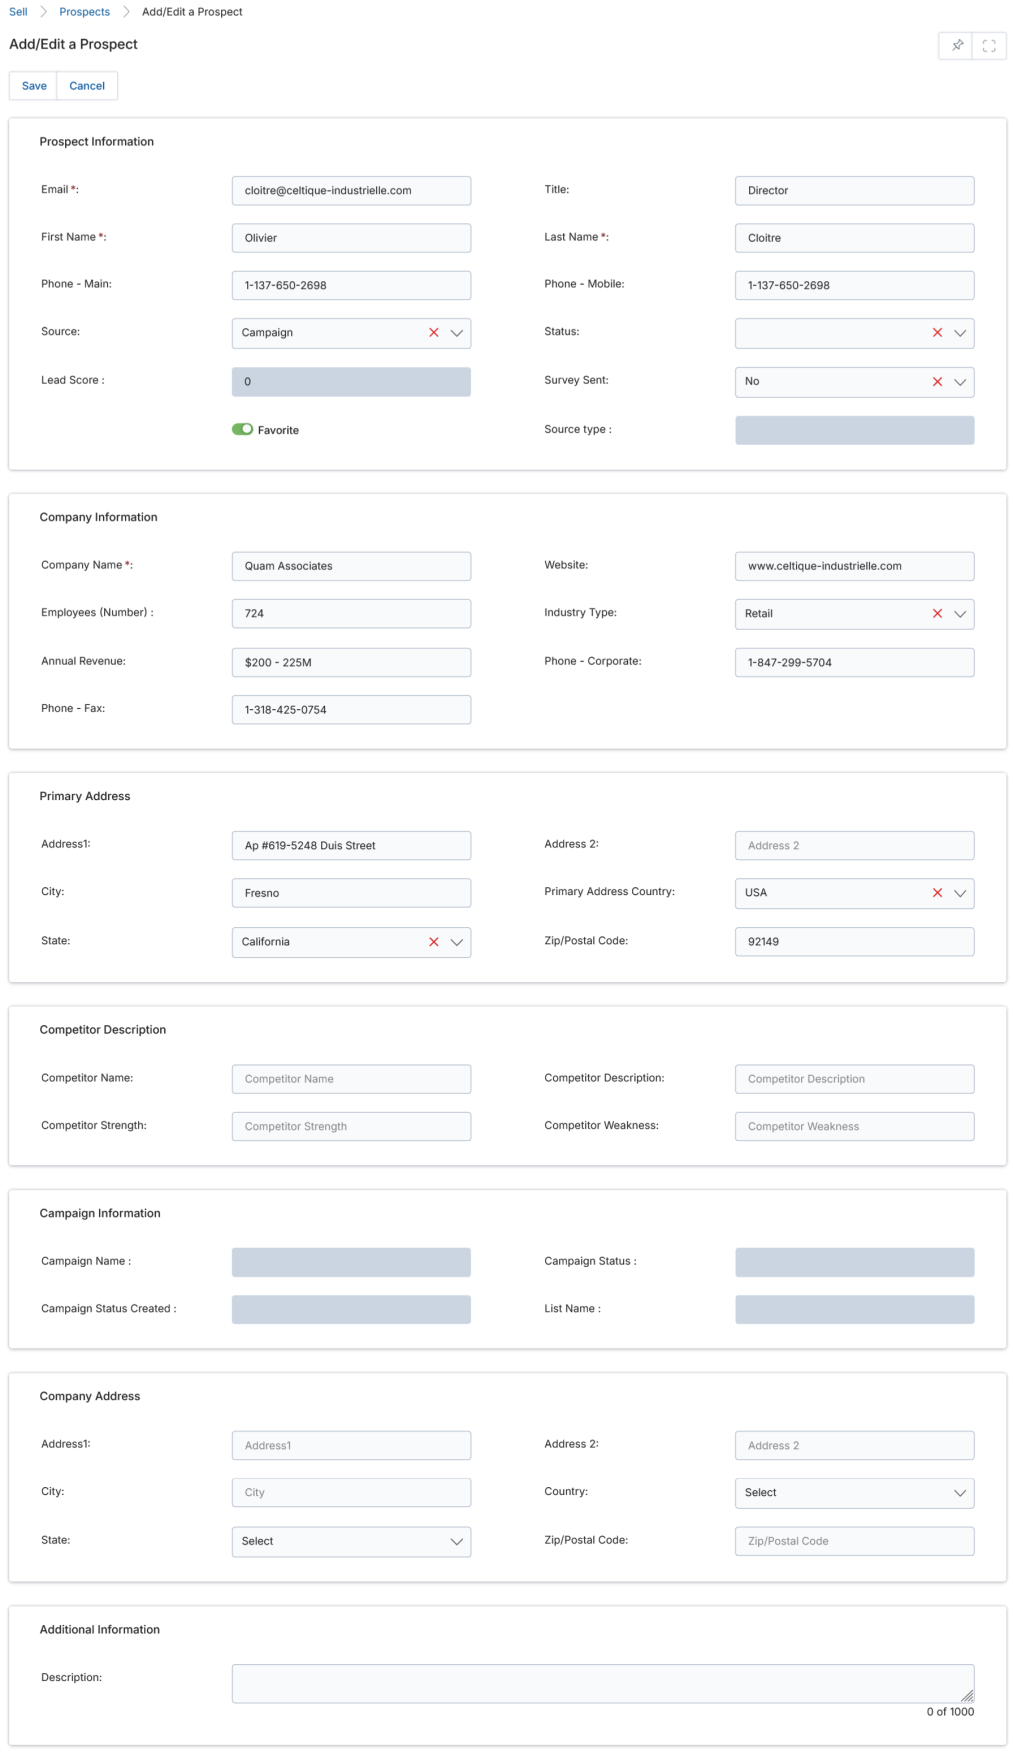
- Primary Address — Address1, Address2, City, State, Country, Zip/Postal Code for the prospect's location.
- Company Address — Same fields for the company's registered location.
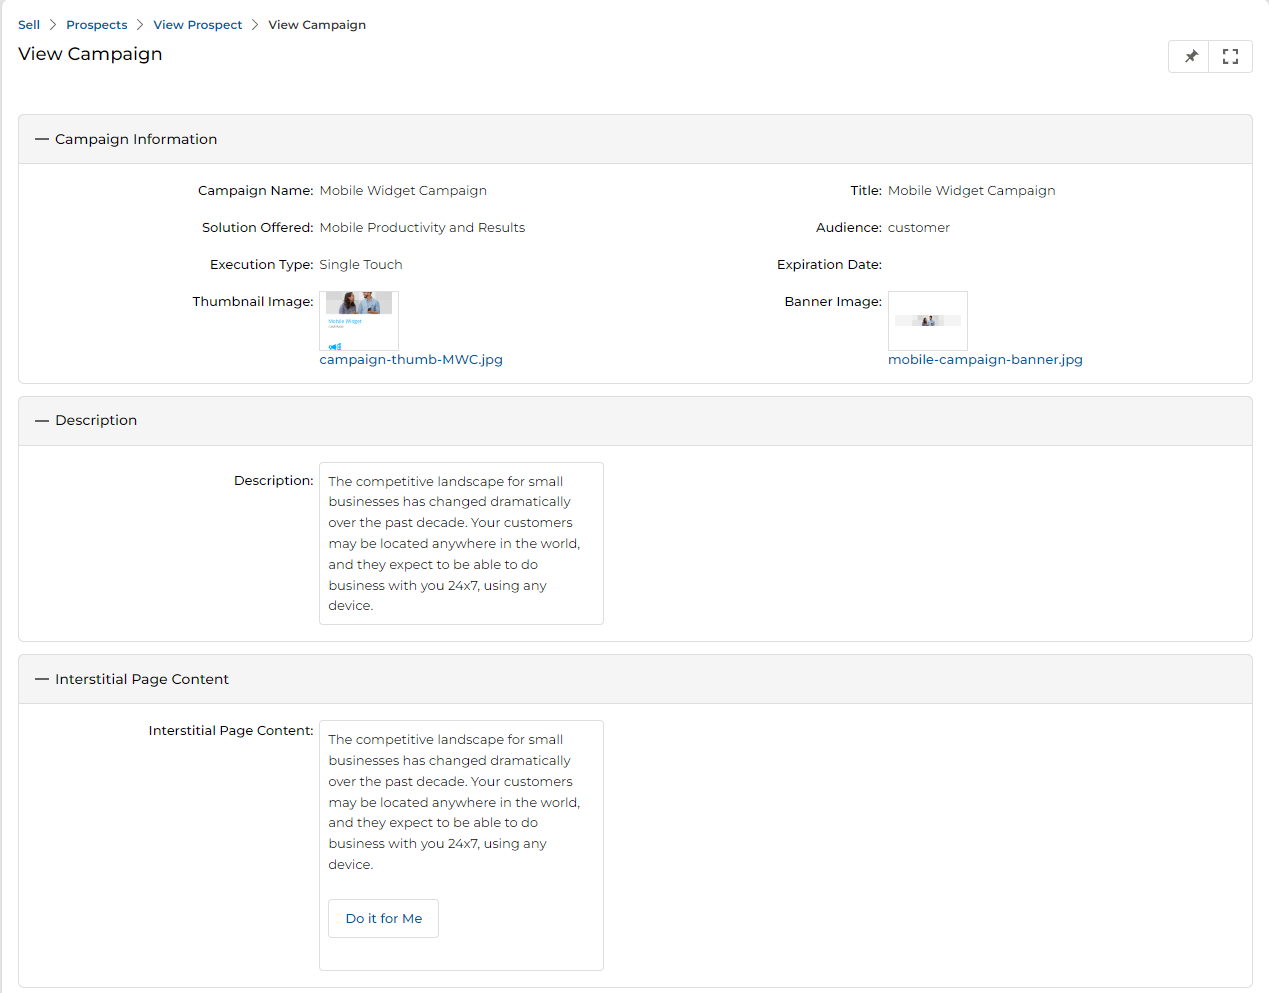
- Campaign Information — Auto-filled with the most recent campaign status (Campaign Name, Campaign Status, date created, and associated list name). The Campaign Status attribute uses value indicators: A=Registered, B=Clicked, C=Opened, etc.
- Additional Information — Free-text Description field for miscellaneous details about the prospect.
- Lead Score History — Related list showing all scoring points earned, the campaign, scoring rule, score value, and date.
- Campaign History — History of all campaigns that have marketed to this prospect and their engagement status.
- Lead Status History — Shows the historical engagement statuses (Accepted, Rejected, Assigned, etc.) with who edited the status and the timestamp.
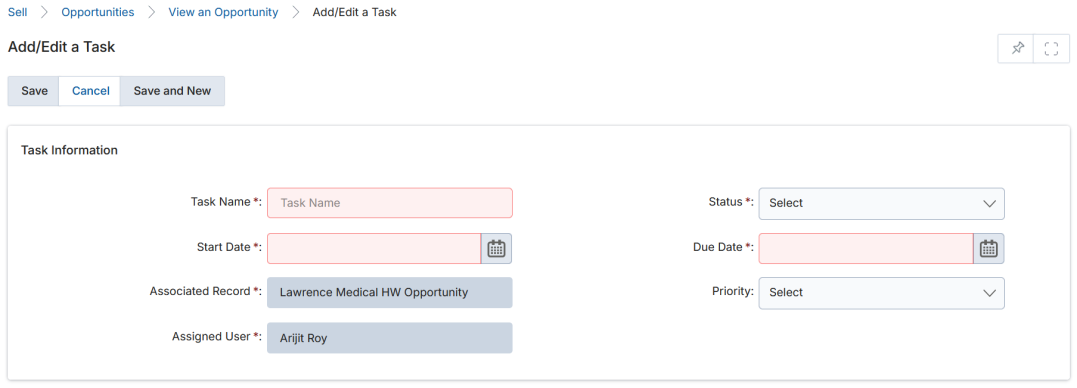
- Tasks — Action items against this prospect. Use Add to create tasks with task name, start date, due date, status, priority, and assignee.
- Notes — Notes capturing engagement history. Use Add to create a note with name, contents, and optional file attachment.
- Prospect Assignment History — History of which users or groups have been assigned visibility into this prospect record.
- My Community — Internal forum for posting messages and files in a conversation thread about this prospect.
Convert Prospect to Contact
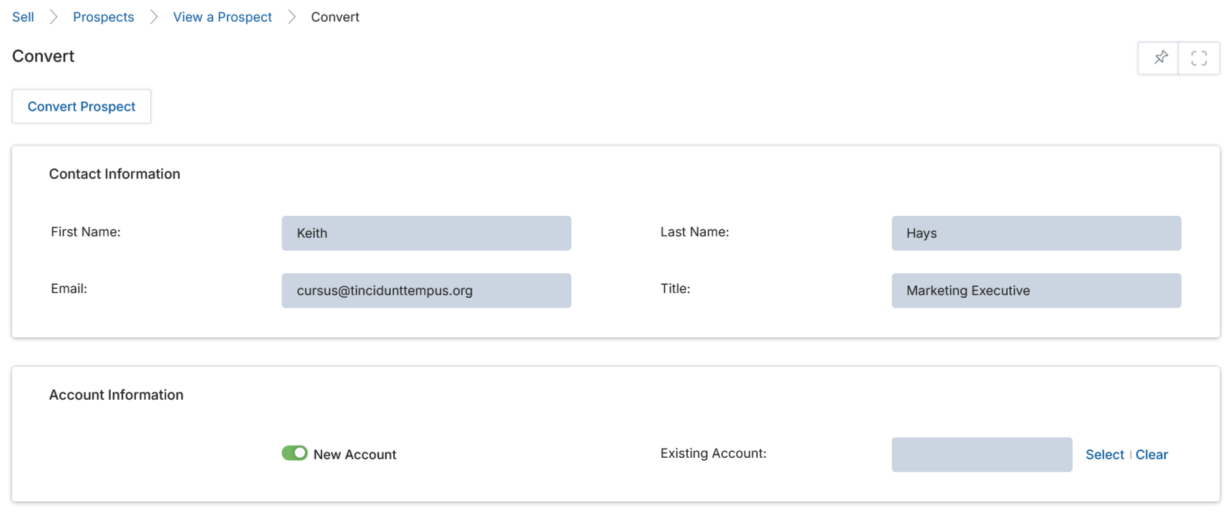
The Convert Prospect operation transforms a prospect into a contact record. From the prospect details page, click Convert Prospect.
- The prospect's Contact Information is auto-filled on the Convert page. You can edit the information before completing the conversion.
- For a New Account, check the New Account checkbox and enter the new account information. For an Existing Account, click Select to open the account picker and choose from the existing account list.
Doing a Search for Duplicate Prospects
From the View Prospect details page, click Duplicate Search. The search is based on the following attributes, which are auto-filled from the current record:
- Company — Searches by the company name associated with the prospect.
- First Name — Searches by the prospect's first name.
- Email — Searches by the prospect's email address.
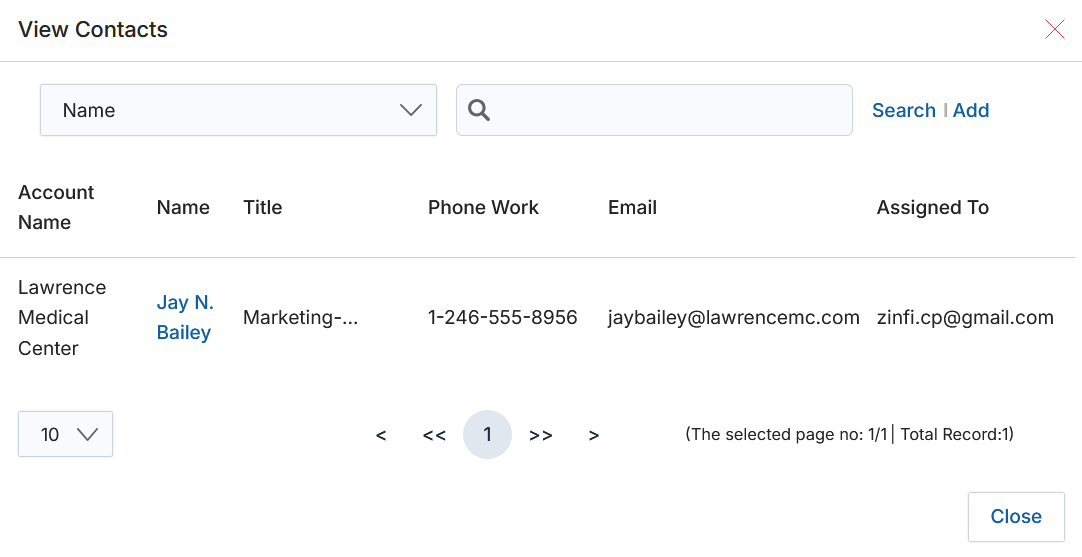
Matching contacts are displayed in the View Contacts section. The View Prospects section shows the duplicate prospects found, displaying Company Name, Name, Title, Email, Phone, Lead Score, and Email Verification.
Assigning a Prospect to a Partner or Group of Partners
- Select the prospect(s) you want to assign, then click Assign To.
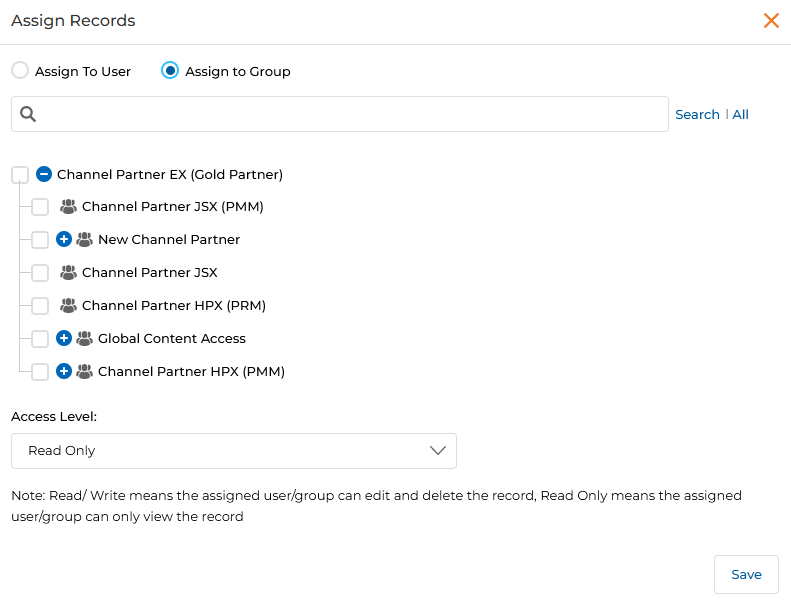
- In the Assign Records dialog, choose Assign to User or Assign to Group, then select the appropriate partner or group from the list.
- Set the Access Level: Read Only (view only) or Read/Write (can edit and delete).
- Click Save to confirm the assignment.
Child Partner Account Records Viewable by Parent Partner Account User
UPM supports hierarchical partner account relationships. Once configured in the administration settings, the Parent Account user can view and manage records from associated Child Accounts, while Child Account users see only their own records.
- Parent/Master Account user — Sees both Parent Prospects and Child Prospects created by Child Account users.
- Child Account user — Sees only their own Child Account prospects.
This hierarchical visibility can be enabled for Sales Prospects, Contracts, Opportunities, and other modules.
Add / Edit a Prospect
Click Add in the View Prospects action bar to create a new prospect, or click the pen icon next to an existing record to edit it. Fill in the mandatory fields (marked with a red asterisk) and click Save.

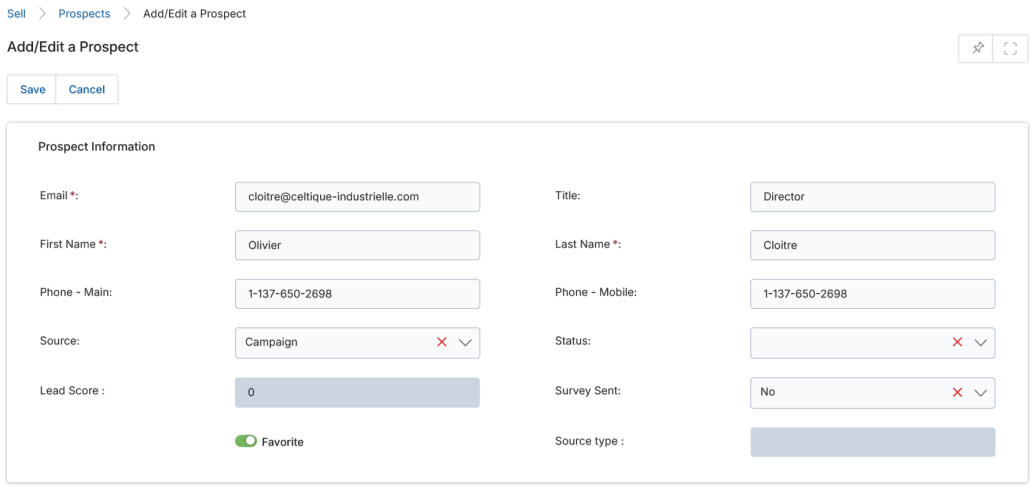
Prospect Information Fields
| Field | Description | Required |
|---|---|---|
| Email ID of the prospect. | Yes | |
| Title | Salutation or job title. | No |
| First Name | First name of the prospect. | Yes |
| Last Name | Last name of the prospect. | Yes |
| Phone – Main | Primary contact phone number. | No |
| Phone – Mobile | Mobile phone number. | No |
| Source | Origin of the prospect (Campaign, Cold Call, Conference, etc.). | No |
| Status | Engagement status (Accepted, Rejected, Assigned, Interested, etc.). | No |
| Lead Score | Auto-generated score from lead scoring rules. | System generated |
| Favorite | Toggle to pin this prospect to the top of the listing. | No |
Company Information Fields
| Field | Description | Required |
|---|---|---|
| Company | The prospect's organization name. Entering a new name will create a Company record. Required — all prospects must link to a company. | Yes |
| Website | Official website address of the organization. | No |
| Employees (Number) | Employee count of the organization. | No |
| Industry Type | Industry vertical. | No |
| Annual Revenue | Annual business income in monetary value. | No |
| Phone – Corporate | Company phone number. | No |
| Phone – Fax | Company fax number. | No |
Import a List of Prospects
To bulk-create prospect records, click Import on the View Prospects page. You will land on the View Imports page.
- Click Download Sample Data to download a sample Excel template for Prospects. The sample contains columns for the required fields only; add additional columns for optional fields as needed.
- Fill out the sample Excel file with your prospect data, then click Add to begin the upload.
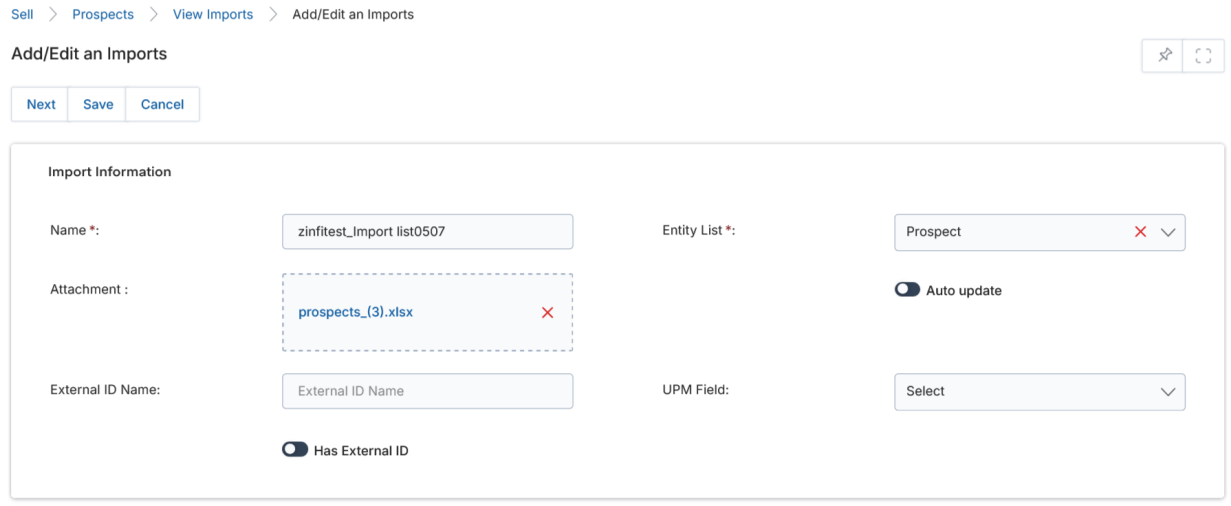
- On the Add/Edit an Imports page, fill in:
- Name — A label for this upload instance.
- Entity List — Select Prospect from the dropdown.
- Attachments — Browse and upload the filled Excel file.
- Auto Update — Enable to overwrite existing records matching by email address. Leave unchecked when creating new records.
- External ID Name — (Auto Update only) The column name in your Excel that maps to the system field.
- UPM Field — (Auto Update only) The corresponding system field to overwrite.
- Has External ID — (Auto Update only) Check if using an external identifier.
- Click Next to map Excel columns to UPM fields on the Select and Mapping Fields page.
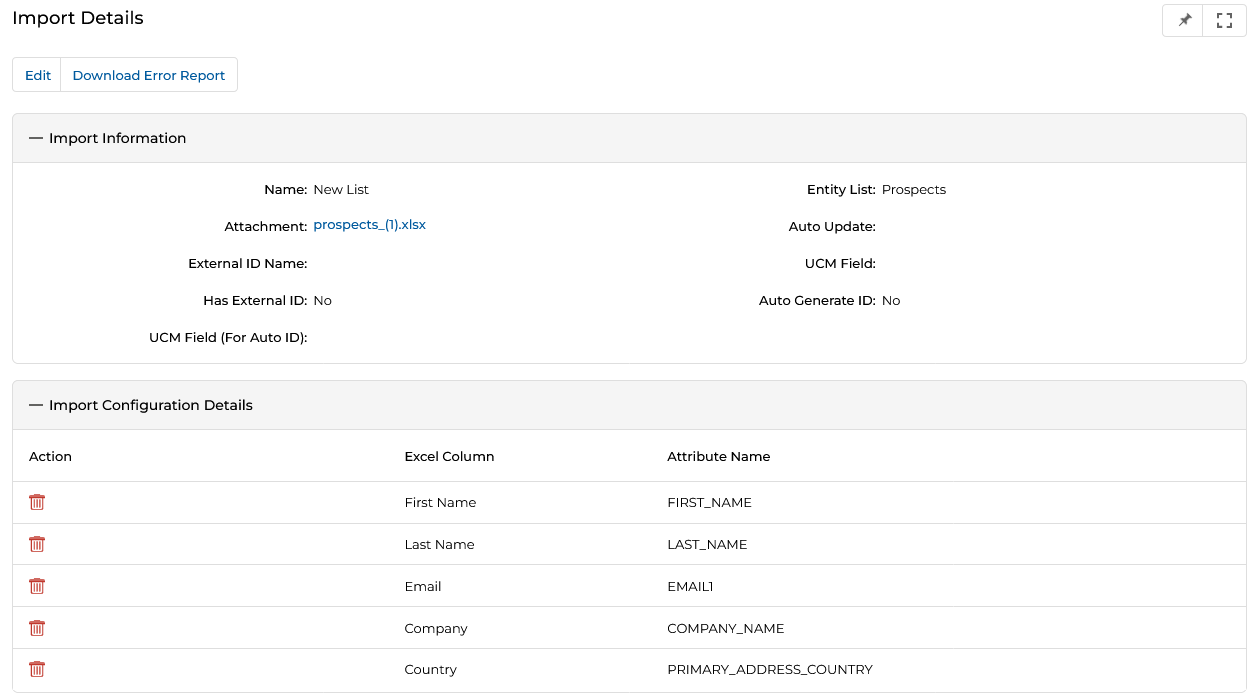
- Click Next again to complete the upload. The Import Details page shows configuration and field mapping summaries.
- Click Download Error Report to download an XLSX error report identifying any records that failed validation.
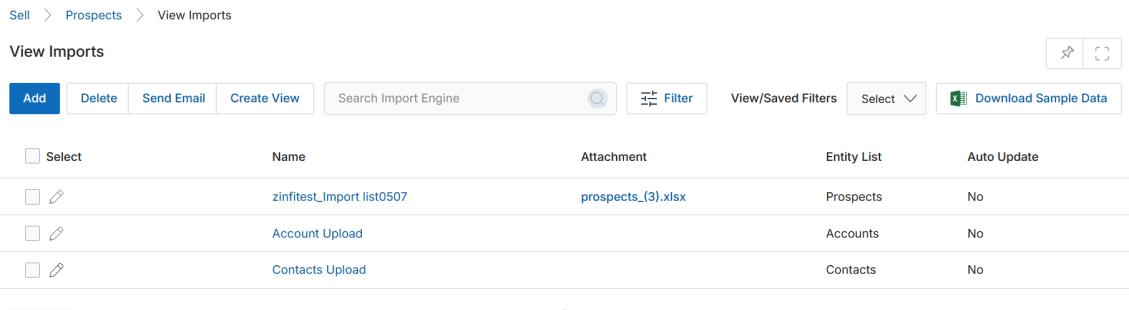
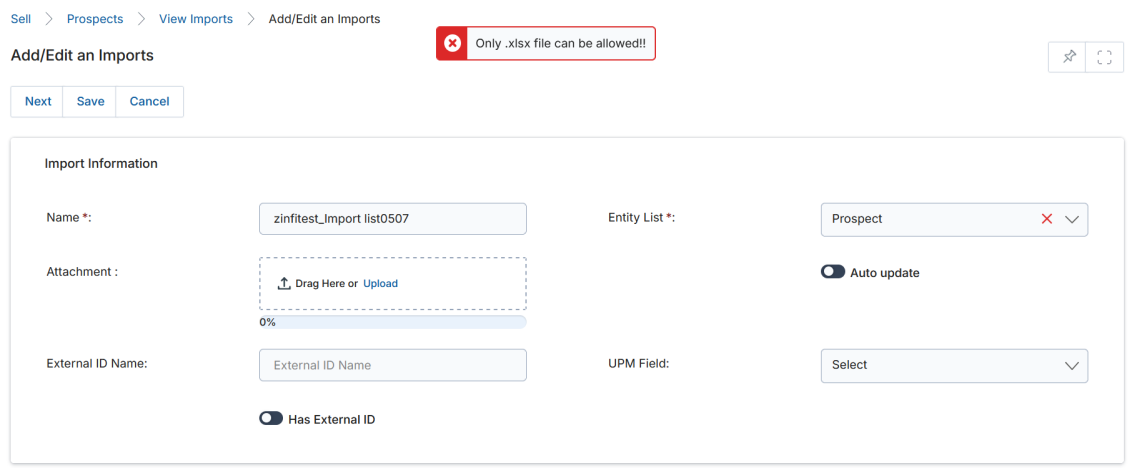
The Import Engine only accepts .xls or .xlsx files. Attempting to upload any other format will trigger an alert. All records in the import file are validated — rows with errors (such as an incorrect country name like "United States" instead of "USA") are logged and skipped, while valid rows are still processed successfully.
Import Engine — Record Assignment for Group/User
To assign imported prospect records to specific users or groups during the import, add two additional columns to your Excel file:
- RecordAssignTo — The name of the Group or the User ID (email) of the individual user.
- AccessType — Either Group or User, matching the RecordAssignTo value.
Companies
Navigate to Sell > Leads > Companies to access the Companies module. Company records are automatically created when you enter a Company Name on any Prospect record.
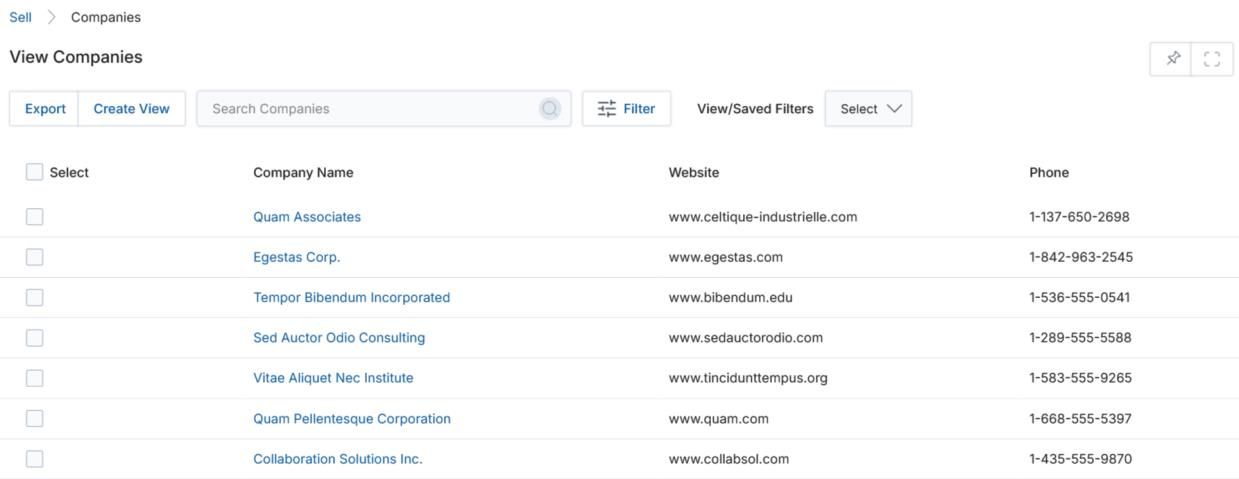
View Companies
The top action bar provides the following actions:
- Export — Exports records into CSV format (Selected Records or All within a range).
- Search — Opens a search pop-up to filter records.
- Clear Search — Clears the active search.
- Saved Searches — Shows saved searches. When selected, you can Edit or Delete the saved search name.
Click any linkable item (such as Company Name) in the grid to navigate to the details page.
View Company Details
Click the Name/Title of any Company listing to open its details page. The page contains the following sections:
Company Information
| Field | Description |
|---|---|
| Name | Name of the company. |
| Phone | Company phone number. |
| Phone – Fax | Company fax number. |
| Employees (Number) | Number of employees at this company. |
| Industry | Industry vertical of this company. |
| Annual Revenue | Estimated annual revenue of this company. |
| Website | Website URL of this company. |
Company Address
| Field | Description |
|---|---|
| Address 1 | Primary address line. |
| Address 2 | Secondary address line. |
| Country | Country of the company. |
| State | State of the company's location. |
| City | City of the company. |
| Zip/Postal Code | Postal code. |
- Additional Information — A short Description of the company.
- Prospects — Lists all Prospect records (reps) at this organization. Click Add to create new prospect records under this company.
Contacts
Navigate to Sell > Leads > Contacts to access the Contacts module.
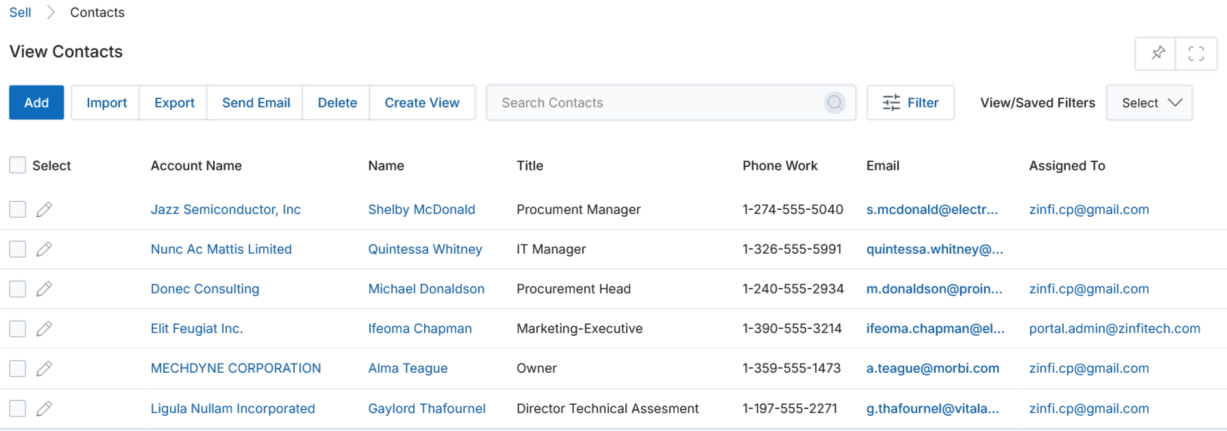
View Contacts
The top action bar provides the following actions:
- Add — Opens a new page to add a contact.
- Delete — Deletes the selected contact(s).
- Send Email — Sends email to a specific distribution list.
- Import — Imports contacts from a pre-formatted Excel sheet.
- Export — Exports records into CSV format.
- Search — Searches for a specific contact. Supports filtering by Campaign Type, Campaign Name, and Campaign Status, plus search operators: equals to, contains, begins with, ends with, and not equal to.
- Clear Search — Clears the active search.
- Saved Searches — Shows saved searches.
In the grid, click Edit (pen icon) to edit a record, or click Account Name / Name to navigate to the details page.
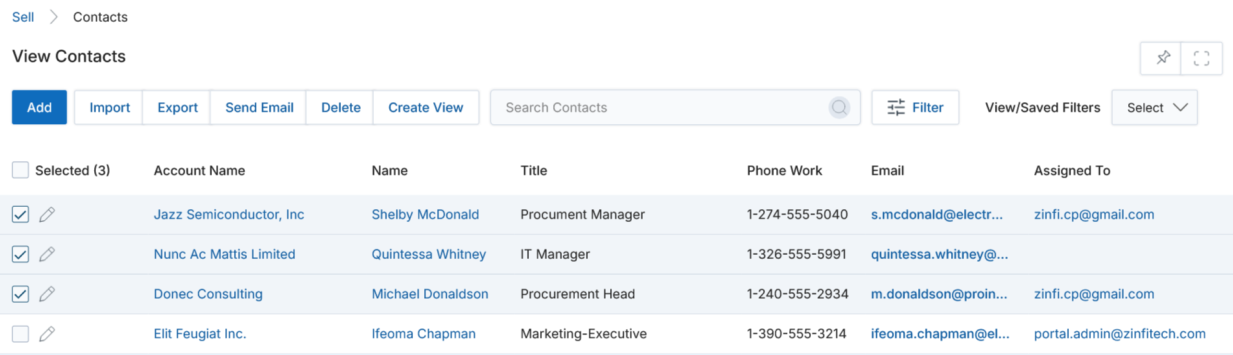
Sending Email to a List of Contacts
- Select the contact(s) and click Send Email.
- Select the contact list(s) from the Category or click Add a List to create a new one, then click Add to an Existing List.
- You will be moved to the contact's email section to compose and send the email blast.
Searching Contacts
- Click Search to open the filter window.
- Enter search parameters by Account Name, Email, and Lead Source, then click Apply. Use Save Filter to save the configuration.
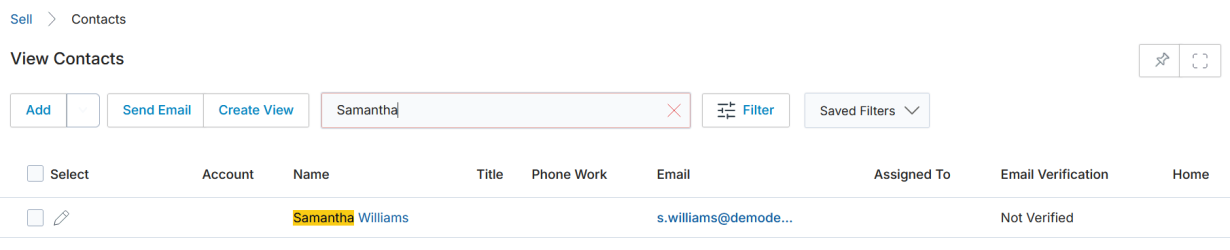
Predictive Search
Predictive Search uses AI and algorithms to guess what you are looking for and provides real-time suggestions as you type. The search activates after three or more characters are entered.
- After 1–2 characters, the system displays a prompt to type additional characters.
- After 3+ characters, the system automatically searches and displays matching records.
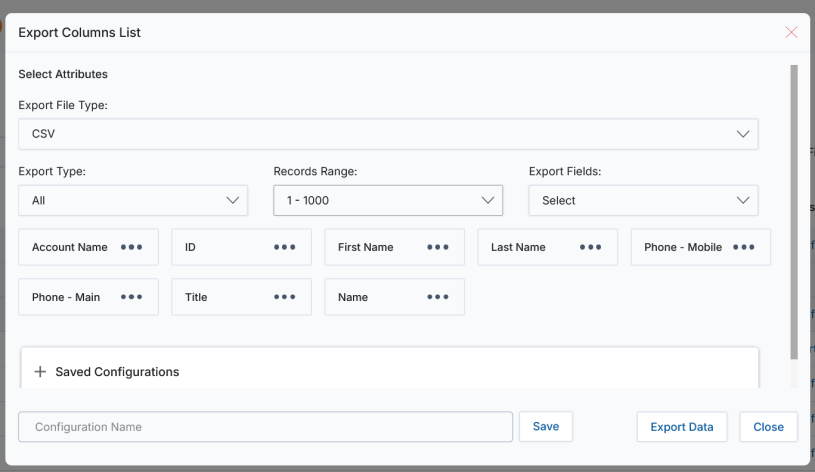
Export Contacts
Pre-select records with the checkbox and click Export, or choose your export range in the tool:
- Selected Records — Exports only the checked rows with your choice of fields.
- All — Choose from the Records Range dropdown (increments of 100 based on available records). Click Export Data to download the Excel sheet.
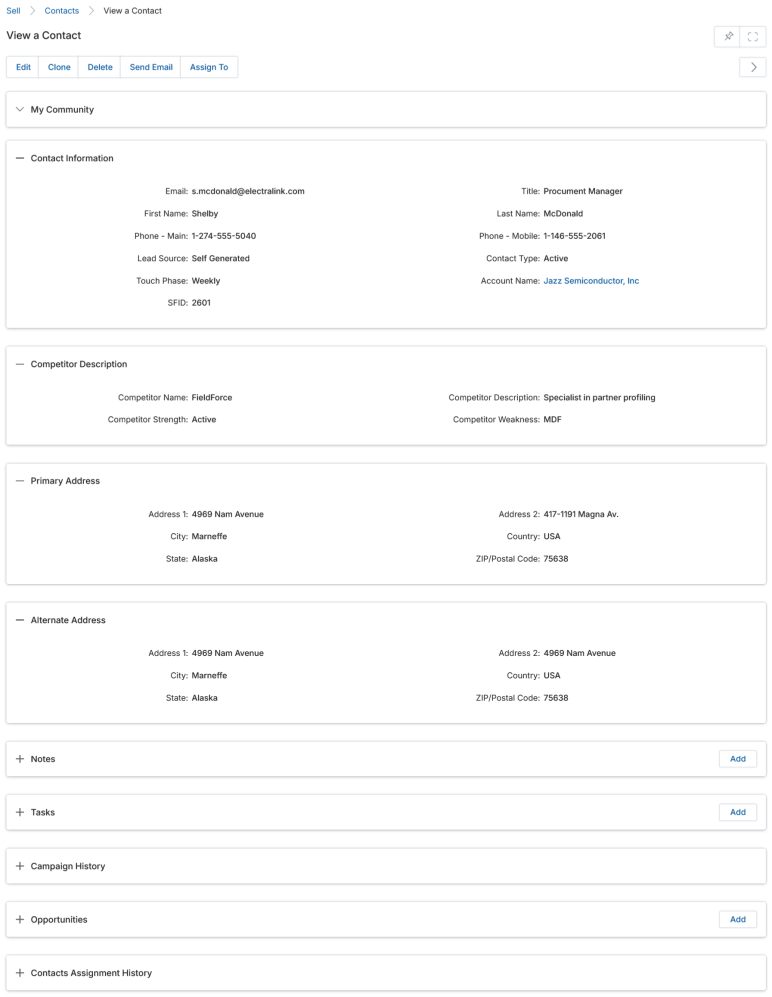
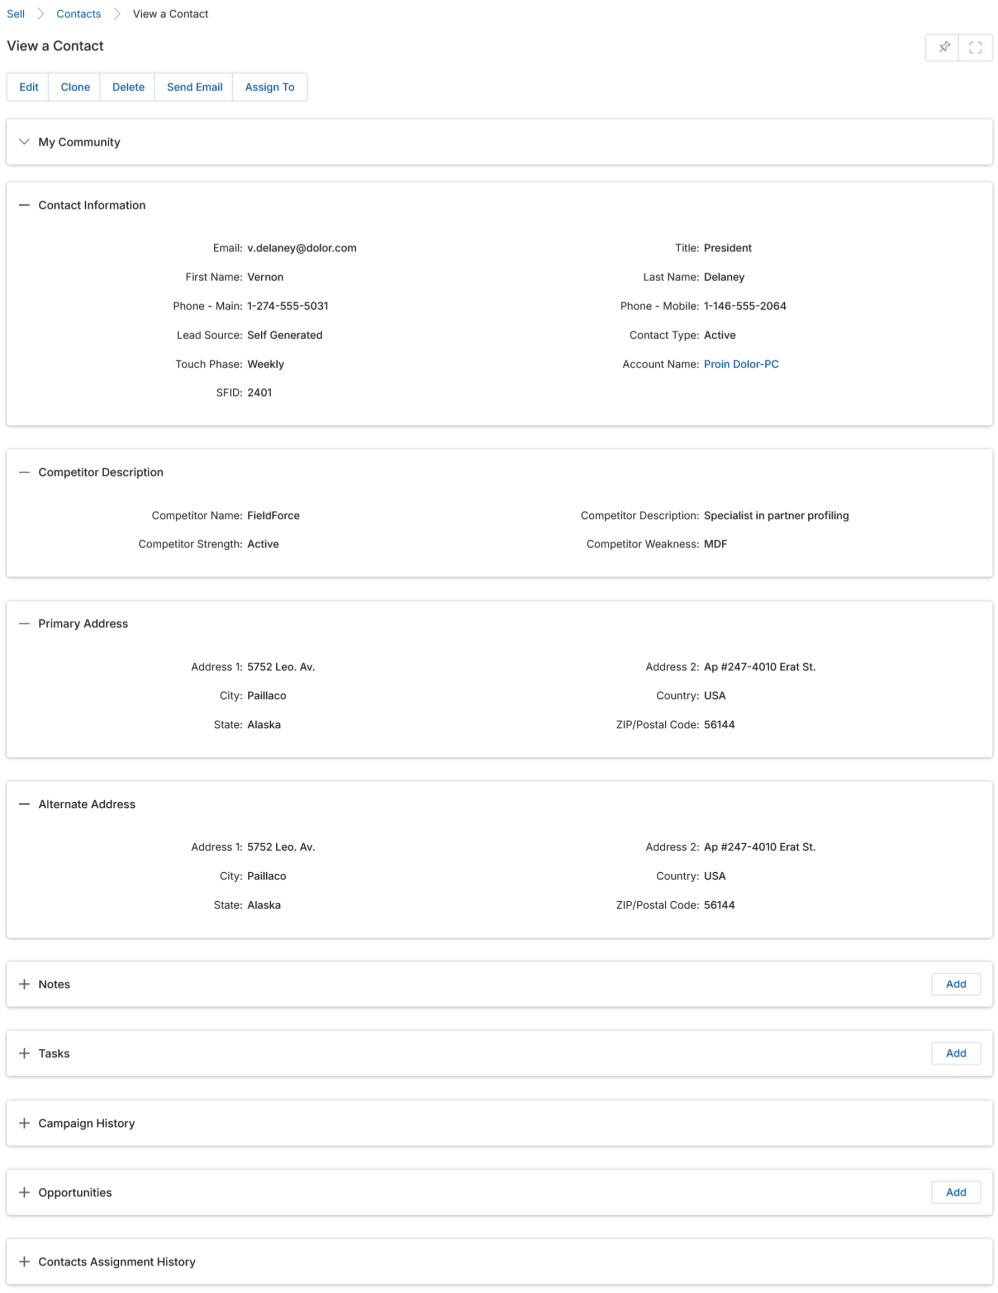
View Contact Details
Click the contact's Name on the View Contacts page to open the details page. The top action bar provides: Edit, Duplicate (clone), Delete, Send Mail, and Assign To.
The details page contains the following sections:
Contact Information
| Field | Description |
|---|---|
| Email ID of the contact. | |
| Title | Job title of the contact. |
| First Name / Last Name | Contact's full name. |
| Phone – Main / Mobile | Contact phone numbers. |
| Lead Source | Source of the contact's origin (Campaign, Cold Call, Conference, etc.). |
| Contact Type | Type of contact as per the business process. |
| Touch Phase | If part of a Multi-Touch Campaign, the current phase in the campaign flow. |
| Account Name | The account linked to this contact (clickable). |
- Competitor Description — Competitor Name, Description, Strength, and Weakness fields.
- Primary Address / Alternate Address — Address, City, State, Country, and Zip/Postal Code for both locations.
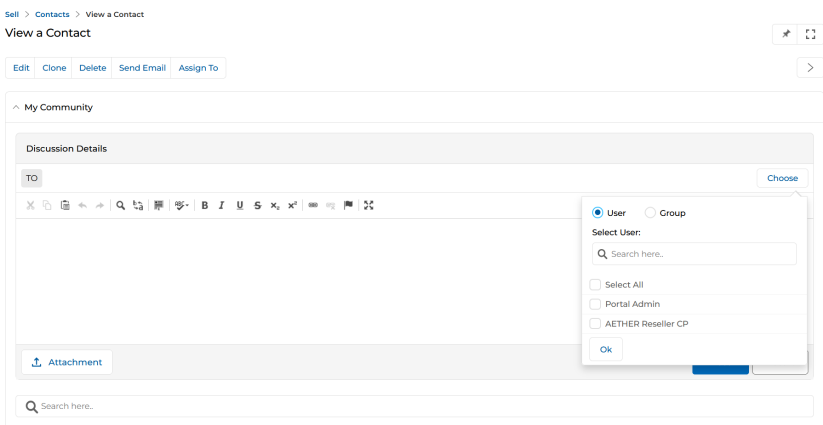
- My Community — Internal forum for posting messages and files. Use the To area to address posts to specific Users or Groups.
- Notes — Related notes. Use Add to create notes with name, contents, and file attachment.
- Tasks — Action items linked to this contact's channel management journey.
- Campaign History — History of all campaigns involving this contact from creation to the current date.
- Opportunities — Existing opportunities associated with this contact.
- Contacts Assignment History — Historical assignment record. Click the globe icon beside a record to withdraw an assignment (only the assigning user can do this).
Add / Edit a Contact
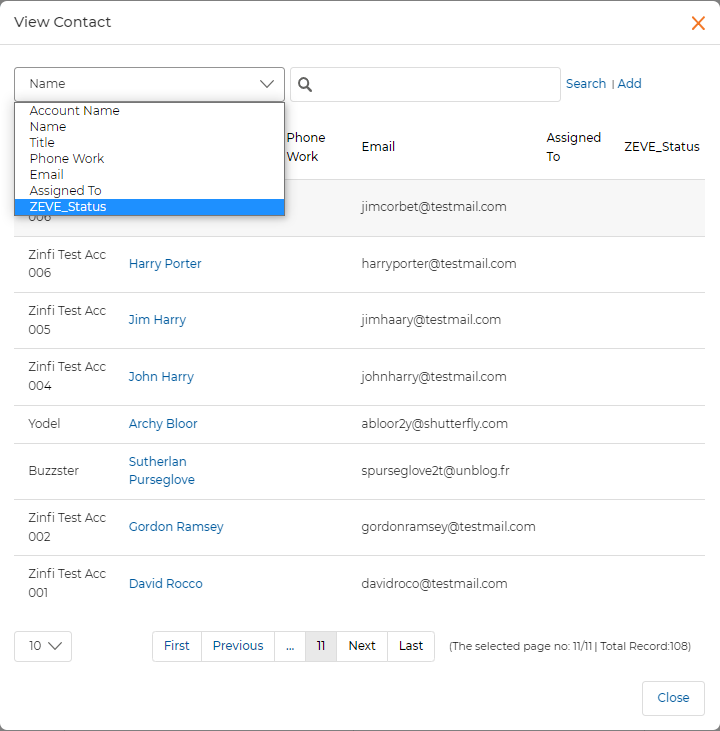
Click Add on the View Contacts page. The Add/Edit a Contact page contains the same sections as the Contact details page. Fill in the mandatory fields and click Save.
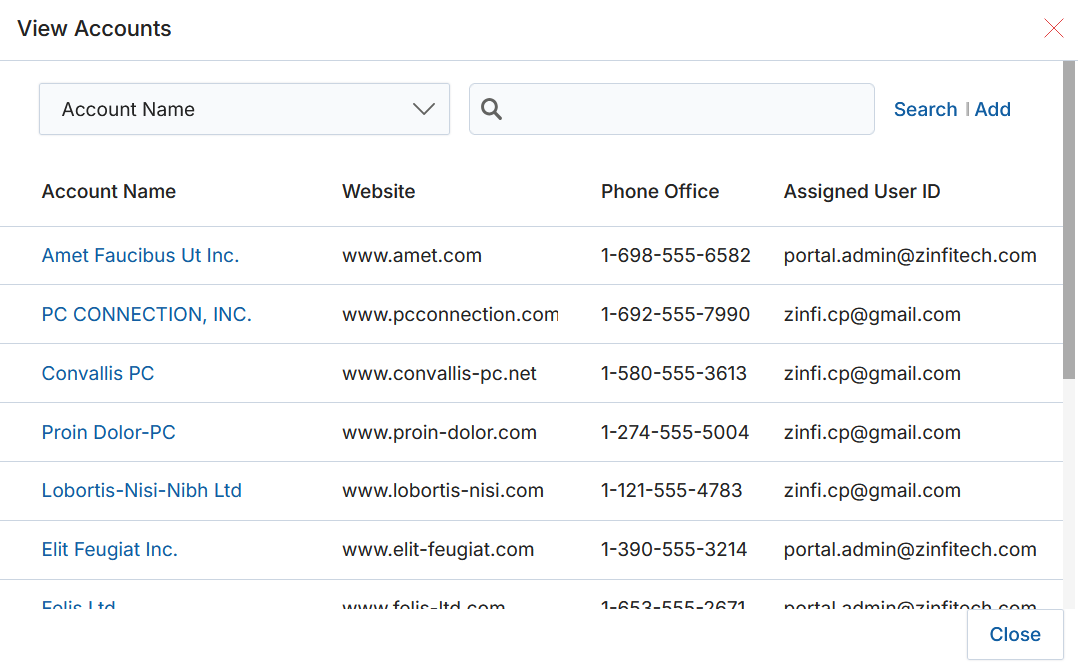
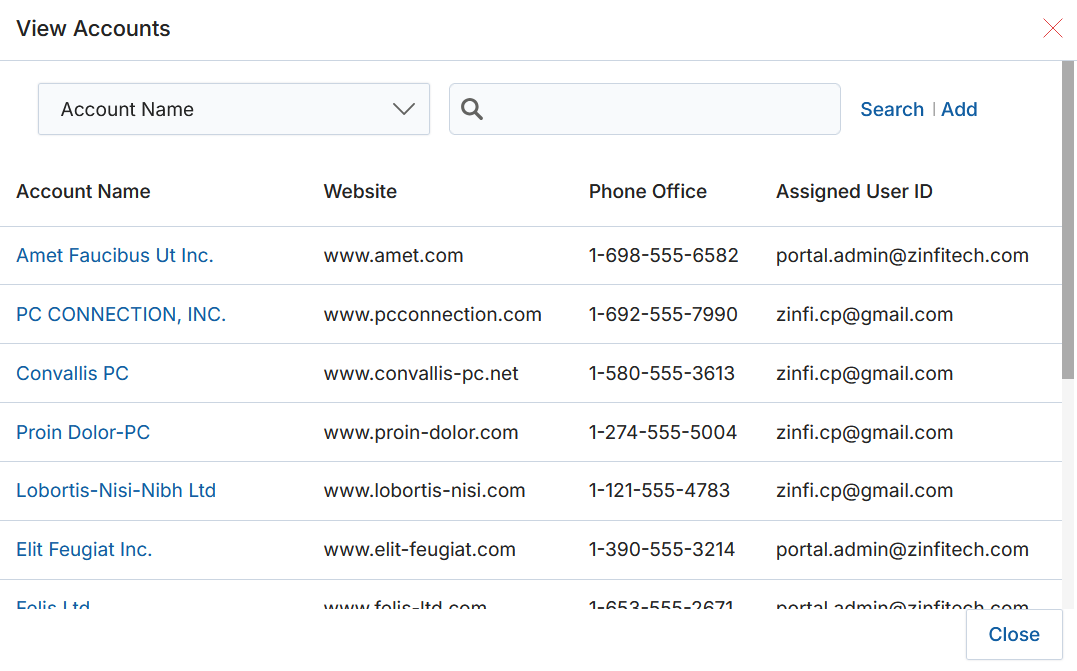
The Account Name field requires clicking Select to open a popup where accounts can be searched by Account Name, Website, Phone Office, or Assigned User ID.
To bulk-create contact records, use the Import button on the View Contacts page. The process follows the same steps as importing prospects — download the sample file, fill it out, upload, map columns, and review the error report. Refer to the Import a List section under Prospects for the detailed procedure.
Accounts
Navigate to Sell > Leads > Accounts to access the Accounts module.
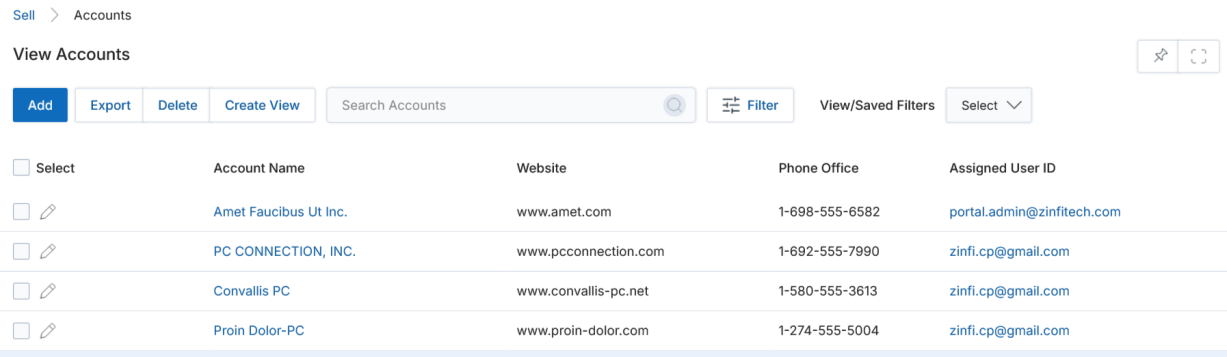
View Accounts
The top action bar provides: Add, Delete, Export (Selected Records or All), Search, Clear Search, and Saved Searches (with Edit and Delete options for saved searches). Click the Edit (pen icon) to edit, or click Account Name to view details.

Searching for an Account
Click Search to open the filter window. Available search fields include Account Name, Annual Revenue, Industry, Phone Office, and Website. Click Apply to run the search.
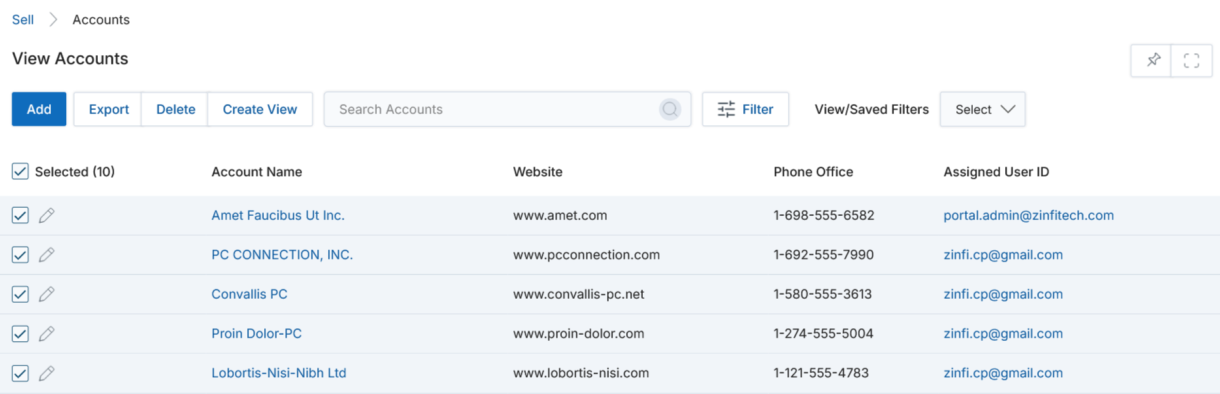
Export Accounts
Pre-select records and click Export, or choose your export range (Selected Records or All with Record Range). Mark the fields to include and click Export Data to download the Excel sheet.
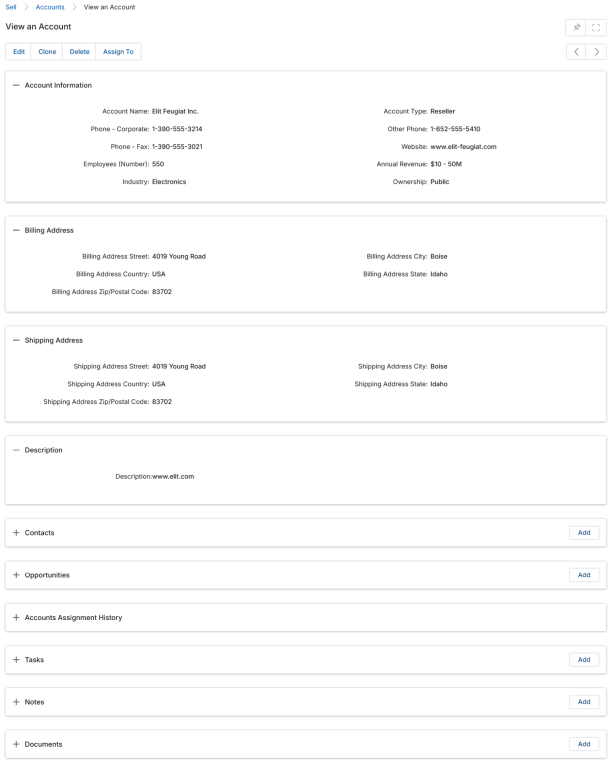
View Account Details
Click the Account Name to open its details page. The top action bar provides: Edit, Clone, Delete, and Assign To.
Account Information
| Field | Description |
|---|---|
| Account Name | Business name of the account. |
| Account Type | Type of account (OEM, Distributor, Reseller, Alliance). |
| Phone – Corporate | Primary contact phone number for the account. |
| Other Phone | Alternative contact phone number. |
| Phone – Fax | Fax contact number. |
| Website | Official website address. |
| Employees (Number) | Employee count of the account organization. |
| Annual Revenue | Annual business income in monetary value. |
| Industry | Industry vertical of the account. |
| Ownership | Ownership name of the account. |
Billing Address
Billing Address Street, City, Country, State, and Zip/Postal Code — used for communicating billing details.
Shipping Address
Shipping Address Street, City, Country, State, and Zip/Postal Code — used for shipping physical assets.
The page also includes related lists:
- Contacts — Related contacts to this account. Use Add, pen icon (edit), or trash icon (delete).
- Opportunities — Related opportunities. Supports Add, edit, delete, and drill-down to details.
- Accounts Assignment History — Click the globe icon to withdraw an assignment (only the assigning user).
- Tasks — Action items associated with the account.
- Notes — Notes capturing account engagement history.
- Documents — Related documents. Supports Add, edit, and delete.
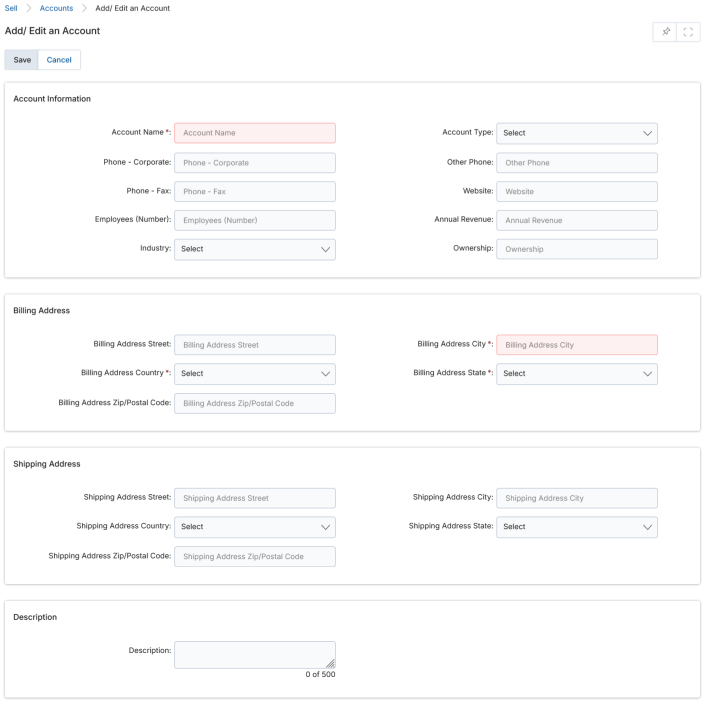
Add / Edit an Account
Click Add on the View Accounts page. Fill in Account Information (Name and Billing Address City are required), Billing Address, Shipping Address, and Description fields, then click Save.
Opportunities
Navigate to Sell > Leads > Opportunities to access the Opportunities module.
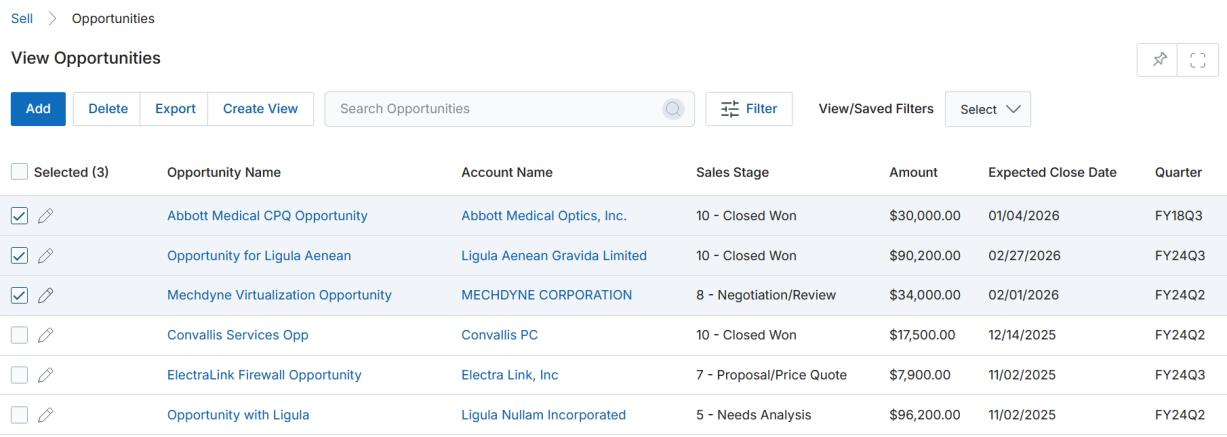
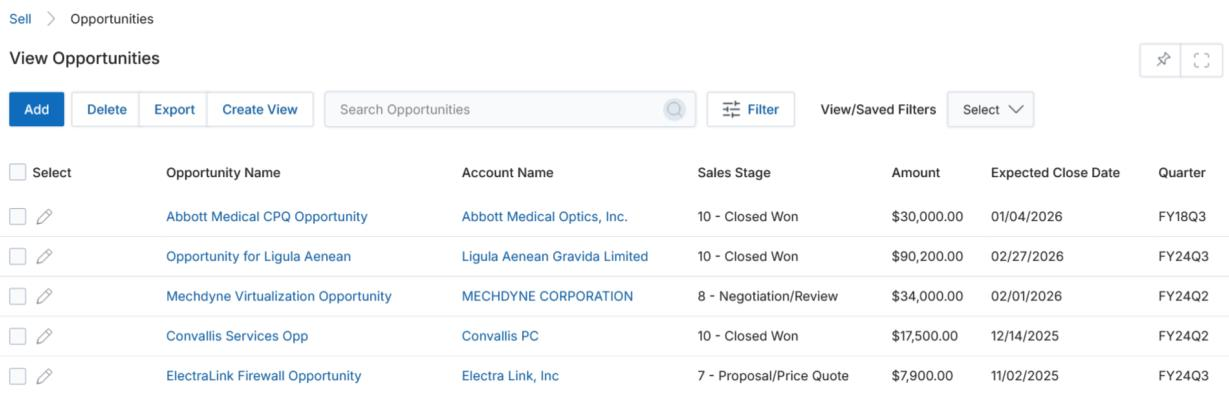
View Existing Opportunities
The top action bar provides: Add, Delete, Export (Selected Records or All), Search, Clear Search, and Saved Searches. Click Name to go to the opportunity details page; click Account Name to go to the account's details page.
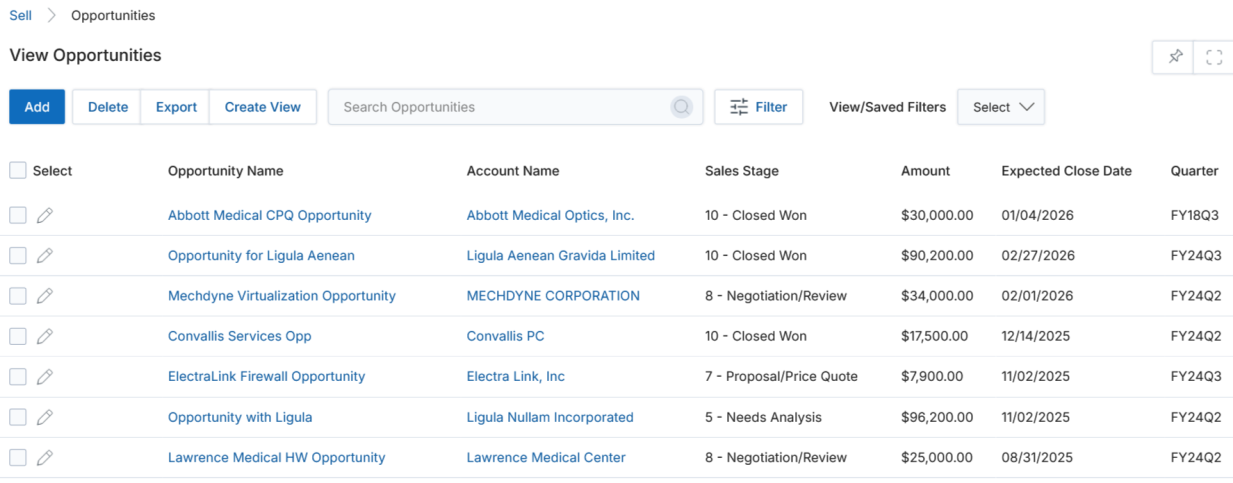
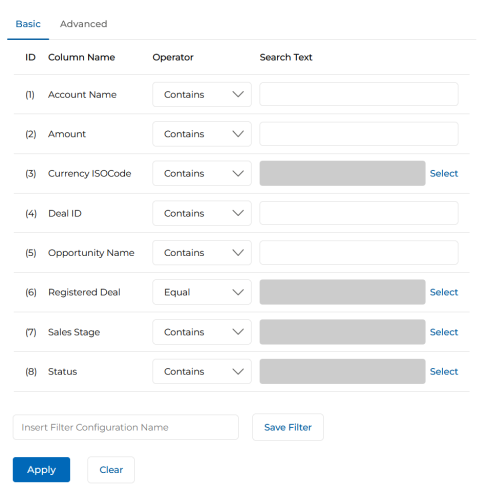
Searching and Exporting Opportunities
The Search filter supports: Account Name, Amount, Currency ISO Code, Deal ID, Opportunity Name, Registered Deal, Sales Stage, and Status. Export follows the same pattern as other modules — pre-select rows or choose All with a record range, mark fields, and click Export Data.
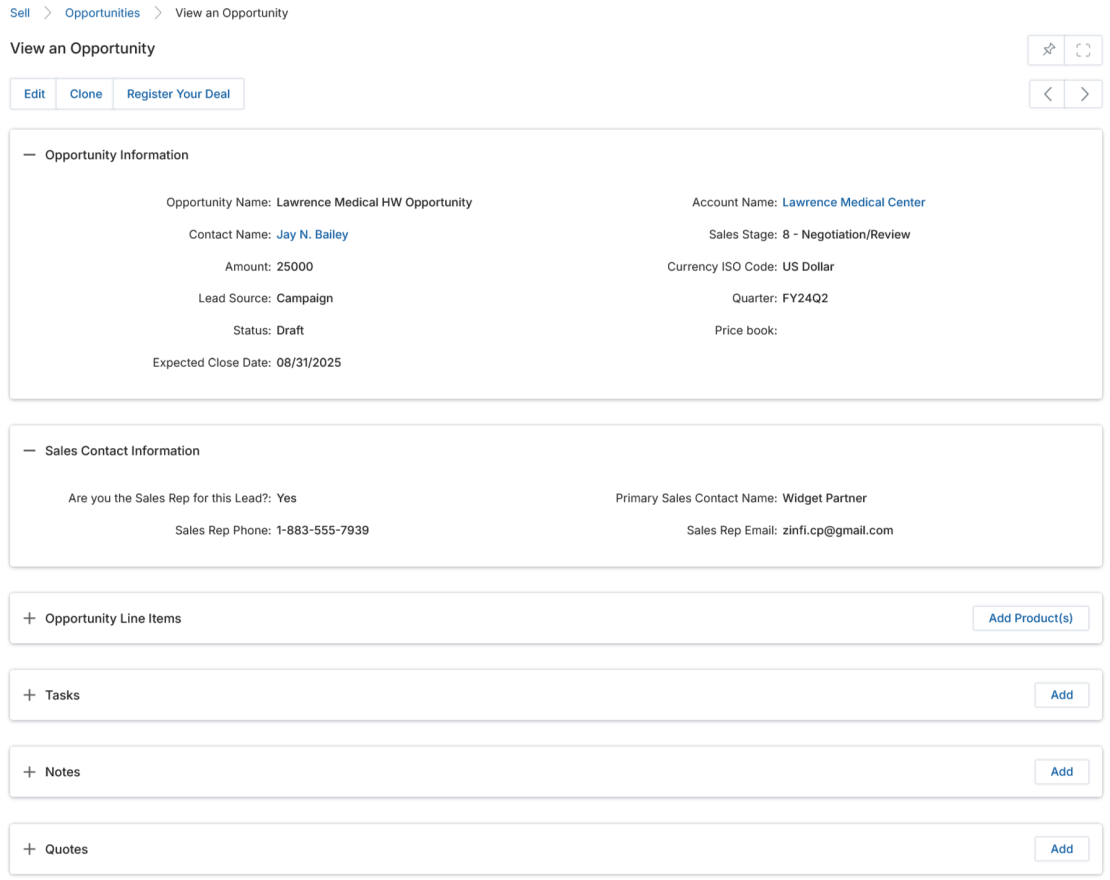
View Opportunity Details or Edit an Existing Opportunity
Click the Opportunity Name to open the details page. The top action bar provides: Edit, Clone, and Register Your Deal.
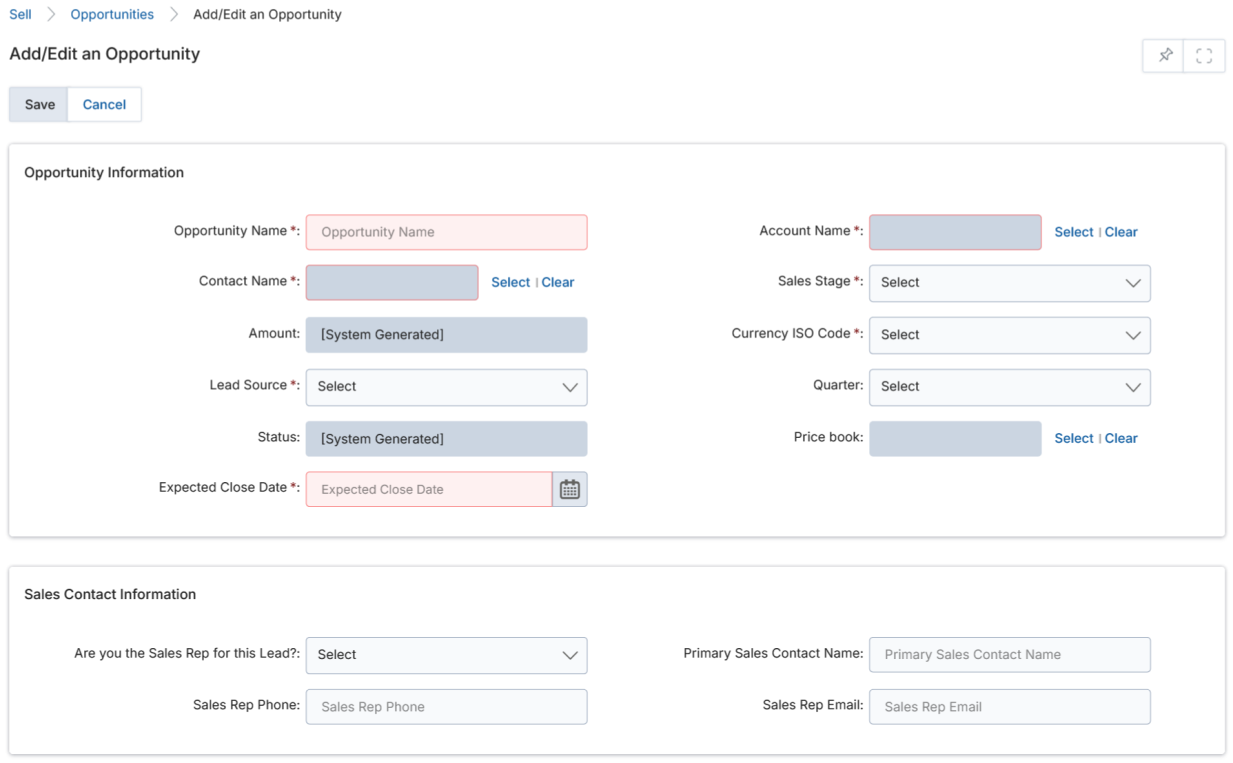
Opportunity Information
| Field | Description |
|---|---|
| Opportunity Name | Name of the opportunity. |
| Account Name | Account associated with the opportunity (selected via popup). |
| Contact Name | Contact associated with the opportunity (selected via popup). |
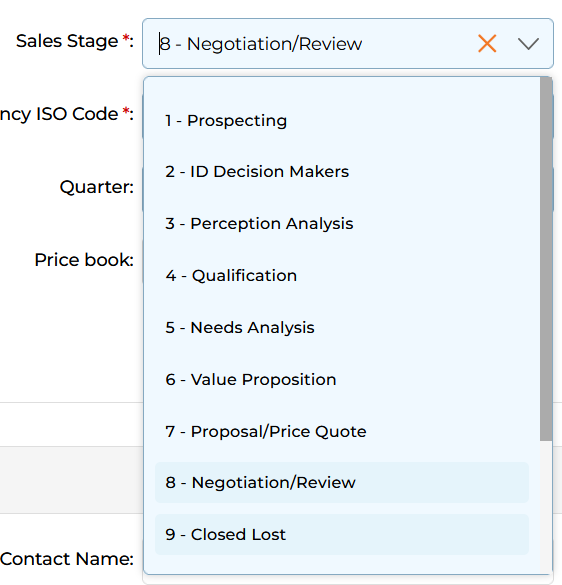
| Sales Stage | Current stage: 1-Prospecting, 2-ID Decision Makers, 3-Perception Analysis, 4-Qualification, 5-Needs Analysis, 6-Value Proposition, 7-Proposal/Price Quote, 8-Negotiation/Review, 9-Closed Lost, 10-Closed Won. |
| Amount | Auto-populated from the total Sales Price of all Opportunity Line Items. |
| Currency ISO Code | Currency for the amount (US Dollar, Pound Sterling, Australian Dollar, or Indian Rupee). |
| Lead Source | Source of the opportunity (Cold Call, Existing Customer, Self Generated, Employee, Partner, etc.). |
| Quarter | Fiscal quarter on which the opportunity was created. |
| Status | System-generated current status of the opportunity. |
| Price Book | Price book associated with this opportunity (selected via popup). If registered as a deal, the Deal ID is displayed. |
| Expected Close Date | Anticipated closure date for the opportunity. |
Sales Contact Information
| Field | Description |
|---|---|
| Are you the Sales Rep for this Lead? | Yes/No indicator for sales contact. |
| Primary Sales Contact Name | Name of the primary sales contact for the opportunity. |
| Sales Rep Phone | Phone number of the sales representative. |
| Sales Rep Email | Email address of the sales representative. |
Opportunity Related Lists
- Opportunity Line Items — Products or services being sold. The total of all line items auto-populates the Amount field.
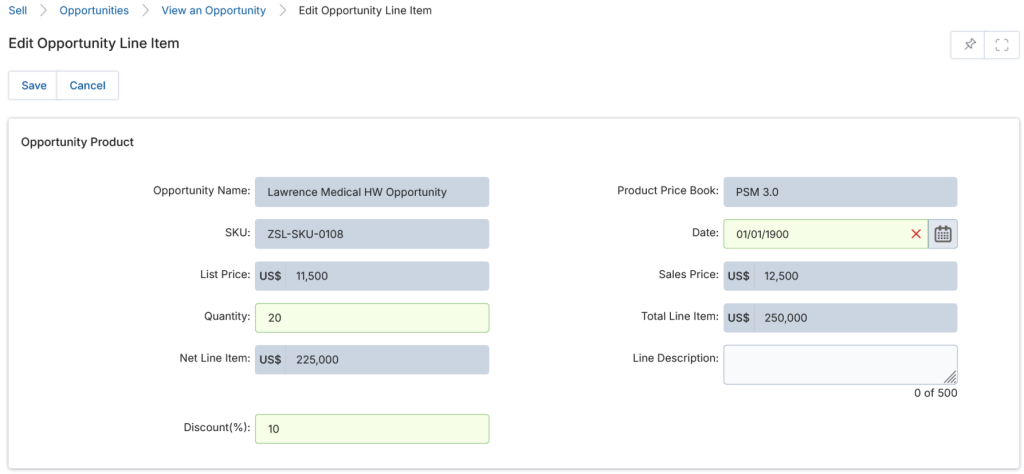
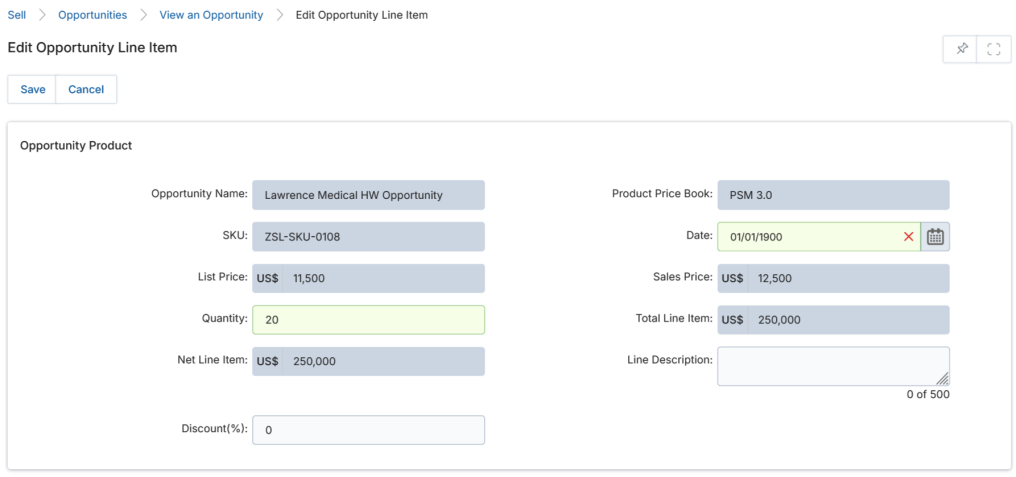
- Click Add Product(s) to add a new product from the associated Price Book.
- Click the pen icon to edit a line item. You can adjust Quantity and Discount — the Total Line Item and Net Line Item update automatically.
- Example: Quantity=10, Sales Price=$12,500 → Total Line Item=$125,000. Add 10% discount → Net Line Item=$112,500.
- Tasks — Action items related to this opportunity.
- Notes — Notes related to this opportunity.
- Quotes — Quotations associated with this opportunity. Supports Add, edit, delete, and drill-down.

Add / Create a New Opportunity
Click Add on the View Opportunities page. Fill in the Opportunity Information and Sales Contact Information fields (all fields marked with asterisks are required), then click Save. The new opportunity appears at the top of the View Opportunities list. Click the name to open the record and add Opportunity Line Items, Tasks, Notes, and Quotes from the related lists.
Products
Navigate to Sell > Leads > Products to browse the product catalog. The Products module is read-only for partners — products are configured by the vendor administrator.

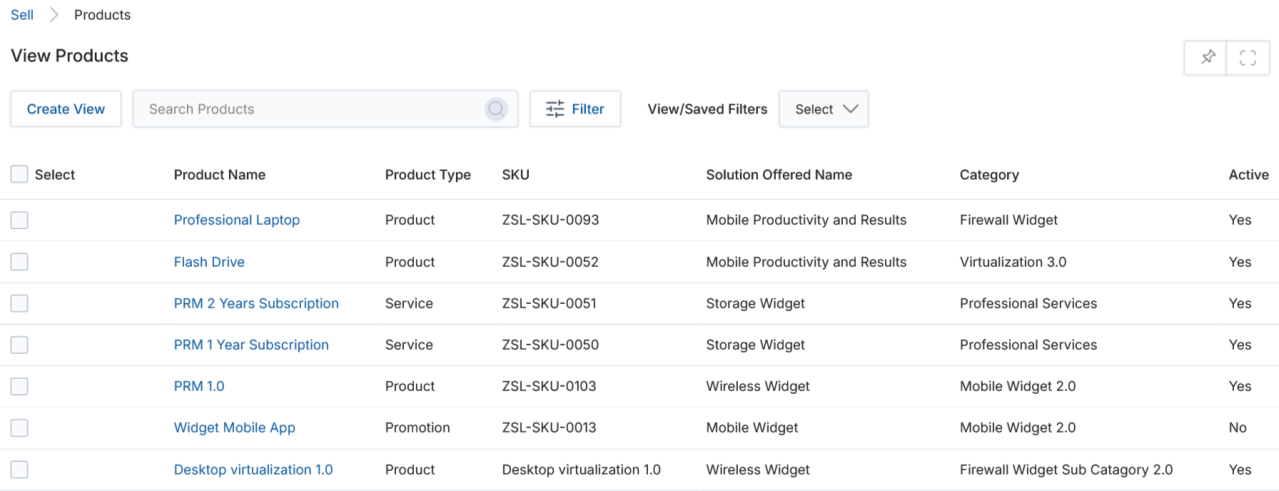
View Products
The top action bar supports Search, Clear Search, and Saved Searches. Click any linkable item in the grid to navigate to its details page.
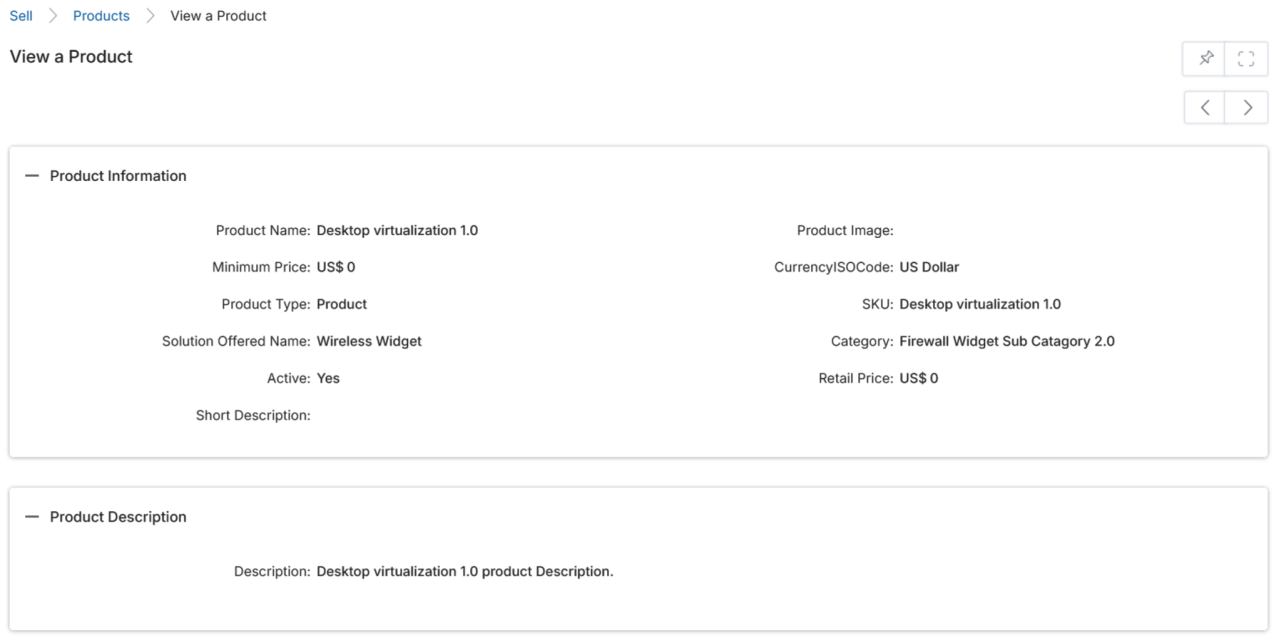
View Product Details
Click the Name/Title of a product listing to open its details page. The page contains two sections:
Product Information
| Field | Description |
|---|---|
| Product Name | Display name of the product. |
| Product Image | Product image, if uploaded. |
| Minimum Price | Minimum allowed price for the product. |
| Currency | Currency ISO code (Australian Dollar, Indian Rupee, Pound Sterling, US Dollar). |
| Product Type | Type of product: Product, Promotion, or Service. |
| SKU | Stock Keeping Unit identifier. |
| Solution Offered Name | Name of the solution offered through this product. |
| Category | Product category. |
| Active | Current availability status (Yes/No). |
| Retail Price | Standard retail price of the product. |
| Short Description | Brief description of the product category. |
Product Description — A longer free-text description of the product.
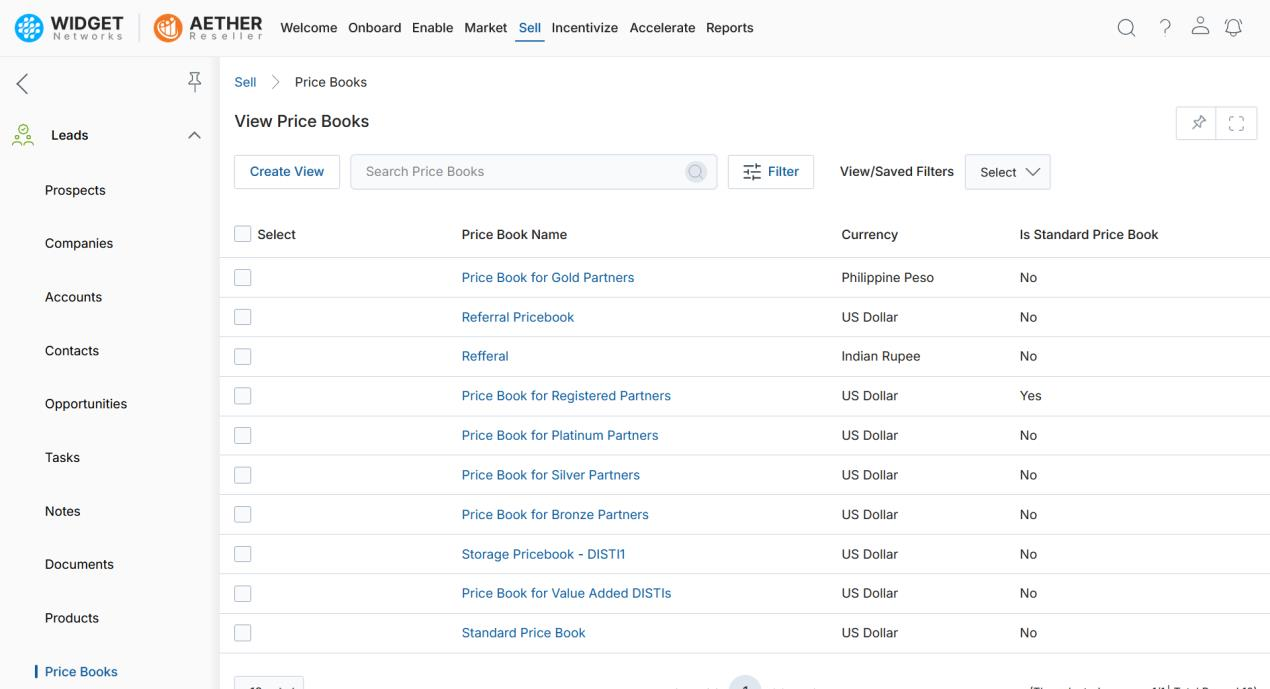
Price Books
Navigate to Sell > Leads > Price Books to browse available price books. Price Books define the pricing and commission structures applied to products when creating Opportunities.
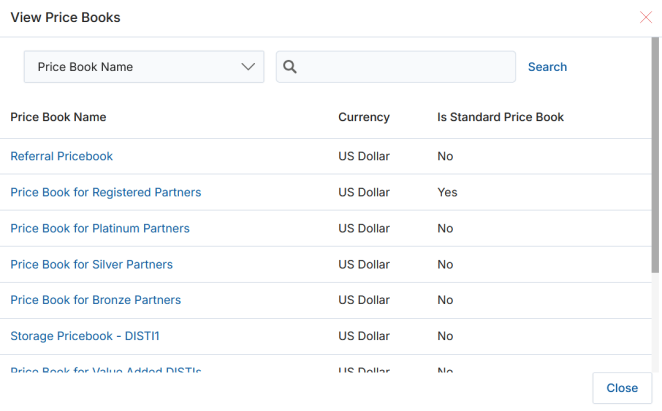
View Price Books
The top action bar supports Search, Clear Search, and Saved Searches. Click any linkable item in the grid to view details.
View Price Book Details
Click the Name/Title of a price book to open its details page.
Price Book Information
| Field | Description |
|---|---|
| Price Book Name | Display name of the price book. |
| Is Standard Price Book | Confirms whether this is the industry-standard price book for products. |
| Currency | Currency used in this price book. |
| Affiliate Commission Rate Unit | Commission rate unit used in the price book. |
| Active | Current status of the price book. |
| Description | Brief description of the Price Book. |
| Affiliate Commission Rate | The affiliate commission rate value. |
| Assign Commission Rate By Product Solution | Whether the commission rate is assigned by product solution. |
Products
Lists all products included in this price book, showing: Product Name, SKU, Partner Price, Currency, and Is Active status.