
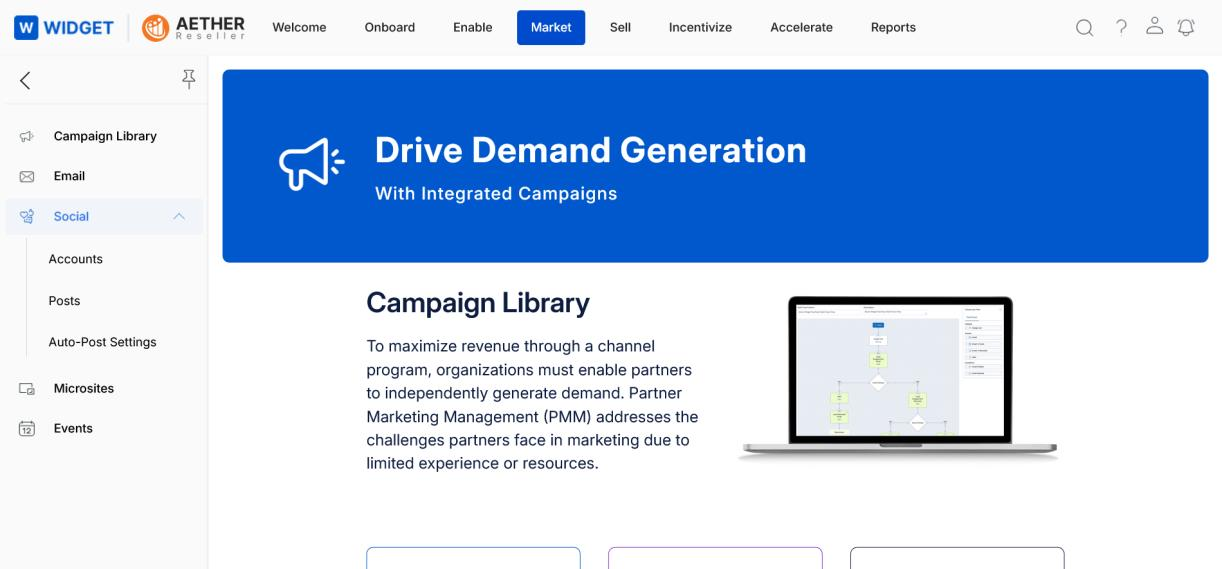
Introduction
The Social Syndication Management application of ZINFI's Partner Marketing Management (PMM) platform makes it easy for partners to distribute social media content across Facebook, Twitter, LinkedIn, and other platforms. Posts can be auto-streamed or manually customised from vendor-supplied feeds for instant or scheduled publishing on profile or company pages.
1.1 Social Post Management
The application provides a complete social content workflow — from browsing vendor campaign content to scheduling and tracking posts:
- In-depth analytics — Measure the effectiveness of specific distributed content at any time.
- Content distribution scheduler — Automate complex distribution processes by choosing a specific date and time to post content on corporate social accounts for lead generation.
- Co-branded microsites — Direct prospects who interact with content to customised, co-branded microsites embedded in the post.
- Post-scheduling management — UPM's robust scheduling features give partners the flexibility to publish content with optimal timing across any connected social account.
Manage Accounts
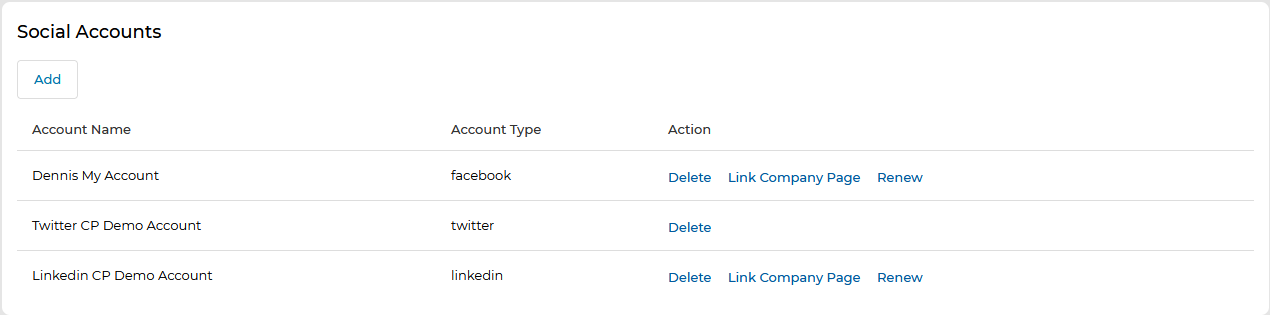
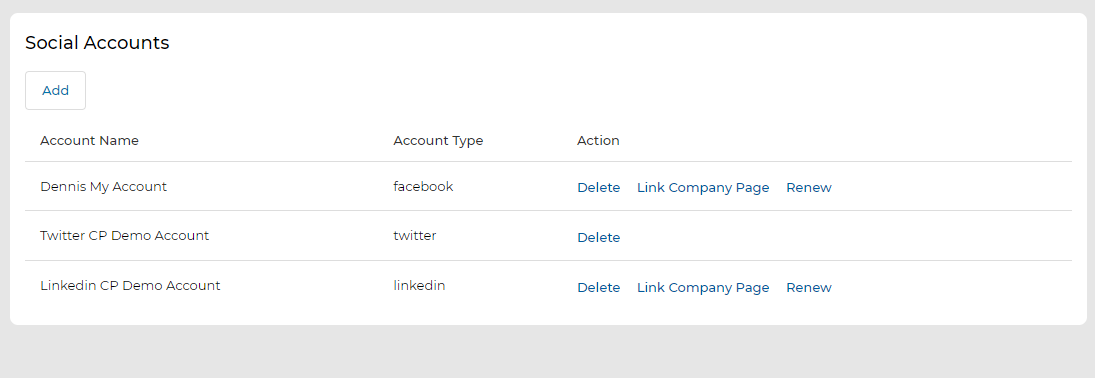
The Manage Accounts section lets partners view, add, and configure the social media accounts connected to the UPM platform.
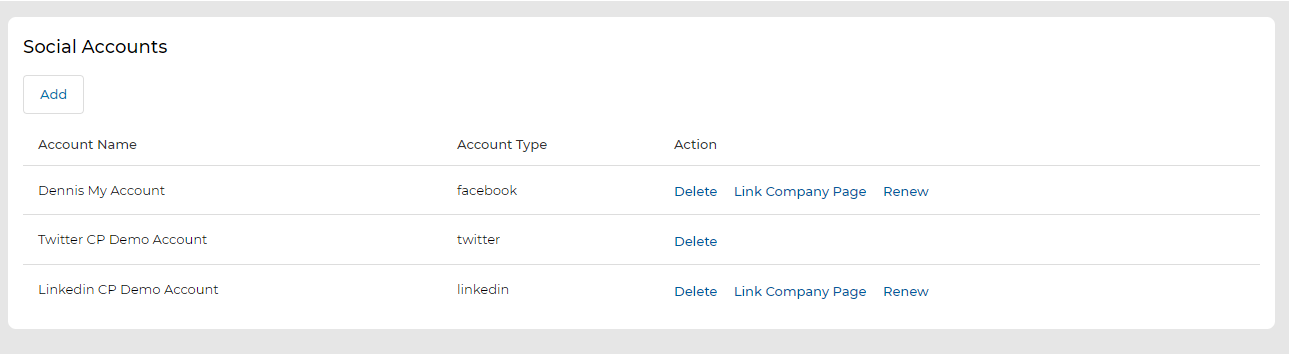
2.1 View Accounts
To view and manage connected social accounts:
- Click Market in the top zone.
- Click Social > Accounts from the left menu bar.
- View the list of social accounts connected with the platform on the Social Accounts page.
- To remove a specific social account, click Delete.
- To link a company page to an existing social account, click Link Company Page.
- To connect a new social account, click Add.
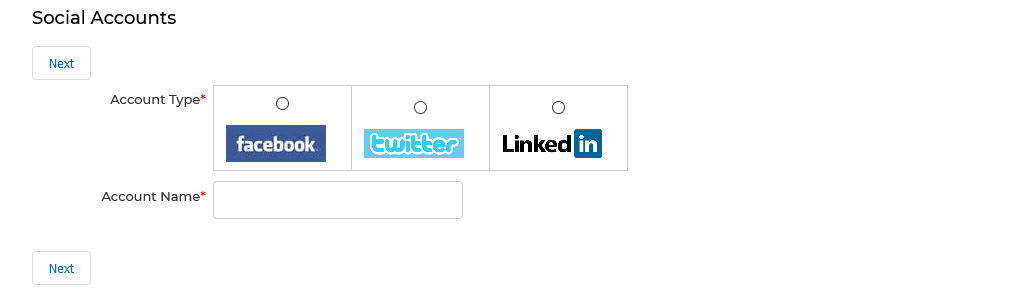
2.2 Add a Social Account
To create and link a new social account:
- Navigate to Market > Social > Accounts. Previously linked accounts are listed here. Click the Add button to begin linking a new account.
New Account Set Up
- Clicking Add opens the Social Accounts setup form. Select the social media platform in the Account Type section (Facebook, Twitter, or LinkedIn).
- Provide a screen name for the account in the Account Name field.
- Click Next to be directed to the login screen of the selected social media platform, where you enter credentials to complete the connection.
2.3 Linking Company Pages
Once an account has been linked, the company pages associated with that account are pulled in from the social platform and displayed for linkage. Only one page can be linked to an account.
- Click the Link Company Page action next to the target social account.
- Choose the desired Link Page from the options displayed.
- Click Save to link the page with the selected social account, or click Return to cancel the operation.

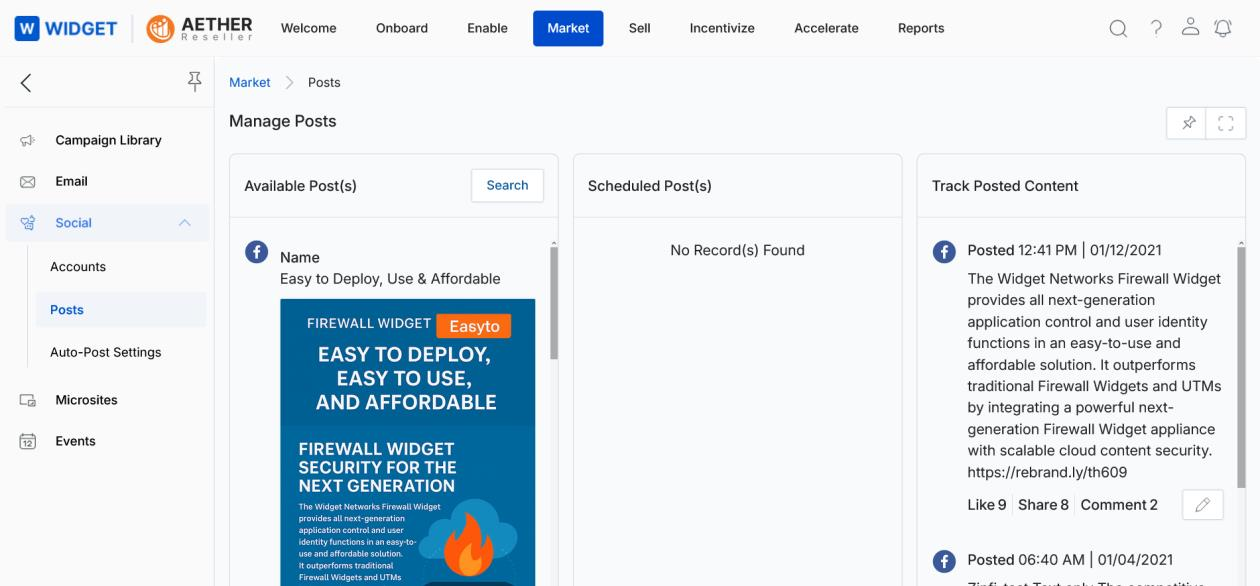
Manage Posts
The Manage Posts area provides three panels for browsing available vendor content, reviewing scheduled posts, and tracking published content across social platforms.
- Navigate to Market > Social > Posts.
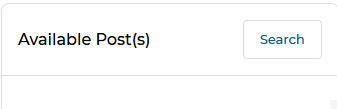
- To search for a specific post, click Search and use the available filtration options.
- Filter posts using any combination of the following parameters:
- Campaign — Select the campaign name to narrow results to a specific vendor campaign.
- Post Tag — Filter by the tag associated with the post.
- Post Type — Select the target social platform: Facebook, Twitter, or LinkedIn.
- Post Title — Search for keywords in the post title.
- Quarter — Filter by the quarter in which the post was created (e.g., FY18Q2).
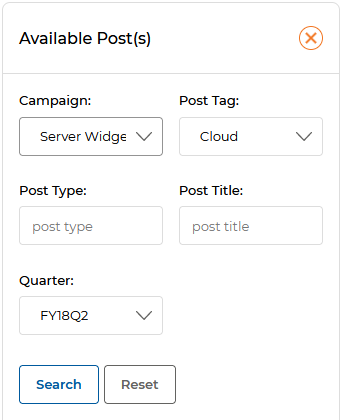
- Click Search once the required parameter values are applied to find the desired post.
- Review posts scheduled for deployment in the Scheduled Post(s) panel.
- To remove a scheduled post, click the trash icon next to that post.
- To track the progress of published content, review the Track Posted Content section on the right panel.
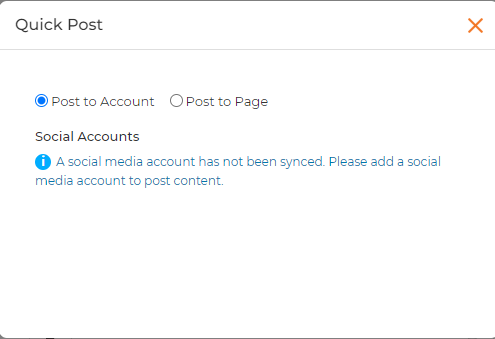
- Quick Post allows you to post content to the social platform immediately, without any changes. Click the Quick Post icon on the desired post card to trigger it.
- Post to Account — Automatically posts content to the Social Media Account synced/registered with the UPM account.
- Post to Page — Automatically posts content to the linked Company Page of the synced Social Media Account.
3.1 Editing & Reposting Posted Content
Partners can edit and reschedule previously posted content:
- Click the small pencil icon next to a posted content entry to open the Manage Post page.
- The Manage Post form displays the following editable fields:
| Field | Description |
|---|---|
| Post Title | Title of the social post. |
| Long URL | URL of the landing page to direct end users to. Click Generate URL to create a shorter version compatible with social platform character limits. |
| Generated Short URL | The shortened URL produced by Generate URL. Click Copy to copy it to the clipboard. |
| Time Zone | Time zone to use when scheduling the post. |
| Scheduled Time | Date and time at which content will be posted to the selected social accounts. |
| Post Content | The text body of the social post. |
| Social Accounts | Checkboxes to select which connected social accounts will receive this post. |
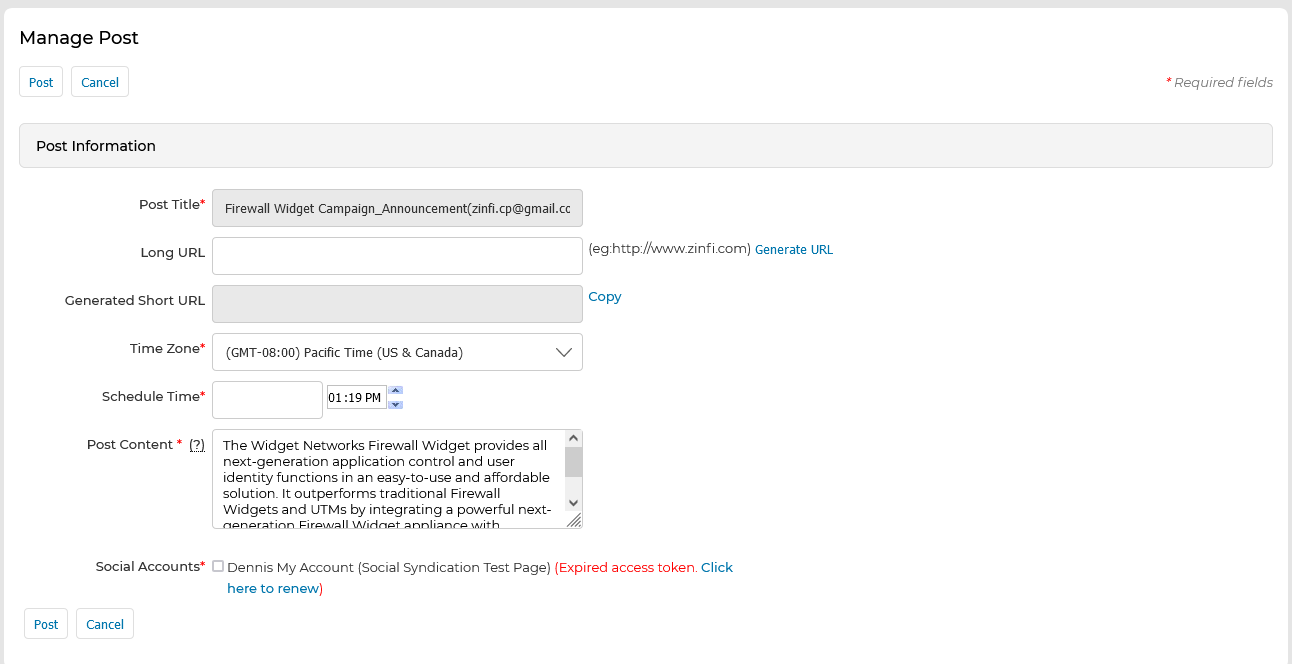
- Once all edits are complete, click Save. The post will appear in the Scheduled Post(s) section on the main Manage Posts page.
Manage Auto Post Settings
The Auto Post Settings screen lets partners configure which social accounts and company pages will automatically receive posts from selected vendor campaigns — removing the need for manual post-by-post scheduling.
- Navigate to Market > Social > Auto Post Settings. The existing social accounts and company pages configured previously are displayed.
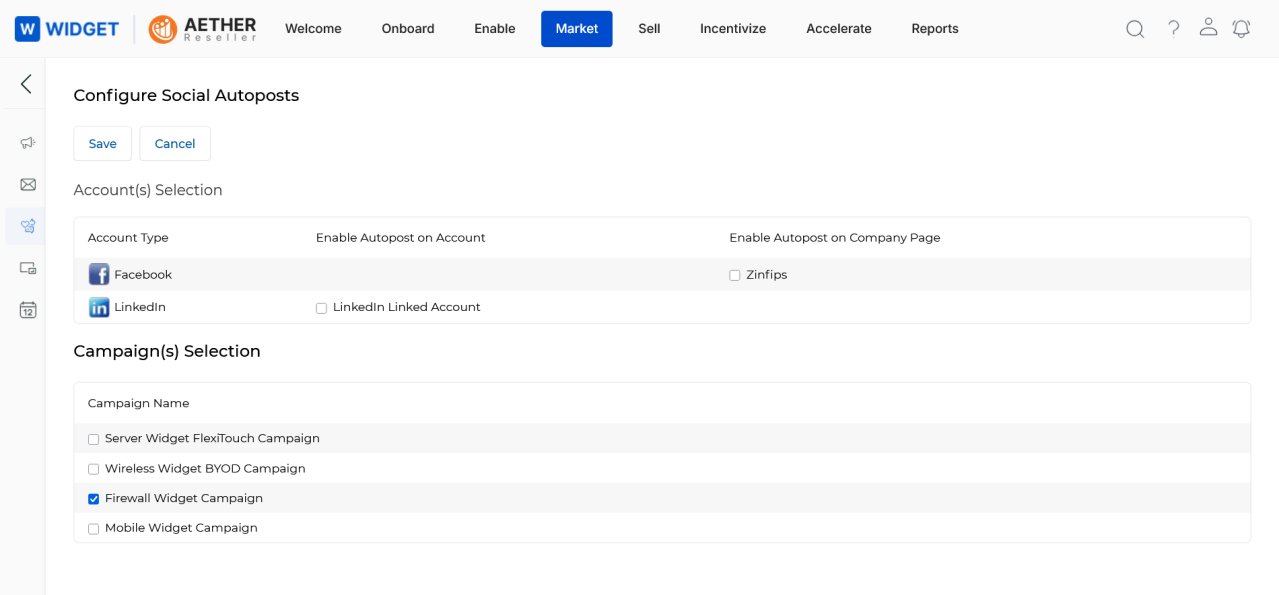
- In the Account(s) Selection table, check the social accounts and company pages you
want to enable for auto-posting.
- Enable Autopost on Account — Posts content directly to the linked personal or business social media account.
- Enable Autopost on Company Page — Posts content to the linked company page associated with that account.
- In the Campaign(s) Selection table, check the campaigns whose new content should be auto-posted to the configured accounts and pages.
- Click Save when done. Auto-posting will now be active for the selected account-and-campaign combinations.