

Overview
Microsites are co-branded landing pages that partners can use to promote vendor products and services. These sites are built from vendor-approved templates, ensuring brand consistency while allowing partners to personalize certain elements. This feature is crucial for partners, especially high-volume affiliates, who need dedicated, trackable web presences to drive leads and conversions.
By providing customizable microsites, the platform empowers partners to execute effective digital marketing campaigns. Lead form submissions from these microsites are automatically routed to the partner's leads queue within the Sell module, streamlining the sales process and enabling accurate attribution for commissions and performance tracking.
Accessing and Initiating Microsite Setup
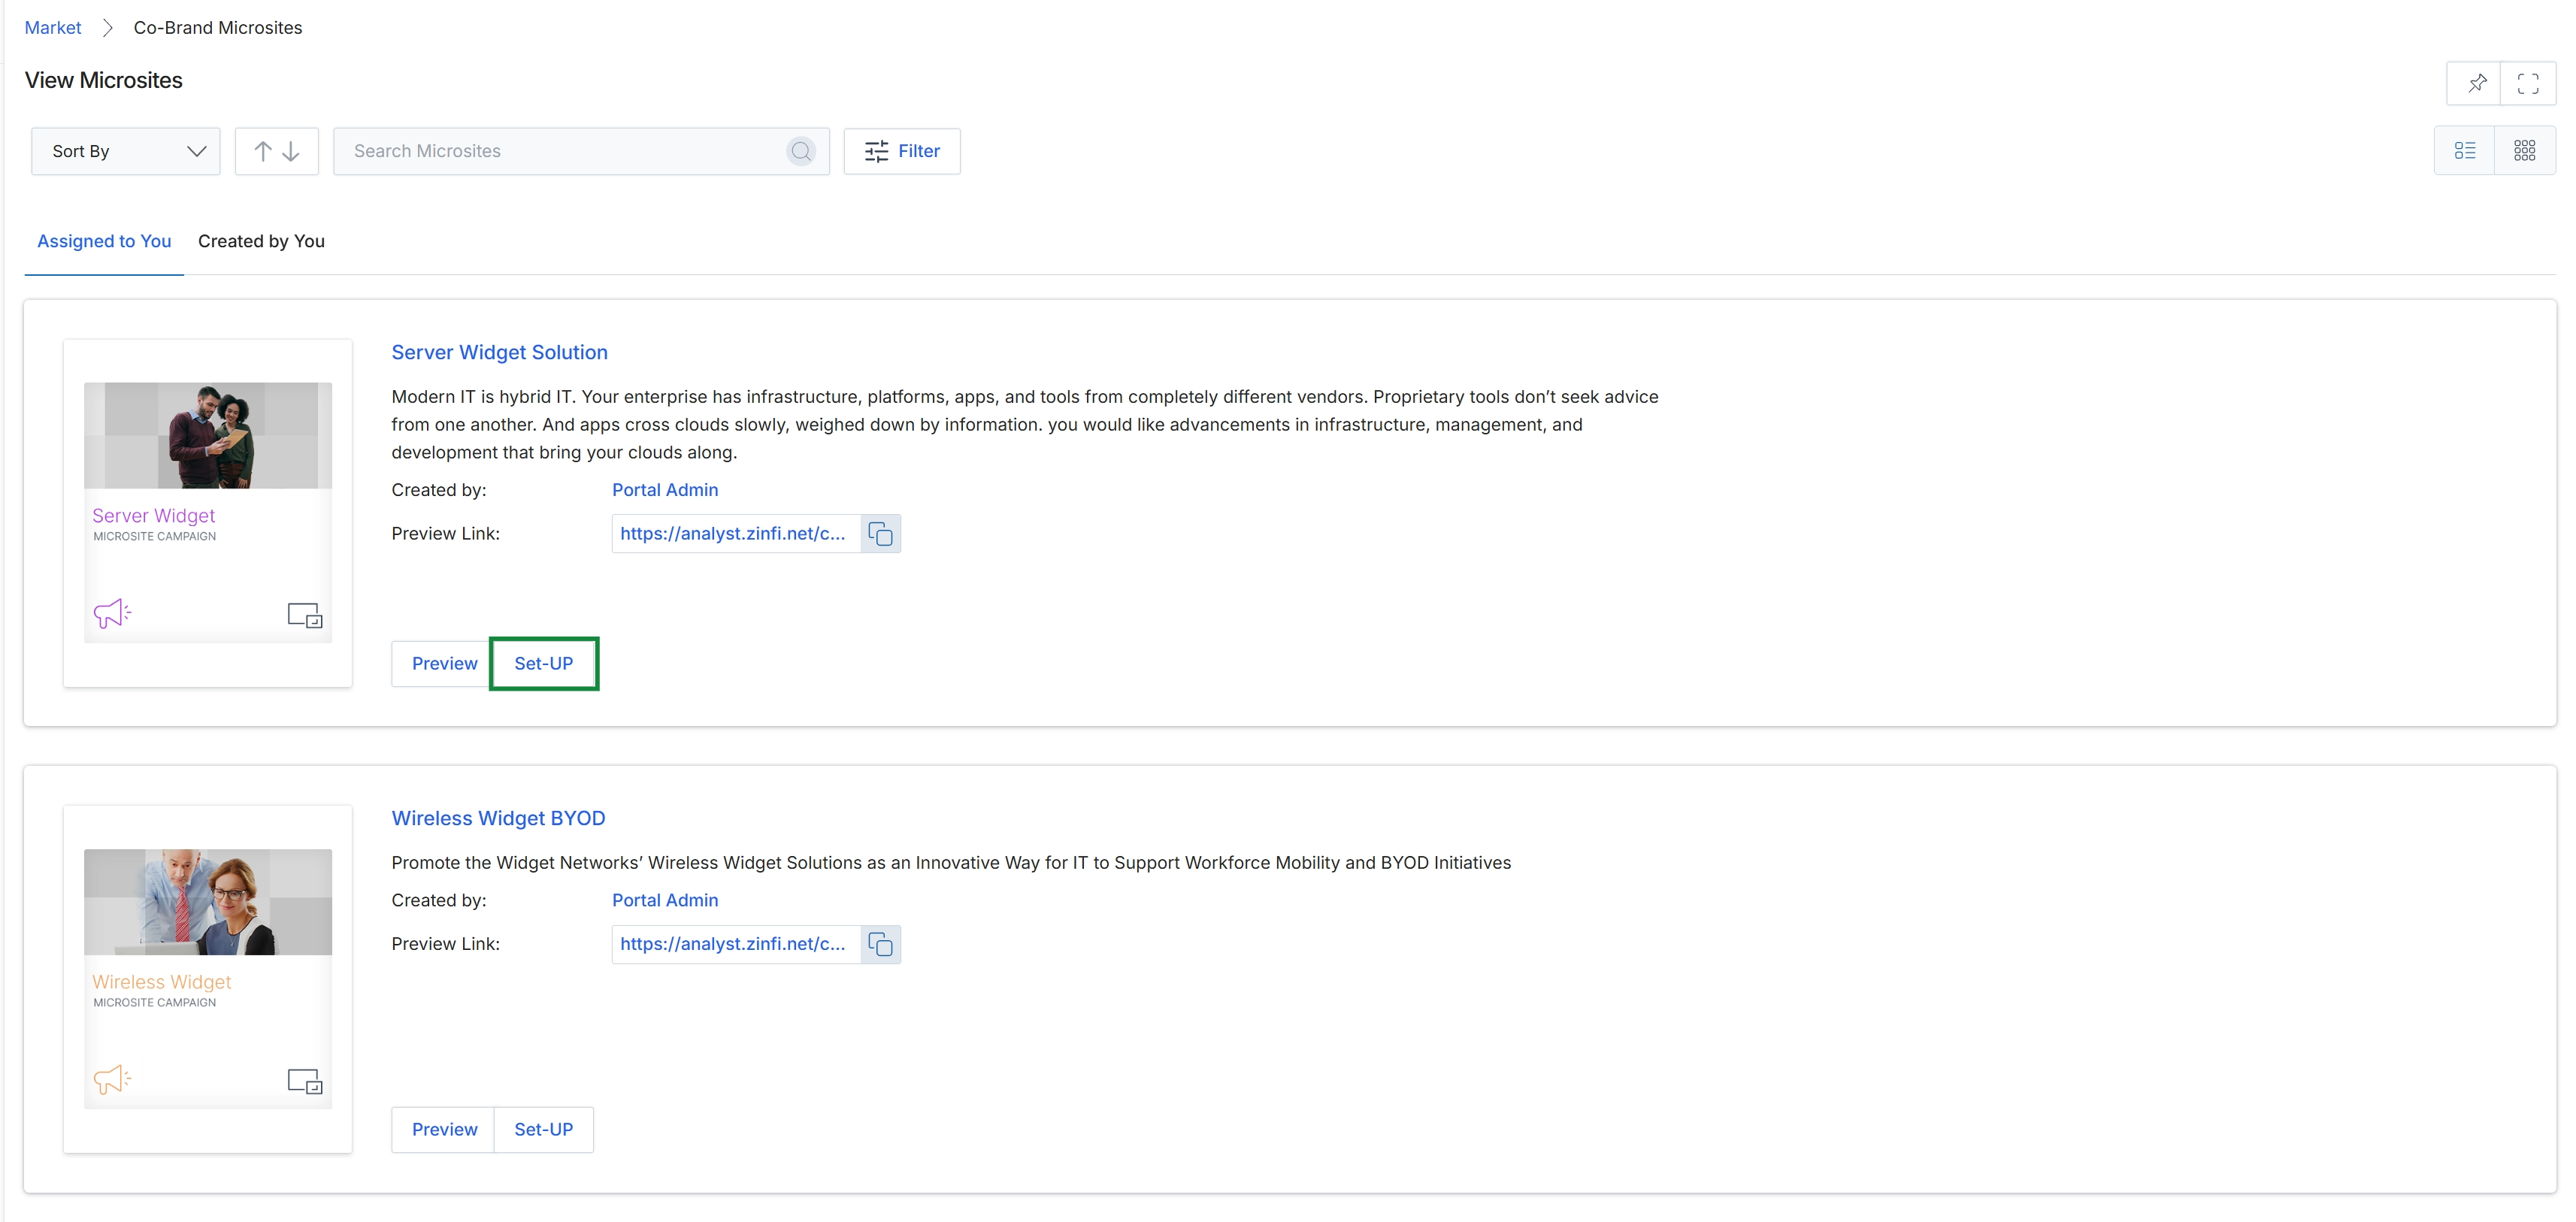
Click the Set-UP button for the "Server Widget Solution" microsite.
Configuring Microsite Details
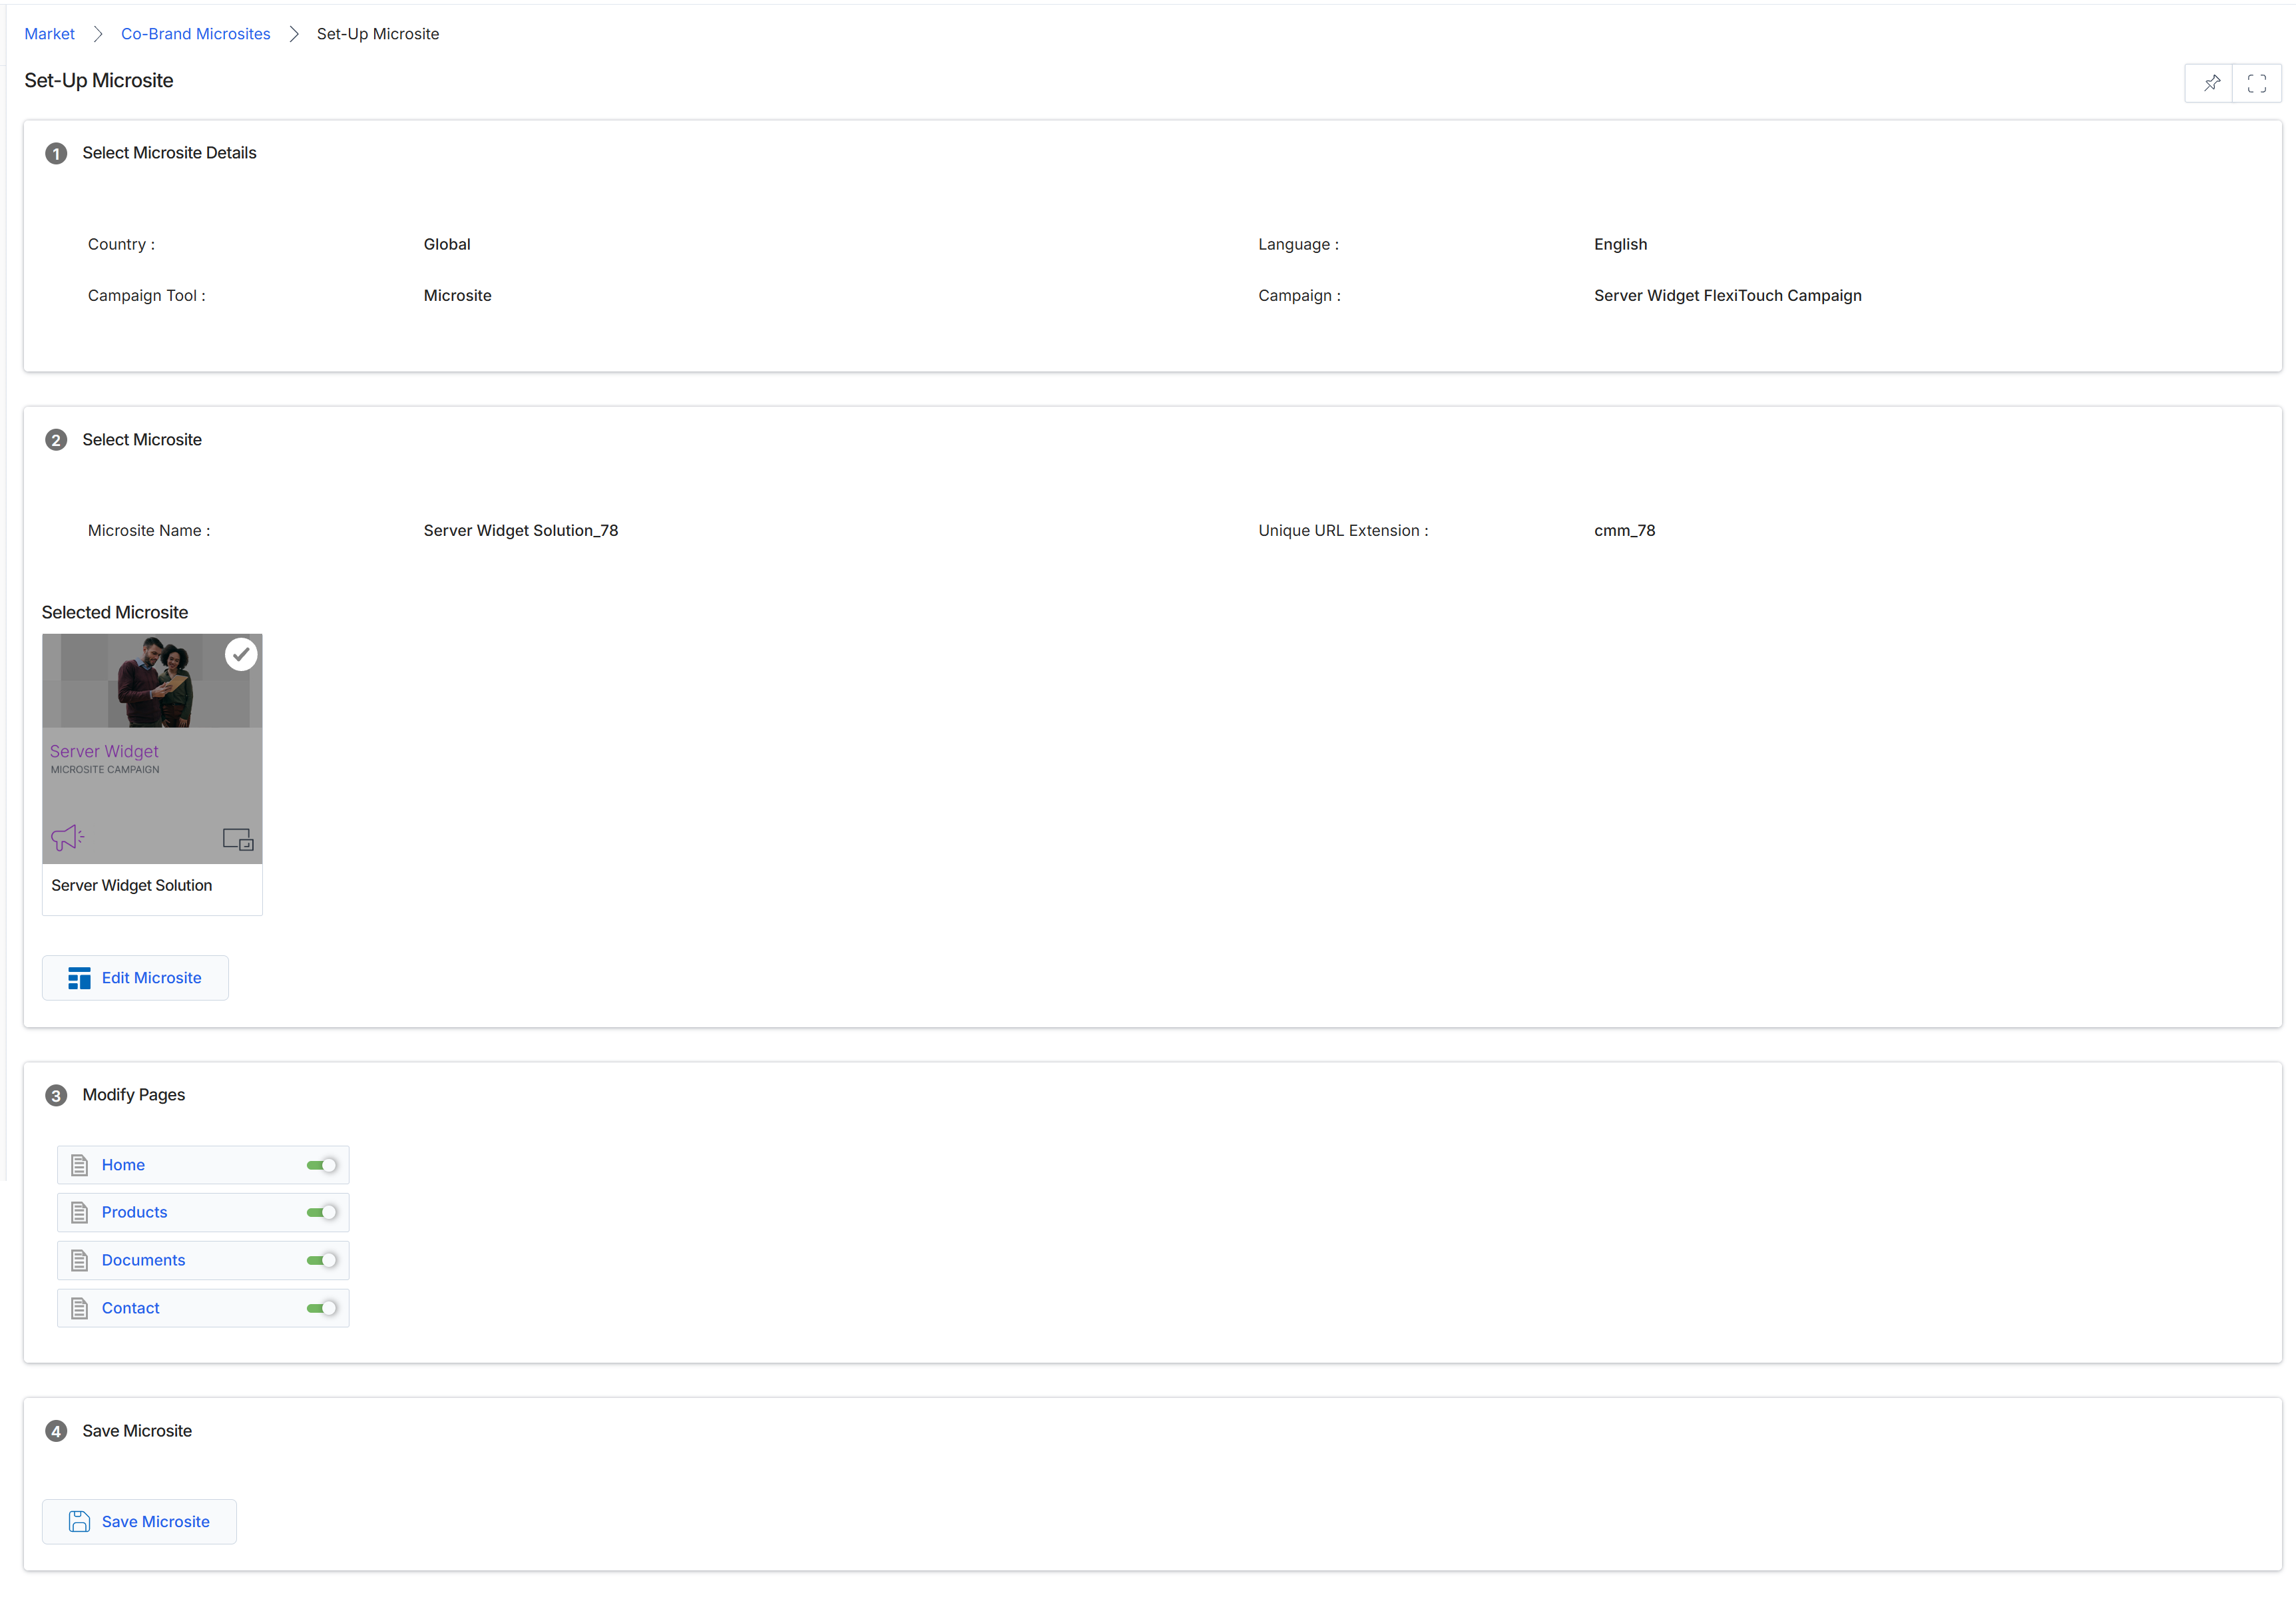
This screen, 'Set-Up Microsite', is part of the workflow for configuring and publishing partner-branded landing pages within the Market module. It displays the selected microsite's core details, including its associated campaign and language, and allows for the review and modification of its constituent pages. Partners use microsites to create co-branded landing pages from vendor-approved templates, which can be customized with specific content and lead capture forms. The platform tracks clicks and form submissions for these microsites, routing leads to the partner's queue in the Sell module. This setup process ensures that the microsite aligns with campaign objectives and is ready for deployment.
Review the microsite details and page configurations, then click Save Microsite to finalize the setup.
Buttons
| Button | Description |
|---|---|
| Edit Microsite | Allows further customization of the selected microsite's content and layout. |
| Save Microsite | Saves all configurations and settings for the microsite. |
Select Microsite Details
| Field | Description |
|---|---|
| Country | Indicates the geographical region for which this microsite is configured, in this case, 'Global'. |
| Language | Specifies the primary language of the microsite content, here set to 'English'. |
| Campaign Tool | Identifies the type of marketing tool being configured, which is 'Microsite'. |
| Campaign | The specific marketing campaign associated with this microsite, 'Server Widget FlexiTouch Campaign'. |
Select Microsite
| Field | Description |
|---|---|
| Microsite Name | The internal name given to the selected microsite, 'Server Widget Solution_78'. |
| Unique URL Extension | The custom part of the URL that identifies this specific microsite, 'cmm_78'. |
Modify Pages
| Field | Description |
|---|---|
| Home | Represents the main landing page of the microsite, with a toggle to enable or disable it. |
| Products | Represents a page dedicated to product information, with a toggle to enable or disable it. |
| Documents | Represents a page for downloadable resources or documents, with a toggle to enable or disable it. |
| Contact | Represents a contact information or inquiry form page, with a toggle to enable or disable it. |
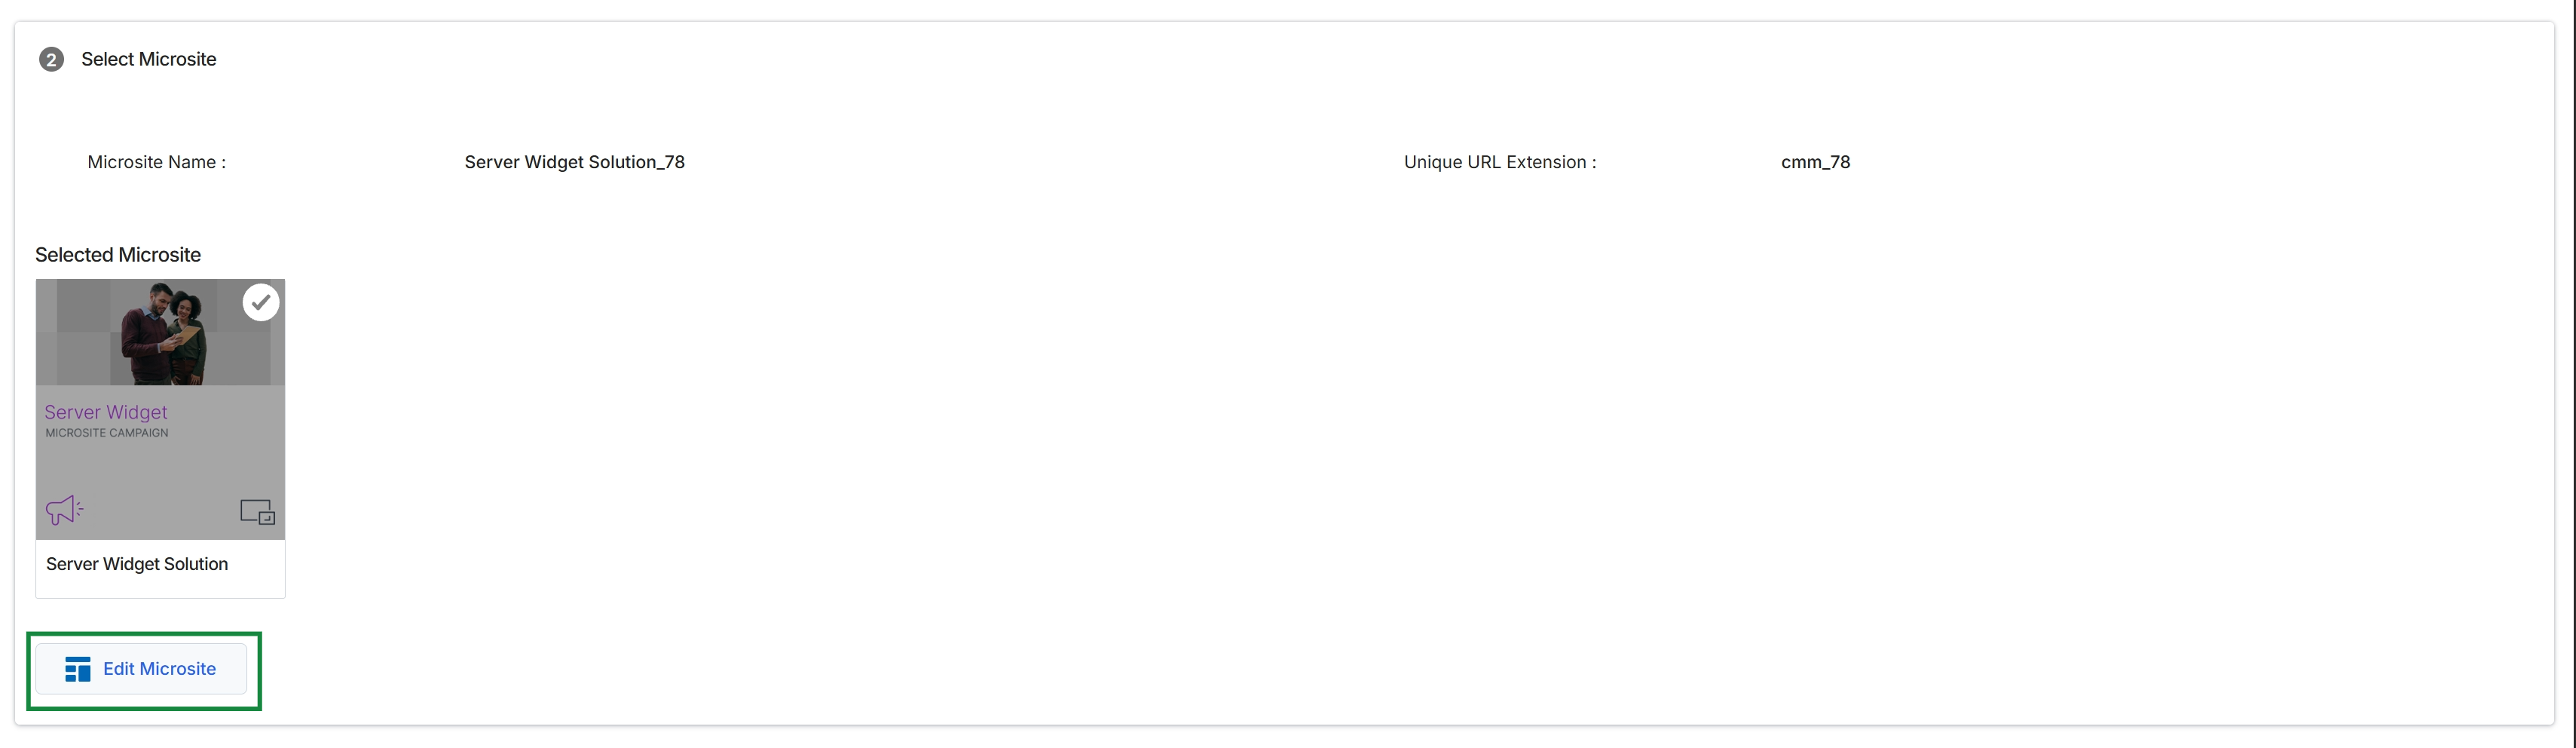
Click the Edit Microsite button.
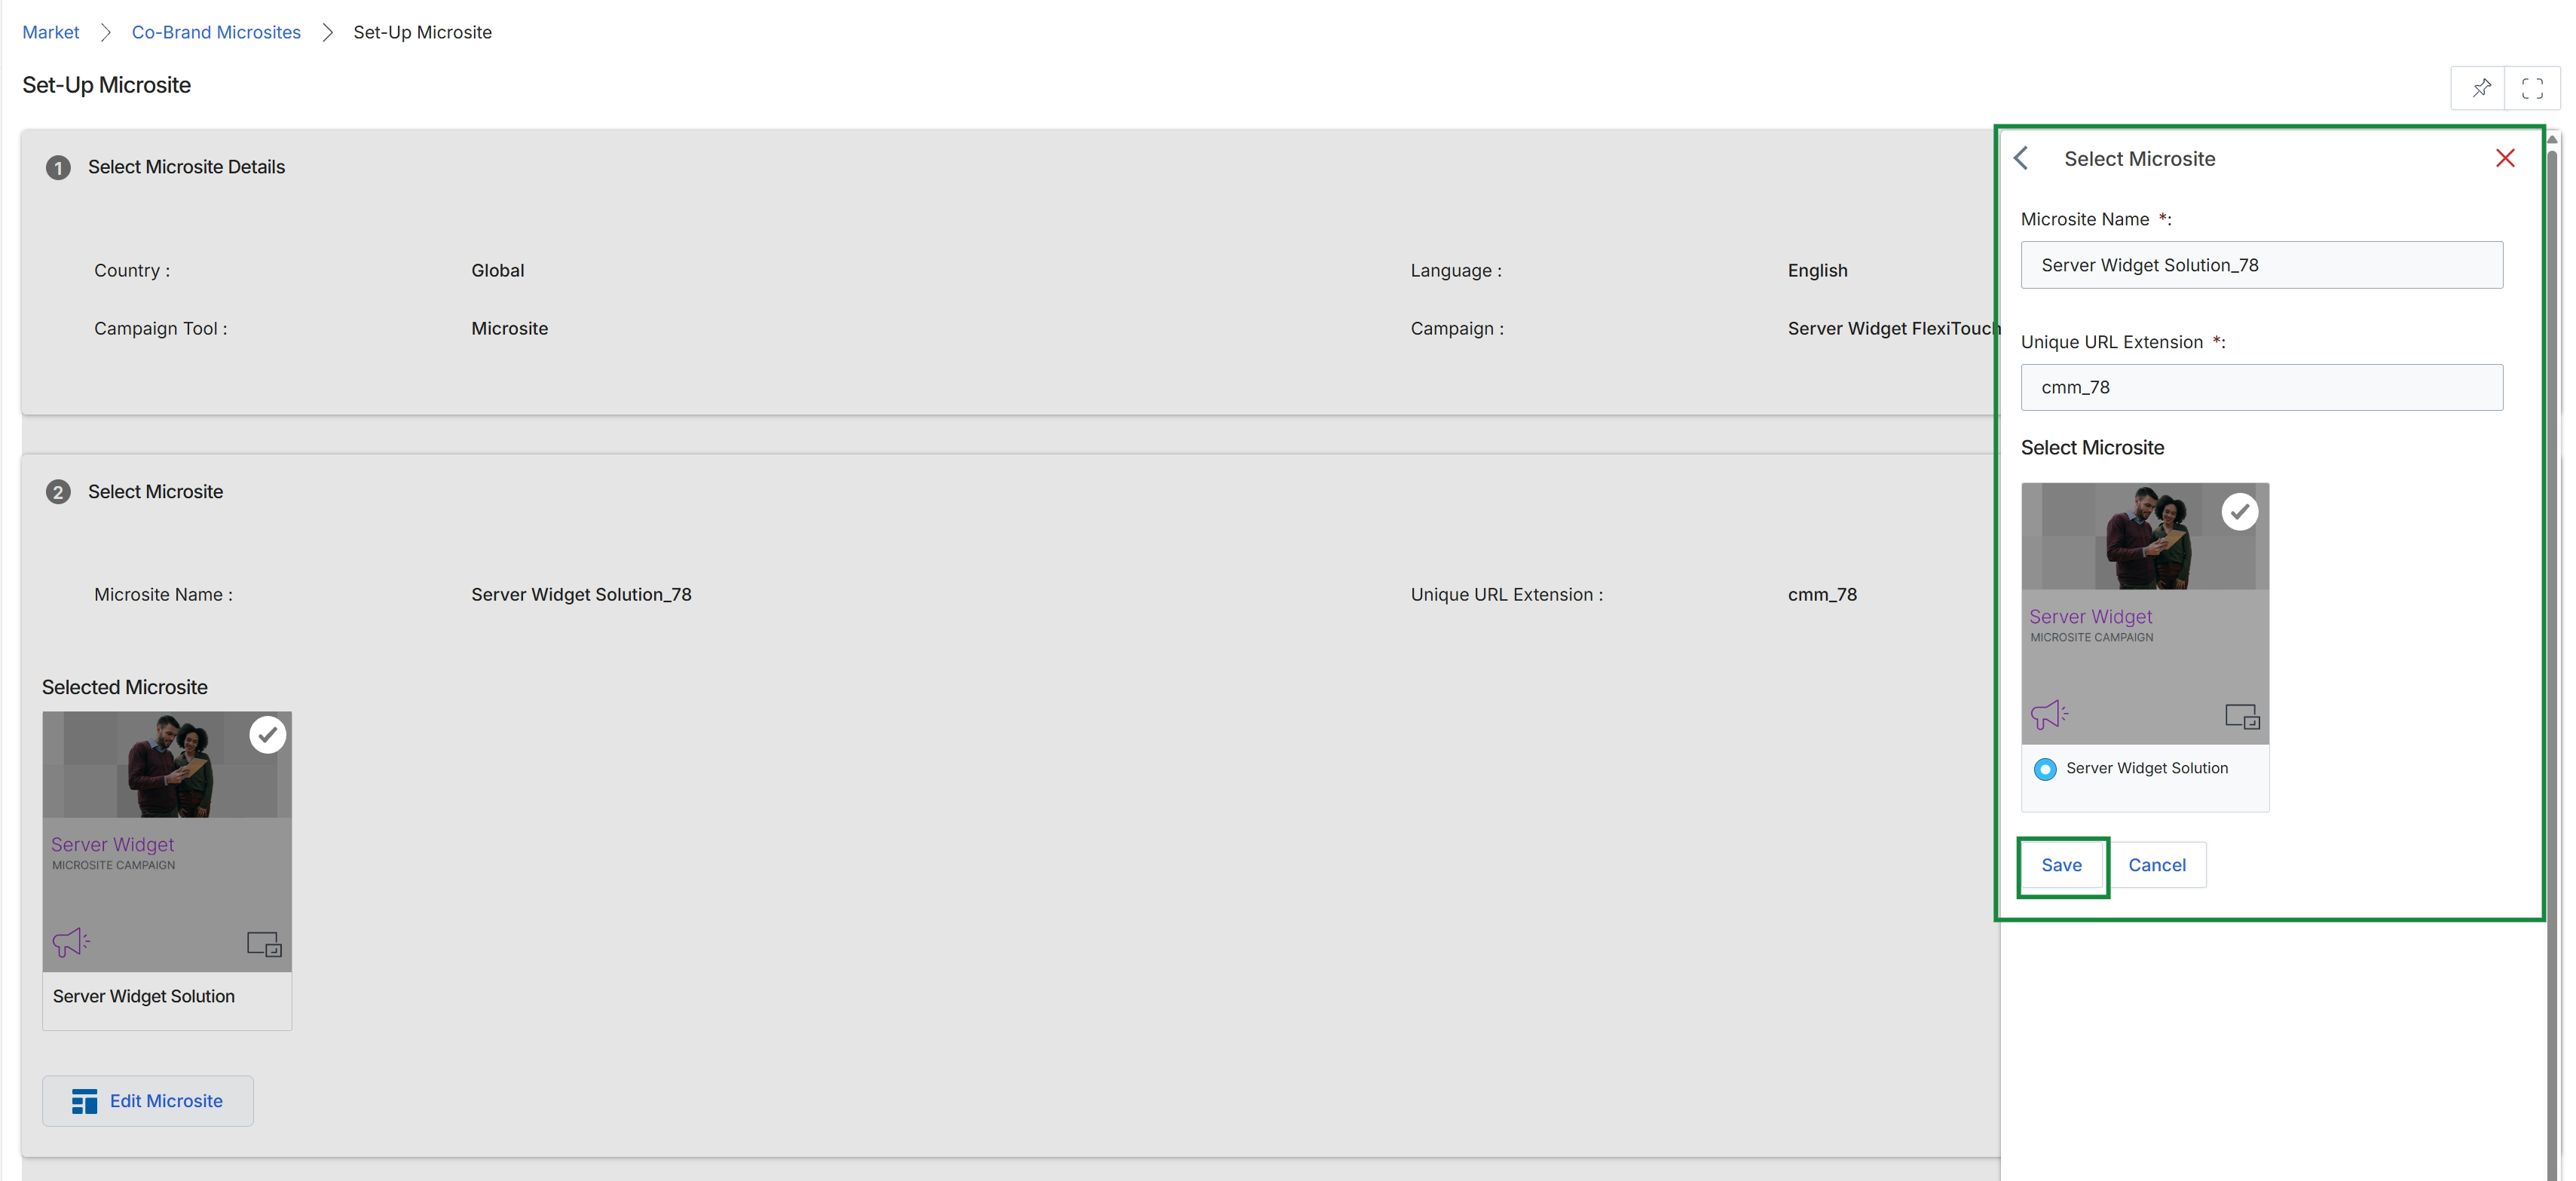
This screen is part of the microsite setup workflow, displaying the initial details configured for the microsite and allowing for the selection of a microsite template. The main panel provides an overview of the microsite's general details, such as its country, language, and associated campaign. A slide-out panel is active, allowing for the confirmation or modification of the microsite's name and its unique URL extension, which are critical for its identification and accessibility. This panel also visually confirms the specific microsite template that has been chosen, ensuring the user can verify the selected design before proceeding with further customization. The ability to define these parameters at this stage ensures that the microsite is correctly branded and trackable within the platform's marketing analytics.
Review the microsite name and unique URL extension in the slide-out panel, then click Save to confirm the template selection and proceed.
Buttons
| Button | Description |
|---|---|
| Save | Saves the configured microsite name and URL extension, confirming the template selection. |
| Cancel | Discards any changes made in the slide-out panel and closes it. |
Select Microsite
| Field | Description |
|---|---|
| Microsite Name | The editable name for the microsite, which identifies it within the platform. |
| Unique URL Extension | The customizable part of the microsite's URL, ensuring it has a distinct web address. |
| Server Widget Solution | The title of the currently selected microsite template, indicating its design and functionality. |
Managing Microsite Pages

Click Save to confirm the microsite selection.
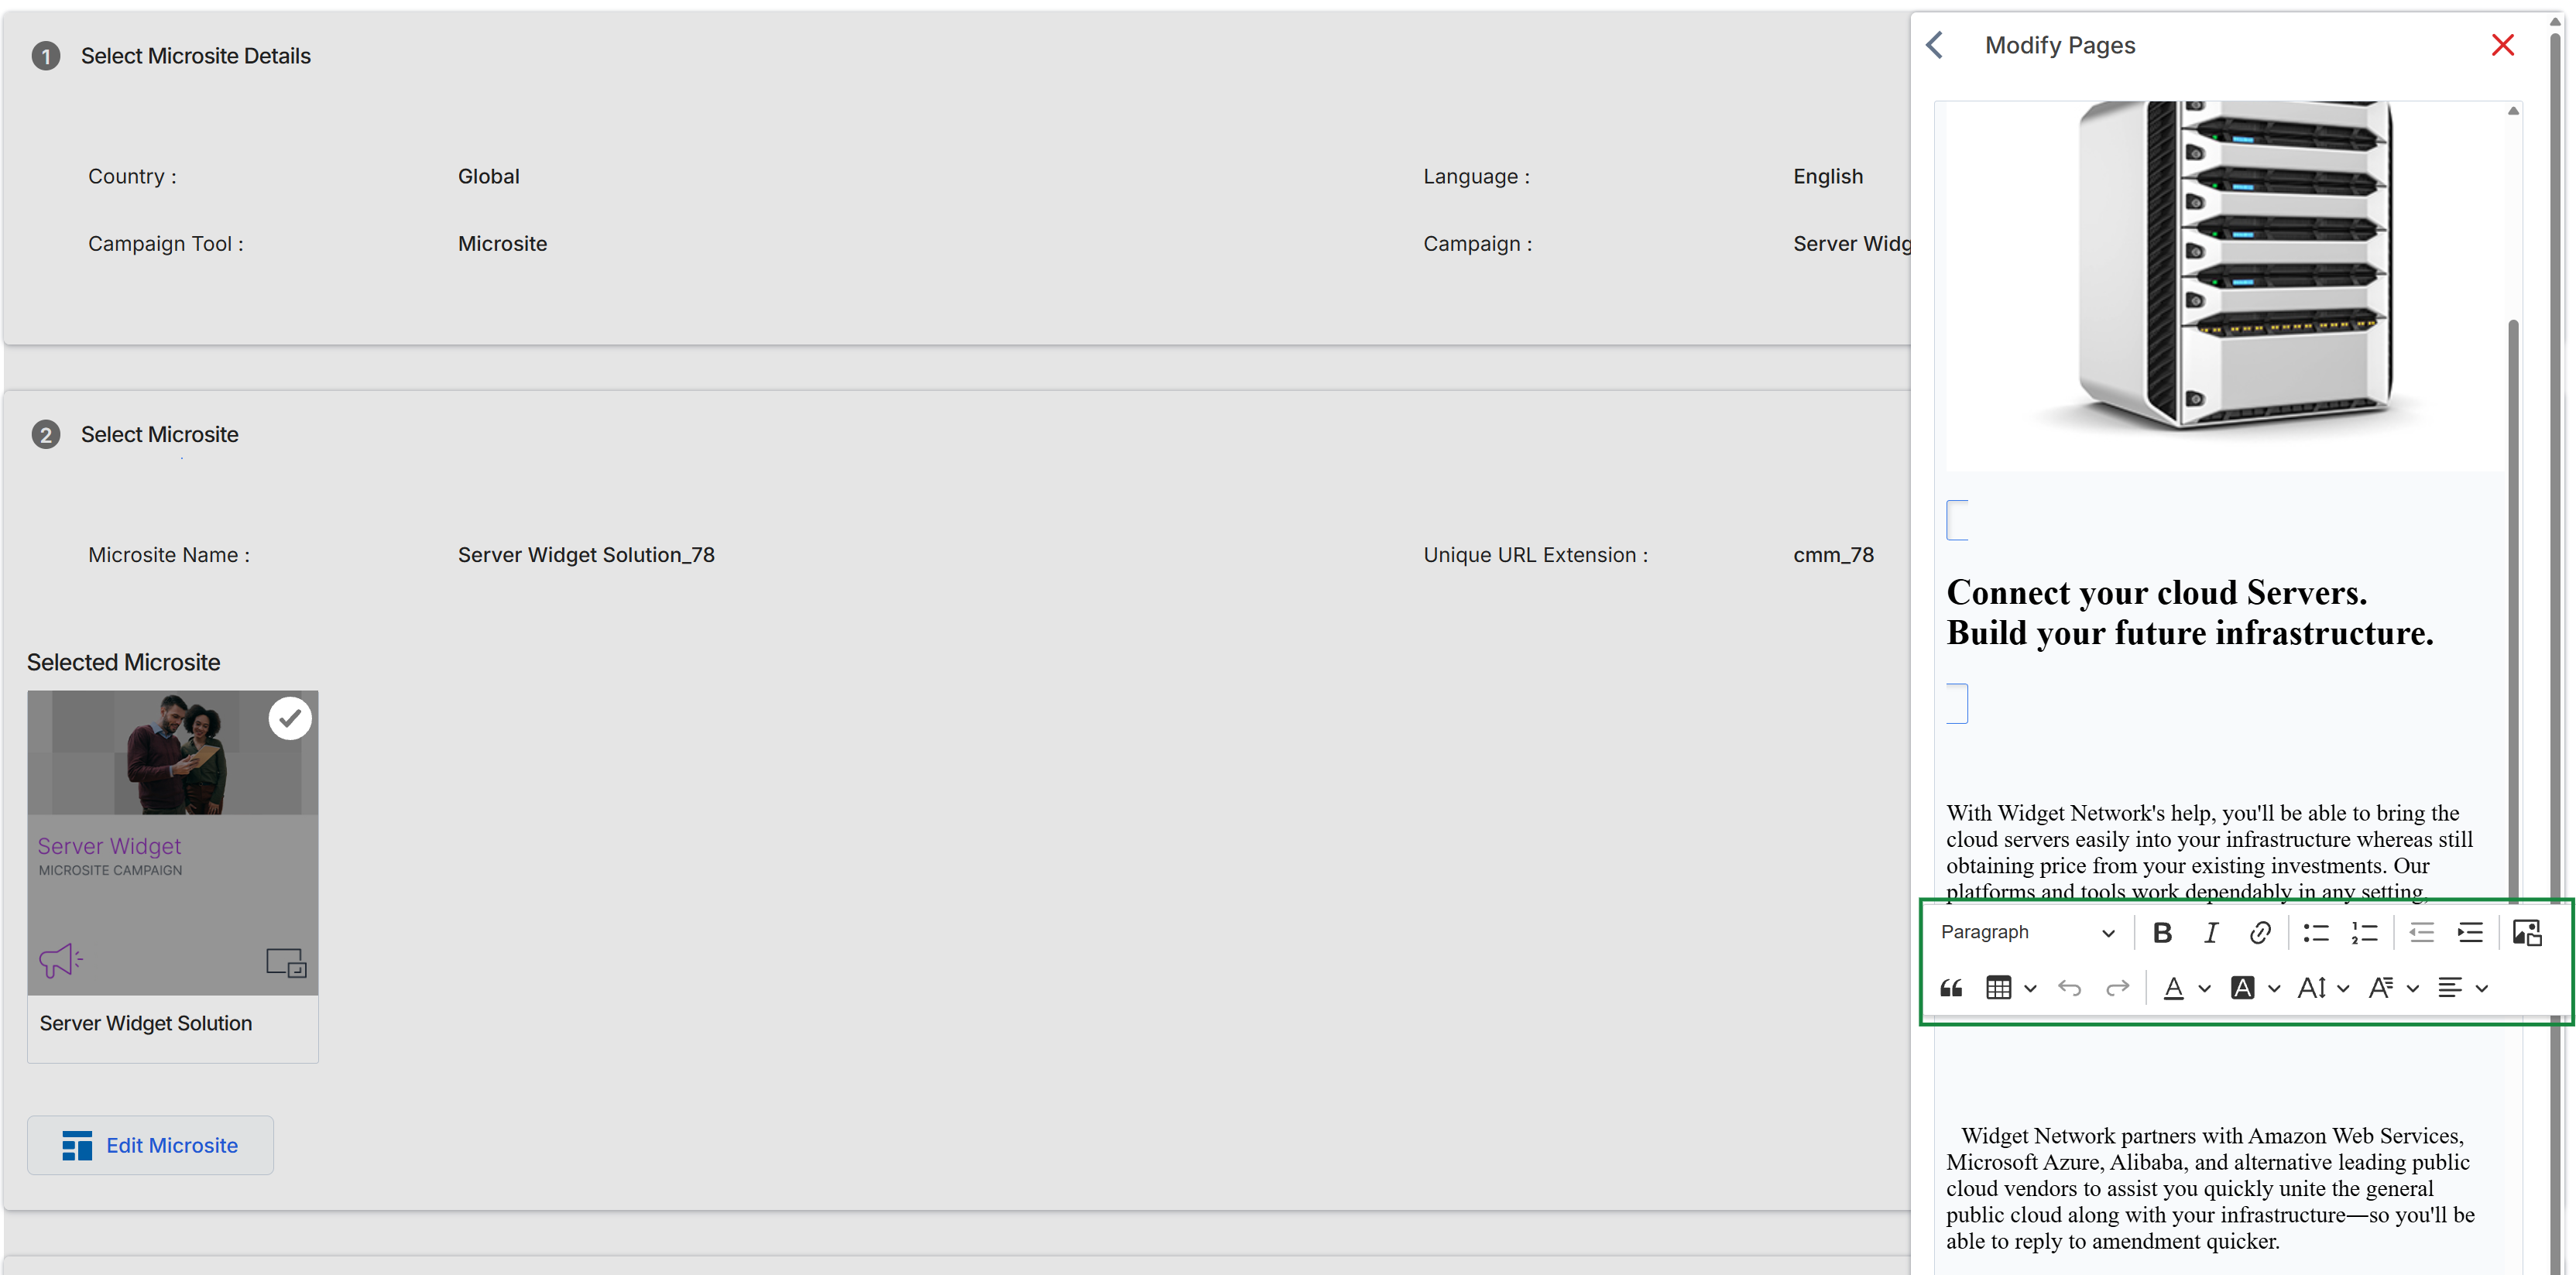
This screen presents the configuration interface for a selected microsite, allowing users to manage its details and content. It displays core information such as the microsite's name, its unique URL extension, and the associated campaign. The right-hand panel provides a live preview of the microsite's content, enabling users to visualize how changes to the text or structure will appear to visitors. This view is central to the microsite creation workflow, where partners can customize co-branded landing pages within vendor-defined templates.
Saving the Microsite

Click the Save Microsite button.