

Overview
Effective event marketing is crucial for partners to drive engagement and generate leads. This module streamlines the process of launching co-branded event email campaigns, enabling partners to leverage vendor-approved templates while maintaining their brand identity. By providing tools for email customization, recipient management, and flexible sending options, the platform empowers partners to execute targeted event promotions efficiently. This ensures consistent messaging, maximizes partner participation in co-marketing efforts, and ultimately contributes to a stronger sales pipeline for both the vendor and its partners.
Initiating an Event Email Campaign
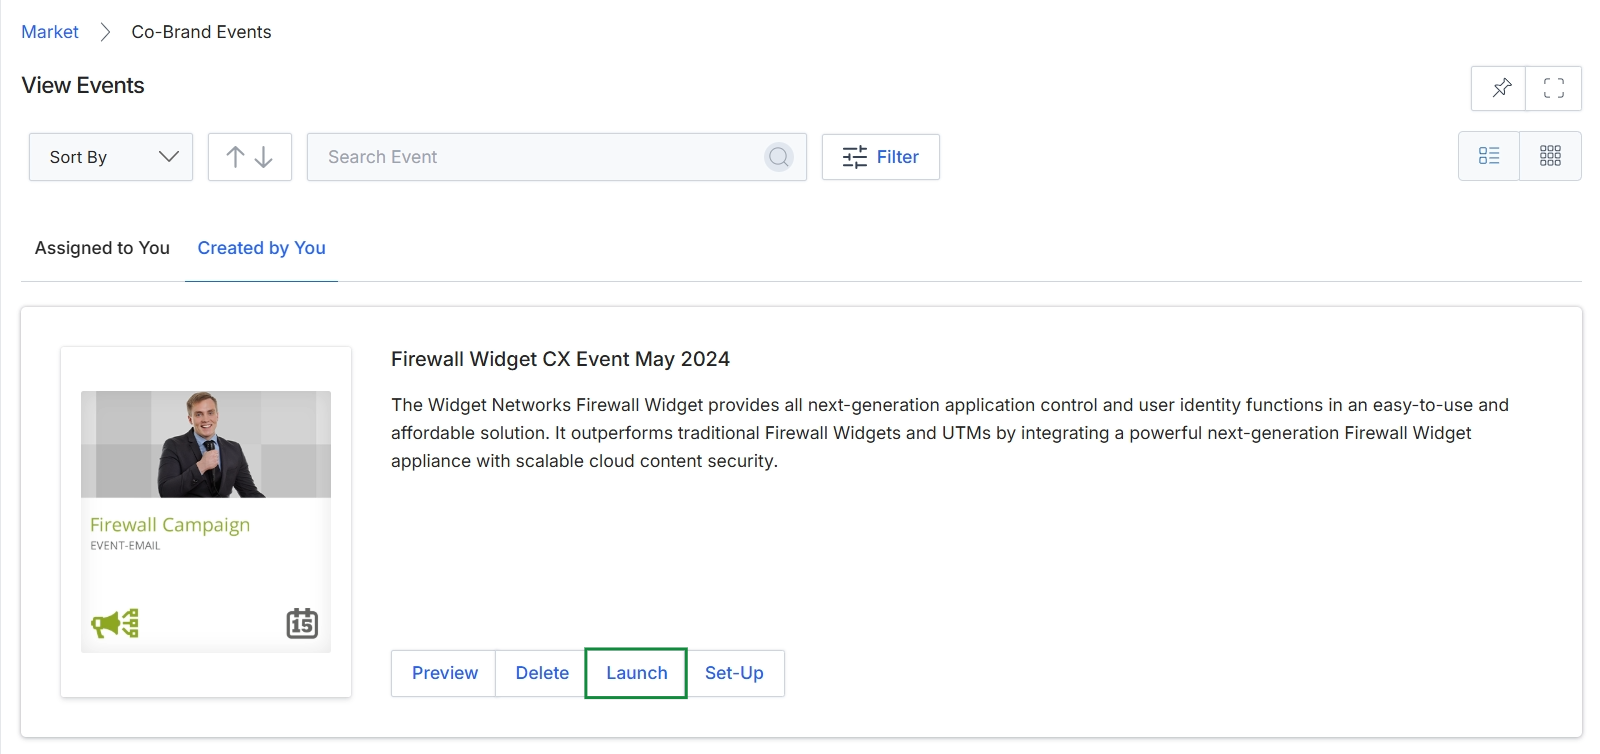
Click the Launch button.
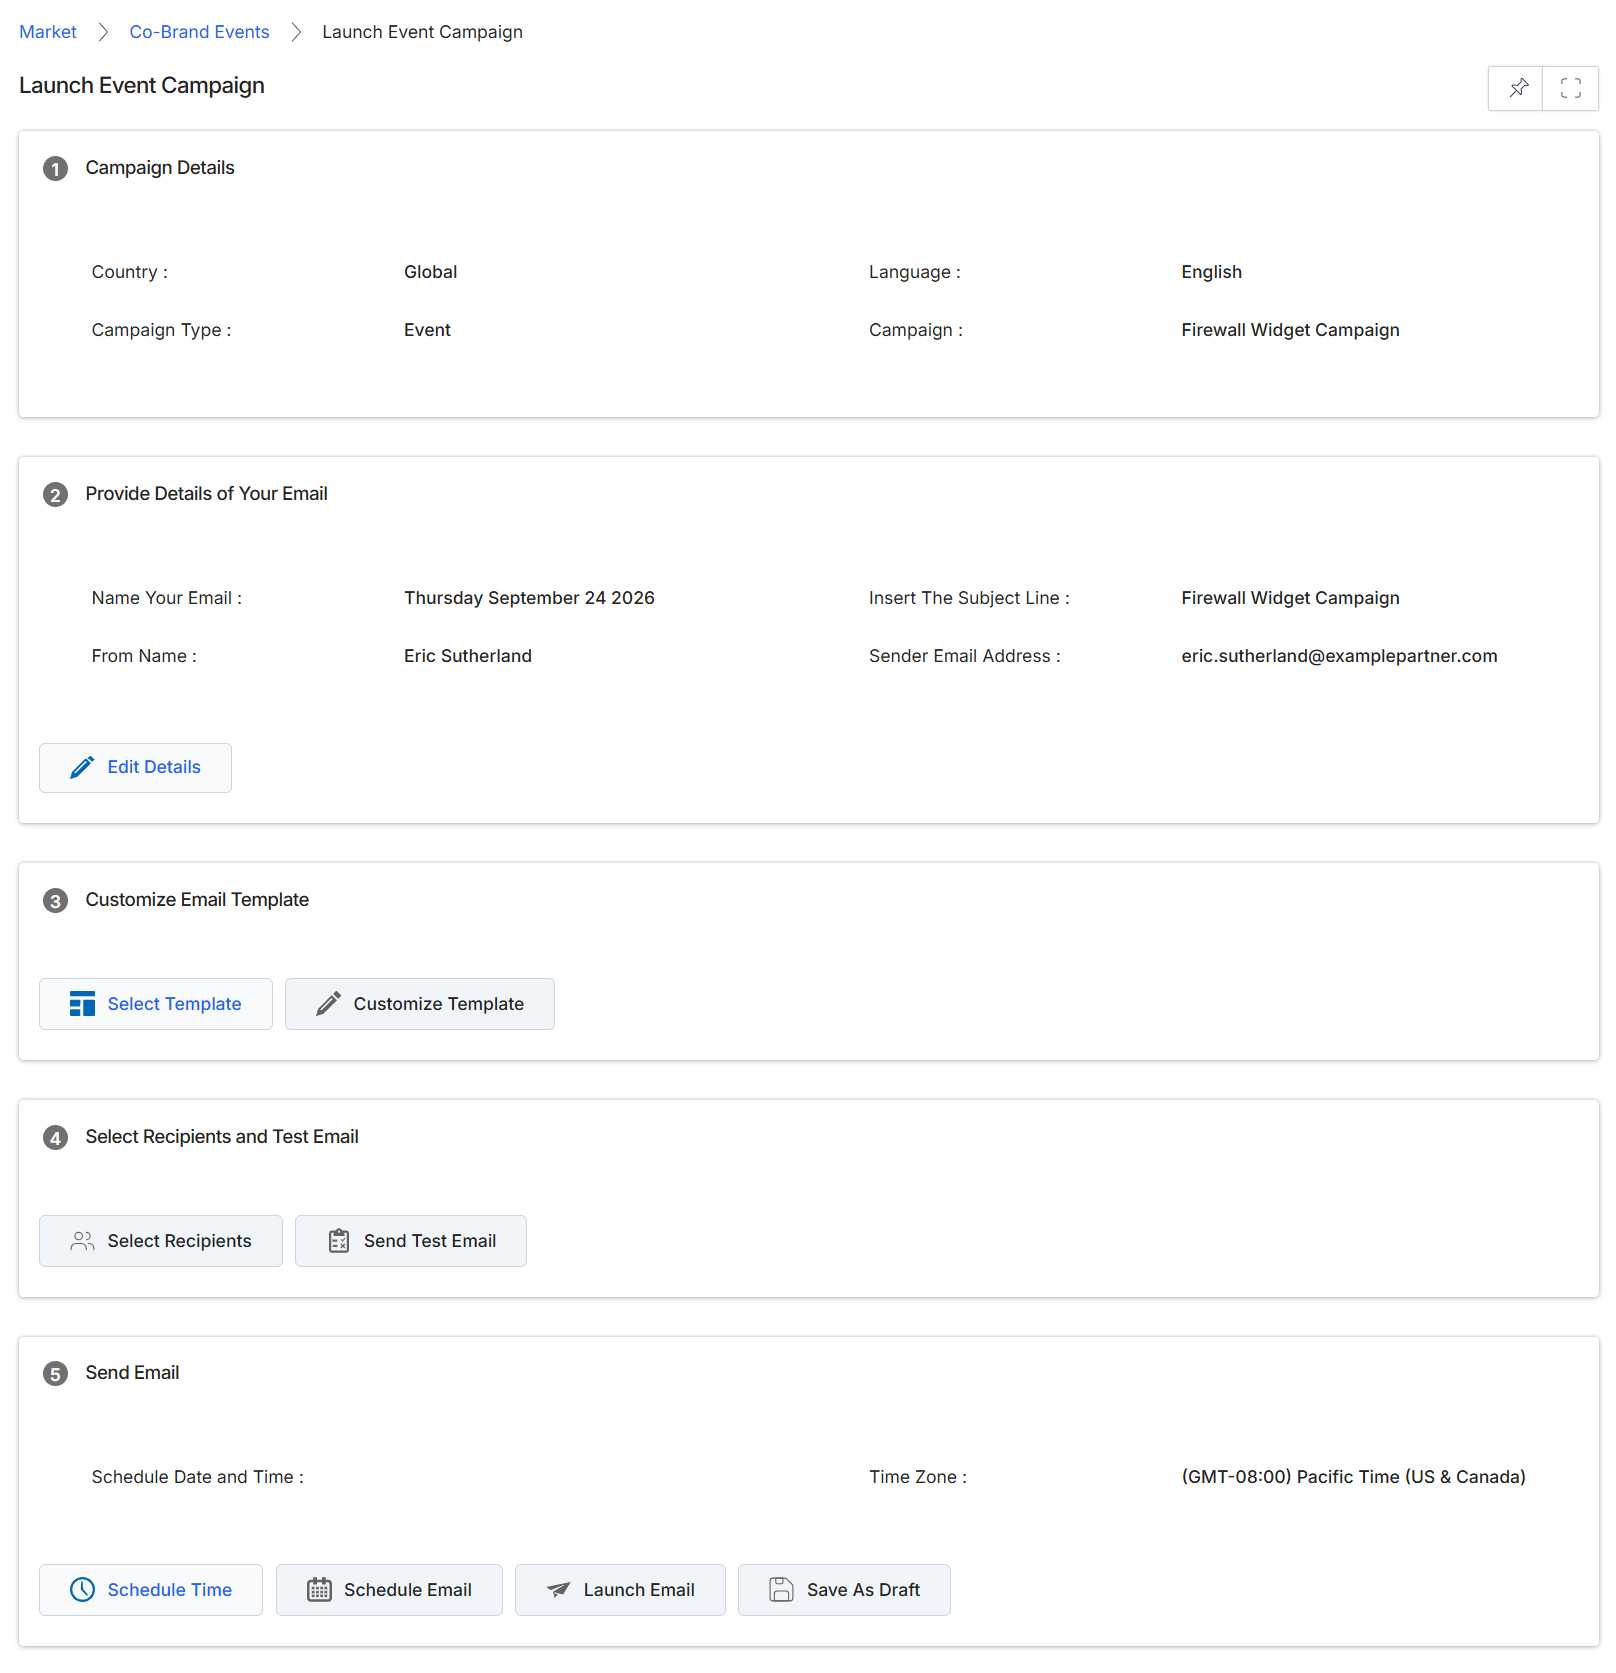
This screen is part of the email campaign execution workflow within the Market module, allowing users to prepare and send event-related emails. It consolidates all necessary steps for launching an email campaign, from reviewing campaign details and email sender information to customizing the email template, selecting recipients, and finally scheduling or launching the email. The screen displays pre-configured campaign parameters and email sender details, which can be edited, and provides options to select or customize an email template. Users can also manage recipients and test the email before setting a schedule or initiating the send, ensuring compliance and accuracy before broad distribution. This structured approach supports both vendor-side and partner-side users in executing marketing activities effectively.
Configure the email details, template, recipients, and schedule settings to prepare the event campaign email for launch.
Buttons
| Button | Description |
|---|---|
| Edit Details | Allows modification of the email's name, subject line, sender name, and sender email address. |
| Select Template | Opens a selection dialog to choose an existing email template from the library. |
| Customize Template | Initiates the email composer to modify the selected template's content and design. |
| Select Recipients | Opens a dialog to choose or upload a mailing list for the email campaign. |
| Send Test Email | Sends a test version of the email to a specified address for review before the actual launch. |
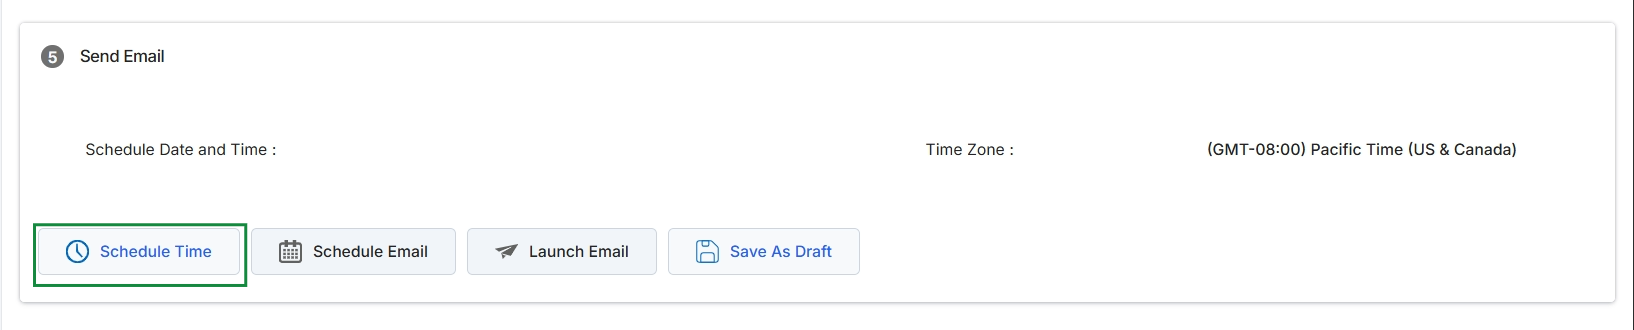
| Schedule Time | A button to open a calendar and time picker to set the desired send date and time. |
| Schedule Email | Schedules the email to be sent at the specified date and time. |
| Launch Email | Immediately sends the email campaign to the selected recipients. |
| Save As Draft | Saves the current email configuration as a draft without sending or scheduling it. |
Campaign Details
| Field | Description |
|---|---|
| Country | The geographical region targeted by the campaign. |
| Language | The language of the campaign content. |
| Campaign Type | The classification of the marketing campaign, in this case, 'Event'. |
| Campaign | The name of the specific campaign this email is associated with. |
Provide Details of Your Email
| Field | Description |
|---|---|
| Name Your Email | The internal name or identifier for this specific email communication. |
| Insert The Subject Line | The subject line that will appear in the recipient's email inbox. |
| From Name | The name displayed as the sender of the email. |
| Sender Email Address | The email address from which the campaign email will be sent. |
Send Email
| Field | Description |
|---|---|
| Schedule Date and Time | An input field to specify the exact date and time for the email to be sent. |
| Time Zone | Displays the currently selected time zone for scheduling, which affects the send time. |
Configuring Email Details
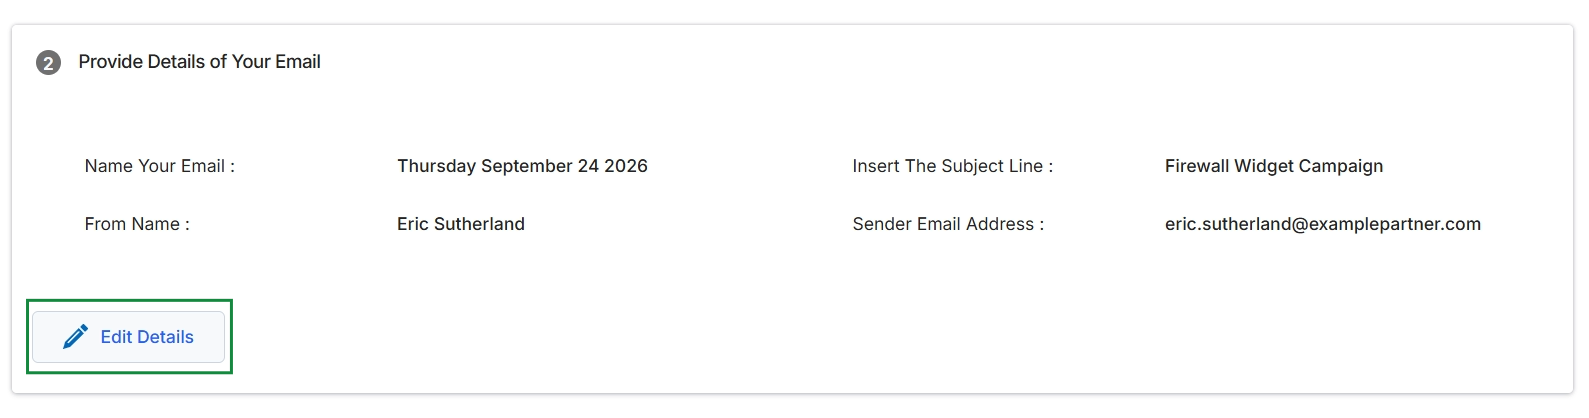
Click the Edit Details button.
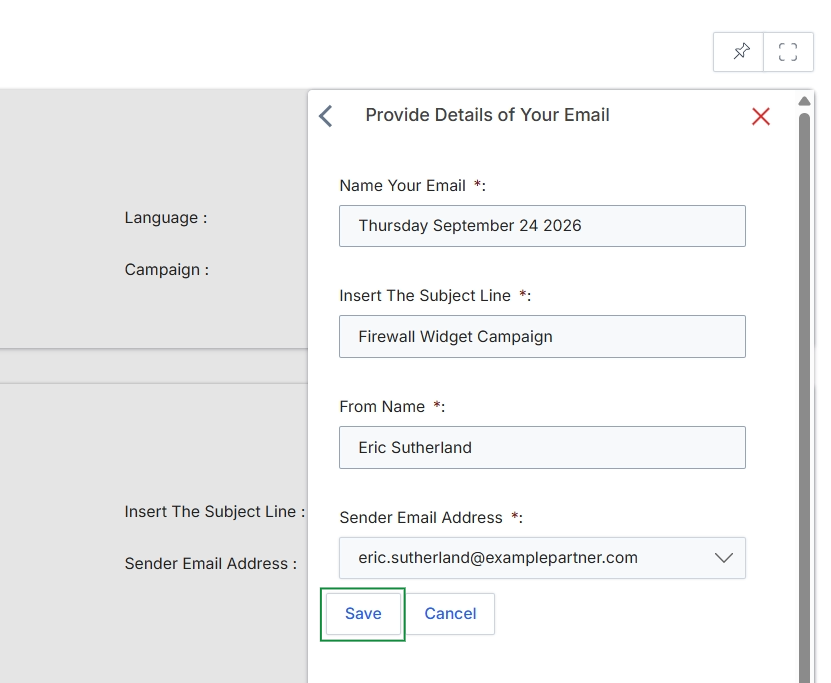
This slide-out panel allows users to define or modify the essential details for an email campaign, which is a core component of the Market module's co-marketing capabilities. Email campaigns facilitate direct communication with target audiences, either by partners leveraging vendor-provided templates or by vendors managing outreach. The fields on this form capture critical information such as the email's internal name for identification, the subject line that recipients will see, the sender's display name, and the email address from which the communication will be sent. These details are fundamental for tracking, deliverability, and ensuring brand consistency, and are used by the platform's email infrastructure to process and send the campaign.
Review and update the email details as needed, then click Save to apply your changes.
Buttons
| Button | Description |
|---|---|
| Save | Saves the entered email details. |
| Cancel | Discards any changes and closes the panel. |
Fields
| Field | Description |
|---|---|
| Name Your Email | The internal name for this email, used for identification and organization within the platform. This is a mandatory field. |
| Insert The Subject Line | The subject line of the email, which will be visible to recipients. This is a mandatory field. |
| From Name | The name displayed as the sender of the email to recipients. This is a mandatory field. |
| Sender Email Address | The email address from which the campaign email will be sent. This is a mandatory field and typically selected from a pre-configured list of approved sender addresses. |

Click Save.
Customizing the Email Template
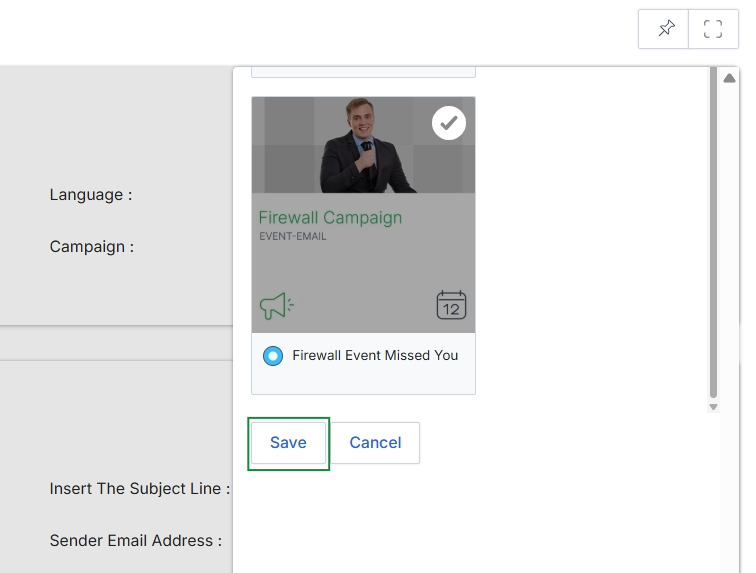
This screen displays a selection interface for associating an email campaign with a specific event campaign within the Market module. It presents a card-like preview of an available campaign, including its name, type, and a specific email associated with it. This allows users to link an email communication, such as a follow-up or reminder, to a broader marketing initiative, ensuring that all related activities are properly grouped and tracked.
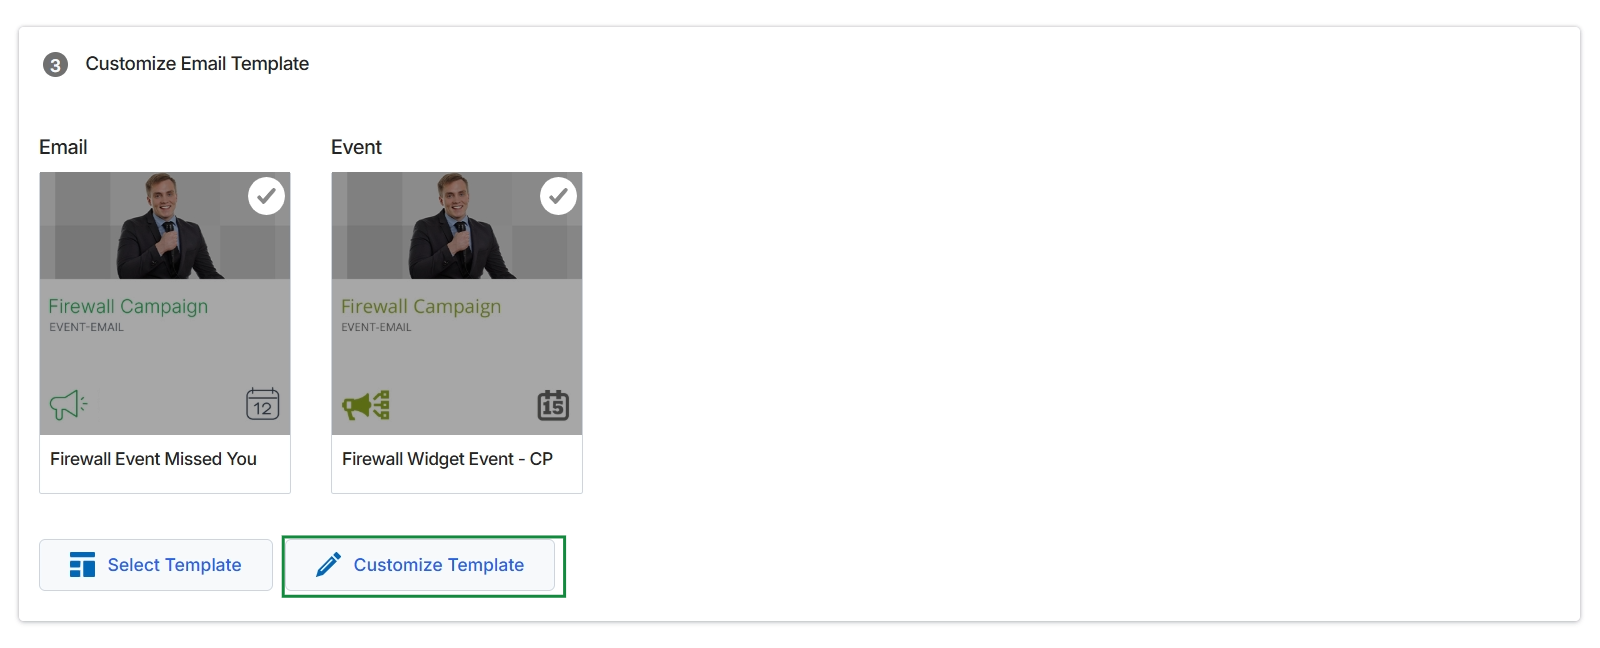
Click Save.
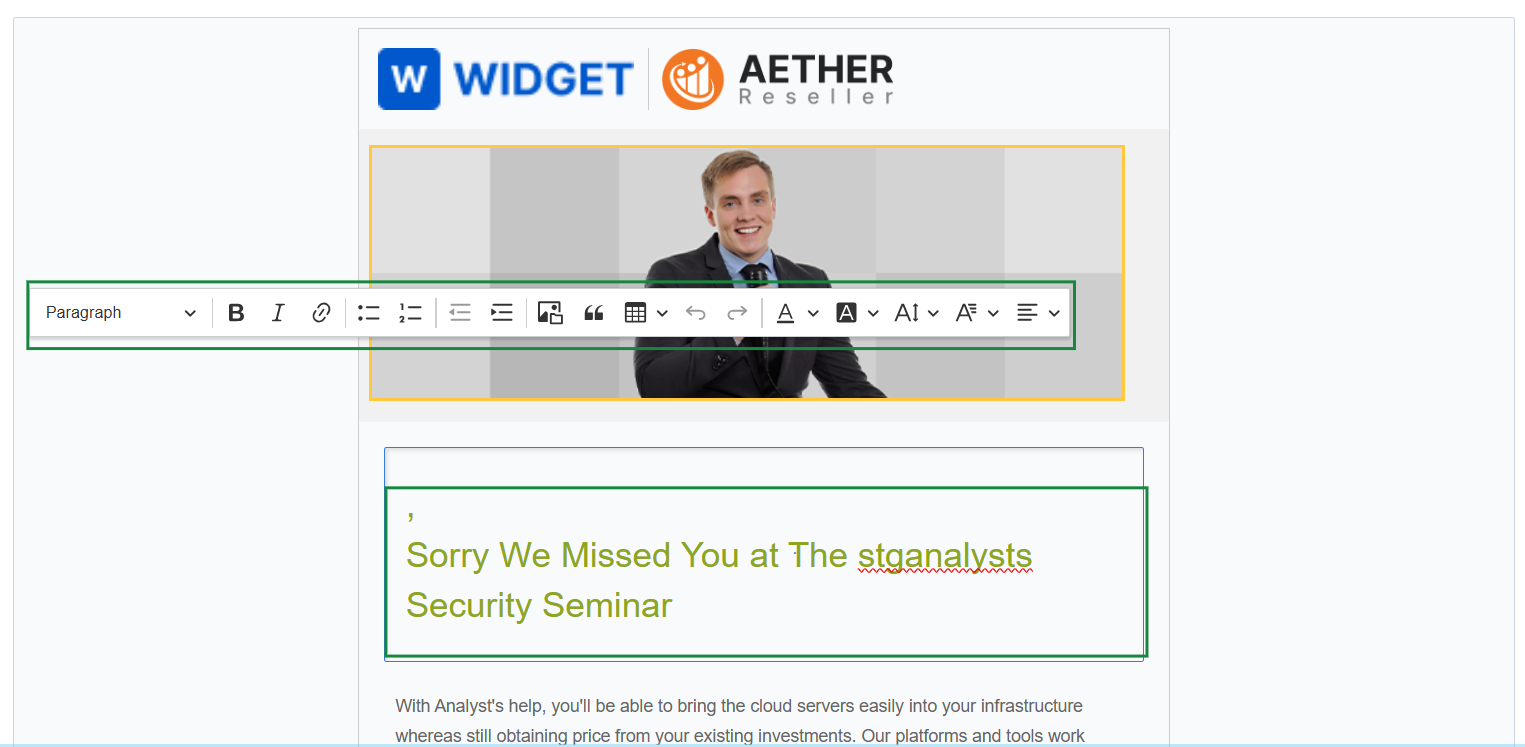
This screen displays an email template within an editor, allowing for content customization as part of an email campaign. It shows a rich text editor toolbar positioned over an editable section of the email, indicating that users can modify text elements such as paragraphs, formatting, and colors. This view is integral to the email campaign execution workflow, where partners or vendors personalize pre-approved templates before sending out marketing communications.
Selecting Recipients and Sending Test Emails

Click the Select Recipients button.
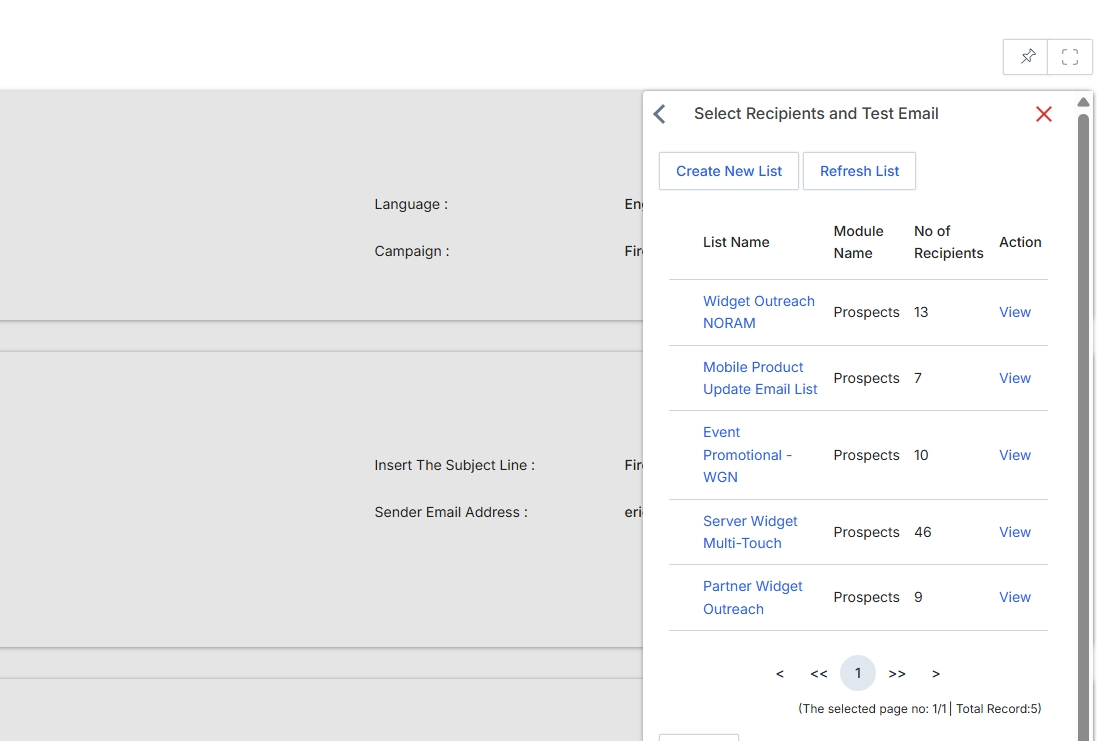
This slide-out panel displays a list of available mailing lists for an email campaign, allowing users to select recipients for their email sends. Each list shows its name, the module it originated from (e.g., Prospects), and the number of recipients it contains. This view is a crucial step in the email campaign workflow, enabling the sender to choose the target audience for their message before proceeding with the email dispatch.

Click Send Test Email.
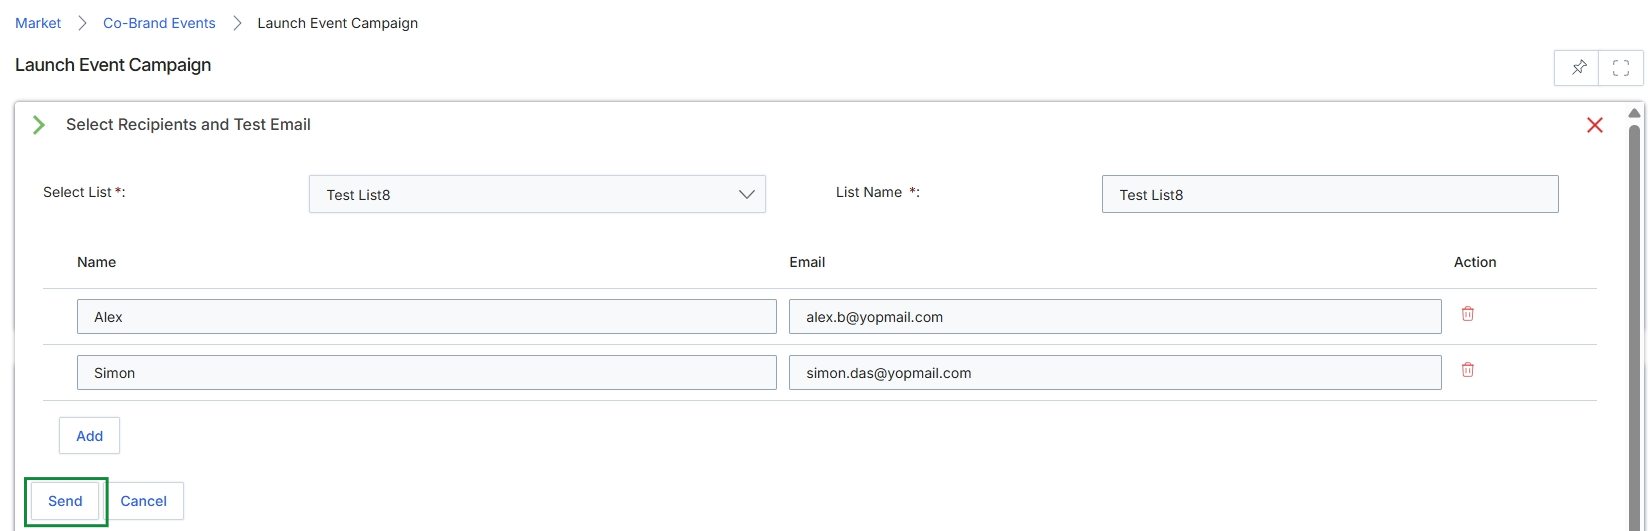
This screen is part of the email campaign execution workflow, specifically for selecting recipients and sending a test email. It allows users to define or select a mailing list for an event campaign and add individual recipients for testing purposes. The ability to send test emails is crucial for verifying email content, formatting, and merge field accuracy before a full campaign launch, ensuring that the final communication aligns with the campaign's objectives and branding guidelines. The platform tracks email metrics post-send, which includes opens, clicks, and bounces, making this a critical step in ensuring deliverability and engagement for any email marketing effort within the Market module.
The system has processed the selected recipients for the test email, and the "Send" button is now highlighted, indicating readiness to dispatch the test email.
Buttons
| Button | Description |
|---|---|
| Add | A button to add a new recipient row to the test list. |
| Send | A button to send the test email to the selected recipients. |
| Cancel | A button to discard changes and return to the previous screen without sending the test email. |
Fields
| Field | Description |
|---|---|
| Select List * | A dropdown menu to select an existing mailing list for the test email. |
| List Name * | The name of the selected or newly created mailing list. |
Column Headings
| Column | Description |
|---|---|
| Name | A column displaying the name of an individual recipient added to the test list. |
| A column displaying the email address of an individual recipient added to the test list. | |
| Action | A column providing actions, such as deleting a recipient, for each entry in the test list. |
Scheduling and Launching the Email
Click Send.
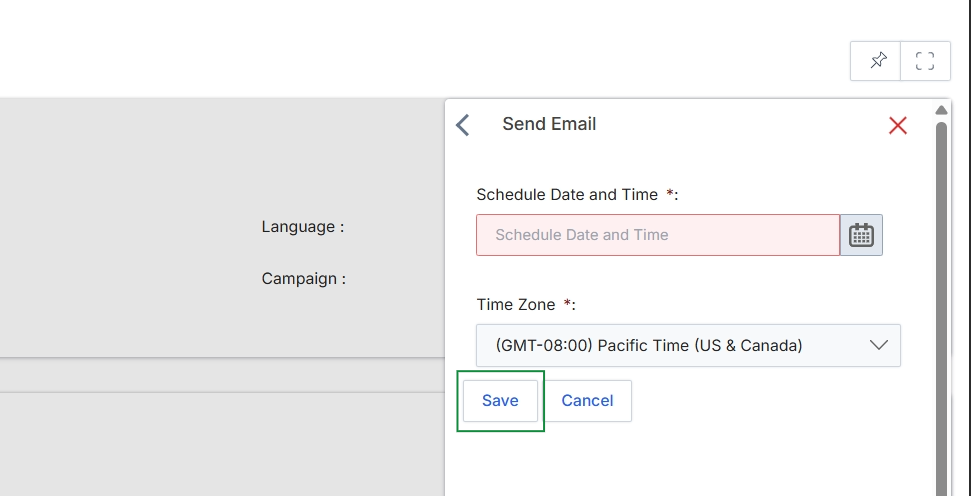
This slide-out panel facilitates the scheduling of an email for a campaign, allowing users to define the exact date and time for the email to be sent. This functionality is a critical step in the email campaign execution workflow (WF-06) within the Market module, enabling both vendors and partners to manage the timing of their communications. By specifying a time zone, the platform ensures that emails are delivered according to the intended local time, regardless of the sender's or recipient's geographical location. This screen ensures that scheduled email sends are accurately configured before being queued for delivery.
Click the "Save" button to confirm the scheduled email send.
Buttons
| Button | Description |
|---|---|
| Save | Saves the configured schedule for the email send. |
| Cancel | Discards any changes and closes the scheduling panel. |
Fields
| Field | Description |
|---|---|
| Schedule Date and Time | The specific date and time when the email is scheduled to be sent. This field is mandatory. |
| Time Zone | The time zone relevant to the scheduled send time, ensuring accurate delivery regardless of geographical location. This field is mandatory. |
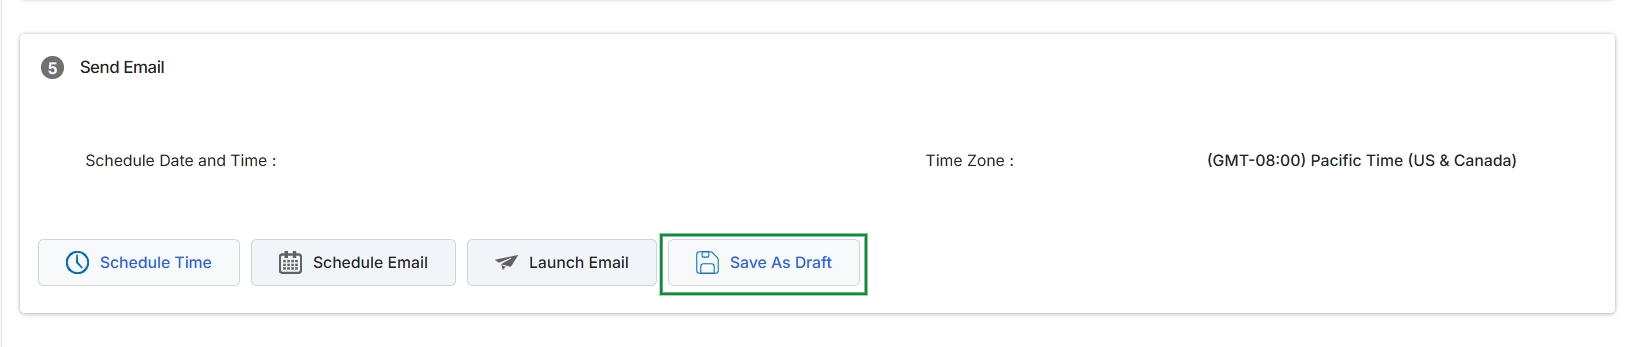
This screen represents the final step in the email campaign execution workflow within the Market module, where users configure the sending parameters for an email. It allows for scheduling the email delivery by specifying a date and time, and it displays the current time zone setting. Users can choose to schedule the email for a future time, launch it immediately, or save their current configuration as a draft for later completion.