

Overview
The platform integrates with various external systems such as CRM, marketing automation, and payment gateways to ensure seamless data flow and process automation. Each integration requires a connector to be configured, which involves authenticating with the external system and defining how data is exchanged. This 'Connections' area is where administrators can oversee all these vital links.
Effective management of these connectors is crucial for the overall health and functionality of the partner program, as they facilitate critical operations like lead and deal synchronization, partner onboarding, and reward payouts. Administrators use this interface to verify connection status, update authentication credentials, and control which internal users or groups have access to manage specific integrations.
Accessing and Viewing Connections
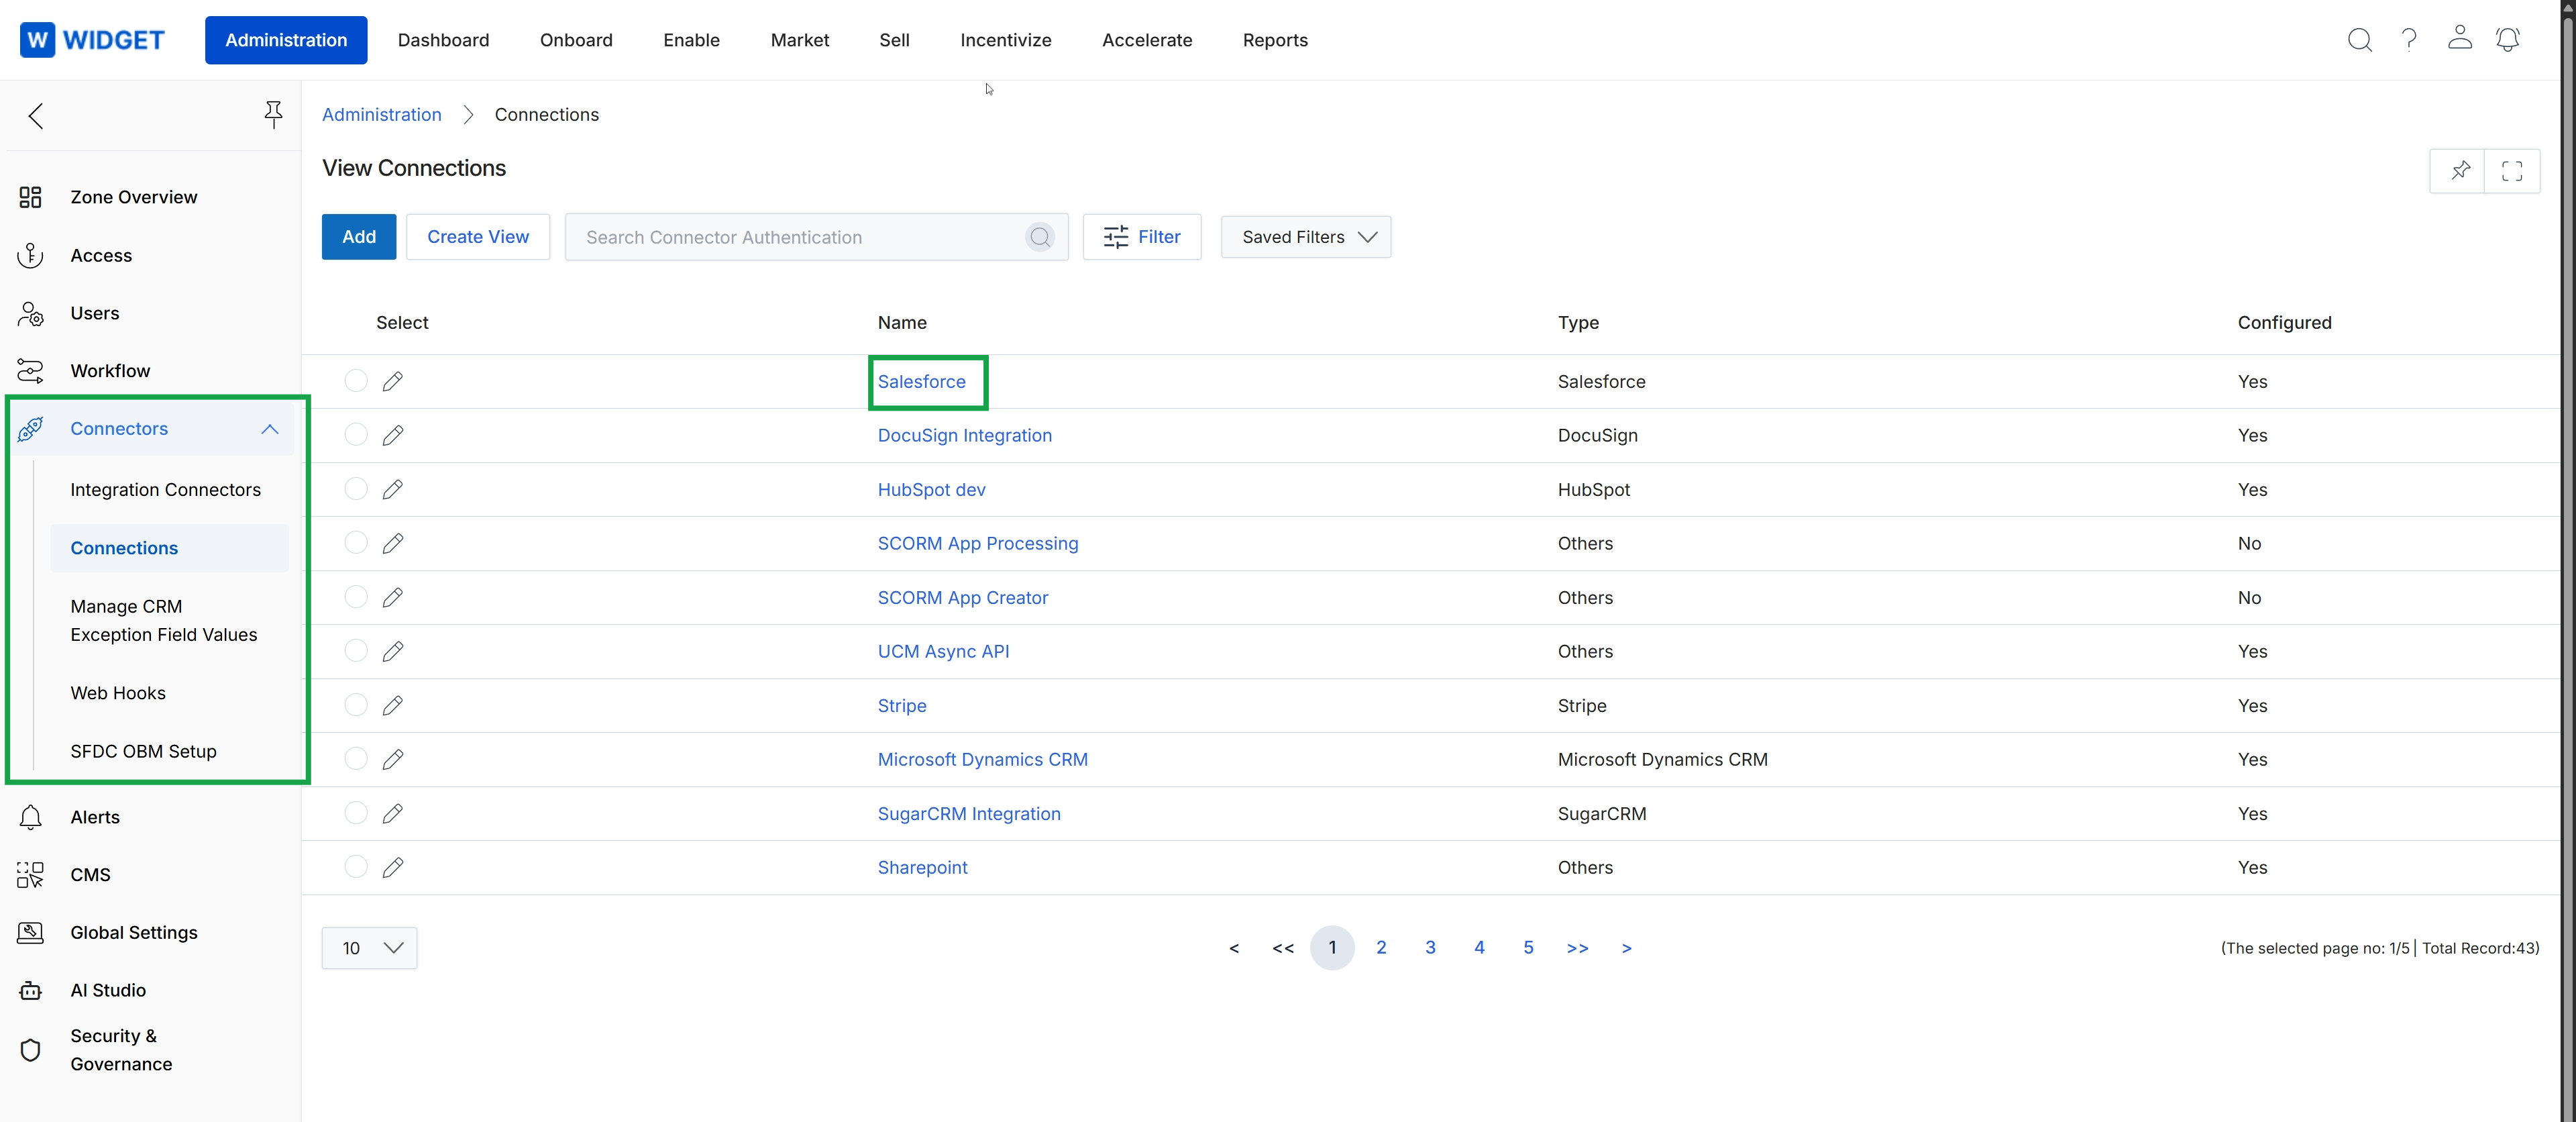
Click Salesforce in the Name column to view its connection details.
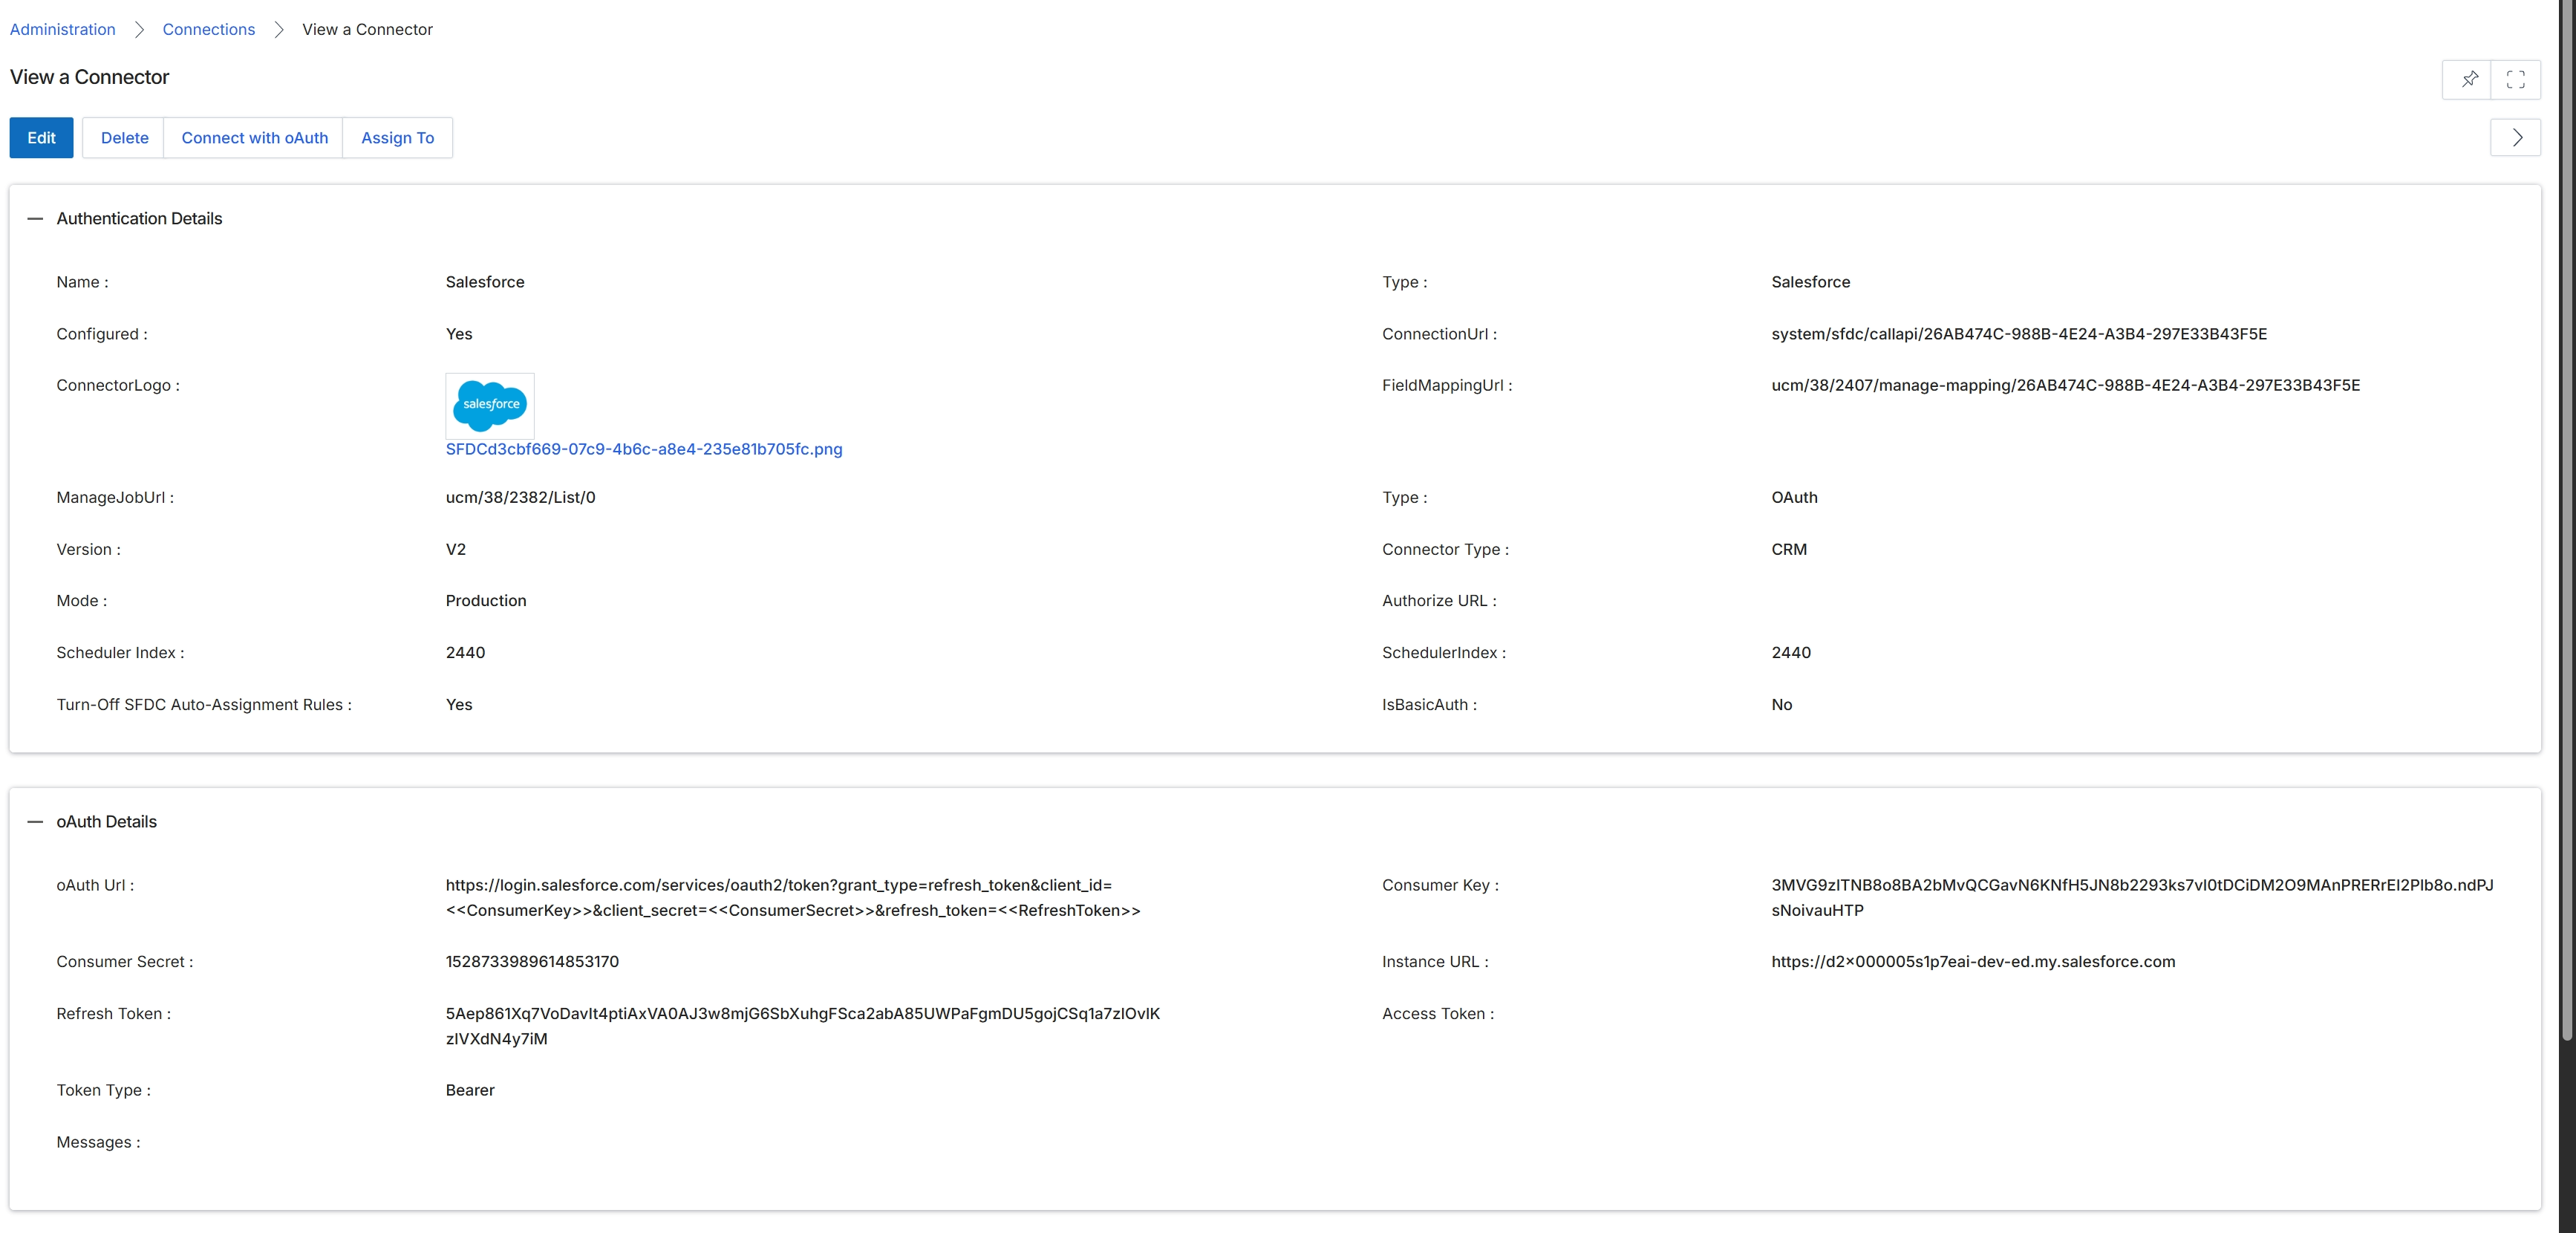
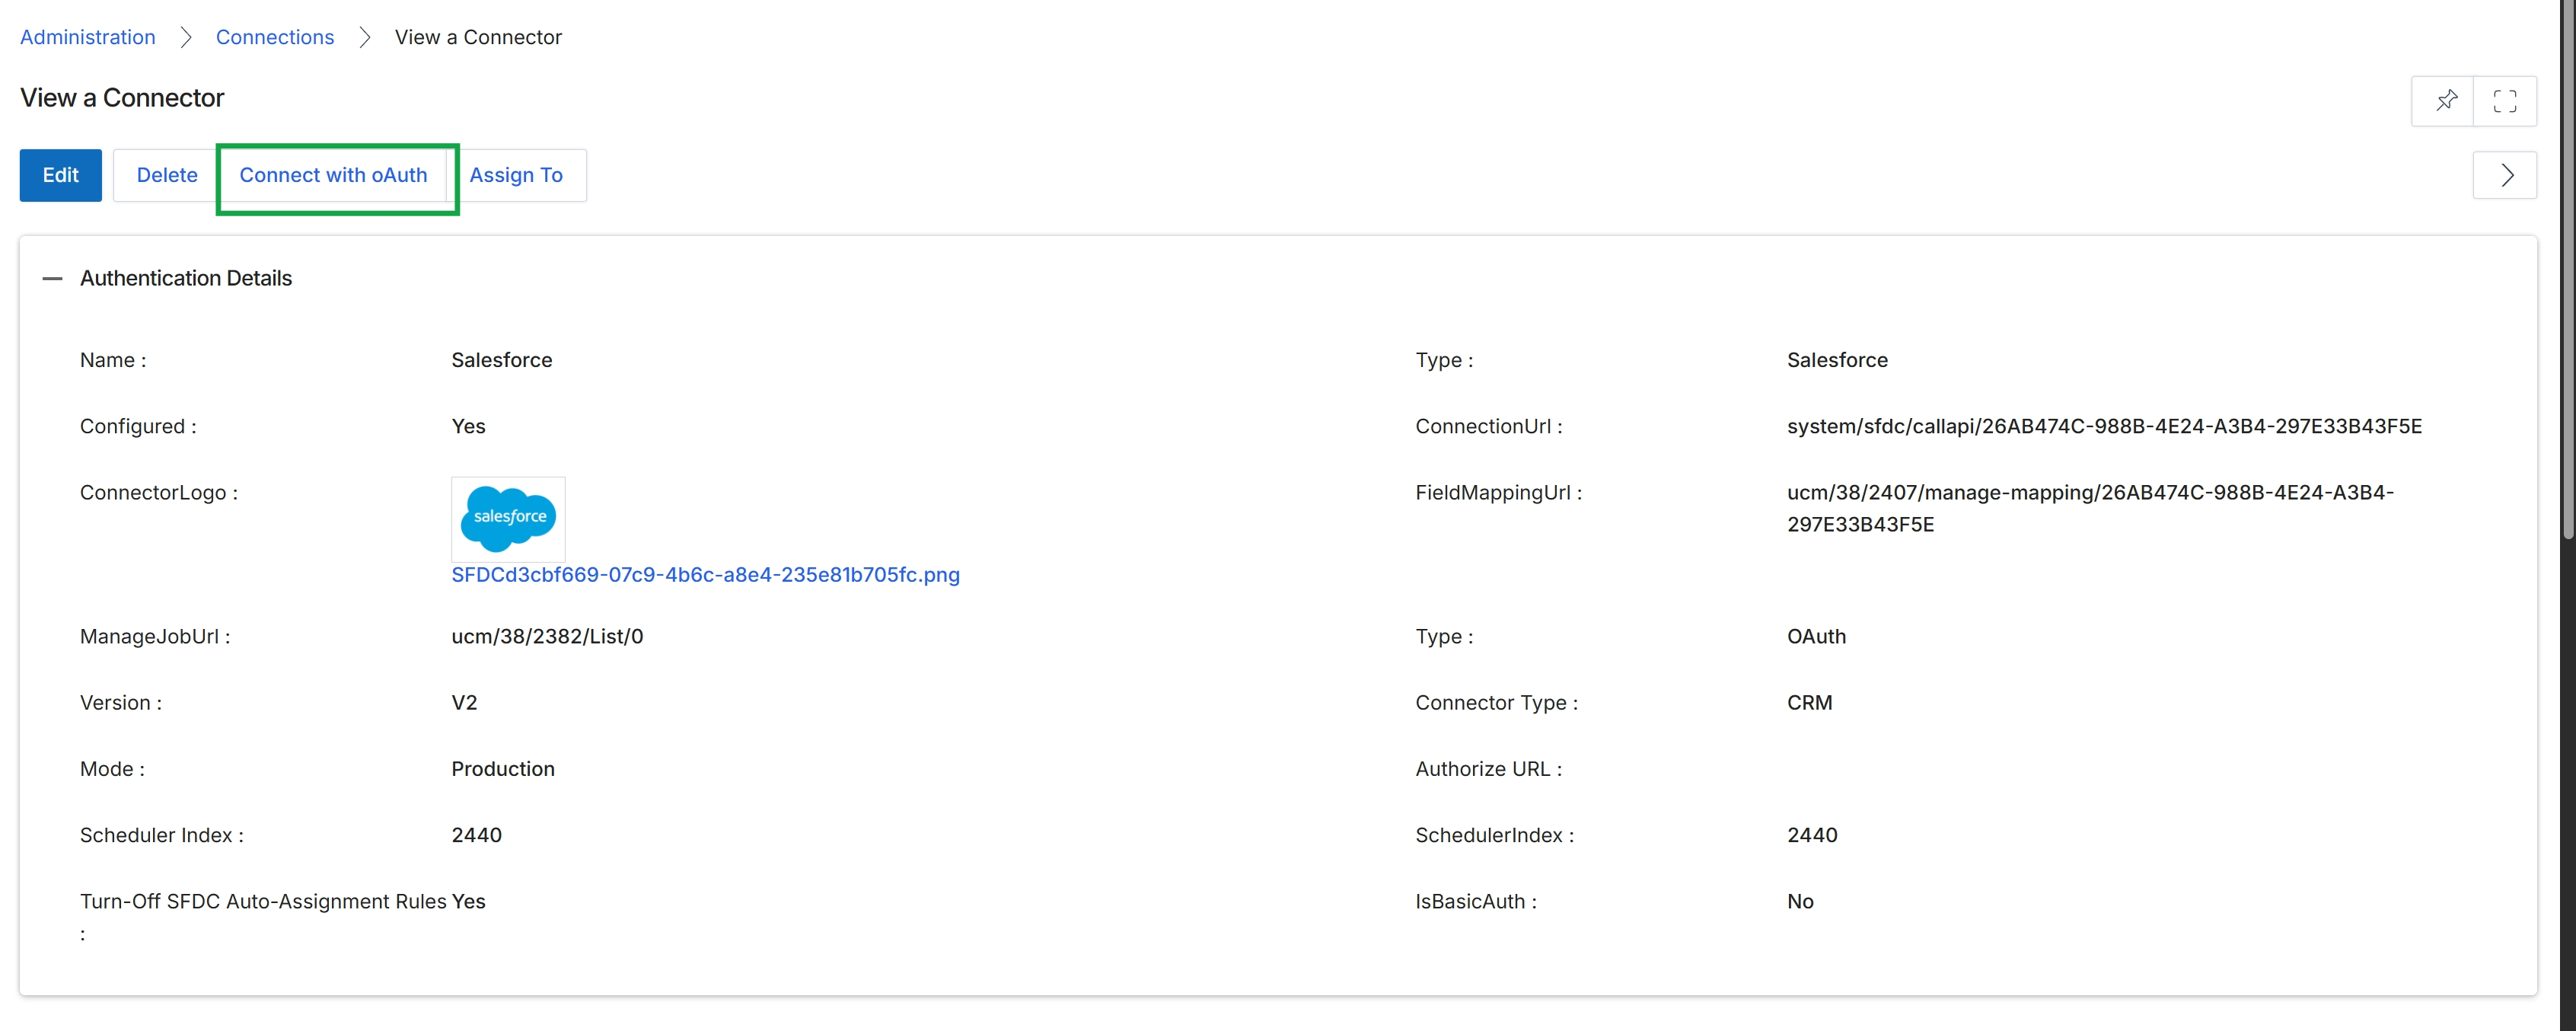
This screen displays the detailed configuration for a specific integration connector, providing a comprehensive overview of how the platform is connected to an external system. Administrators use this view to review the setup, verify authentication details, and understand the parameters governing data synchronization. It is a critical component of the Administration module, as proper connector configuration ensures seamless data flow between the platform and integrated third-party applications like CRMs, marketing automation tools, or payment gateways. The information presented here includes authentication credentials, connection URLs, and other technical specifications that define the integration's behavior and status.
Review the detailed configuration of the Salesforce integration connector.
Buttons
| Button | Description |
|---|---|
| Edit | Click to modify the connector's configuration. |
| Delete | Click to remove this connector from the platform. |
| Connect with oAuth | Click to re-authenticate or establish an OAuth connection for the connector. |
| Assign To | Click to assign this connector to specific users or roles for management. |
Authentication Details
| Field | Description |
|---|---|
| Name | The display name of the integration connector. |
| Configured | Indicates whether the connector has been successfully configured. |
| ConnectorLogo | The logo associated with the integrated system. |
| ManageJobUrl | The URL for managing related jobs or processes within the connector. |
| Version | The version of the connector being used. |
| Mode | The operational mode of the connector, such as 'Production'. |
| Scheduler Index | An identifier for the connector's scheduling configuration. |
| Turn-Off SFDC Auto-Assignment Rules | Indicates if Salesforce (SFDC) auto-assignment rules are disabled for this connector. |
| Type | The type of external system this connector integrates with, such as 'Salesforce'. |
| ConnectionUrl | The URL used to establish the connection to the external system. |
| FieldMappingUrl | The URL for managing the field mapping configuration between the platform and the external system. |
| Type | The authentication type used by the connector, such as 'OAuth'. |
| Connector Type | The category of the connector, such as 'CRM'. |
| Authorize URL | The URL used for authorizing the connection with the external system. |
| SchedulerIndex | An identifier for the connector's scheduling configuration. |
| IsBasicAuth | Indicates whether basic authentication is used for the connector. |
oAuth Details
| Field | Description |
|---|---|
| oAuth Url | The OAuth URL used for authentication with the external system. |
| Consumer Secret | The secret key used for OAuth authentication. |
| Refresh Token | The token used to obtain new access tokens without re-authenticating. |
| Token Type | The type of token issued, such as 'Bearer'. |
| Messages | Any messages or status updates related to the OAuth connection. |
| Consumer Key | The public key used to identify the client application in OAuth. |
| Instance URL | The base URL of the external system instance. |
| Access Token | The token used to access protected resources on behalf of the user. |
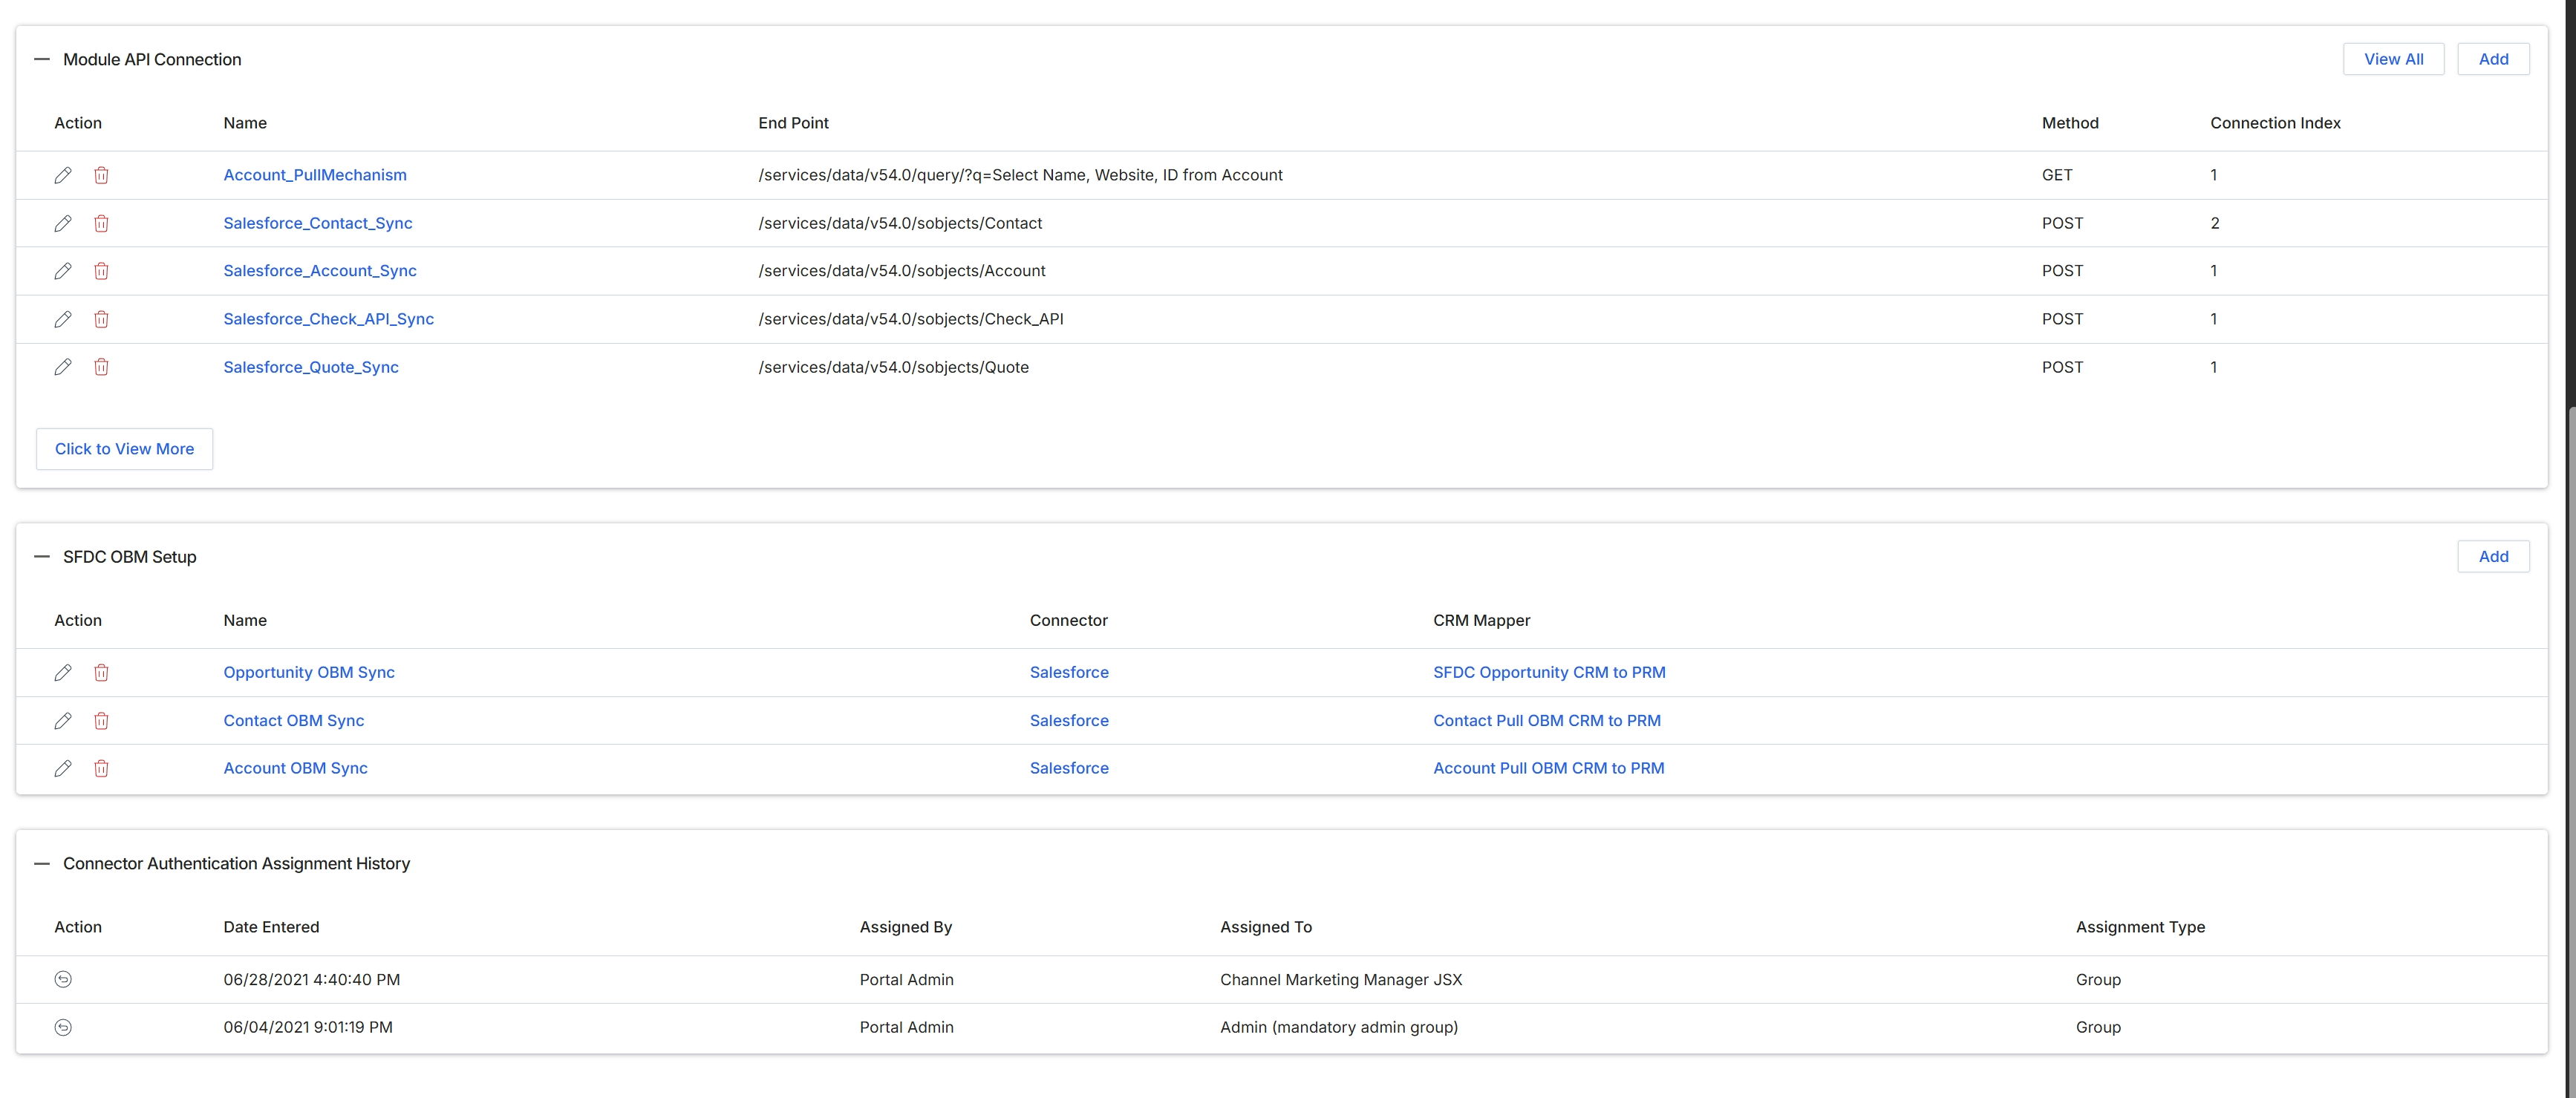
This screen provides an overview of the various integration connections configured within the platform, categorized into different sections. It displays the Module API Connections, which are custom API endpoints configured for specific data interactions, and the SFDC OBM Setup, detailing the Salesforce CRM integrations for Opportunity, Contact, and Account synchronization. Additionally, the Connector Authentication Assignment History section tracks when and by whom connector authentications were assigned, providing an audit trail for integration access. Administrators use this screen to monitor existing connections, understand their configurations, and review historical assignments, ensuring data flow and security across integrated systems.
Review the configured API connections, CRM setups, and connector authentication assignment history.
Buttons
| Button | Description |
|---|---|
| View All | Button to view all module API connections. |
| Add | Button to add a new module API connection. |
| Click to View More | Button to load more module API connections. |
| Add | Button to add a new SFDC OBM setup. |
Module API Connection
| Column | Description |
|---|---|
| Action | Column header for actions available on each module API connection, such as edit or delete. |
| Name | Column header for the name of the module API connection. |
| End Point | Column header for the API endpoint URL. |
| Method | Column header for the HTTP method used by the API connection (e.g., GET, POST). |
| Connection Index | Column header for the index of the connection. |
SFDC OBM Setup
| Column | Description |
|---|---|
| Action | Column header for actions available on each SFDC OBM setup, such as edit or delete. |
| Name | Column header for the name of the SFDC OBM setup. |
| Connector | Column header for the name of the connector used (e.g., Salesforce). |
| CRM Mapper | Column header for the CRM mapper configuration. |
Connector Authentication Assignment History
| Column | Description |
|---|---|
| Action | Column header for actions available on each connector authentication assignment history entry. |
| Date Entered | Column header for the date and time the assignment was entered. |
| Assigned By | Column header for the user who assigned the authentication. |
| Assigned To | Column header for the user or group to whom the authentication was assigned. |
| Assignment Type | Column header for the type of assignment (e.g., Group). |
Managing Connector Authentication
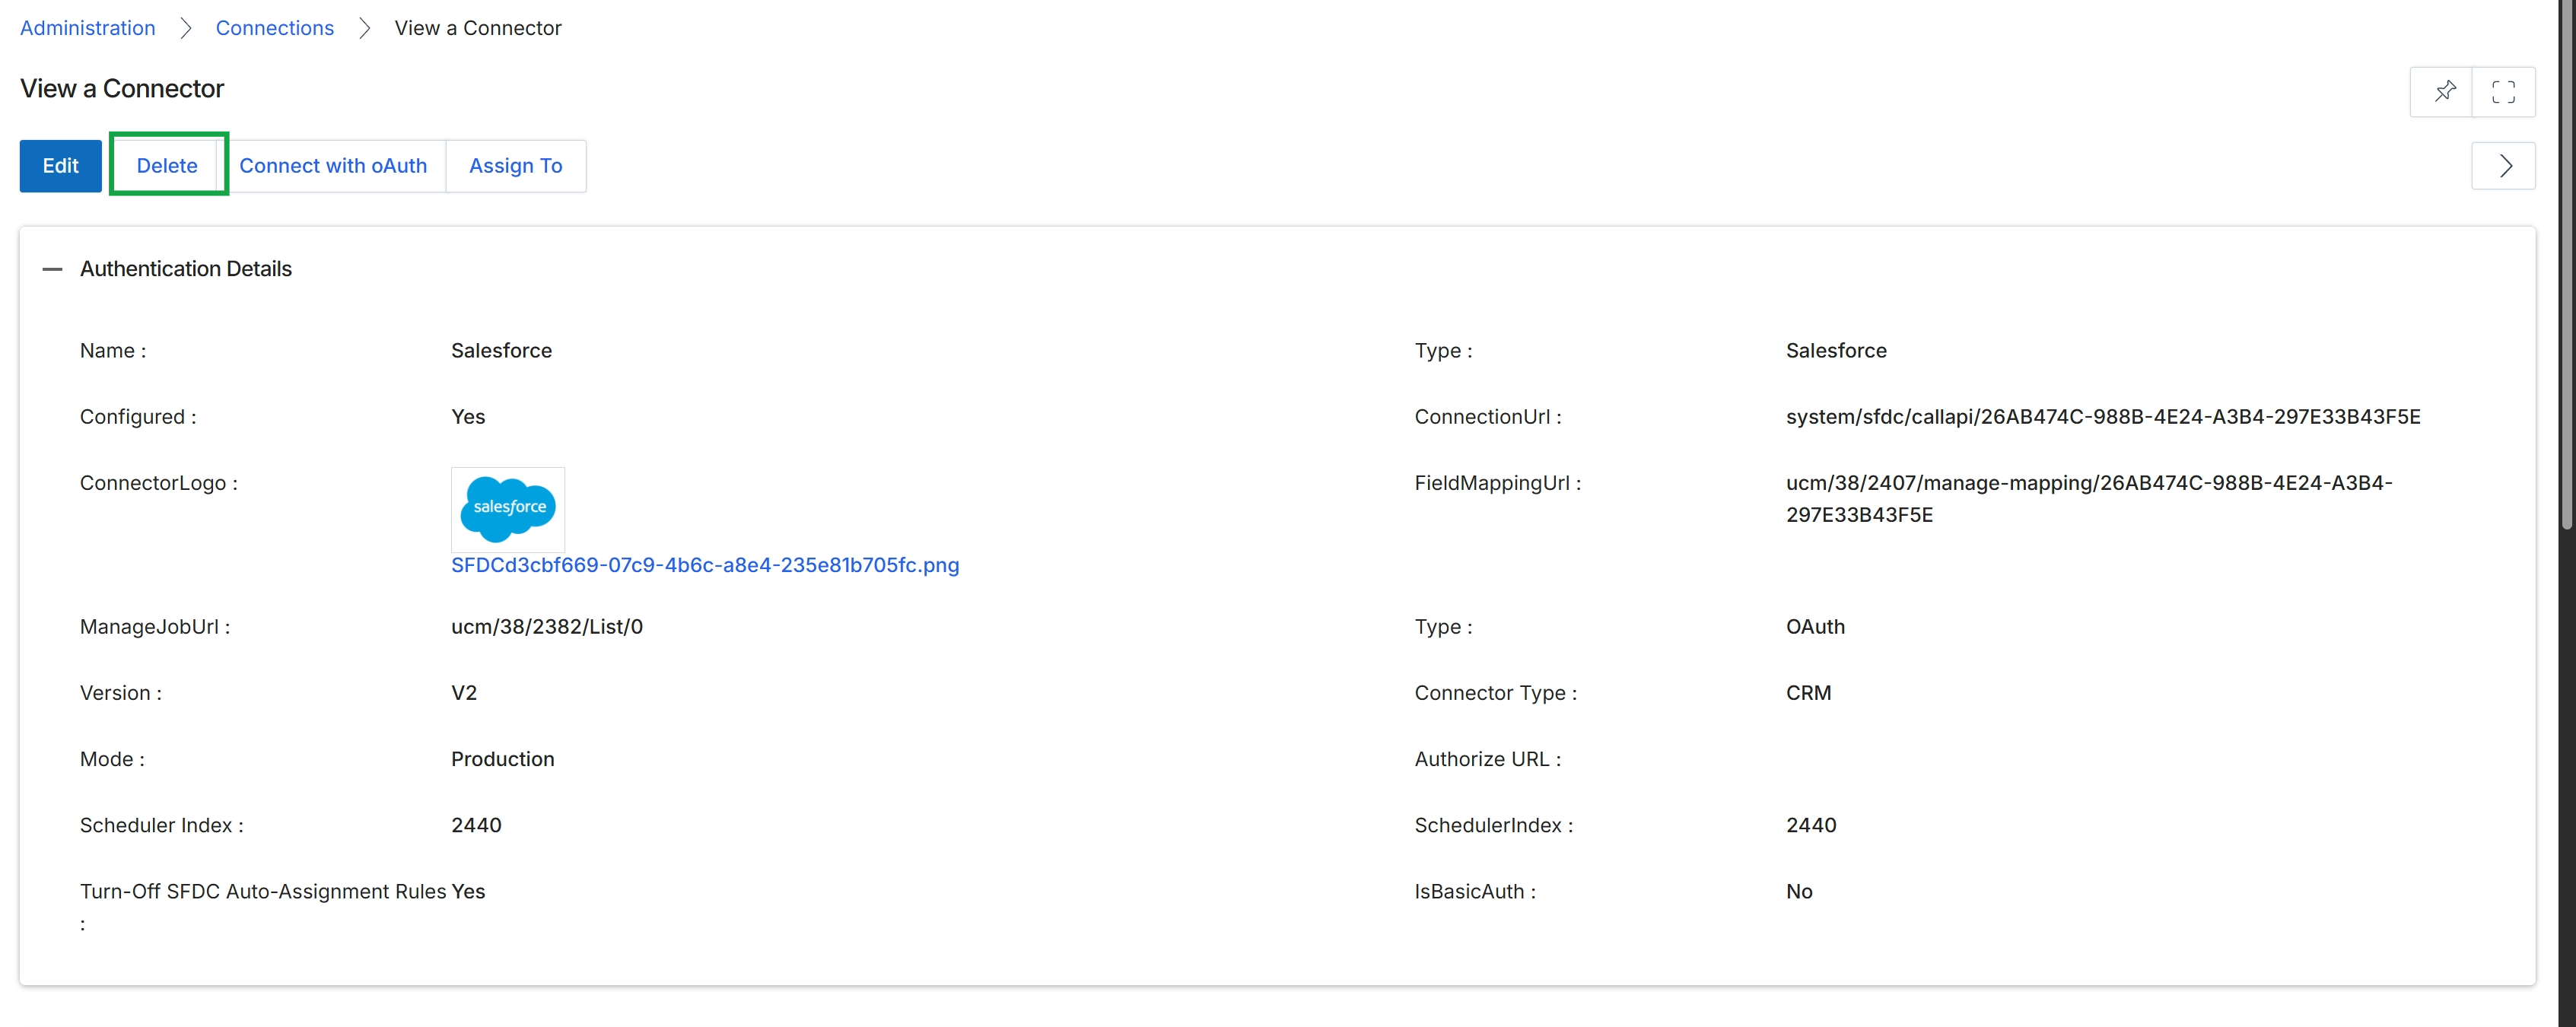
Click the Delete button.
Click the Connect with oAuth button.
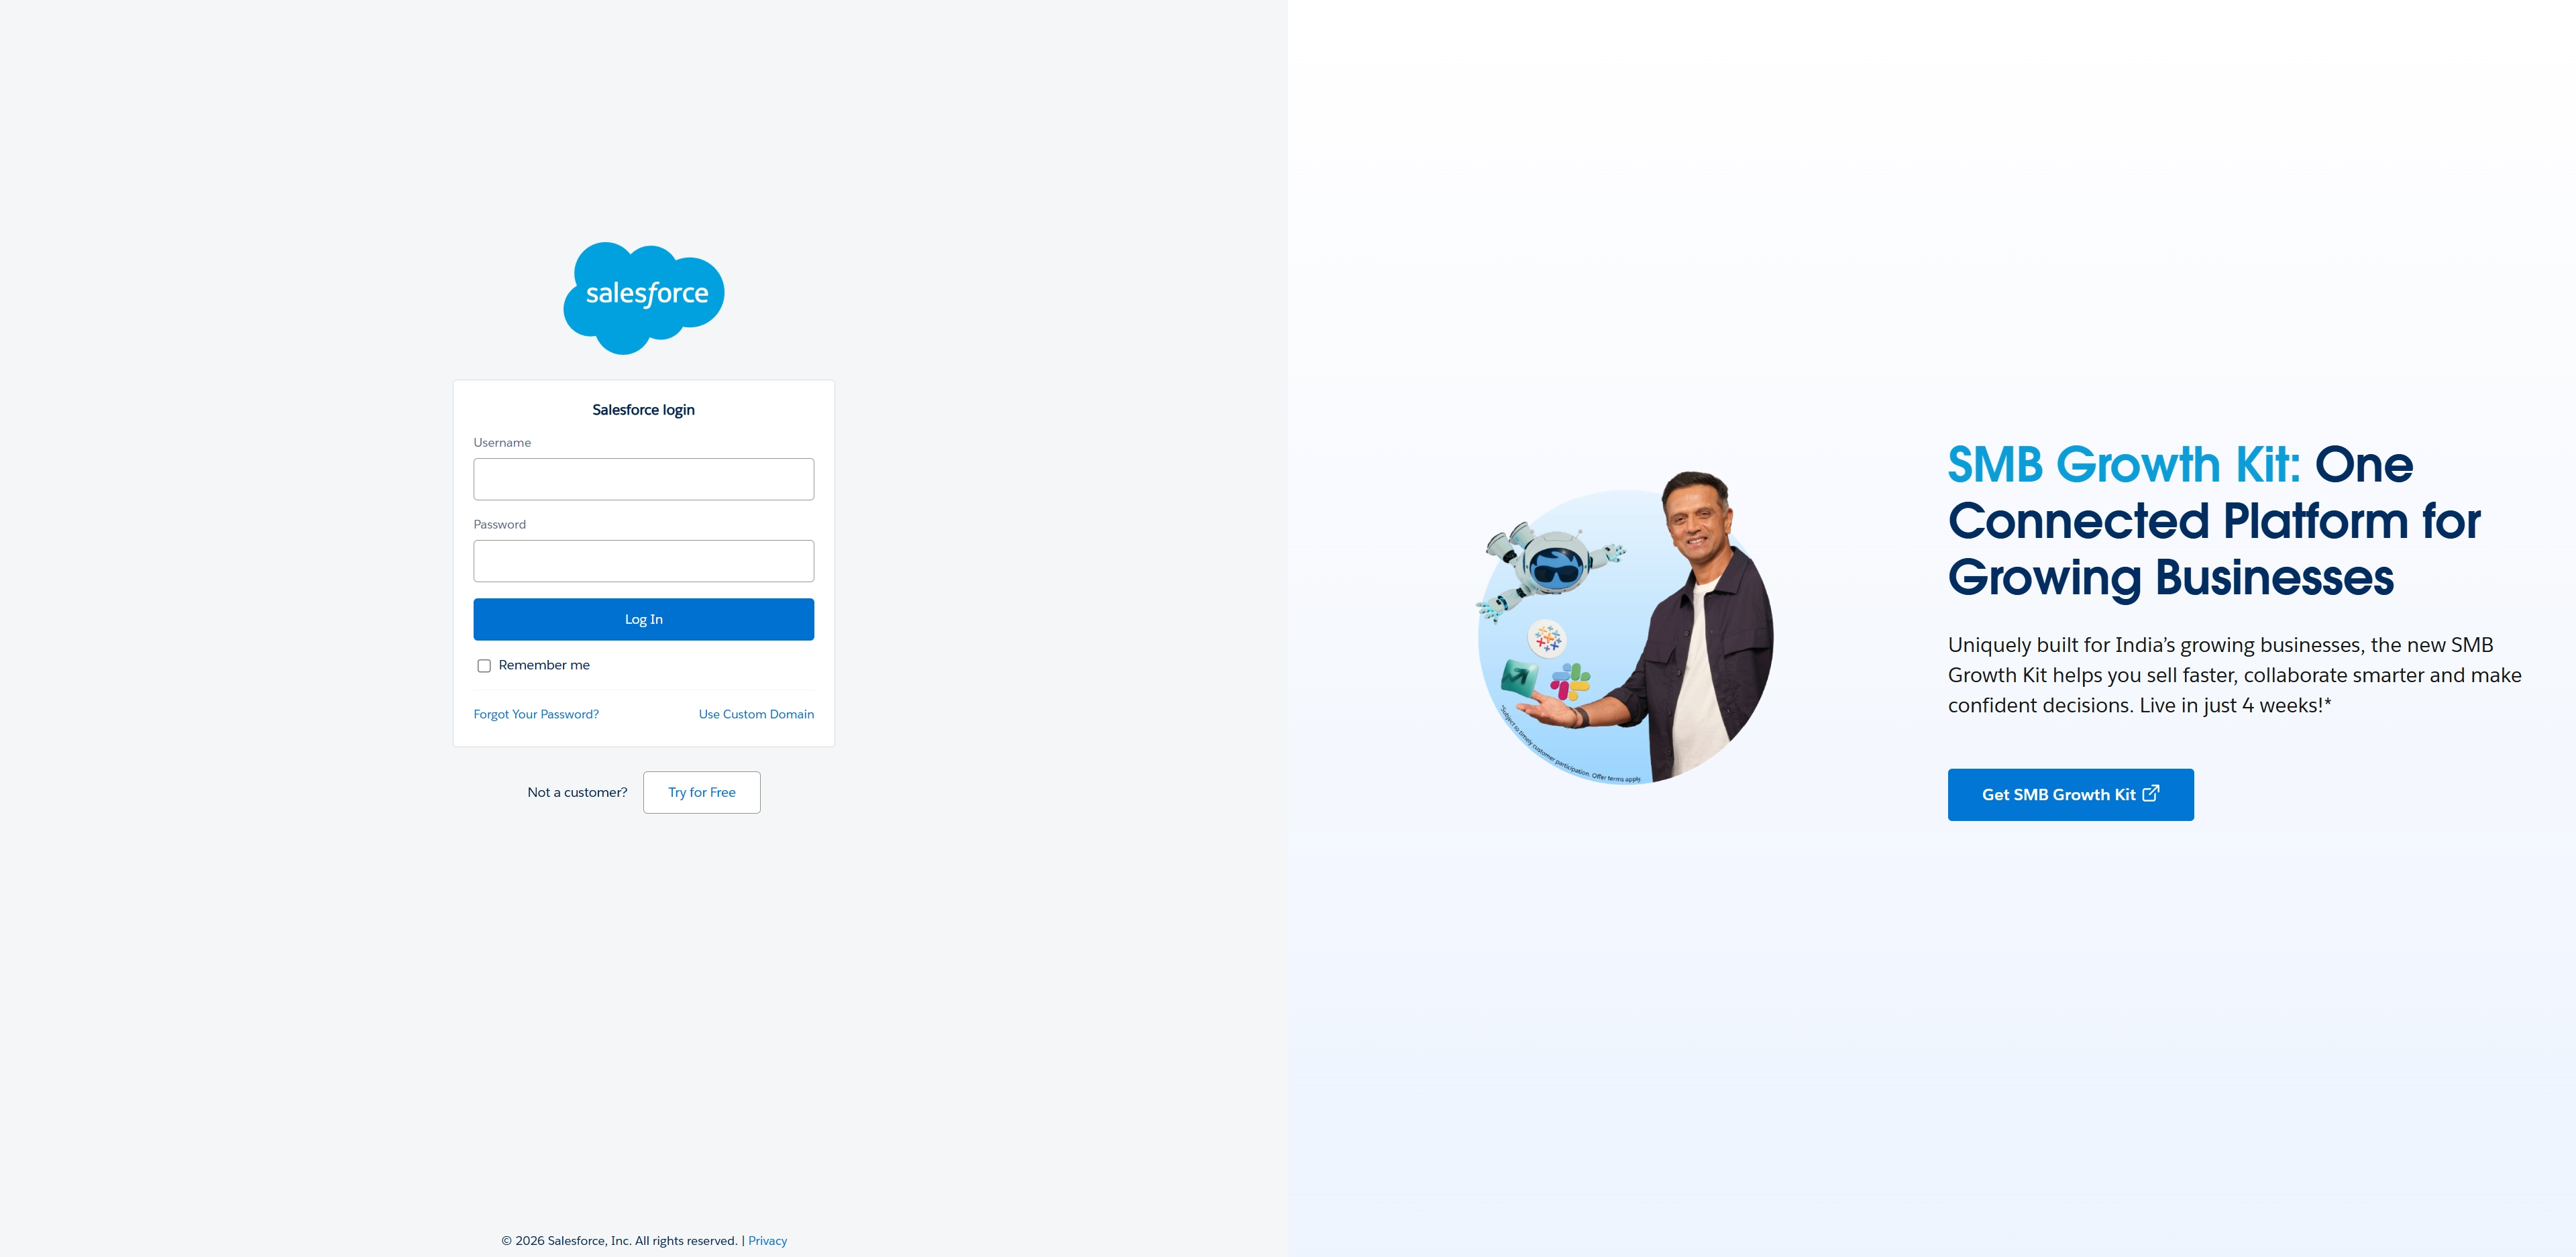
This screen displays the login page for Salesforce, an external CRM system. It is presented to the administrator when configuring the Salesforce integration connector within the platform's Administration module. The purpose of this screen is to allow the administrator to authenticate their Salesforce account, which is a necessary step for establishing the connection and enabling data synchronization between the platform and Salesforce.
Assigning Connector Access
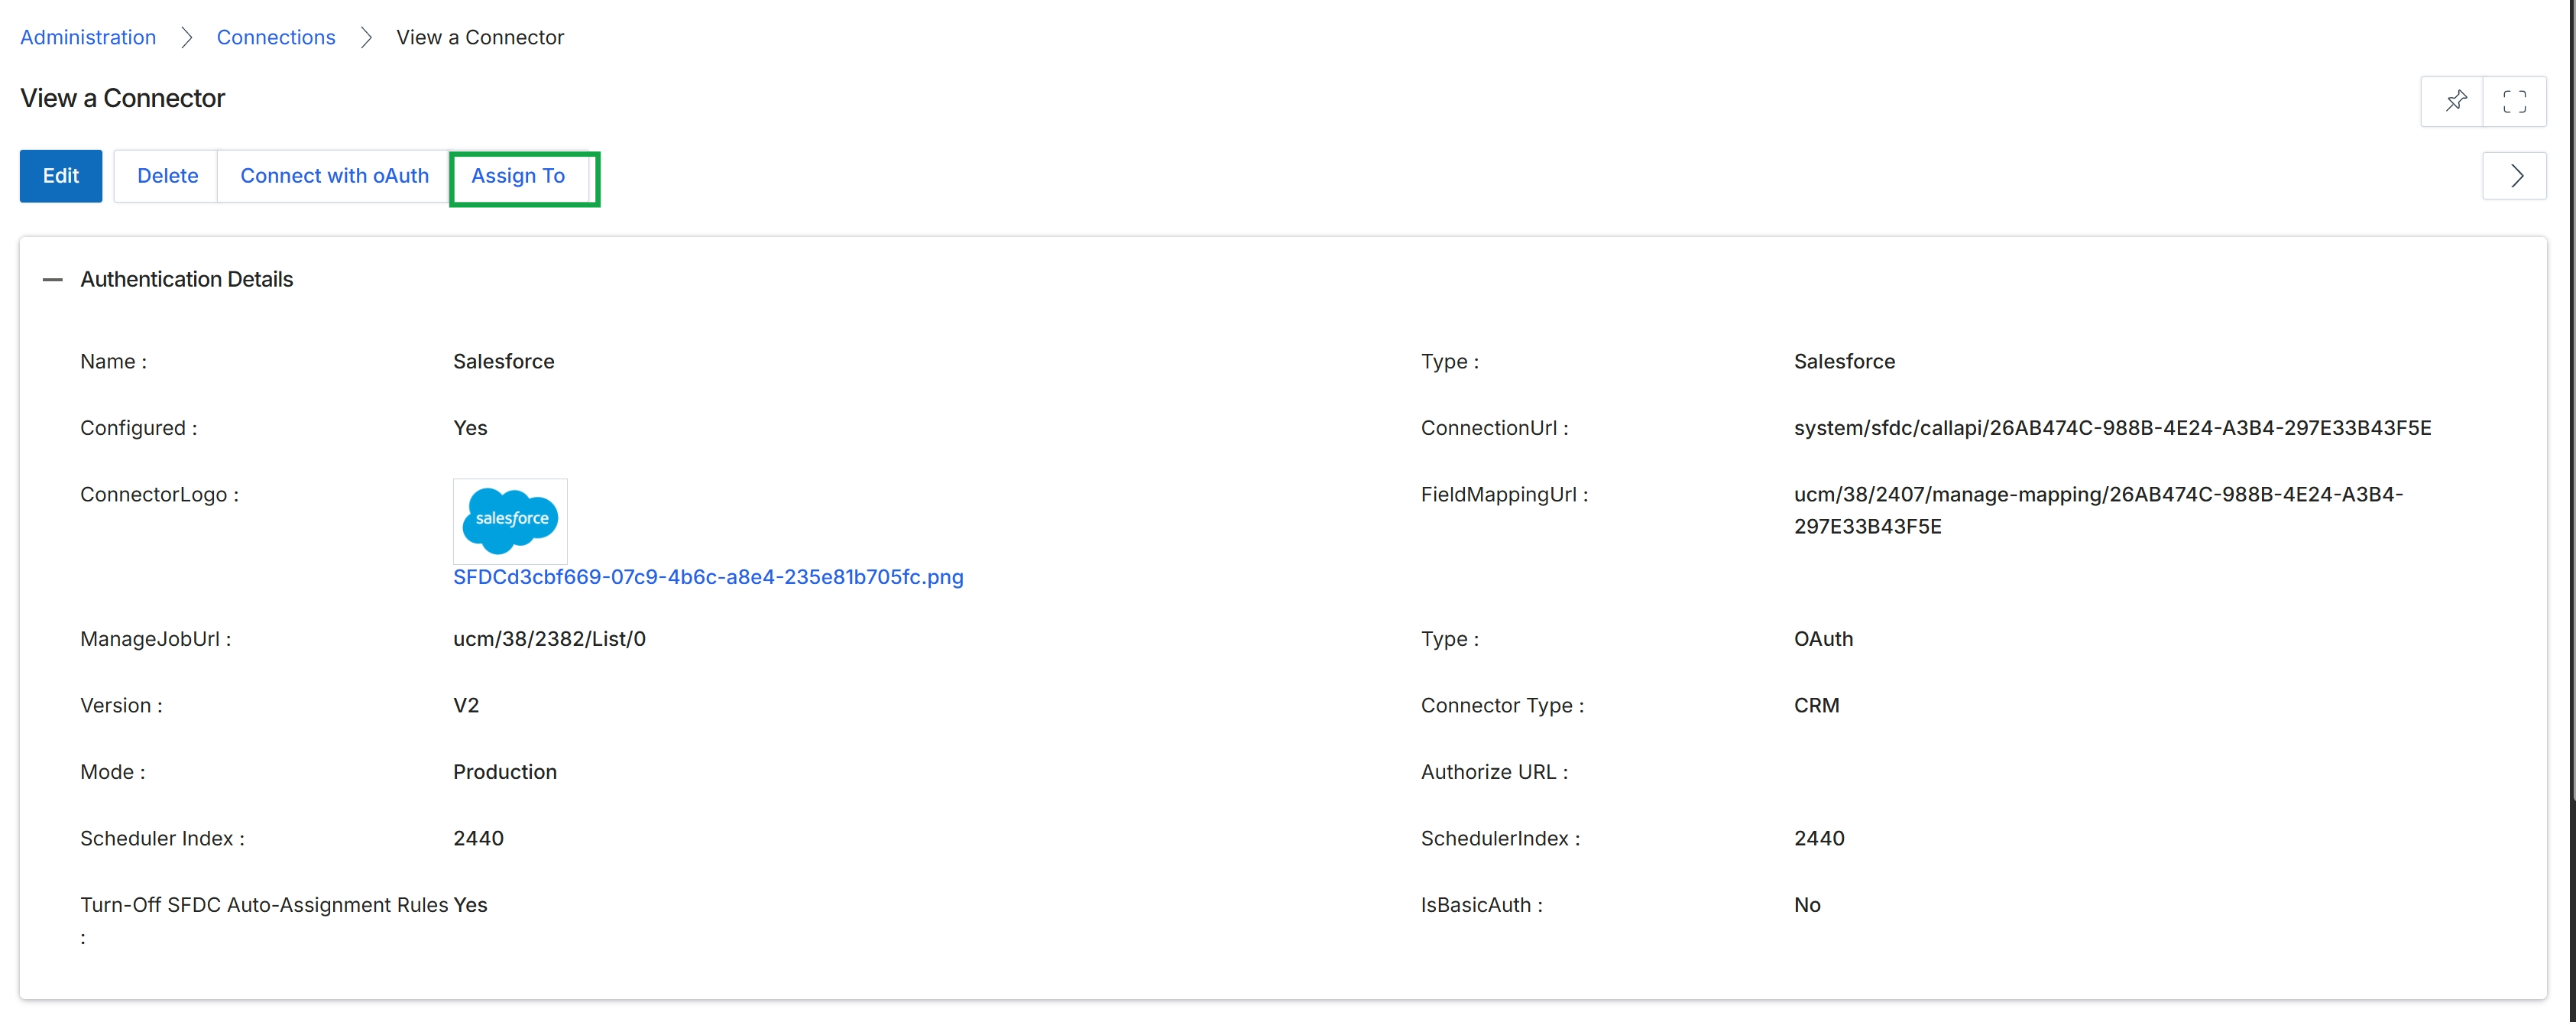
Click the Assign To button.
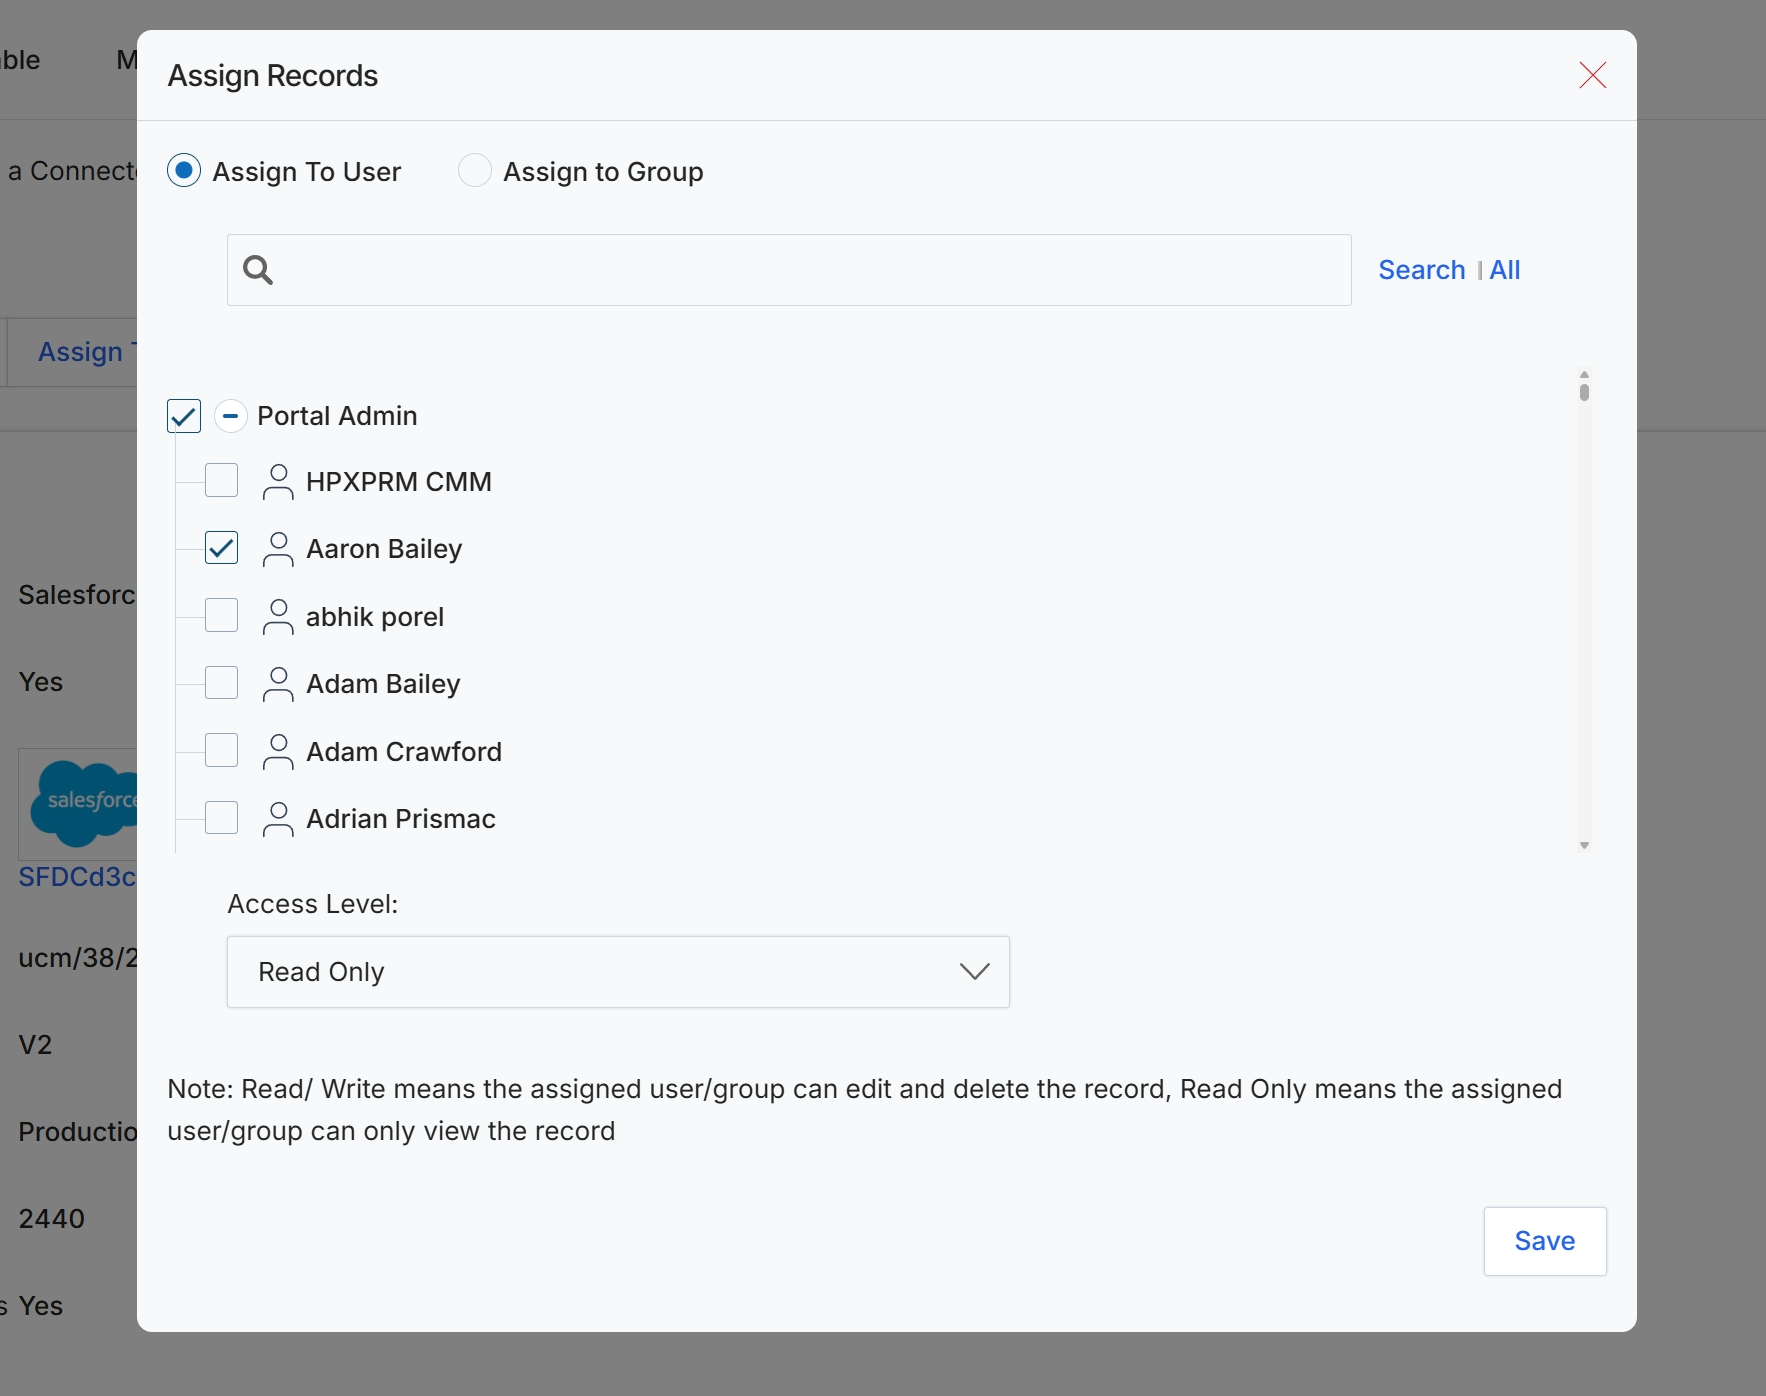
This dialog allows administrators to assign specific records, such as integration connectors, to individual users or user groups within the platform. This assignment mechanism is crucial for controlling access and defining ownership over various system configurations and data entities. By assigning records, administrators can delegate management responsibilities, ensure that only authorized personnel can modify or view sensitive settings, and streamline operational workflows. The dialog supports both individual user assignments and group-based assignments, providing flexibility in managing permissions and access levels across the organization.
Select the users or groups to whom the record should be assigned and specify their access level.
Buttons
| Button | Description |
|---|---|
| Save | Click to save the record assignments and close the dialog. |
Fields
| Field | Description |
|---|---|
| Assign To User | Select this option to assign the record to individual users. |
| Assign to Group | Select this option to assign the record to a predefined user group. |
| Search | Enter keywords to search for specific users or groups. |
| Access Level | A dropdown menu to define the access level (e.g., Read Only, Read/Write) for the selected users or groups. |
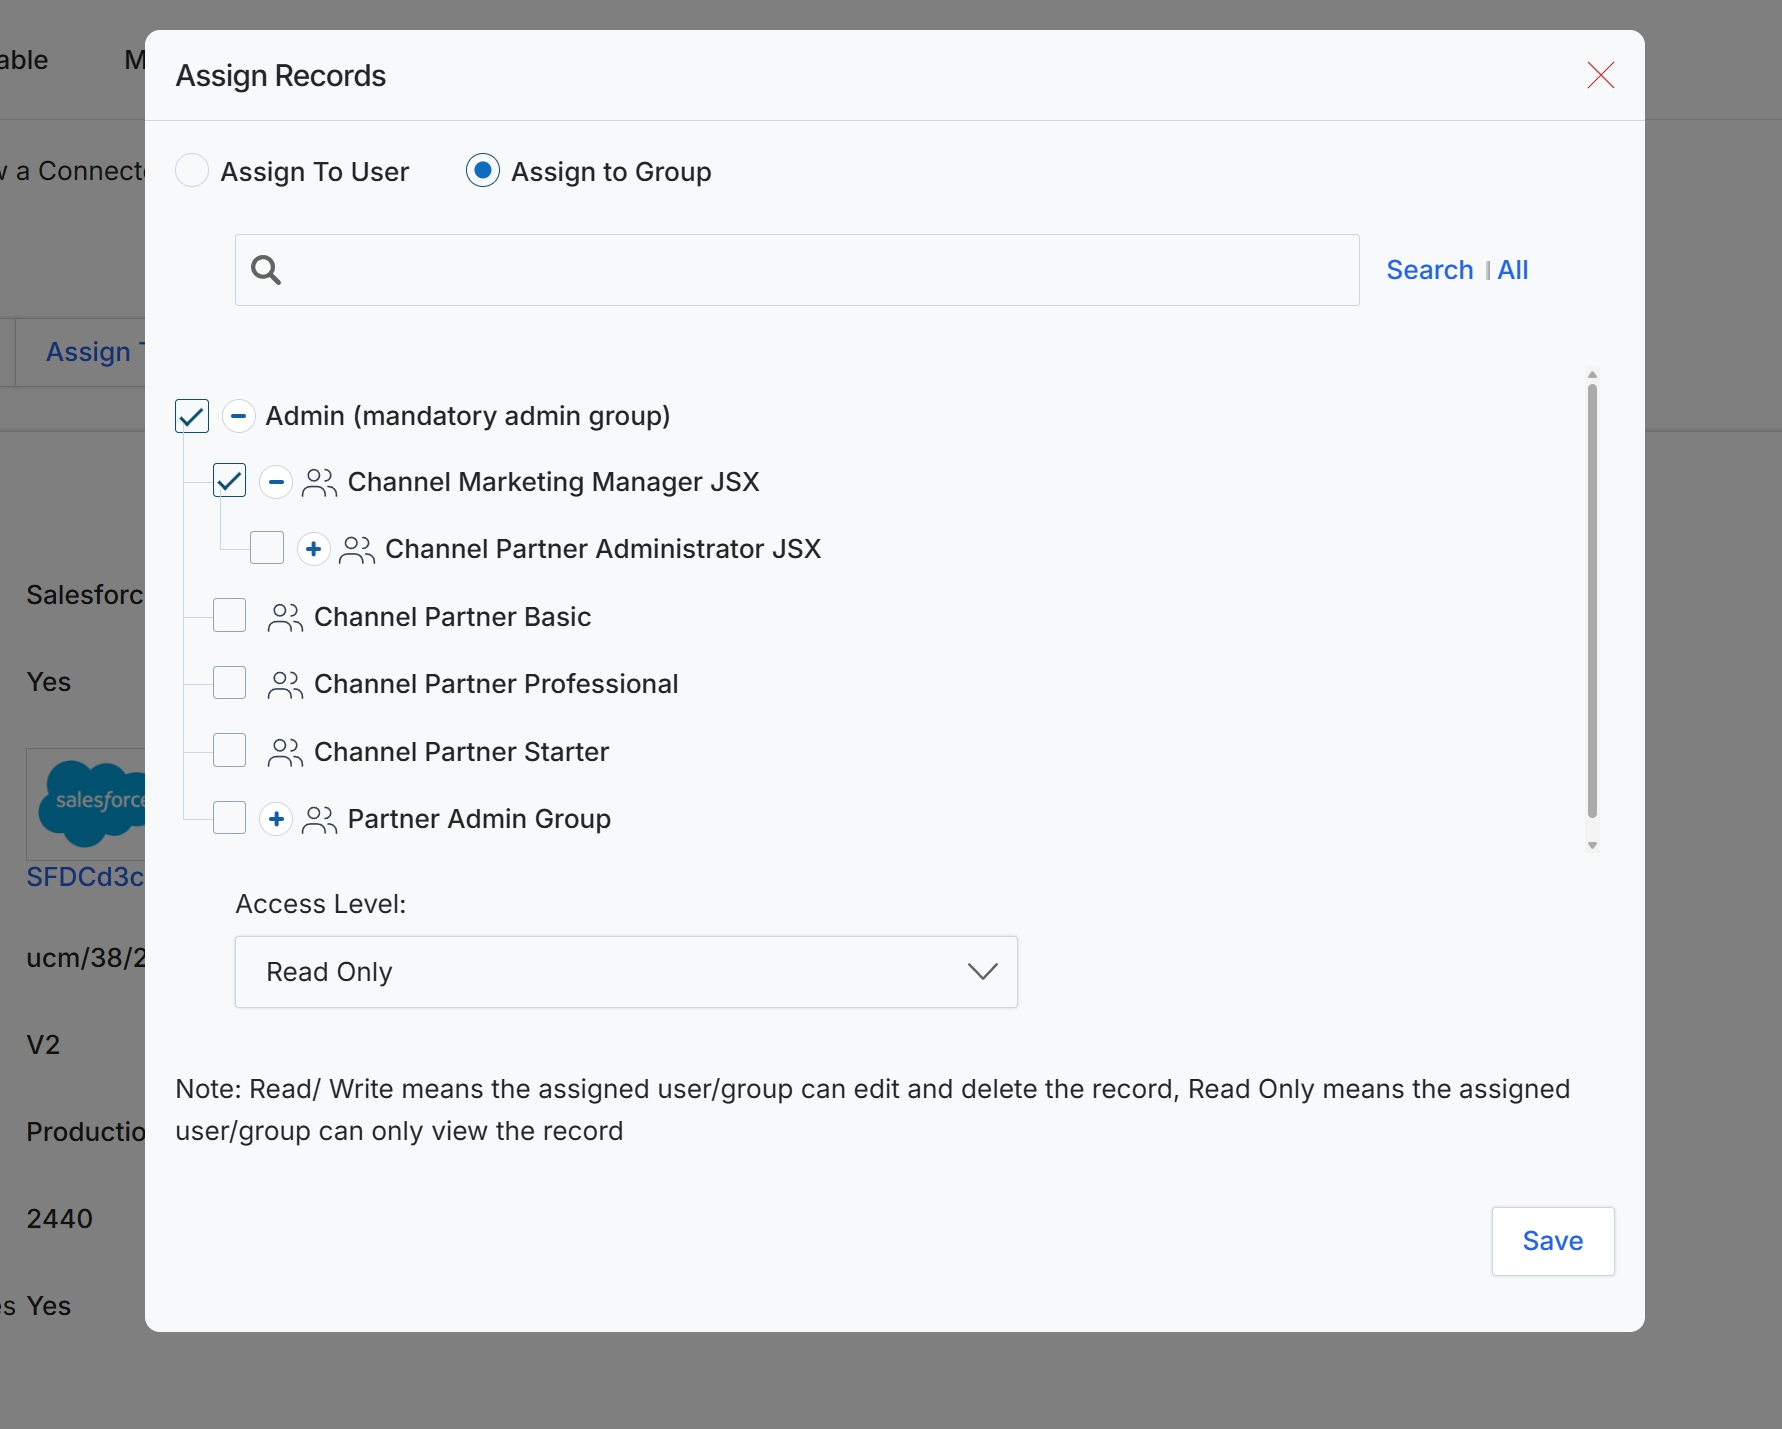
This dialog allows administrators to assign records to specific user groups, controlling access and permissions for the selected record. By assigning a record to a group, administrators can ensure that only authorized personnel or teams have the appropriate level of interaction with that record, whether it's viewing, editing, or deleting. This feature is crucial for maintaining data security and adhering to internal governance policies, especially in environments with multiple user roles and responsibilities. The dialog also allows for setting a specific access level for the assigned group, further refining their permissions.
Select the 'Channel Marketing Manager JSX' group and set the 'Access Level' to 'Read Only' to define permissions for the assigned record.
Buttons
| Button | Description |
|---|---|
| Save | Saves the record assignment and access level settings. |
Fields
| Field | Description |
|---|---|
| Assign To User | Select this option to assign the record to an individual user. |
| Assign to Group | Select this option to assign the record to a user group. |
| Search | A search bar to find specific users or groups. |
| Access Level | A dropdown menu to select the permission level for the assigned user or group, such as 'Read Only' or 'Read/Write'. |